Claims Aware WCF using WIF in .Net 4.5
Claims aware WCF service:
In this sample, I have decided to create a Wcf web application.
1- Lunch Visual studio 2012
2- Choose new Project
3- From the list of template, choose Wcf Service Application (Ensure that the .Net Framework 4.5 is selected)
4- Click ok
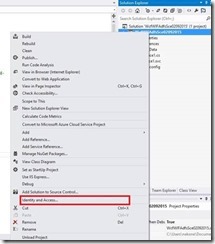
5- From the solution explorer, right click on your project and select “Identity and Access”
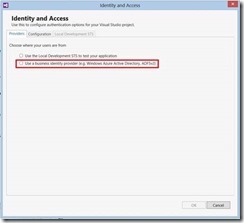
6- In the Identity and Access, you have three tabs: Providers, Configuration, and Local Development STS. In our case, we are just interested in “Providers tab” as the configuration tab is going to be populated automatically based on the information we will enter in it. Select “Use a business identity provider” from the options presented to you by the “Providers tab” since we are going to use ADFS 2.0 as the STS.
7- In this step, enter the path to ADFS metadata location. Note that the “APP ID URI” will be automatically populated by the wizard based on the Wcf service Uri.
In this sample screen shot you will notice the presence of two certificates warnings. Remember, when you configure ADFS 2.0 you were asked to either choose a certificate or let ADFS wizard generating a certificate. Regardless of the option ensure that the chain of the certificate is present on your local certificate store. In my case, the Warning “SSL Certificate Invalid” cleared up after I imported the Root CA certificate in the local “Trusted Root Certificate Authorities”.
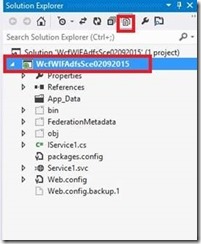
8- After the previous action, a metadata file will be automatically generated. You can select “Show all files” to display the folder in which the metadata file is saved.
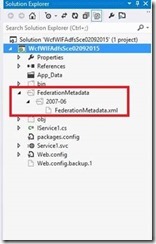
9- Expand the metadata folder to get to the metadata file.
10- A system.identityModel tag will be automatically added to the config file.
In 1, we have the information we will use to add our wcf service as a relying party to ADFS. Basically, ADFS will identify Wcf service through that value.
We set the certificateValidationMode to “None” because the certificate used to configure Adfs is a self-signed certificate. Therefore, the certificate chain will not be checked.
11- Some other tags have been generated in the config files as shown in the following screen shot:
In 1, a certificate has been automatically generated. The private key of this certificate will be used to decrypt the incoming token from the STS. For that to be possible, we will need to import its public key and use it later to add the service as a Relying Party.
In 2, the mode of the security was initially set to Message. We changed it to TransportWithMessageCredential because we are going to use SSL in this case.
12- Service implementation:
  1 public class Service1 : IService1
 2     {
 3         public string GetData(int value)
 4         {
 5
 6             ClaimsPrincipal claimsPrincipal = OperationContext.Current.ClaimsPrincipal;
 7             StringBuilder builder = new StringBuilder();
 8             foreach (Claim claim in claimsPrincipal.Claims)
 9             {
10                 builder.AppendLine("ClaimType :" + claim.Type + "   ClaimValue:" + claim.Value + "\n");
11             }
12             builder.Append(Environment.NewLine);
13             var p = OperationContext.Current.ClaimsPrincipal;
14             var originalCaller = p.Identity.Name;
15
16             return string.Format("I am {0} and I entered: {1}. Claims returned by adfs: {2}{3}", originalCaller, value, builder.ToString(), Environment.NewLine);
17
18         }
19     }
Adfs Configuration:
1- Open Adfs
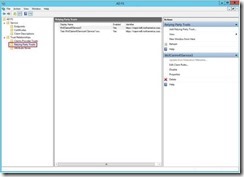
2- To add a Relying Party, you need to Right click on “Relying Party Trust”. Then, choose “Add Relying Party Trust”
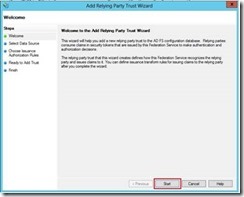
3- The “Add Relying Party Trust Wizards” will pop open. Click on “Start” to continue.
4- This step presents three options:
a- Import data about the relying party published online or on a local network.
You will choose this option if you want adfs to import all the information for you.
b- Import data about the relying party from a file
c- Enter data about the relying party manually
In our case, we are going to choose c as we want to enter information about the relying party manually.
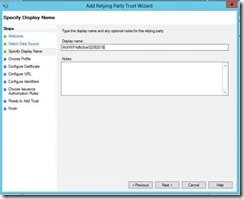
5- Enter the name the Adfs will display about the Relying Party
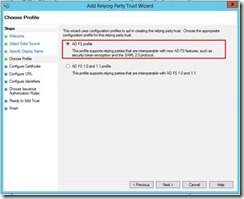
6- In this step, choose ADFS profile as that support SAML 2.0 token generation
7- In this step, you will select a certificate if you want to encrypt issued token. Remember about the certificate that has been automatically generated in the WCF Config file. The line was as follow:
 1  <serviceCredentials useIdentityConfiguration="true">
2             <!--Certificate added by Identity and Access Tool for Visual Studio.-->
3             <serviceCertificate findValue="CN=localhost" storeLocation="LocalMachine" storeName="My" x509FindType="FindBySubjectDistinguishedName" />
4           </serviceCredentials>
I have recommended to import the public key. We will need to reference that here so that ADFS will encrypt the token before sending it to WCF service.
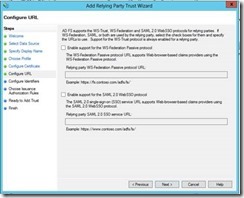
8- In this sample, we are going to leave this option empty as we are not configuring a web App. This windows is useful when a Web App is to be used as a Relying Party.
9- Remember, we had this configuration from wcf service:
 1 <system.identityModel>
2     <identityConfiguration>
3       <audienceUris>
4         <add value="https://NAPE-LAB/Test/WcfWIFAdfsSce02092015/Service1.svc" />
5       </audienceUris>
https://NAPE-LAB/Test/WcfWIFAdfsSce02092015/Service1.svc represent the identifier adfs will use to identify the Relying Party.
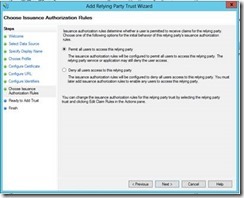
10- In this step we will permit all users to access the relying party as long they can authenticate themselves to the STS
11- Summary of the configured for the Relying Party. Just click next if all of the information looks correct.
12- Leave “Open the Edit claim rule dialog for this relying party trust when the wizard closes” checked so that you will able to add claims rule.
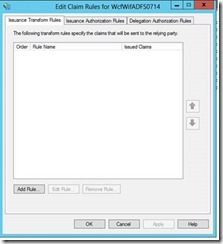
13- Add new Rule.
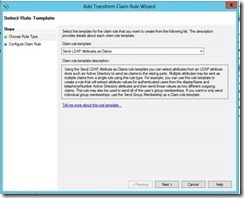
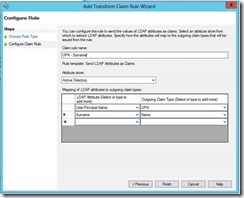
14- Here I chose “Send LDAP Attributes as Claims”
15- In this windows you choose any rule you would like to see in your application. I just chose Name and UPN. Click finish after you are done.
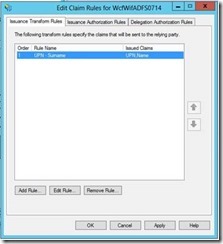
16- Please verify the rules you have entered and click OK.
We will just a console application to call the service.
Client configuration:
  1 <system.serviceModel>
 2         <bindings>
 3             <ws2007FederationHttpBinding>
 4                 <binding name="WS2007FederationHttpBinding_IService1">
 5                     <security mode="TransportWithMessageCredential">
 6                         <message>
 7                             <issuer address="https://win-adfs/adfs/services/trust/13/windowstransport"
 8                                 binding="wsHttpBinding" bindingConfiguration="https://win-adfs/adfs/services/trust/13/windowstransport">
 9                                 <identity>
10                                     <servicePrincipalName value="host/WIN-NAPE12.northamerica.corp.microsoft.com" />
11                                 </identity>
12                             </issuer>
13                             <issuerMetadata address="https://win-adfs/adfs/services/trust/mex" />
14                             <tokenRequestParameters>
15                                 <trust:SecondaryParameters xmlns:trust="https://docs.oasis-open.org/ws-sx/ws-trust/200512">
16                                     <trust:KeyType xmlns:trust="https://docs.oasis-open.org/ws-sx/ws-trust/200512">https://docs.oasis-open.org/ws-sx/ws-trust/200512/SymmetricKey</trust:KeyType>
17                                     <trust:KeySize xmlns:trust="https://docs.oasis-open.org/ws-sx/ws-trust/200512">256</trust:KeySize>
18                                     <trust:KeyWrapAlgorithm xmlns:trust="https://docs.oasis-open.org/ws-sx/ws-trust/200512">https://www.w3.org/2001/04/xmlenc#rsa-oaep-mgf1p</trust:KeyWrapAlgorithm>
19                                     <trust:EncryptWith xmlns:trust="https://docs.oasis-open.org/ws-sx/ws-trust/200512">https://www.w3.org/2001/04/xmlenc#aes256-cbc</trust:EncryptWith>
20                                     <trust:SignWith xmlns:trust="https://docs.oasis-open.org/ws-sx/ws-trust/200512">https://www.w3.org/2000/09/xmldsig#hmac-sha1</trust:SignWith>
21                                     <trust:CanonicalizationAlgorithm xmlns:trust="https://docs.oasis-open.org/ws-sx/ws-trust/200512">https://www.w3.org/2001/10/xml-exc-c14n#</trust:CanonicalizationAlgorithm>
22                                     <trust:EncryptionAlgorithm xmlns:trust="https://docs.oasis-open.org/ws-sx/ws-trust/200512">https://www.w3.org/2001/04/xmlenc#aes256-cbc</trust:EncryptionAlgorithm>
23                                 </trust:SecondaryParameters>
24                             </tokenRequestParameters>
25                         </message>
26                     </security>
27                 </binding>
28             </ws2007FederationHttpBinding>
29             <wsHttpBinding>
30                 <binding name="https://win-adfs/adfs/services/trust/13/windowstransport">
31                     <security mode="Transport" />
32                 </binding>
33             </wsHttpBinding>
34         </bindings>
35         <client>
36             <endpoint address="https://nape-lab/Test/WcfWIFAdfsSce02092015/Service1.svc"
37                 binding="ws2007FederationHttpBinding" bindingConfiguration="WS2007FederationHttpBinding_IService1"
38                 contract="ServiceWifADFSRef.IService1" name="WS2007FederationHttpBinding_IService1" />
39         </client>
40     </system.serviceModel>
Client calling:
  1 class Program
 2     {
 3         static void Main(string[] args)
 4         {
 5             using (Service1Client client = new Service1Client("WS2007FederationHttpBinding_IService1"))
 6             {
 7                 try
 8                 {
 9                     string cl = client.GetData(1950);
10                     client.Close();
11                     Console.WriteLine(cl);
12                     Console.ReadLine();
13
14                 }
15                 catch (Exception ex)
16                 {
17                     Console.WriteLine("\nError: \n{0}", ex.Message);
18                     client.Abort();
19                 }
20
21             }
22
23             Console.WriteLine("\n\nPress any key to exit");
24             Console.ReadKey();
25
26         }
27     }
Comments
Anonymous
June 18, 2015
How about with VS 2013? I don't see any way of doing the same there, is there one ?Anonymous
June 18, 2015
Did you take a look at this link: blogs.msdn.com/.../what-do-i-need-to-build-a-claims-aware-wcf-service-in-vs-2013.aspxAnonymous
June 18, 2015
No I didn't. I will check it out. Thanks for the info.Anonymous
June 19, 2015
No problem. Thanks.Anonymous
September 23, 2015
Is it possible to explain how to use ADFS/SAML in local development(WIndows 7) and how to use username and password for generating token Thanks!
