Microsoft Azure - Cloud Backup and Recovery
| If you’re new to the cloud, or the public cloud, you may be wondering what are some typical workloads, and how you can integrate it into your existing environment. One of those workloads is backup, and its a pretty easy one to understand both from the practical point of view, and from potential to provide cost savings and operational efficiencies - especially if we're replacing tape hardware and offisite secure storage services. |  |
| In this post I’ll be exploring the option of using Azure Backup for backup and long term retention of your files. There are other backup solutions - e.g. SQL backup direct to Azure using Microsoft SQL Server 2014, Microsoft StorSimple storage appliances with Azure Cloud storage tier and Cloud Snapshots, or using 3rd party solutions such as Commvault in conjunction with Azure storage, but they will be beyond the scope of this post. | |
Why use Azure Backup?If you’ve used a tape backup solution then some of these challenges will feel familiar:
|
|
Deploying Azure BackupAzure Backup can be deployed in two methods: either the simple Microsoft Azure Backup agent/application that can be used directly in a Windows Server (2008+) to back up file shares; or as an extension to System Center Data Protection Manager - in which case it can be used to backup up advanced workloads such as SQL Server or SharePoint directly to Azure. In this post I’ll be walking through the basic steps to use Microsoft Azure Backup to protect a Folder on a Windows Server 2012R2 machine. For the full details on Microsoft Azure Backup and how it works with Data Protection Manager, check the MSDN documentation and keep your eye on the System Center DPM blog. |
|
Protecting a folder on a Windows Server 2012 R2 Server
1: Create a Recovery Vault in your Azure subscription
Scroll to the Recovery Services option in the menu and click to create a new vault:
Select “Backup Vault”, “Quick Create”, give it a name and choose the Azure Geo where you want it to be created:
Once created, click the name to drill into the service:
From here we will do two things, download the Azure Backup agent software, and generate and download the vault credentials:
2: Install the Azure Backup agent on the server
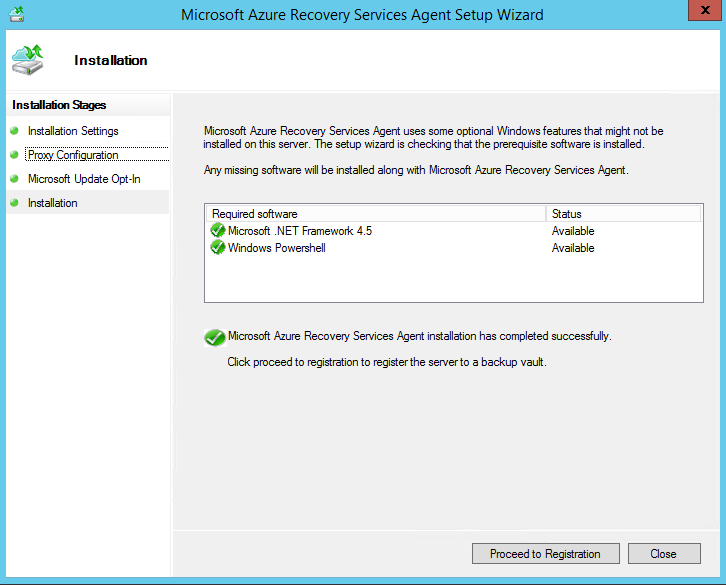
Run the MARSAgentInstaller.exe (obtained in Step 2) on the server you are backing up.
3: Connect Windows Server Backup to Azure Recovery Vault
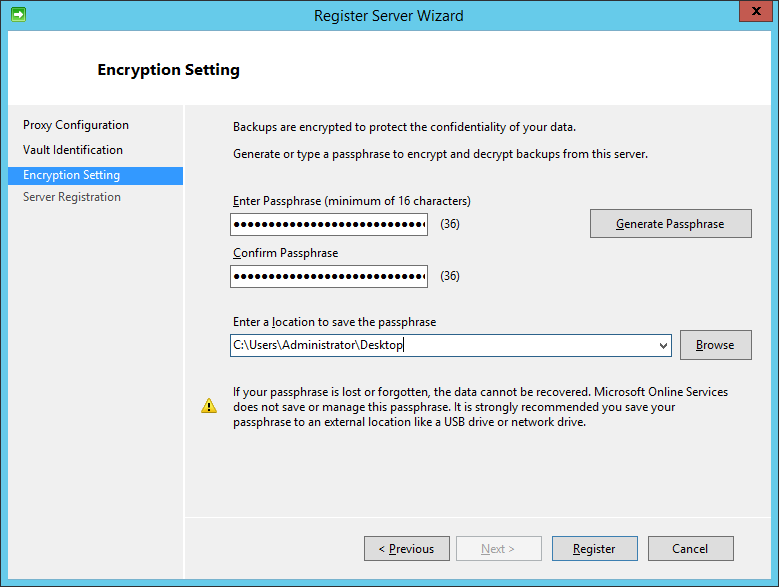
Either click the “Proceed to Registration” button after installing Microsoft Azure Backup, or launch Microsoft Azure Backup (from the Start Menu or Desktop Shortcut) and select the “Register Server” option. This should bring up the “Register Server Wizard”. Complete the Proxy Configuration screen as required for your network, then move on to the “Vault Identification” screen and click the button to browse and select the vault credentials file you downloaded in step 1:
On the next screen, enter a passphrase. This passphrase which will be used to encrypt all your data before it is sent to the server. You can have a passphrase automatically generated for you but remember to write it down or have the file somewhere – you will need this passphrase to recover your data!
That’s it, the registration should be complete and your server should now show up under “servers” in your Azure Recovery Vault:
4: Configure a folder or files for backup
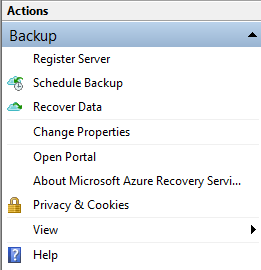
All that’s left to do now, is backup some files. In the Microsoft Azure Backup program, select “Schedule Backup”:
Choose your backup schedule and retention range:
You can have a maximum of 120 recovery points using Microsoft Azure Backup. The following tables give you an idea of the backup frequency versus retention you can achieve with different settings:
Retention Range (days) |
Weekly Backup Days |
Number of backups per day |
40 |
7: Su Mo Tu We Th Fr Sa Su |
3: 10:00 16:00 20:30 |
120 |
7: Su Mo Tu We Th Fr Sa Su |
1: 20:30 |
420 |
2: Su We |
1: 20:30 |
840 |
1: Su |
1: 20:30 |
Retention Range (days) |
Backups |
1684 (4.6 years) |
Every 2 weeks on Sunday at 20:30 |
3360 (~9 years) (note 3360 is the max retention in days you can select) |
Every 4 weeks on Sunday at 20:30 |
If you combine multiple backup schedules, like in a grandfather-father-son style backup tape rotation, then you are able to configure backups to suit both long term protection and short term protection objectives.
In this case and for the purposes of writing this blog article, I’ve chosen a 60 day retention with multiple backups on Monday and Tuesday:

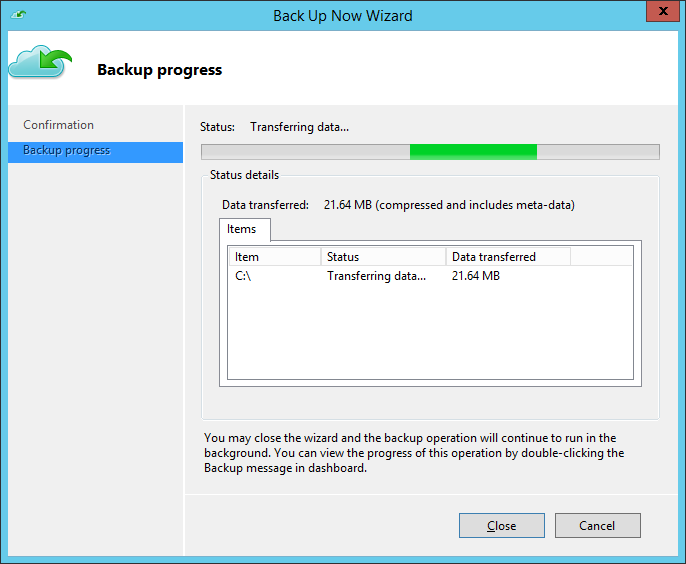
As a last step, I am going to manually trigger a backup as my initial backup by selecting the “Backup Now” option in the Actions Pane.
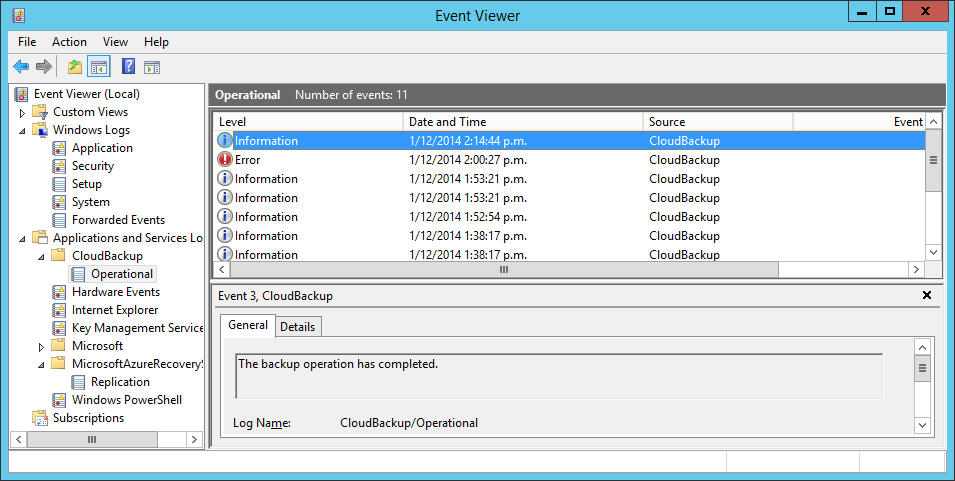
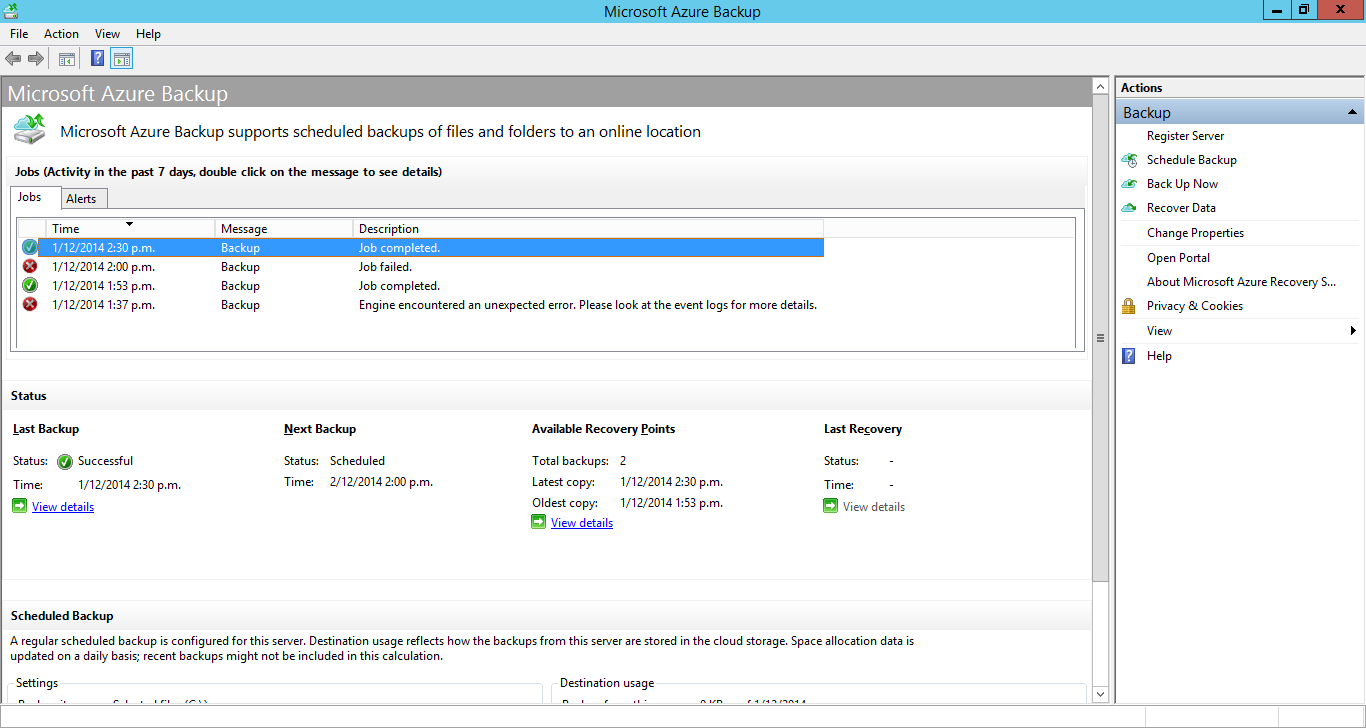
Once the backup is completed, you will see the history in the Microsoft Azure Backup application, as well as an entry in the Event Log under Applications/CloudBackup/Operational:
You can also see the status of protected items via the Azure Recovery Vault console:
Recovering a file on a Windows Server 2012 R2 Server
So you’ve been backing up your files and suddenly you get a request from a user to restore a previous version. How do you do that?
1: Recover Data using the Microsoft Azure Backup application
In the Microsoft Azure Backup application, choose “Recover Data” from the Action Pane.
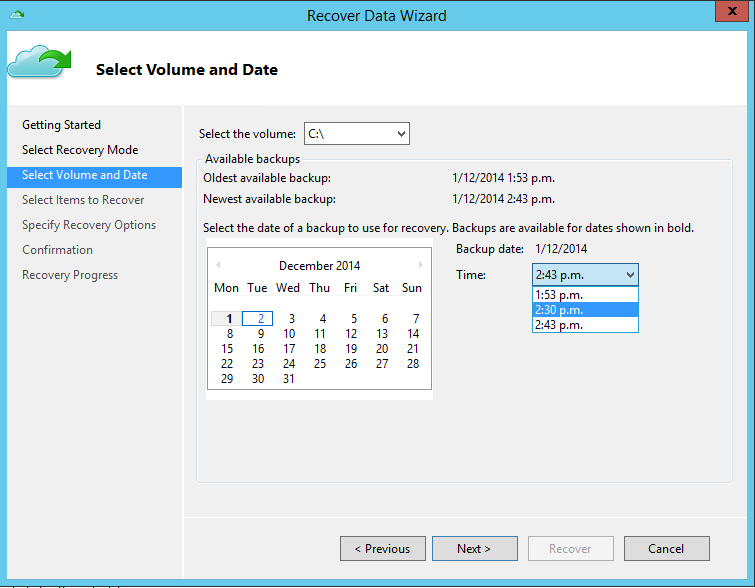
After selecting which server you want to recover your files to, you can choose which recovery point to use for the file restore:
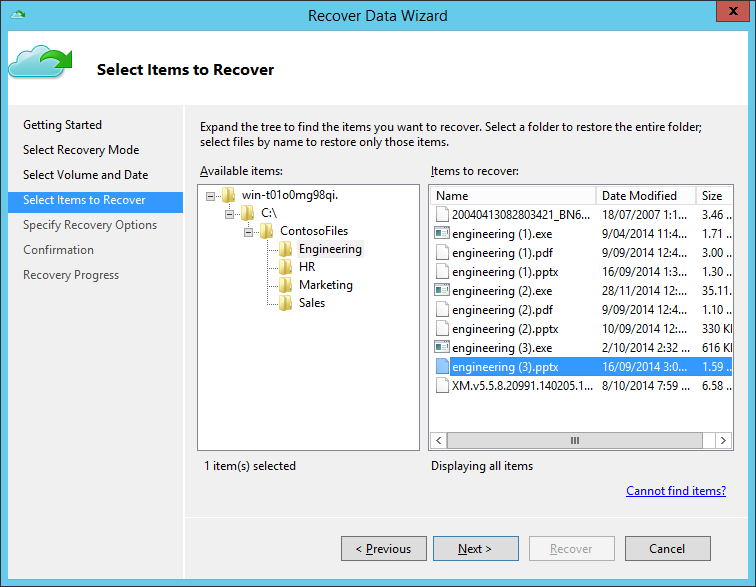
which files to recover:
and where to place the recovered files:
now all that is left is to confirm the files you are recovering, kick off the recovery and wait while your files are retrieved from the Azure Recovery Vault and written back on to your server:
Comments
- Anonymous
December 05, 2014
An excellent post which is informative and helpful - thanks Regan - Anonymous
April 01, 2015
Thanks Regan. Is there any way to automate (schedule) the recover data process? Perhaps using powershell?
The detailed steps are working smoothly, thank you.
@sballarati - Anonymous
May 18, 2017
> Run the MARSAgentInstaller.exe (obtained in Step 2) on the server you are backing up.OUCH!NEVER run a program, especially a vulnerable executable installer from your "Downloads" folder!


