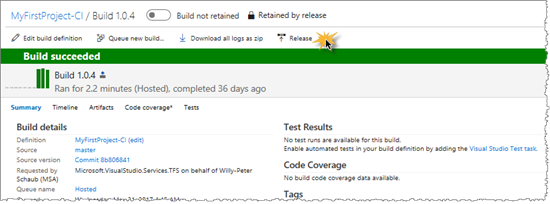
A really COOL feature we noticed on VSTS – New Release Definition Editor
The feature was introduced in New Release Definition Editor in Team Services. It’s therefore not really a new, but a cool feature that we explored and fell in ![]() with.
with.
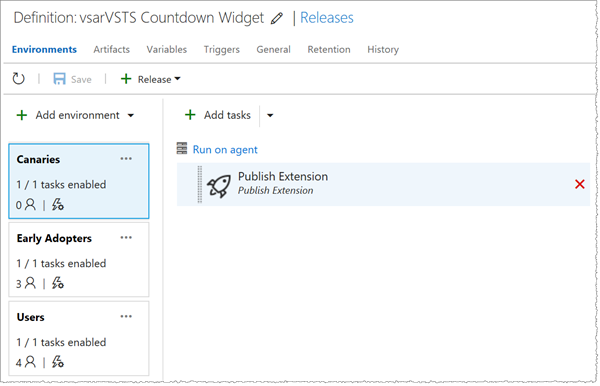
Looking back - this is how one of our pipelines look when viewed in the current (old) release editor.
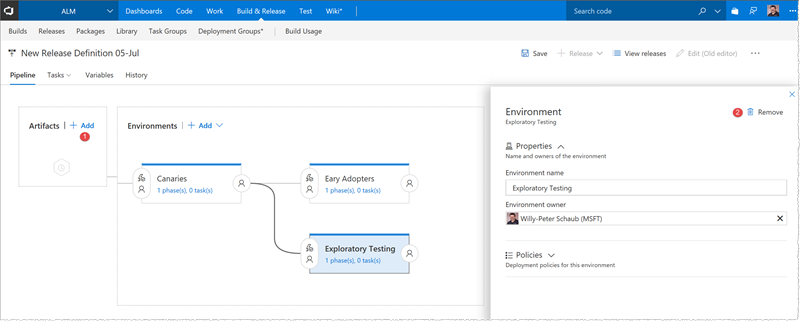
Looking forward - this is how the same pipeline looks, when viewed in the new release definition editor.
The difference is like night and day. The new experience is visual, intuitive, and cool.
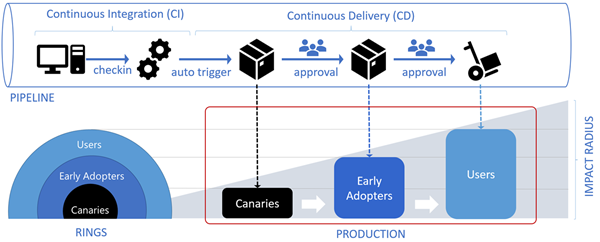
It also aligns with pipeline diagrams we introduced in our CI/CD pipeline posts and the recent Phase the roll-out of your application through rings article.
How to enable the new editor experience
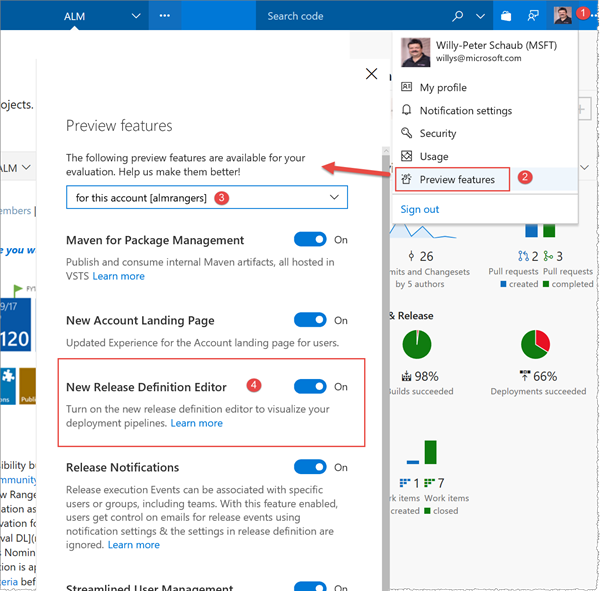
To enable this and other preview features, you need to logon to your Visual Studio Team Services (VSTS) account.
- Click on your avatar.
- Select Preview features.
- Select whether to filter the preview features based on “me” or “this” account.
- Toggle the preview features you’d like to explore, in this case the New Release Definition Editor.
If the preview feature is not yet listed, join the early adopters or keep an eye on your preview features. It’s coming!
What’s new in the latest preview?
We opted to update one of our hands-on lab manuals, 1.5 weeks before an inaugural event, when these two new features made it into the latest preview.
- Ability to configure your pipeline Artifacts for a new and blank release definition.
- Ability to Remove an environment.
There’s also the easy configuration experience and a productivity feature. Environment properties and deployment settings are now in-context, saving you a lot of confusing context switches, state saves, and meaningless mouse clicks.
And there is more to come! The team is continuously introducing features to the new release definition editor.
Using the new experience to re-do our pipeline
Seeing is believing … let’s share and walk-through the new exercise of our updated hands-on lab manual.
Prerequisites
- The hands-on lab is based on the Countdown Widget pipeline we introduced in set up a CI/CD pipeline with unit testing and code coverage for your Team Services extension.
- We assume that we have a Visual Studio Team Services account, a marketplace publisher account, and an associated build definition.
Overview
To complete the CI/CD pipeline we need to create a release that is triggered by the build artifact. We’ll use the Publish Extension Task of the VSTS Developer Tools Build Tasks we used to package the extension during the build. This updates the VSIX package file by unzipping the content, updating the configuration values and zipping all the files. The task then deploys it to the configured Marketplace publisher account and deploy the extension to distinct DEV –> BETA environments, as shown.
Create empty release
- You can get started with your release definition in two ways:
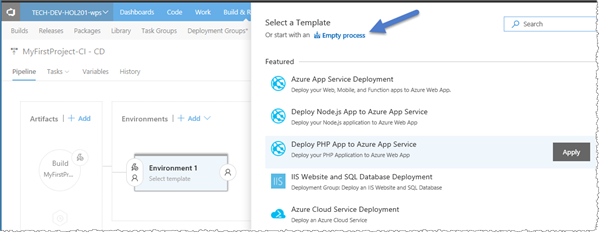
- Select the Empty process.
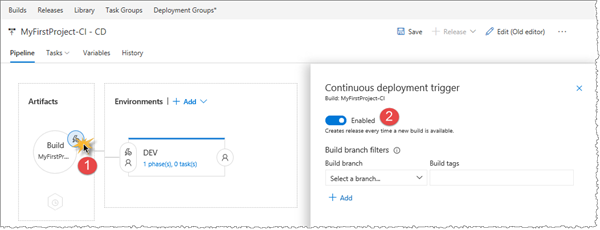
- Click on the Artifact trigger ❶ and verify that the Continuous deployment trigger ❷ is enabled.
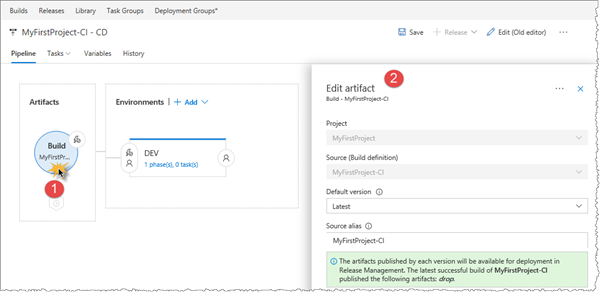
- Click on the Build artifacts ❶and verify that your Artifact ❷ defaults as shown.
- Click on the environment ❶ and change the name to DEV ❷.
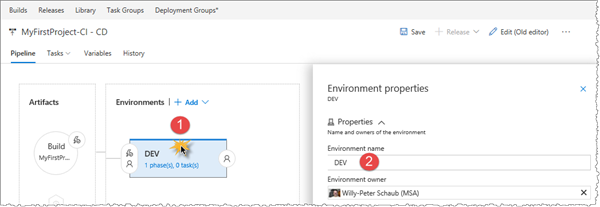
- Change the release name to Countdown Sample.

- Click on re-deployment conditions ❶ and review the Approvals which are set to Automatic by default ❷.
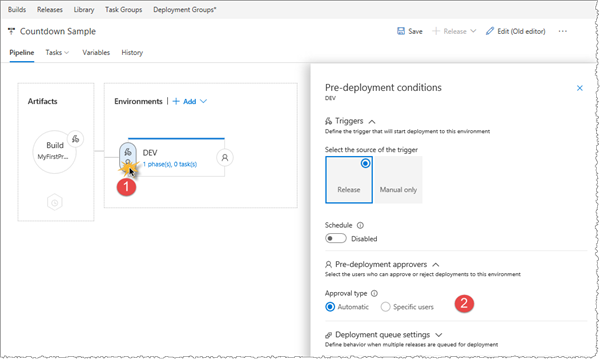
Configure DEV environment
- Click on 1 phase(s) 0 task(s).
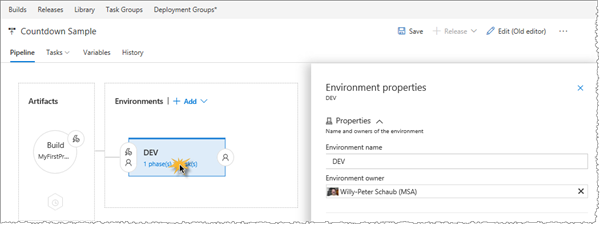
- Click on + (add a task to the phase) .

- Search for Publish Extension ❶ and click Add ❷ to add to the agent phase.

- Click on Publish Extension task to configure the settings that need attention.

- Set the VSTS Marketplace connection to the service endpoint ❶ you created in exercise 4, and select VSIX file ❷.
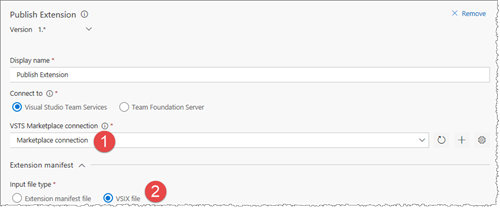
- Configure the remainder of the Publish Extension task.
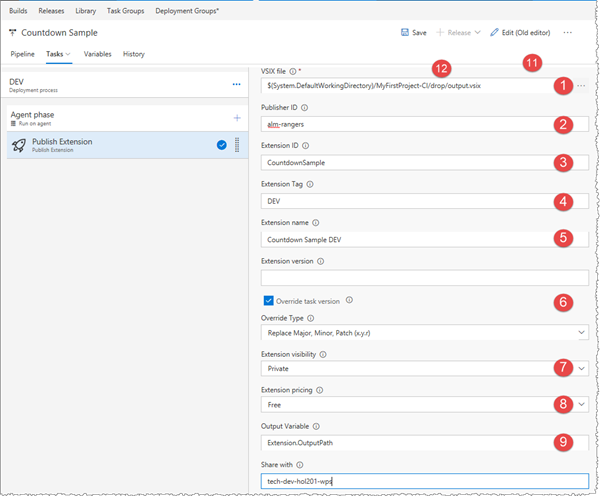
- VSIX file ❶ set to the $(System.DefaultWorkingDirectory)/MyFirstProject-CI/drop/output.vsix file, which was created by the build.
- Publisher ID ❷ set to the marketplace publisher, which you created in Exercise 3.
- Extension ID ❸ set to unique ID, for example CountdownSample.
- Extension Tag ❹ set to DEV to match the DEV environment.
- Extension name ❺ set to Count Down Sample DEV.
NOTE – If you deploy your extension to the same publisher and/or the same VSTS accounts, we recommend that you change the extension name to include the extension tag, for example CountdownSampleBETA. It makes it much easier to distinguish which extension is which by just looking at the name.
-
- Override tasks version ❻ is checked.
- Extension visibility ❼ set to Private.
- Extension pricing ❽ set to Free.
- Share with ❾ set to our VSTS account, whereby you can configure other accounts as well to share your DEV extension.
Save the release configuration - not needed, but optional if you’re as paranoid as I am.

Configure BETA environment
- Select the DEV environment ❶, click on Add ❷ and select Clone selected environment ❸.
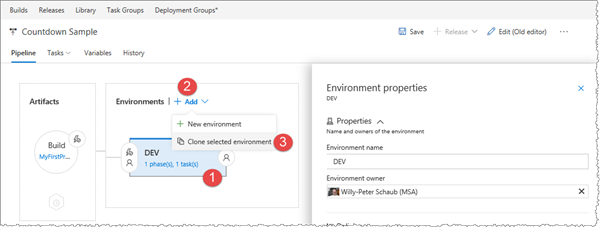
- Change the environment name to BETA.

- Click on pre-deployment conditions ❶ and review the trigger ❷. Select Specific users ❸ for approval type and add your account to the list of approvers.
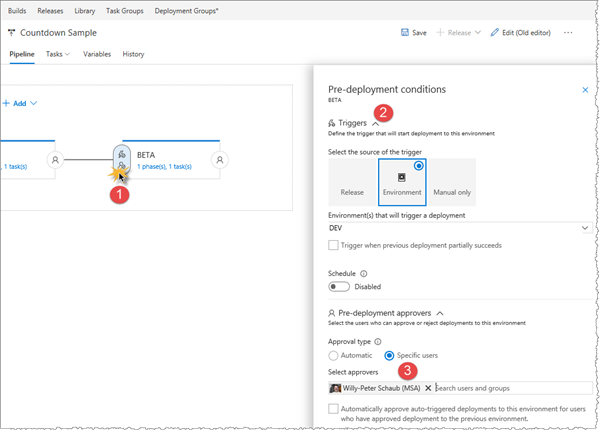
- Update the configuration of the cloned Publish Extension task.
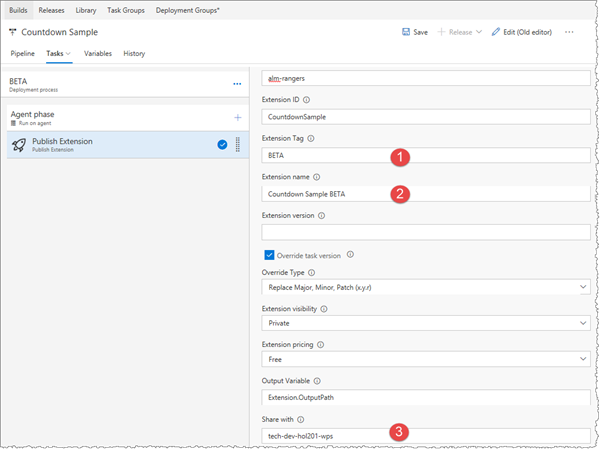
- Extension Tag ❶ set to BETA to match the DEV environment.
- Extension name ❷ set to Count Down Sample BETA.
- Share with ❸ set to our VSTS account, whereby you’d deploy to a different environment (ring) in a production environment.
- Save the release definition

It’s time to validate the release
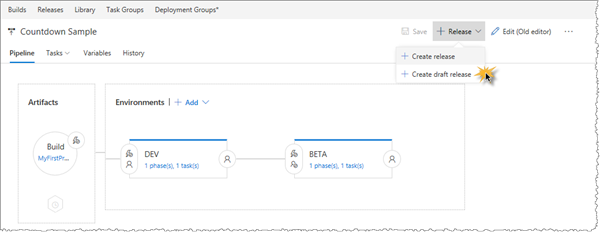
- Click on + Release and select Create Release
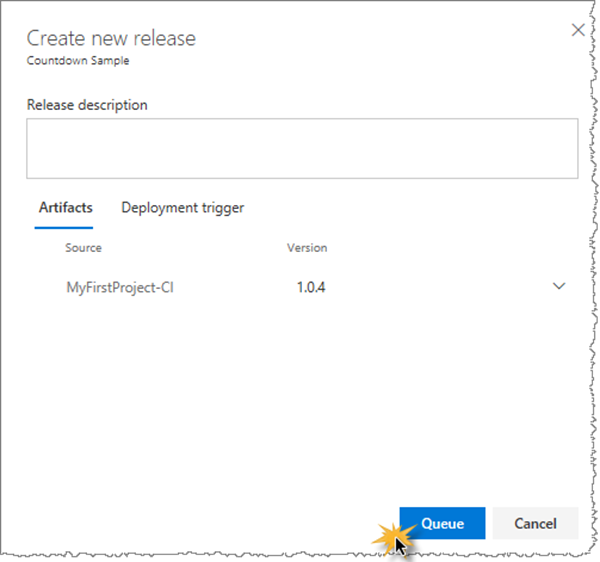
- Review the Artifacts, which refer to our latest build, the Automated deployments, and click Queue
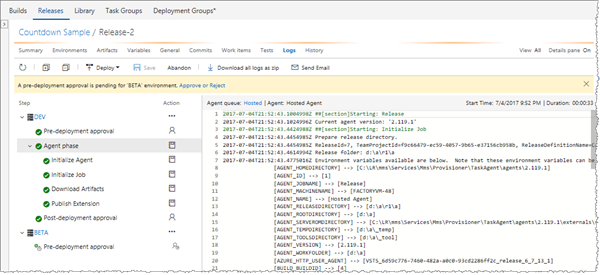
- Click on new release that’s been created to observe the deployment

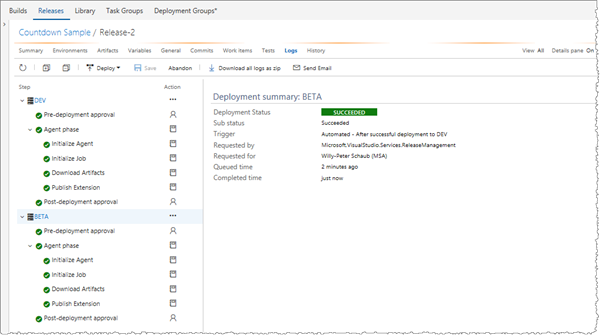
- Click on Logs and verify that the DEV release is successful and notice that the BETA release waits for manual approval, as configured
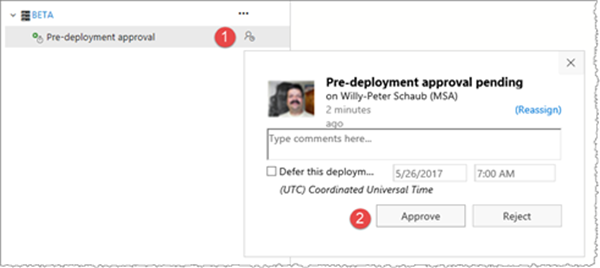
- Click on the Approvers ❶ icon and click on Approve ❷ to approve the release to the BETA environment
- Verify that the BETA release completes successfully as well
- Open a new browser tab and go to https://marketplace.visualstudio.com/manage/publishers
- Verify your publisher is selected and that the Countdown Sample DEV and BETA extension have been publisher successfully

IMPORTANT - We’re intentionally NOT implementing the PROD environment in our hands-on lab, which publishes a public version of the extension. It’s important we do not duplicate features on the marketplace, and review the extension product documentation before we flip the public switch. There are scenarios in which you cannot undo, for example uninstall, a public extension publication.
That’s it! Enjoy the new editor!!!
Comments
- Anonymous
July 08, 2017
The comment has been removed- Anonymous
July 08, 2017
The comment has been removed - Anonymous
July 11, 2017
Sultanov, have you retried? The preview should now be available in all of your VSTS accounts :)
- Anonymous
- Anonymous
September 11, 2017
Does it have provision to accommodate multiple retries? if build fails first time?
