Een aanmeldings- en aanmeldingsstroom instellen met een sociaal account met behulp van aangepast Azure Active Directory B2C-beleid
In Een aanmeldings- en aanmeldingsstroom instellen met behulp van het aangepaste azure Active Directory B2C-beleidsartikel , stellen we aanmeldingsstroom in voor een lokaal account met behulp van Azure Active Directory B2C (Azure AD B2C).
In dit artikel voegen we een aanmeldingsstroom toe voor een extern account, zoals een sociaal account zoals Facebook. In dit geval staat Azure AD B2C een gebruiker toe zich aan te melden bij uw toepassing met referenties van een externe id-provider voor sociale netwerken (IdP).
Voor lokale accounts wordt een gebruikersaccount uniek geïdentificeerd met behulp van het objectIdgebruikerskenmerk. Voor externe IdP gebruiken alternativeSecurityId we het gebruikerskenmerk, hoewel er nog steeds een objectId bestaat.
Vereisten
Als u er nog geen hebt, maakt u een Azure AD B2C-tenant die is gekoppeld aan uw Azure-abonnement.
Registreer een webtoepassing en schakel impliciete toekenning van id-token in. Gebruik voor de omleidings-URI https://jwt.ms.
Visual Studio Code (VS Code) moet op uw computer zijn geïnstalleerd.
Voer de stappen uit in Het instellen van een aanmeldings- en aanmeldingsstroom voor een lokaal account met behulp van aangepast Azure Active Directory B2C-beleid. Dit artikel maakt deel uit van de reeks instructies voor het maken en uitvoeren van uw eigen aangepaste beleidsregels.
Notitie
Dit artikel maakt deel uit van de reeks instructies voor het maken en uitvoeren van uw eigen aangepaste beleidsregels in Azure Active Directory B2C. We raden u aan deze reeks te starten vanuit het eerste artikel.
Stap 1: Facebook-toepassing maken
Gebruik de stappen die worden beschreven in Een Facebook-toepassing maken om facebook-app-id en app-geheim op te halen. Sla de vereisten en de rest van de stappen in het artikel Registratie instellen en aanmelden met een Facebook-account over.
Stap 2: Een Facebook-beleidssleutel maken
Gebruik de stappen die worden beschreven in Het Facebook-sleutelarchief maken een beleidssleutel in uw Azure AD B2C-tenant. Sla de vereisten en de rest van de stappen in het artikel Registratie instellen en aanmelden met een Facebook-account over.
Stap 3: aanmelding configureren met Facebook
Als u aanmelden met Facebook wilt configureren, moet u de volgende stappen uitvoeren:
- Meer claims declareren
- Definieer meer claimtransformaties om te helpen met claimsmanipulaties, zoals het maken
AlternativeSecurityId. - Facebook-claimprovider configureren
- Configureer technische profielen van Microsoft Entra om het sociale account van en naar de Microsoft Entra-database te lezen en schrijven.
- Configureer een zelf-asserted technisch profiel (voor het accepteren van extra invoer van de gebruiker of het bijwerken van gebruikersgegevens) en de inhoudsdefinitie.
Stap 3.1: Meer claims declareren
Zoek in het ContosoCustomPolicy.XML bestand de ClaimsSchema sectie en declareer vervolgens meer claims met behulp van de volgende code:
    <!--<ClaimsSchema>-->
        ...
        <ClaimType Id="issuerUserId">
            <DisplayName>Username</DisplayName>
            <DataType>string</DataType>
            <UserHelpText/>
            <UserInputType>TextBox</UserInputType>
            <Restriction>
                <Pattern RegularExpression="^[a-zA-Z0-9]+[a-zA-Z0-9_-]*$" HelpText="The username you provided is not valid. It must begin with an alphabet or number and can contain alphabets, numbers and the following symbols: _ -" />
            </Restriction>
        </ClaimType>

        <ClaimType Id="identityProvider">
            <DisplayName>Identity Provider</DisplayName>
            <DataType>string</DataType>
            <UserHelpText/>
        </ClaimType>

        <ClaimType Id="authenticationSource">
            <DisplayName>AuthenticationSource</DisplayName>
            <DataType>string</DataType>
            <UserHelpText>Specifies whether the user was authenticated at Social IDP or local account.</UserHelpText>
        </ClaimType>

        <ClaimType Id="upnUserName">
            <DisplayName>UPN User Name</DisplayName>
            <DataType>string</DataType>
            <UserHelpText>The user name for creating user principal name.</UserHelpText>
        </ClaimType>

        <ClaimType Id="alternativeSecurityId">
            <DisplayName>AlternativeSecurityId</DisplayName>
            <DataType>string</DataType>
            <UserHelpText/>
        </ClaimType>

        <ClaimType Id="mailNickName">
            <DisplayName>MailNickName</DisplayName>
            <DataType>string</DataType>
            <UserHelpText>Your mail nick name as stored in the Azure Active Directory.</UserHelpText>
        </ClaimType>

        <ClaimType Id="newUser">
            <DisplayName>User is new or not</DisplayName>
            <DataType>boolean</DataType>
            <UserHelpText/>
        </ClaimType>
    <!--</ClaimsSchema>-->
Stap 3.2: claimtransformaties definiëren
Zoek in het ContosoCustomPolicy.XML bestand het ClaimsTransformations element en voeg claimtransformaties toe met behulp van de volgende code:
   <!--<ClaimsTransformations>-->
       ...
       <ClaimsTransformation Id="CreateRandomUPNUserName" TransformationMethod="CreateRandomString">
           <InputParameters>
               <InputParameter Id="randomGeneratorType" DataType="string" Value="GUID" />
           </InputParameters>
           <OutputClaims>
               <OutputClaim ClaimTypeReferenceId="upnUserName" TransformationClaimType="outputClaim" />
           </OutputClaims>
       </ClaimsTransformation>

       <ClaimsTransformation Id="CreateAlternativeSecurityId" TransformationMethod="CreateAlternativeSecurityId">
           <InputClaims>
               <InputClaim ClaimTypeReferenceId="issuerUserId" TransformationClaimType="key" />
               <InputClaim ClaimTypeReferenceId="identityProvider" TransformationClaimType="identityProvider" />
           </InputClaims>
           <OutputClaims>
               <OutputClaim ClaimTypeReferenceId="alternativeSecurityId" TransformationClaimType="alternativeSecurityId" />
           </OutputClaims>
       </ClaimsTransformation>

       <ClaimsTransformation Id="CreateUserPrincipalName" TransformationMethod="FormatStringClaim">
           <InputClaims>
               <InputClaim ClaimTypeReferenceId="upnUserName" TransformationClaimType="inputClaim" />
           </InputClaims>
           <InputParameters>
               <InputParameter Id="stringFormat" DataType="string" Value="cpim_{0}@{RelyingPartyTenantId}" />
           </InputParameters>
           <OutputClaims>
               <OutputClaim ClaimTypeReferenceId="userPrincipalName" TransformationClaimType="outputClaim" />
           </OutputClaims>
       </ClaimsTransformation>
   <!--</ClaimsTransformations>-->
We hebben drie claimtransformaties gedefinieerd, die we gebruiken om waarden voor alternativeSecurityId en userPrincipalName claims te genereren. Deze ClaimsTransformations worden aangeroepen in het technische OAuth2-profiel in stap 3.3.
Stap 3.3: Facebook-claimprovider configureren
Als u wilt dat gebruikers zich kunnen aanmelden met een Facebook-account, moet u het account definiëren als een claimprovider waarmee Azure AD B2C kan communiceren via een eindpunt. U kunt een Facebook-account definiëren als claimprovider.
Zoek ClaimsProviders het element in het ContosoCustomPolicy.XML bestand en voeg een nieuwe claimprovider toe met behulp van de volgende code:
    <!--<ClaimsProviders>-->
        ...
        <ClaimsProvider>
            <!-- The following Domain element allows this profile to be used if the request comes with domain_hint
                    query string parameter, e.g. domain_hint=facebook.com  -->
            <Domain>facebook.com</Domain>
            <DisplayName>Facebook</DisplayName>
            <TechnicalProfiles>
                <TechnicalProfile Id="Facebook-OAUTH">
                <!-- The text in the following DisplayName element is shown to the user on the claims provider
                        selection screen. -->
                <DisplayName>Facebook</DisplayName>
                <Protocol Name="OAuth2" />
                <Metadata>
                    <Item Key="ProviderName">facebook</Item>
                    <Item Key="authorization_endpoint">https://www.facebook.com/dialog/oauth</Item>
                    <Item Key="AccessTokenEndpoint">https://graph.facebook.com/oauth/access_token</Item>
                    <Item Key="HttpBinding">GET</Item>
                    <Item Key="UsePolicyInRedirectUri">0</Item>
                    <Item Key="client_id">facebook-app-id</Item>
                    <Item Key="scope">email public_profile</Item>
                    <Item Key="ClaimsEndpoint">https://graph.facebook.com/me?fields=id,first_name,last_name,name,email</Item>
                    <Item Key="AccessTokenResponseFormat">json</Item>
                </Metadata>
                <CryptographicKeys>
                    <Key Id="client_secret" StorageReferenceId="facebook-policy-key" />
                </CryptographicKeys>
                <InputClaims />
                <OutputClaims>
                    <OutputClaim ClaimTypeReferenceId="issuerUserId" PartnerClaimType="id" />
                    <OutputClaim ClaimTypeReferenceId="givenName" PartnerClaimType="first_name" />
                    <OutputClaim ClaimTypeReferenceId="surname" PartnerClaimType="last_name" />
                    <OutputClaim ClaimTypeReferenceId="displayName" PartnerClaimType="name" />
                    <OutputClaim ClaimTypeReferenceId="email" PartnerClaimType="email" />
                    <OutputClaim ClaimTypeReferenceId="identityProvider" DefaultValue="facebook.com" AlwaysUseDefaultValue="true" />
                    <OutputClaim ClaimTypeReferenceId="authenticationSource" DefaultValue="socialIdpAuthentication" AlwaysUseDefaultValue="true" />
                </OutputClaims>
                <OutputClaimsTransformations>
                    <OutputClaimsTransformation ReferenceId="CreateRandomUPNUserName" />
                    <OutputClaimsTransformation ReferenceId="CreateUserPrincipalName" />
                    <OutputClaimsTransformation ReferenceId="CreateAlternativeSecurityId" />
                </OutputClaimsTransformations>
                </TechnicalProfile>
            </TechnicalProfiles>
        </ClaimsProvider>
    <!--</ClaimsProviders>-->
Vervangen:
facebook-app-idmet de waarde van FacebookappIDdie u in stap 1 hebt verkregen.facebook-policy-keymet de naam van de Facebook-beleidssleutel die u in stap 2 hebt verkregen.
Let op de claimstransformaties die we in stap 3.2 in de OutputClaimsTransformations verzameling hebben gedefinieerd.
Stap 3.4 : Technische profielen voor Microsoft Entra maken
Net als bij aanmelden met een lokaal account moet u de Technische profielen van Microsoft Entra configureren, die u gebruikt om verbinding te maken met Microsoft Entra ID-opslag, om een sociaal gebruikersaccount op te slaan of te lezen.
Zoek in het
ContosoCustomPolicy.XMLbestand hetAAD-UserUpdatetechnische profiel en voeg vervolgens een nieuw technisch profiel toe met behulp van de volgende code:<TechnicalProfile Id="AAD-UserWriteUsingAlternativeSecurityId"> <DisplayName>Azure Active Directory technical profile for handling social accounts</DisplayName> <Protocol Name="Proprietary" Handler="Web.TPEngine.Providers.AzureActiveDirectoryProvider, Web.TPEngine, Version=1.0.0.0, Culture=neutral, PublicKeyToken=null" /> <Metadata> <Item Key="Operation">Write</Item> <Item Key="RaiseErrorIfClaimsPrincipalAlreadyExists">true</Item> </Metadata> <CryptographicKeys> <Key Id="issuer_secret" StorageReferenceId="B2C_1A_TokenSigningKeyContainer" /> </CryptographicKeys> <InputClaims> <InputClaim ClaimTypeReferenceId="alternativeSecurityId" PartnerClaimType="alternativeSecurityId" Required="true" /> </InputClaims> <PersistedClaims> <!-- Required claims --> <PersistedClaim ClaimTypeReferenceId="alternativeSecurityId" /> <PersistedClaim ClaimTypeReferenceId="userPrincipalName" /> <PersistedClaim ClaimTypeReferenceId="mailNickName" DefaultValue="unknown" /> <PersistedClaim ClaimTypeReferenceId="displayName" DefaultValue="unknown" /> <!-- Optional claims --> <PersistedClaim ClaimTypeReferenceId="givenName" /> <PersistedClaim ClaimTypeReferenceId="surname" /> </PersistedClaims> <OutputClaims> <OutputClaim ClaimTypeReferenceId="objectId" /> <OutputClaim ClaimTypeReferenceId="newUser" PartnerClaimType="newClaimsPrincipalCreated" /> </OutputClaims> </TechnicalProfile>We hebben een nieuw Microsoft Entra Technical Profile
AAD-UserWriteUsingAlternativeSecurityIdtoegevoegd waarmee een nieuw sociaal account wordt geschreven naar Microsoft Entra-id.Vervang B2C_1A_TokenSigningKeyContainer door de tokenondertekeningssleutel die u hebt gemaakt in De ondertekening configureren.
Voeg in het
ContosoCustomPolicy.XMLbestand nog een technisch profiel van Microsoft Entra toe na hetAAD-UserWriteUsingAlternativeSecurityIdtechnische profiel met behulp van de volgende code:<TechnicalProfile Id="AAD-UserReadUsingAlternativeSecurityId"> <DisplayName>Azure Active Directory</DisplayName> <Protocol Name="Proprietary" Handler="Web.TPEngine.Providers.AzureActiveDirectoryProvider, Web.TPEngine, Version=1.0.0.0, Culture=neutral, PublicKeyToken=null" /> <Metadata> <Item Key="Operation">Read</Item> <Item Key="RaiseErrorIfClaimsPrincipalDoesNotExist">false</Item> </Metadata> <CryptographicKeys> <Key Id="issuer_secret" StorageReferenceId="B2C_1A_TokenSigningKeyContainer" /> </CryptographicKeys> <InputClaims> <InputClaim ClaimTypeReferenceId="alternativeSecurityId" PartnerClaimType="alternativeSecurityId" Required="true" /> </InputClaims> <OutputClaims> <!-- Required claims --> <OutputClaim ClaimTypeReferenceId="objectId" /> <!-- Optional claims --> <OutputClaim ClaimTypeReferenceId="userPrincipalName" /> <OutputClaim ClaimTypeReferenceId="displayName" /> <OutputClaim ClaimTypeReferenceId="givenName" /> <OutputClaim ClaimTypeReferenceId="surname" /> </OutputClaims> </TechnicalProfile>We hebben een nieuw Microsoft Entra Technical Profile
AAD-UserReadUsingAlternativeSecurityIdtoegevoegd dat een nieuw sociaal account van Microsoft Entra-id leest. Het gebruiktalternativeSecurityIdals een unieke id voor het sociale account.Vervang B2C_1A_TokenSigningKeyContainer door de tokenondertekeningssleutel die u hebt gemaakt in De ondertekening configureren.
Stap 3.5: inhoudsdefinitie configureren
Nadat een gebruiker zich heeft aangemeld, kunt u bepaalde gegevens van hen verzamelen met behulp van een zelf-asserted technisch profiel. U moet dus inhoudsdefinitie configureren voor het zelf-asserted technische profiel.
Zoek in het ContosoCustomPolicy.XML bestand het ContentDefinitions element en voeg vervolgens een nieuwe inhoudsdefinitie toe in de ContentDefinitions verzameling met behulp van de volgende code:
    <ContentDefinition Id="socialAccountsignupContentDefinition">
        <LoadUri>~/tenant/templates/AzureBlue/selfAsserted.cshtml</LoadUri>
        <RecoveryUri>~/common/default_page_error.html</RecoveryUri>
        <DataUri>urn:com:microsoft:aad:b2c:elements:contract:selfasserted:2.1.7</DataUri>
        <Metadata>
            <Item Key="DisplayName">Collect information from user page alongside those from social Idp.</Item>
        </Metadata>
    </ContentDefinition>
We gebruiken deze inhoudsdefinitie als metagegevens in een zelfbeveerd technisch profiel in de volgende stap (stap 3.6).
Stap 3.6: een zelfbewust technisch profiel configureren
Het zelf-asserted technische profiel dat u in deze stap configureert, wordt gebruikt voor het verzamelen van meer informatie van de gebruiker of het bijwerken van vergelijkbare informatie die is verkregen uit het sociale account.
Zoek in het ContosoCustomPolicy.XML bestand de ClaimsProviders sectie en voeg vervolgens een nieuwe claimprovider toe met behulp van de volgende code:
    <!--<ClaimsProviders>-->
        ...
        <ClaimsProvider>
            <DisplayName>Self Asserted for social sign in</DisplayName>
            <TechnicalProfiles>
                <TechnicalProfile Id="SelfAsserted-Social">
                    <DisplayName>Collect more info during social signup</DisplayName>
                    <Protocol Name="Proprietary" Handler="Web.TPEngine.Providers.SelfAssertedAttributeProvider, Web.TPEngine, Version=1.0.0.0, Culture=neutral, PublicKeyToken=null" />
                    <Metadata>
                      <Item Key="ContentDefinitionReferenceId">socialAccountsignupContentDefinition</Item>
                    </Metadata>
                    <CryptographicKeys>
                      <Key Id="issuer_secret" StorageReferenceId="B2C_1A_TokenSigningKeyContainer" />
                    </CryptographicKeys>
                    <InputClaims>
                      <!-- These claims ensure that any values retrieved in the previous steps (e.g. from an external IDP) are prefilled.
                           Note that some of these claims may not have any value, for example, if the external IDP did not provide any of
                           these values, or if the claim did not appear in the OutputClaims section of the IDP.
                           In addition, if a claim is not in the InputClaims section, but it is in the OutputClaims section, then its
                           value will not be prefilled, but the user will still be prompted for it (with an empty value). -->
                      <InputClaim ClaimTypeReferenceId="displayName" />
                      <InputClaim ClaimTypeReferenceId="givenName" />
                      <InputClaim ClaimTypeReferenceId="surname" />
                    </InputClaims>
                    <!---User will be asked to input or update these values-->
                    <DisplayClaims>
                        <DisplayClaim ClaimTypeReferenceId="displayName"/>
                        <DisplayClaim ClaimTypeReferenceId="givenName"/>
                        <DisplayClaim ClaimTypeReferenceId="surname"/>
                    </DisplayClaims>

                    <OutputClaims>
                      <!-- These claims are not shown to the user because their value is obtained through the "ValidationTechnicalProfiles"
                           referenced below, or a default value is assigned to the claim. A claim is only shown to the user to provide a
                           value if its value cannot be obtained through any other means. -->
                      <OutputClaim ClaimTypeReferenceId="objectId" />
                      <OutputClaim ClaimTypeReferenceId="newUser" />
                      <!---<OutputClaim ClaimTypeReferenceId="executed-SelfAsserted-Input" DefaultValue="true" />-->

                      <!-- Optional claims. These claims are collected from the user and can be modified. If a claim is to be persisted in the directory after having been
                           collected from the user, it needs to be added as a PersistedClaim in the ValidationTechnicalProfile referenced below, i.e.
                           in AAD-UserWriteUsingAlternativeSecurityId. -->
                      <OutputClaim ClaimTypeReferenceId="displayName" />
                      <OutputClaim ClaimTypeReferenceId="givenName" />
                      <OutputClaim ClaimTypeReferenceId="surname" />
                    </OutputClaims>
                    <ValidationTechnicalProfiles>
                      <ValidationTechnicalProfile ReferenceId="AAD-UserWriteUsingAlternativeSecurityId" />
                    </ValidationTechnicalProfiles>
                  </TechnicalProfile>
            </TechnicalProfiles>
        </ClaimsProvider>
    <!--</ClaimsProviders>-->
De claimprovider die we hebben toegevoegd, bevat een zelfbeveiligd technisch profiel, SelfAsserted-Social. Het zelfbeweert technische profiel maakt gebruik van het AAD-UserWriteUsingAlternativeSecurityId technische profiel als validatie technisch profiel. AAD-UserWriteUsingAlternativeSecurityId Het technische profiel wordt dus uitgevoerd wanneer de gebruiker de knop Doorgaan selecteert (zie de schermopname in stap 7).
U ziet ook dat we de inhoudsdefinitie hebben toegevoegd, socialAccountsignupContentDefinitiondie we hebben geconfigureerd in stap 3.5 in de sectie metagegevens.
Stap 4: de indelingsstappen voor gebruikersbeleving bijwerken
Zoek in het ContosoCustomPolicy.XML bestand de HelloWorldJourney gebruikersbeleving en vervang alle indelingsstappen door de stappen die worden weergegeven in de volgende code:
    <!--<OrchestrationSteps>-->
        ...
        <OrchestrationStep Order="1" Type="CombinedSignInAndSignUp">
            <ClaimsProviderSelections>
                <ClaimsProviderSelection TargetClaimsExchangeId="FacebookExchange" />
            </ClaimsProviderSelections>
        </OrchestrationStep>

        <OrchestrationStep Order="2" Type="ClaimsExchange">
            <ClaimsExchanges>
                <ClaimsExchange Id="FacebookExchange"
                    TechnicalProfileReferenceId="Facebook-OAUTH" />
            </ClaimsExchanges>
        </OrchestrationStep>

        <!-- For social IDP authentication, attempt to find the user account in the
        directory. -->
        <OrchestrationStep Order="3" Type="ClaimsExchange">
            <ClaimsExchanges>
                <ClaimsExchange Id="AADUserReadUsingAlternativeSecurityId" TechnicalProfileReferenceId="AAD-UserReadUsingAlternativeSecurityId" />
            </ClaimsExchanges>
        </OrchestrationStep>

        <!-- Show self-asserted page only if the directory does not have the user account
        already (i.e. we don't have an objectId).  -->
        <OrchestrationStep Order="4" Type="ClaimsExchange">
            <Preconditions>
                <Precondition Type="ClaimsExist" ExecuteActionsIf="true">
                    <Value>objectId</Value>
                    <Action>SkipThisOrchestrationStep</Action>
                </Precondition>
            </Preconditions>
            <ClaimsExchanges>
                <ClaimsExchange Id="SelfAsserted-Social" TechnicalProfileReferenceId="SelfAsserted-Social" />
            </ClaimsExchanges>
        </OrchestrationStep>

        <OrchestrationStep Order="5" Type="ClaimsExchange">
            <Preconditions>
                <Precondition Type="ClaimsExist" ExecuteActionsIf="true">
                    <Value>objectId</Value>
                    <Action>SkipThisOrchestrationStep</Action>
                </Precondition>
            </Preconditions>
            <ClaimsExchanges>
                <ClaimsExchange Id="AADUserWrite" TechnicalProfileReferenceId="AAD-UserWriteUsingAlternativeSecurityId" />
            </ClaimsExchanges>
        </OrchestrationStep>
        <OrchestrationStep Order="6" Type="SendClaims" CpimIssuerTechnicalProfileReferenceId="JwtIssuer" />
    <!--</OrchestrationSteps>-->
In de indeling hebben we verwezen naar technische profielen waarmee een gebruiker zich kan aanmelden met een sociaal account.
Wanneer het aangepaste beleid wordt uitgevoerd:
Indelingsstap 1 : deze stap bevat een
ClaimsProviderSelectionselement, waarin de beschikbare aanmeldingsopties worden vermeld waaruit een gebruiker kan kiezen. In dit geval hebben we slechts één optie,FacebookExchangedus wanneer het beleid wordt uitgevoerd, worden gebruikers rechtstreeks naar Facebook.com in stap 2 gebracht, zoals wordt weergegeven door hetTargetClaimsExchangeIdkenmerk.Indelingsstap 2 : het
Facebook-OAUTHtechnische profiel wordt uitgevoerd, zodat de gebruiker wordt omgeleid naar Facebook om zich aan te melden.Indelingsstap 3: in stap 3 wordt het
AAD-UserReadUsingAlternativeSecurityIdtechnische profiel uitgevoerd om te proberen het sociale gebruikersaccount te lezen uit Microsoft Entra ID-opslag. Als het sociale account wordt gevonden,objectIdwordt deze geretourneerd als een uitvoerclaim.Indelingsstap 4 : deze stap wordt uitgevoerd als de gebruiker nog niet bestaat (
objectIdbestaat niet). Het toont het formulier waarmee meer informatie van de gebruiker wordt verzameld of vergelijkbare informatie wordt bijgewerkt die is verkregen via het sociale account.Indelingsstap 5 : deze stap wordt uitgevoerd als de gebruiker nog niet bestaat (
objectIdbestaat niet), dus hetAAD-UserWriteUsingAlternativeSecurityIdtechnische profiel wordt uitgevoerd om het sociale account naar Microsoft Entra-id te schrijven.Indelingsstap 6 - Ten slotte wordt in stap 6 het JWT-token aan het einde van de uitvoering van het beleid samengesteld en geretourneerd.
Stap 5: Relying Party-uitvoerclaims bijwerken
Zoek in het ContosoCustomPolicy.XML bestand het RelyingParty element en vervang vervolgens alle uitvoerclaimverzameling door de volgende code:
    <OutputClaim ClaimTypeReferenceId="displayName" />
    <OutputClaim ClaimTypeReferenceId="givenName" />
    <OutputClaim ClaimTypeReferenceId="surname" />
    <OutputClaim ClaimTypeReferenceId="email" />
    <OutputClaim ClaimTypeReferenceId="objectId" PartnerClaimType="sub"/>
    <OutputClaim ClaimTypeReferenceId="identityProvider" />
We hebben de id-provider (identityProvider) toegevoegd als een uitvoerclaim, dus deze wordt opgenomen in het JWT-token dat wordt geretourneerd aan de relying party-toepassing.
Stap 6: Beleid uploaden
Volg de stappen in Het aangepaste beleidsbestand uploaden om uw beleidsbestand te uploaden. Als u een bestand met dezelfde naam uploadt als het bestand dat zich al in de portal bevindt, moet u het aangepaste beleid overschrijven selecteren als dit al bestaat.
Stap 7: beleid testen
Volg de stappen in Het aangepaste beleid testen om uw aangepaste beleid te testen.
U wordt omgeleid naar een aanmeldingspagina van Facebook. Voer uw Facebook-referenties in en selecteer Vervolgens Aanmelden. U wordt rechtstreeks omgeleid naar Facebook terwijl we dit zo instellen, dat we in onze indelingsstappen niet meerdere aanmeldingsopties hebben waaruit u kunt kiezen. Normaal gesproken voegt u in een app een knop toe, zoals Aanmelden met Facebook, die, wanneer deze is geselecteerd, het beleid uitvoert.
Als dit de eerste keer is dat dit beleid wordt uitgevoerd (het sociale account bestaat nog niet in Microsoft Entra-opslag), ziet u een schermopname zoals hieronder wordt weergegeven. U ziet dit scherm niet in volgende beleidsuitvoeringen, omdat het sociale account al bestaat in Microsoft Entra-opslag.
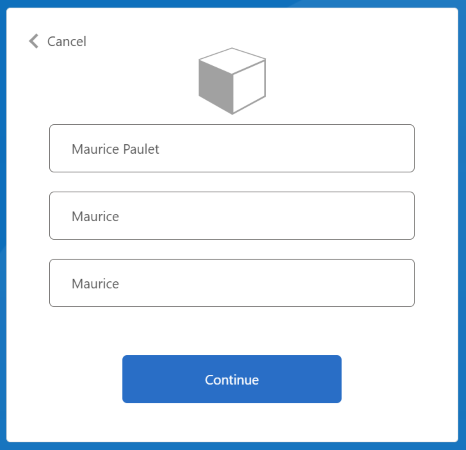
Voer de weergavenaam, de voornaam en de achternaam in of werk deze bij en selecteer vervolgens de knop Doorgaan.
Nadat het beleid is uitgevoerd, wordt u omgeleid naar https://jwt.msen ziet u een gedecodeerd JWT-token. Het lijkt op het volgende JWT-tokenfragment:
{
  "typ": "JWT",
  "alg": "RS256",
  "kid": "pxLOMWFgP4T..."
}.{
   ...
  "acr": "b2c_1a_contosocustompolicy",
   ...
  "given_name": "Maurice",
  "family_name": "Paulet",
  "name": "Maurice Paulet",
  "email": "maurice.p@contoso.com",
  "idp": "facebook.com"
}.[Signature]
U ziet dat de id-provider, "idp": "facebook.com"is opgenomen in het JWT-token.
Een gecombineerde lokale en sociale aanmelding
In dit artikel verwijzen onze stappen voor het organiseren van gebruikerstrajecten alleen naar technische profielen waarmee een gebruiker zich kan aanmelden met behulp van een sociaal account. We kunnen de indelingsstappen wijzigen zodat een gebruiker zich kan aanmelden met een lokaal account of een sociaal account. Hiervoor bevat het element van ClaimsProviderSelections de eerste indelingsstap de aanmeldingsopties die beschikbaar zijn voor de gebruiker.
Gebruik de volgende stappen om een gecombineerd lokaal en sociaal account toe te voegen:
Zoek in het
ContosoCustomPolicy.XMLbestand hetAccountTypeInputCollectorzelfbeclaimde technische profiel en voeg vervolgens claim toeauthenticationSourcein de verzameling uitvoerclaims met behulp van de volgende code:<OutputClaim ClaimTypeReferenceId="authenticationSource" DefaultValue="localIdpAuthentication" AlwaysUseDefaultValue="true" />Voeg in de
UserJourneyssectie een nieuw gebruikerstrajectLocalAndSocialSignInAndSignUptoe met behulp van de volgende code:<!--<UserJourneys>--> ... <UserJourney Id="LocalAndSocialSignInAndSignUp"> <OrchestrationSteps> <!--Orchestration steps will be added here--> </OrchestrationSteps> </UserJourney> <!--</UserJourneys>-->Voeg in het gebruikerstraject dat u hebt gemaakt,
LocalAndSocialSignInAndSignUpindelingsstappen toe met behulp van de volgende code:<!--<UserJourneys> ... <UserJourney Id="LocalAndSocialSignInAndSignUp"> <OrchestrationSteps>--> <OrchestrationStep Order="1" Type="CombinedSignInAndSignUp" ContentDefinitionReferenceId="SignupOrSigninContentDefinition"> <ClaimsProviderSelections> <ClaimsProviderSelection TargetClaimsExchangeId="FacebookExchange" /> <ClaimsProviderSelection ValidationClaimsExchangeId="LocalAccountSigninEmailExchange" /> </ClaimsProviderSelections> <ClaimsExchanges> <ClaimsExchange Id="LocalAccountSigninEmailExchange" TechnicalProfileReferenceId="UserSignInCollector" /> </ClaimsExchanges> </OrchestrationStep> <!-- Check if the user has selected to sign in using one of the social providers --> <OrchestrationStep Order="2" Type="ClaimsExchange"> <Preconditions> <Precondition Type="ClaimsExist" ExecuteActionsIf="true"> <Value>objectId</Value> <Action>SkipThisOrchestrationStep</Action> </Precondition> </Preconditions> <ClaimsExchanges> <ClaimsExchange Id="FacebookExchange" TechnicalProfileReferenceId="Facebook-OAUTH" /> <ClaimsExchange Id="AccountTypeInputCollectorClaimsExchange" TechnicalProfileReferenceId="AccountTypeInputCollector"/> </ClaimsExchanges> </OrchestrationStep> <!--For Local sign in option start--> <OrchestrationStep Order="3" Type="ClaimsExchange"> <Preconditions> <Precondition Type="ClaimsExist" ExecuteActionsIf="true"> <Value>objectId</Value> <Action>SkipThisOrchestrationStep</Action> </Precondition> <Precondition Type="ClaimEquals" ExecuteActionsIf="true"> <Value>accountType</Value> <Value>work</Value> <Action>SkipThisOrchestrationStep</Action> </Precondition> <Precondition Type="ClaimEquals" ExecuteActionsIf="true"> <Value>authenticationSource</Value> <Value>socialIdpAuthentication</Value> <Action>SkipThisOrchestrationStep</Action> </Precondition> </Preconditions> <ClaimsExchanges> <ClaimsExchange Id="GetAccessCodeClaimsExchange" TechnicalProfileReferenceId="AccessCodeInputCollector" /> </ClaimsExchanges> </OrchestrationStep> <OrchestrationStep Order="4" Type="ClaimsExchange"> <Preconditions> <Precondition Type="ClaimsExist" ExecuteActionsIf="true"> <Value>objectId</Value> <Action>SkipThisOrchestrationStep</Action> </Precondition> <Precondition Type="ClaimEquals" ExecuteActionsIf="true"> <Value>authenticationSource</Value> <Value>socialIdpAuthentication</Value> <Action>SkipThisOrchestrationStep</Action> </Precondition> </Preconditions> <ClaimsExchanges> <ClaimsExchange Id="SignUpWithLogonEmailExchange" TechnicalProfileReferenceId="UserInformationCollector" /> </ClaimsExchanges> </OrchestrationStep> <OrchestrationStep Order="5" Type="ClaimsExchange"> <Preconditions> <Precondition Type="ClaimEquals" ExecuteActionsIf="true"> <Value>authenticationSource</Value> <Value>socialIdpAuthentication</Value> <Action>SkipThisOrchestrationStep</Action> </Precondition> </Preconditions> <ClaimsExchanges> <ClaimsExchange Id="AADUserReaderExchange" TechnicalProfileReferenceId="AAD-UserRead"/> </ClaimsExchanges> </OrchestrationStep> <!--For Local sign in option end--> <!--For social sign in option start--> <!-- For social IDP authentication, attempt to find the user account in the directory. --> <OrchestrationStep Order="6" Type="ClaimsExchange"> <Preconditions> <Precondition Type="ClaimEquals" ExecuteActionsIf="true"> <Value>authenticationSource</Value> <Value>localIdpAuthentication</Value> <Action>SkipThisOrchestrationStep</Action> </Precondition> </Preconditions> <ClaimsExchanges> <ClaimsExchange Id="AADUserReadUsingAlternativeSecurityId" TechnicalProfileReferenceId="AAD-UserReadUsingAlternativeSecurityId" /> </ClaimsExchanges> </OrchestrationStep> <!-- Show self-asserted page only if the directory does not have the user account already (i.e. we do not have an objectId). --> <OrchestrationStep Order="7" Type="ClaimsExchange"> <Preconditions> <Precondition Type="ClaimsExist" ExecuteActionsIf="true"> <Value>objectId</Value> <Action>SkipThisOrchestrationStep</Action> </Precondition> <Precondition Type="ClaimEquals" ExecuteActionsIf="true"> <Value>authenticationSource</Value> <Value>localIdpAuthentication</Value> <Action>SkipThisOrchestrationStep</Action> </Precondition> </Preconditions> <ClaimsExchanges> <ClaimsExchange Id="SelfAsserted-Social" TechnicalProfileReferenceId="SelfAsserted-Social" /> </ClaimsExchanges> </OrchestrationStep> <OrchestrationStep Order="8" Type="ClaimsExchange"> <Preconditions> <Precondition Type="ClaimsExist" ExecuteActionsIf="true"> <Value>objectId</Value> <Action>SkipThisOrchestrationStep</Action> </Precondition> <Precondition Type="ClaimEquals" ExecuteActionsIf="true"> <Value>authenticationSource</Value> <Value>localIdpAuthentication</Value> <Action>SkipThisOrchestrationStep</Action> </Precondition> </Preconditions> <ClaimsExchanges> <ClaimsExchange Id="AADUserWrite" TechnicalProfileReferenceId="AAD-UserWriteUsingAlternativeSecurityId" /> </ClaimsExchanges> </OrchestrationStep> <!--For social sign in option end--> <OrchestrationStep Order="9" Type="ClaimsExchange"> <ClaimsExchanges> <ClaimsExchange Id="GetMessageClaimsExchange" TechnicalProfileReferenceId="UserInputMessageClaimGenerator"/> </ClaimsExchanges> </OrchestrationStep> <OrchestrationStep Order="10" Type="SendClaims" CpimIssuerTechnicalProfileReferenceId="JwtIssuer" /> <!-- </OrchestrationSteps> </UserJourney> </UserJourneys>-->In de eerste stap geven we de opties op waaruit een gebruiker moet kiezen in hun traject, lokale of sociale verificatie. In de volgende stappen gebruiken we voorwaarden om de optie bij te houden die de gebruiker heeft gekozen of de fase van het traject waarop de gebruiker zich bevindt. We gebruiken bijvoorbeeld de
authenticationSourceclaim om onderscheid te maken tussen een lokaal verificatietraject en een sociaal verificatietraject.In de
RelyingPartysectie wijzigt u DefaultUserJourney inReferenceIdLocalAndSocialSignInAndSignUpGebruik de procedure in stap 6 en stap 7 om uw beleid te uploaden en uit te voeren. Nadat u het beleid hebt uitgevoerd, ziet u een scherm dat lijkt op de volgende schermopname.
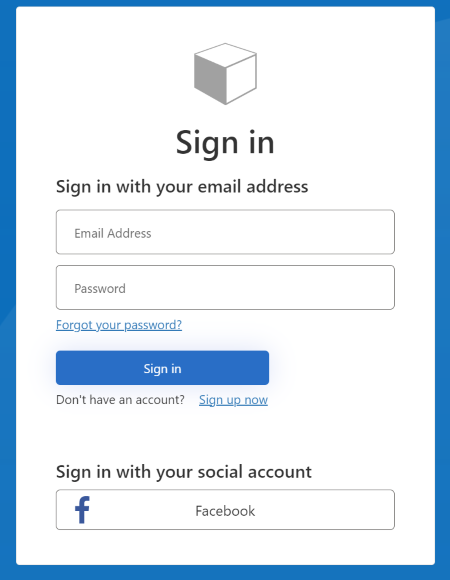
U kunt zien dat een gebruiker zich kan registreren of aanmelden met een lokaal account of een sociaal account.
Volgende stappen
- Meer informatie over het definiëren van een technisch OAuth2-profiel in een aangepast Azure Active Directory B2C-beleid.