Aan de slag: Uw eerste Windows-container uitvoeren
Van toepassing op: Windows Server 2025, Windows Server 2022, Windows Server 2019, Windows Server 2016
In dit onderwerp wordt beschreven hoe u uw eerste Windows-container uitvoert nadat u uw omgeving hebt ingesteld, zoals beschreven in Aan de slag: Windows voorbereiden voor containers. Als u een container wilt uitvoeren, downloadt u eerst (in containers ook wel een pull-bewerking genoemd) een basisinstallatiekopie, die een basislaag van besturingssysteemdiensten aan uw container biedt. Vervolgens maakt en draait u een containerafbeelding, die is gebaseerd op de basisafbeelding. Lees verder voor meer informatie.
Een container basisafbeelding ophalen
Alle containers worden gemaakt van containerafbeeldingen. Microsoft biedt verschillende startinstallatiekopieën, basisbeelden genoemd, waaruit u kunt kiezen (zie Container basisbeelden). Met deze procedure wordt het lichtgewicht Nano Server-basisimage opgehaald (gedownload en geïnstalleerd).
Open een opdrachtpromptvenster (zoals de ingebouwde opdrachtprompt, PowerShell of Windows Terminal) en voer vervolgens de volgende opdracht uit om de basisinstallatiekopie te downloaden en te installeren:
docker pull mcr.microsoft.com/windows/nanoserver:ltsc2022Als Docker niet kan worden gestart bij het ophalen van de installatiekopie, is de Docker-daemon mogelijk onbereikbaar. U kunt dit probleem oplossen door de Docker-service opnieuw te starten.
Tip
Als er een foutbericht wordt weergegeven met de tekst
no matching manifest for linux/amd64 in the manifest list entries, controleert u of Docker niet is geconfigureerd voor het uitvoeren van Linux-containers. Als u wilt overschakelen naar Windows-containers in Docker, klikt u met de rechtermuisknop op het Docker-pictogram en selecteert u Overschakelen naar Windows-containers. Als u de opdrachtregel wilt gebruiken om tussen containers te schakelen, voert u& $Env:ProgramFiles\Docker\Docker\DockerCli.exe -SwitchDaemonuit.Nadat de installatiekopie is gedownload, leest u de gebruiksrechtovereenkomst terwijl u wacht en controleert u of de installatiekopie op uw systeem bestaat door een query uit te voeren op uw lokale opslagplaats voor docker-installatiekopieën. Bij het uitvoeren van de opdracht
docker imageswordt een lijst van geïnstalleerde afbeeldingen geretourneerd.Hier is een voorbeeld van de uitvoer die het Nano Server-image toont.
REPOSITORY             TAG                 IMAGE ID            CREATED             SIZE
microsoft/nanoserver   latest              105d76d0f40e        4 days ago          652 MB
Een Windows-container uitvoeren
In dit eenvoudige voorbeeld wordt een 'Hallo wereld'-containerimage gemaakt en gedeployed. Voor de beste ervaring voert u deze opdrachten uit in een opdrachtpromptvenster met verhoogde bevoegdheid (maar gebruik de Windows PowerShell ISE niet. Het werkt niet voor interactieve sessies met containers, omdat de containers lijken te hangen).
Start een container met een interactieve sessie vanuit de
nanoserverimage door de volgende opdracht in de commandoregel in te voeren:docker run -it mcr.microsoft.com/windows/nanoserver:ltsc2022 cmd.exeNadat de container is gestart, verandert het opdrachtpromptvenster de context in de container. In de container maken we een eenvoudig 'Hallo wereld'-tekstbestand en sluiten we de container af door de volgende opdrachten in te voeren:
echo "Hello World!" > Hello.txt
exit
Haal de container-id op voor de container die u zojuist hebt afgesloten door de opdracht docker ps uit te voeren:
docker ps -aMaak een nieuwe 'HelloWorld'-afbeelding die de wijzigingen bevat in de eerste container die u hebt gedraaid. Voer hiervoor de opdracht docker commit uit, waarbij u
<containerid>vervangt door de id van uw container:docker commit <containerid> helloworldU hebt nu een aangepaste afbeelding die het hello-world-script bevat. Dit is te zien met het docker-images -commando.
docker imagesHier volgt een voorbeeld van de uitvoer:
REPOSITORY                             TAG                 IMAGE ID            CREATED             SIZE
helloworld                             latest              a1064f2ec798        10 seconds ago      258MB
mcr.microsoft.com/windows/nanoserver   2022                2b9c381d0911        3 weeks ago         256MB
Voer ten slotte de nieuwe container uit met behulp van de Docker-opdracht met de parameter
--rmwaarmee de container automatisch wordt verwijderd zodra de opdrachtregel (cmd.exe) stopt.docker run --rm helloworld cmd.exe /s /c type Hello.txtHet resultaat is dat Docker een container heeft gemaakt op basis van de 'HelloWorld'-installatiekopie, Docker een exemplaar van cmd.exe in de container heeft gestart en dat cmd.exe ons bestand heeft gelezen en de inhoud naar de shell heeft uitgevoerd. Als laatste stap heeft Docker de container gestopt en verwijderd.
Een Windows-container uitvoeren met windows-beheercentrum
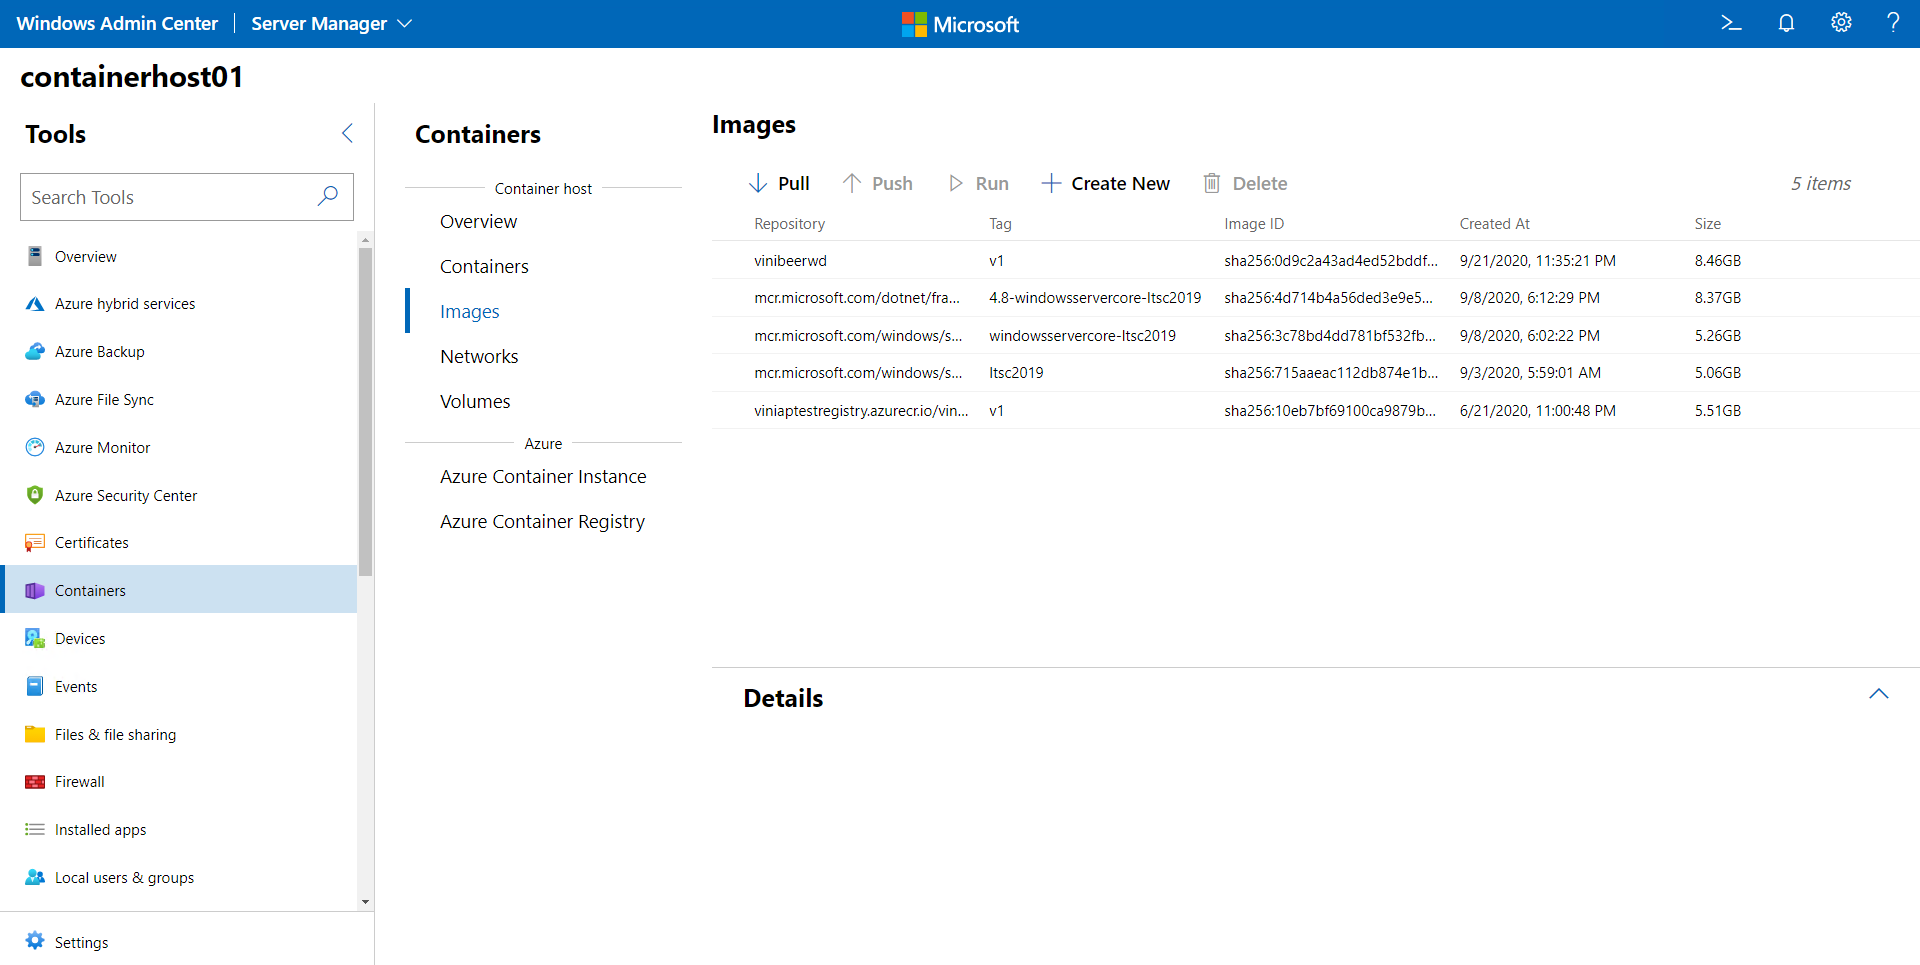
Gebruik het Windows-beheercentrum om uw containers lokaal uit te voeren. Gebruik met name de extensie Containers van uw Windows Admin Center-exemplaar om de containers uit te voeren. Open eerst de containerhost die u wilt beheren en selecteer in het deelvenster Extra de extensie Containers. Selecteer vervolgens het tabblad Afbeeldingen in de Container-extensie onder Container Host.

Als uw host geen basiscontainerimage heeft, selecteert u de optie Pull om de instellingen voor de pull-containerimage te openen.

Geef in de instellingen voor de Pull Container Image de afbeeldings-URL en de tag op. Als u niet zeker weet welke installatiekopie u wilt ophalen, biedt het Windows-beheercentrum een lijst met algemene installatiekopieën van Microsoft. U kunt ook de inloggegevens opgeven om een image uit een private repository op te halen. Nadat u de benodigde gegevens hebt ingevuld, selecteert u Pull. Windows Admin Center start het pull-proces op de containerhost. Nadat het downloaden is voltooid, ziet u de nieuwe afbeelding op het tabblad Afbeeldingen.
Selecteer de afbeelding die u wilt uitvoeren en selecteer Uitvoeren.

Stel in het menu Uitvoeren de configuratie voor de container in, zoals de containernaam, het isolatietype, welke poorten moeten worden gepubliceerd en geheugen en CPU-toewijzing. Daarnaast kunt u Docker-runopdrachten toevoegen die zich niet in de gebruikersinterface bevinden, zoals -v voor permanent volume. Raadpleeg de documentatievoor meer informatie over beschikbare Docker-uitvoeringsparameters.
Zodra u de configuratie voor de container hebt voltooid, klikt u op uitvoeren. U ziet de status van de actieve containers op het tabblad Containers:
