Notitie
Voor toegang tot deze pagina is autorisatie vereist. U kunt proberen u aan te melden of de directory te wijzigen.
Voor toegang tot deze pagina is autorisatie vereist. U kunt proberen de mappen te wijzigen.
In dit artikel wordt beschreven hoe u NuGet gebruikt om de Windows Driver Kit op uw computer te installeren. NuGet is een populaire pakketbeheerder die wordt gebruikt voor het verpakken en distribueren van software. Zie Wat is NuGet? voor meer informatie.
Overzicht van Windows Drivers Kit
Windows Driver Kit (WDK) is een softwarehulpprogrammaset die wordt gebruikt voor het ontwikkelen, testen en implementeren van Windows-stuurprogramma's. De inhoud die in de WDK is opgenomen, kan worden gecategoriseerd in vijf unieke typen: Headers, Bibliotheken, Voorbeelden, Hulpprogramma's en Sjablonen.
De WDK wordt uitgebracht in drie verschillende distributies, met verschillende installatieopties.
Windows Driver Kit (WDK):De WDK is beschikbaar als een traditioneel msi-pakket. Hiervoor moet Visual Studio worden geïnstalleerd en wordt de WDK geïnstalleerd op %ProgramFiles(x86)%\Windows Kits\. Zie De Windows Driver Kit (WDK) downloaden voor meer informatie over het downloaden en installeren van de WDK.
Enterprise Windows Drivers Kit (EWDK): de EWDK wordt geleverd als een zelfstandige ISO, waaronder de buildhulpprogramma's voor de opdrachtregelcompilator, de SDK en de WDK. De EWDK is een zelfstandige opdrachtregelomgeving. Om aan de slag te gaan, koppelt u de ISO en voert u LaunchBuildEnv uit. Ga naar De Windows Driver Kit (WDK) downloaden en gebruiken voor meer informatie over het downloaden en gebruiken van de EWDK.
Windows Drivers Kit NuGet-pakket: Het WDK NuGet-pakket bestaat uit essentiële bibliotheken, headers, DLL, hulpprogramma's en metagegevens die worden gebruikt voor het bouwen van Windows-stuurprogramma's die worden gedeeld en ondersteund door moderne CI/CD-pijplijnen. De officiële release van het WDK NuGet-pakket is nu beschikbaar op nuget.org. Zie Kit-versiebeheer voor meer informatie over de nieuwste versie van de WDK, SDK en Visual Studio.
Ontwikkelaars kunnen NuGet-pakketten (Windows Driver Kit) rechtstreeks vanuit Visual Studio openen en integreren via NuGet Package Manager. Door deze pakketten te gebruiken, kunnen stuurprogrammaontwikkelaars naadloos essentiële buildhulpprogramma's in hun projecten installeren, waardoor een gestroomlijnd en efficiënt proces voor het verkrijgen van WDK wordt vergemakkelijkt. Bovendien maakt het gebruik van WDK NuGet-pakketten vaker updates en releases mogelijk en kunnen ze eenvoudig worden geïntegreerd in buildsystemen binnen CI/CD-pijplijnen. Zie Pakketten installeren en beheren in Visual Studio met behulp van de NuGet Package Manager-voor meer informatie.
Hier vindt u de koppelingen naar de x64- en ARM64 WDK NuGet-pakketten die beschikbaar zijn op nuget.org.
x64: https://www.nuget.org/packages/Microsoft.Windows.WDK.x64/
ARM64: https://www.nuget.org/packages/Microsoft.Windows.WDK.ARM64
Instructies voor het bouwen van stuurprogramma's in geautomatiseerde build-systemen
Zie Lokaal bouwen voor instructies over het bouwen van stuurprogramma's in een groot geautomatiseerd systeem.
Aan de slag met WDK NuGet
Vereiste voorwaarden
- X64/ARM64-pc met Windows 11 of hoger.
Visual Studio 2022 installeren
Voor de WDK NuGet is Visual Studio vereist. Download en installeer Visual Studio 2022 Community, Professional of Enterprise Edition.
Visual Studio Tools downloaden
Wanneer u Visual Studio 2022 installeert, selecteert u de Desktop-ontwikkeling met C++ workload en voegt u vervolgens onder Afzonderlijke onderdelen toe:
- MSVC v143 - VS 2022 C++ ARM64/ARM64EC Spectre-gemitigeerde bibliotheken (Nieuwste)
- MSVC v143 - VS 2022 C++ x64/x86 bibliotheken met Spectre-mitigatie (laatste versie)
- C++ ATL voor de nieuwste v143-buildtools met Spectre-mitigaties (ARM64/ARM64EC)
- C++ ATL voor de nieuwste v143-buildtools met Spectre-beveiligingen (x86 & x64)
- C++ MFC voor de nieuwste v143-buildtools met Spectre-beveiligingsmaatregelen (ARM64/ARM64EC)
- C++ MFC voor de nieuwste v143 buildtools met Spectre-beveiligingsmaatregelen (x86 & x64)
- Windows Driver Kit
WDK NuGet installeren
Volg de volgende stappen om het WDK NuGet-pakket te verkrijgen en te installeren in Visual Studio.
Start Visual Studio.
Maak een nieuw stuurprogrammaproject aan, bijvoorbeeld een C++-project voor een kernelmodusstuurprogramma (KMDF).
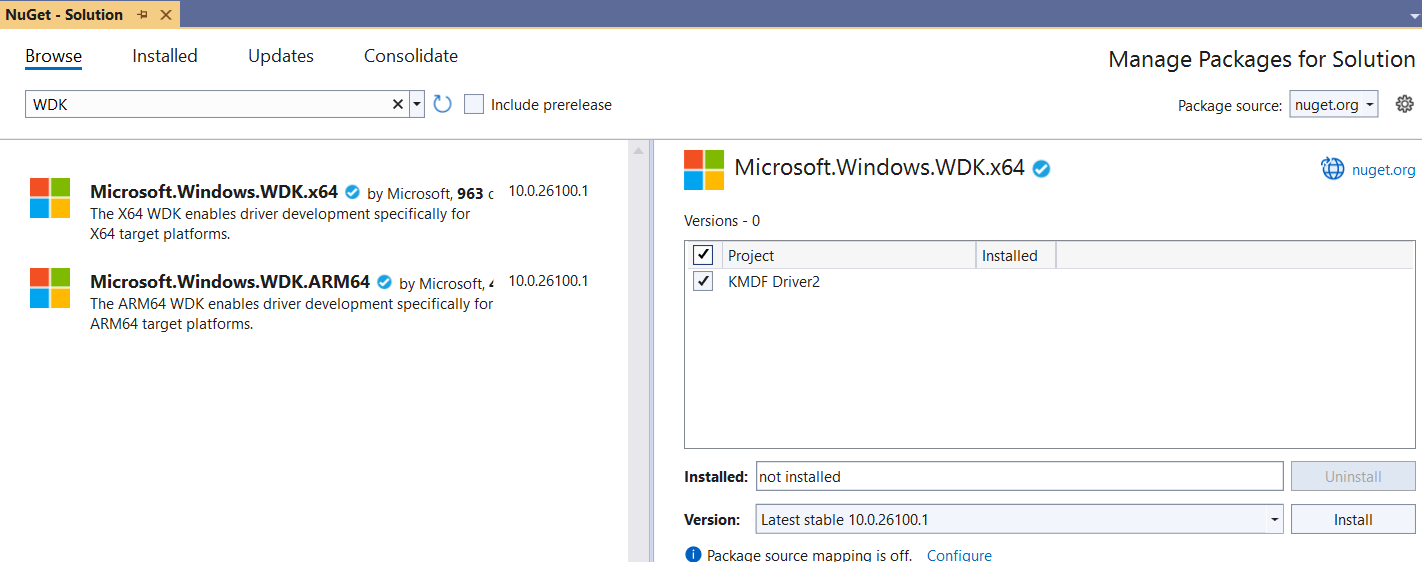
Klik met de rechtermuisknop op het oplossingsbestand voor het stuurprogrammaproject en selecteer NuGet-pakketten beheren.
Selecteer de vervolgkeuzelijst naast de pakketbron en selecteer
nuget.org.Zoek naar WDK.
Selecteer
Microsoft.Windows.WDK.x64ofMicrosoft.Windows.WDK.ARM64op basis van de platformarchitectuur waarvoor u wilt ontwikkelen.Laat andere selectievakjes ingesteld op de standaardinstellingen.
Selecteer Installeren.
Opmerking
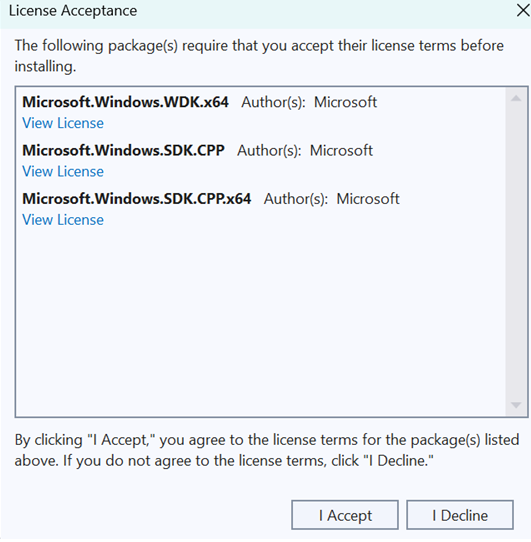
Het SDK NuGet-pakket wordt automatisch geïnstalleerd als onderdeel van de WDK NuGet-installatie.
Als u de installatie wilt voltooien, controleert en accepteert u de licentievoorwaarden.
Bouw en test uw WDK-stuurprogrammaoplossing.
Opmerking
Het gebruik van de dotnet-opdrachtregel werkt niet met WDK en het gebruik ervan wordt niet aanbevolen.
WDK NuGet bijwerken
Volg deze stappen om NuGet-pakketten bij te werken in bestaande stuurprogrammaprojecten.
Open het bestaande stuurprogrammaproject in Visual Studio.
Klik met de rechtermuisknop op het oplossingsbestand voor het stuurprogrammaproject en selecteer NuGet-pakketten beheren.
Selecteer het tabblad Updates .
Selecteer het vak Prerelease opnemen als u prerelease WDK-pakketten wilt gebruiken.
Selecteer de pakketten die u in de lijst wilt bijwerken.
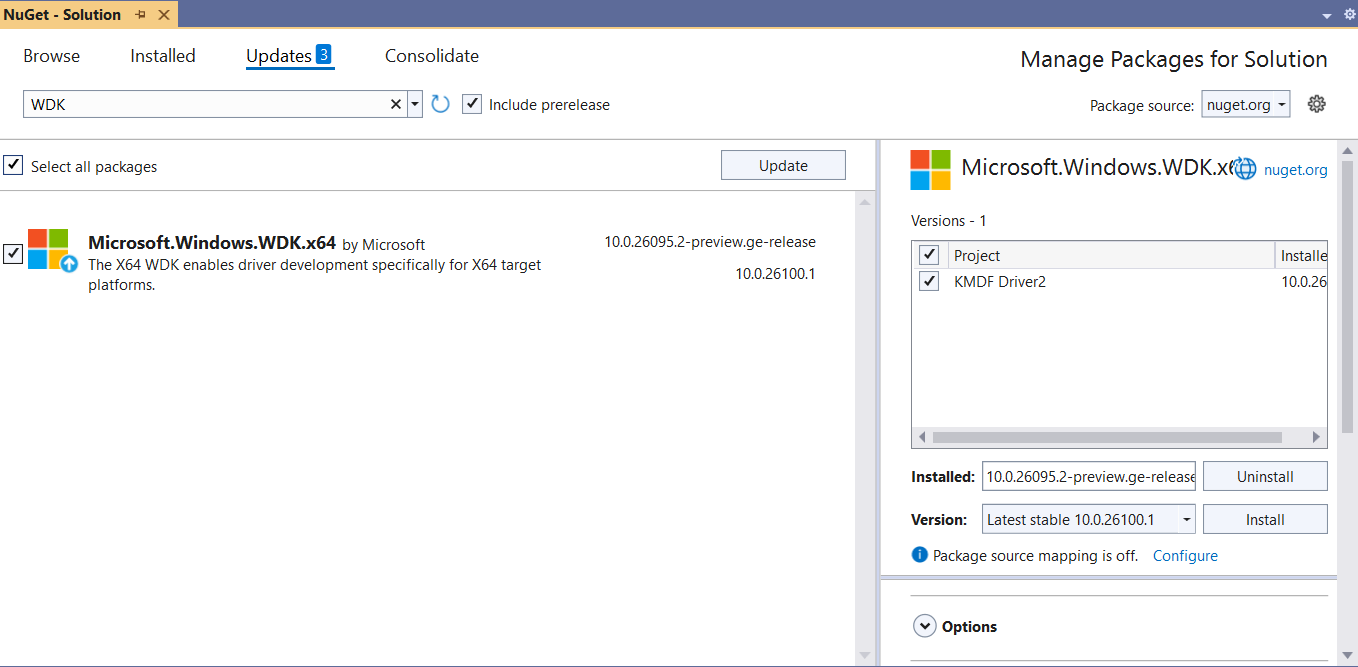
Selecteer Installeren.
Selecteer de optie Toepassen.
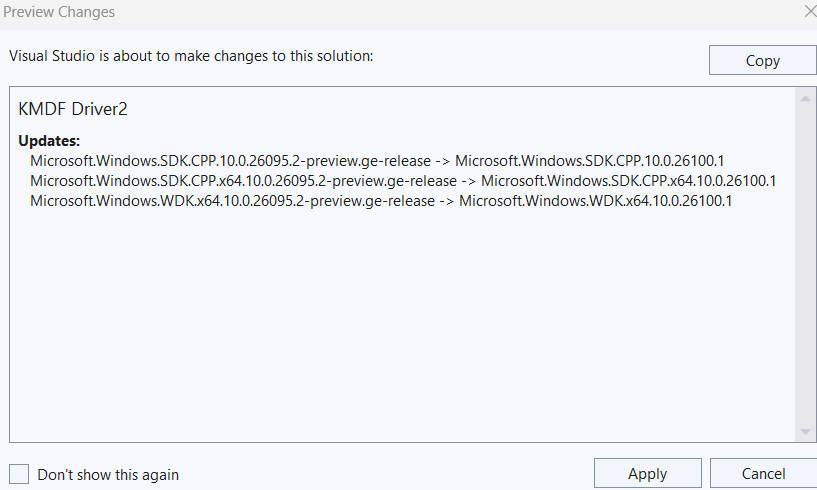
Als u de installatie wilt voltooien, controleert en accepteert u de licentievoorwaarden.
Zie ook
- Wat is NuGet?
- Opdrachtregelparameters gebruiken om Visual Studio- te installeren, bij te werken en te beheren
- Visual Studio Tools downloaden