SSIS 2012 EzAPI - Basic Intro
Since the upgrade from 2008R2 to 2012 with the addition of Project based package setups I never found many blog entries and so far nothing that clearly shows the basic setup of a project. So in this (which I hope to make the first of many blog entries I am going to cover the basic setup of an EzAPI project.
Setup (Download and Build EzAPI)
First thing you are going to need to do is download the Source Code for EzAPI (SSIS 2012 version).
Instead of downloading the installer I prefer to download just the source code so I can include it as a project reference when setting up my project to create packages. So we will start by going to https://sqlsrvintegrationsrv.codeplex.com/SourceControl/latest

From here you can click on the Main section in the lower left menu to expand the grouping.

While “main” is selected, click on the “Download” link.
This should download “sqlsrvintegrationsrv-100610.zip”
(Note that if a new version has been released for a later version of SQL Server you need to make sure you download the history version for 2012 to follow this guide).
Extract all the files in the Zip file so you can open a project to begin working with EzAPI.
Inside the Zip file is 2 folders that look like this:

Open the “main” folder, then “EzAPI” folder and finally the “src” folder.
You should now be in the “src” folder and it should look like this:
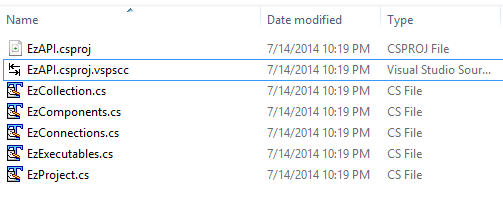
Now you can open the “EzAPI.csproj” file starting a new project in Visual Studio 2012.
Before moving any farther you should make sure you can “Build” the solution to make sure you have the references required for the project to compile.
Creating your first EzAPI based package/SSIS project
Once the project has been successfully built EzAPI you can move on to creating your first SSIS Project.
In this case “Right Click” on the Solution and select Add -> New Project

Then select “Visual C#” -> “Windows” -> “Console Application”

(Don’t forget to give the project a name. I used “FirstEzAPIPackage” for this example.)
While the new project is selected you want to make sure you add references to the following DLLs from the .Net tab.


Microsoft.SqlServer.DTSRuntimeWrap
Microsoft.SqlServer.ManagedDTS
Now so we can use EzAPI but also add new features in later blog posts we will add a Reference to the copy in our Solution.

Now we add the Code to the program file in the project.
  using System;
 using System.Collections.Generic;
 using System.Linq;
 using System.Text;
 using System.Threading.Tasks;

 using Microsoft.SqlServer.Dts;
 using Microsoft.SqlServer.SSIS.EzAPI;


 namespace FirstEzAPIPackage
 {
 class Program
 {
 static void Main(string[] args)
 {

 //Unlike in 2008R2 and earlier we start with a Project in SSIS now
 EzProject myEzAPIProject = new EzProject();

 //With EzAPI YOU ALWAYS WANT TO NAME EVERYTHING (if not you get a GUID for the name)
 myEzAPIProject.Name = "MyFirstEzAPISSISProject";

 //now lets create 2 empty packages just to see an example of the process
 EzPackage FirstEzAPIPackage = new EzPackage();
 EzPackage SecondEzAPIPackage = new EzPackage();

 //Dont forget to name them...
 FirstEzAPIPackage.Name = "FirstPackage";
 SecondEzAPIPackage.Name = "SecondPackage";


 //One of the last steps you take is to add your packages to your project
 myEzAPIProject.AddPackage(FirstEzAPIPackage);
 myEzAPIProject.AddPackage(SecondEzAPIPackage);


 //When you save the Project it saves the entire project in a single ISPAC file
 myEzAPIProject.SaveTo("c:\\SSIS\\FirstEzAPISSISProject.ispac");

 }
 }
 }
Final steps – Compile and Test
Save your changes, then Build the new project.
In the last line of the code we setup the project to save to “C:\SSIS\” folder. So you need to make sure you have an SSIS folder off the C drive (or change that path in the code) prior to compiling and running your code.
Once your project is built you need to remember that you don’t have the IsPac project file created yet. The Build compiles the Console Application you just created into a .EXE file. If you look at the second to last line of the “Output” screen you can copy the full path to your .EXE file so you can run the code to test it out.
In this case we didn’t add any parameters, so just open the command prompts and run the file.
We also didn’t add any output yet so a few seconds later it should complete without printing anything.
Now if we open the C:\SSIS folder we should have a new .IsPac file named “FirstEzAPISSISProject.ispac”

If you want to check the contents you can either load the package into SSDT, deploy the code to an SSIS server or take the shortcut and just check the contents. If you change the IsPac file type to a .Zip instead you can actually open the file and see that it has 2 packages and some config/parameter files inside just like any other compiled SSIS project should.

Next Steps
In the next blog entry I will be actually making the packages from this example do something then in future versions look into adding Project level parameters to show configuration options added with SSIS 2012. If there are specific features you would like to see in a future blog please leave a comment here.