Automatic checkout / check-in in InfoPath 2013 with SharePoint 2013
Automatic checkout / checkin in InfoPath 2013 with SharePoint 2013
=========================================
Checkin check out steps :
=========================================
# Create a blank form publish it to forms library.
# create a data connection library in the site.
# start secure store service and create a secure store service application
# configure SSA as per the blog
#Steps for editing UDCX file needs to be done later on.
# open the xsn for the published form from the saved location.
# create receive data connection to forms library select the following
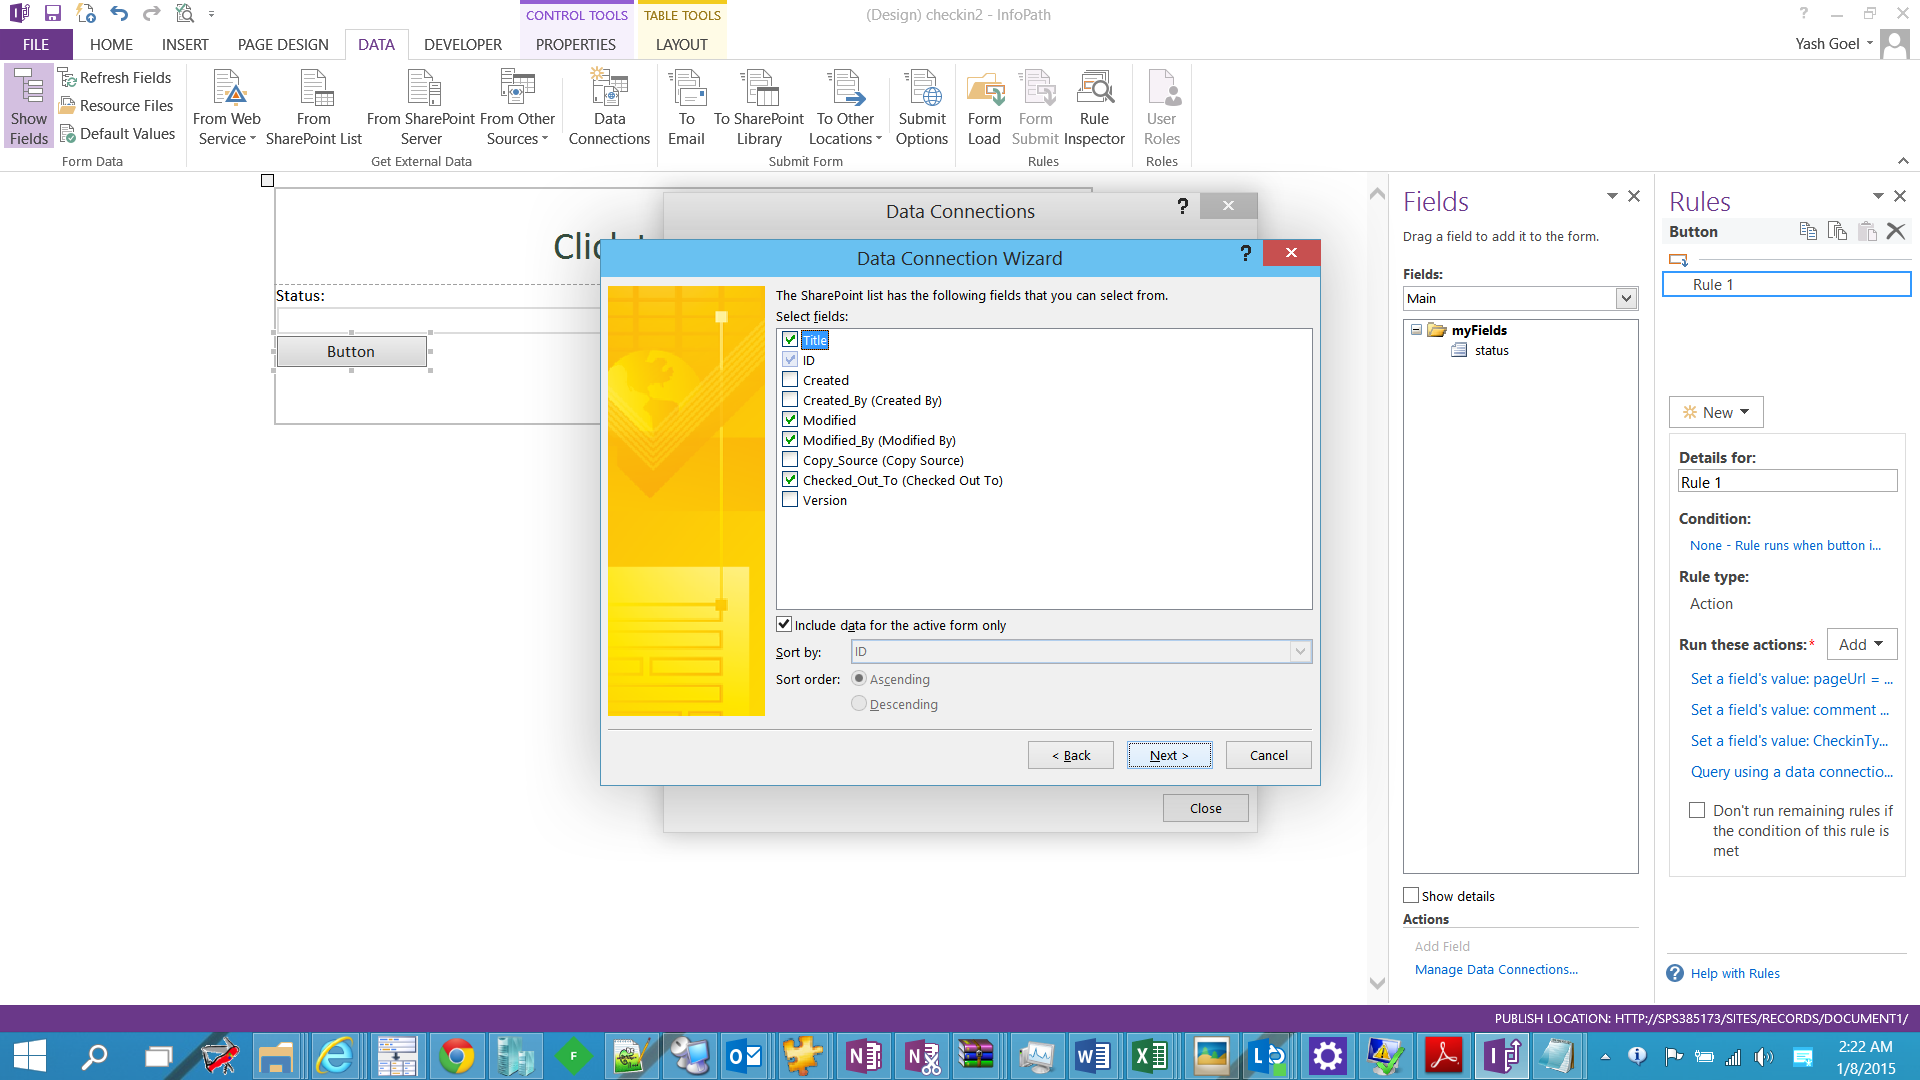
# make sure you select the include data for the active form check box.
# select retrieve data on form load
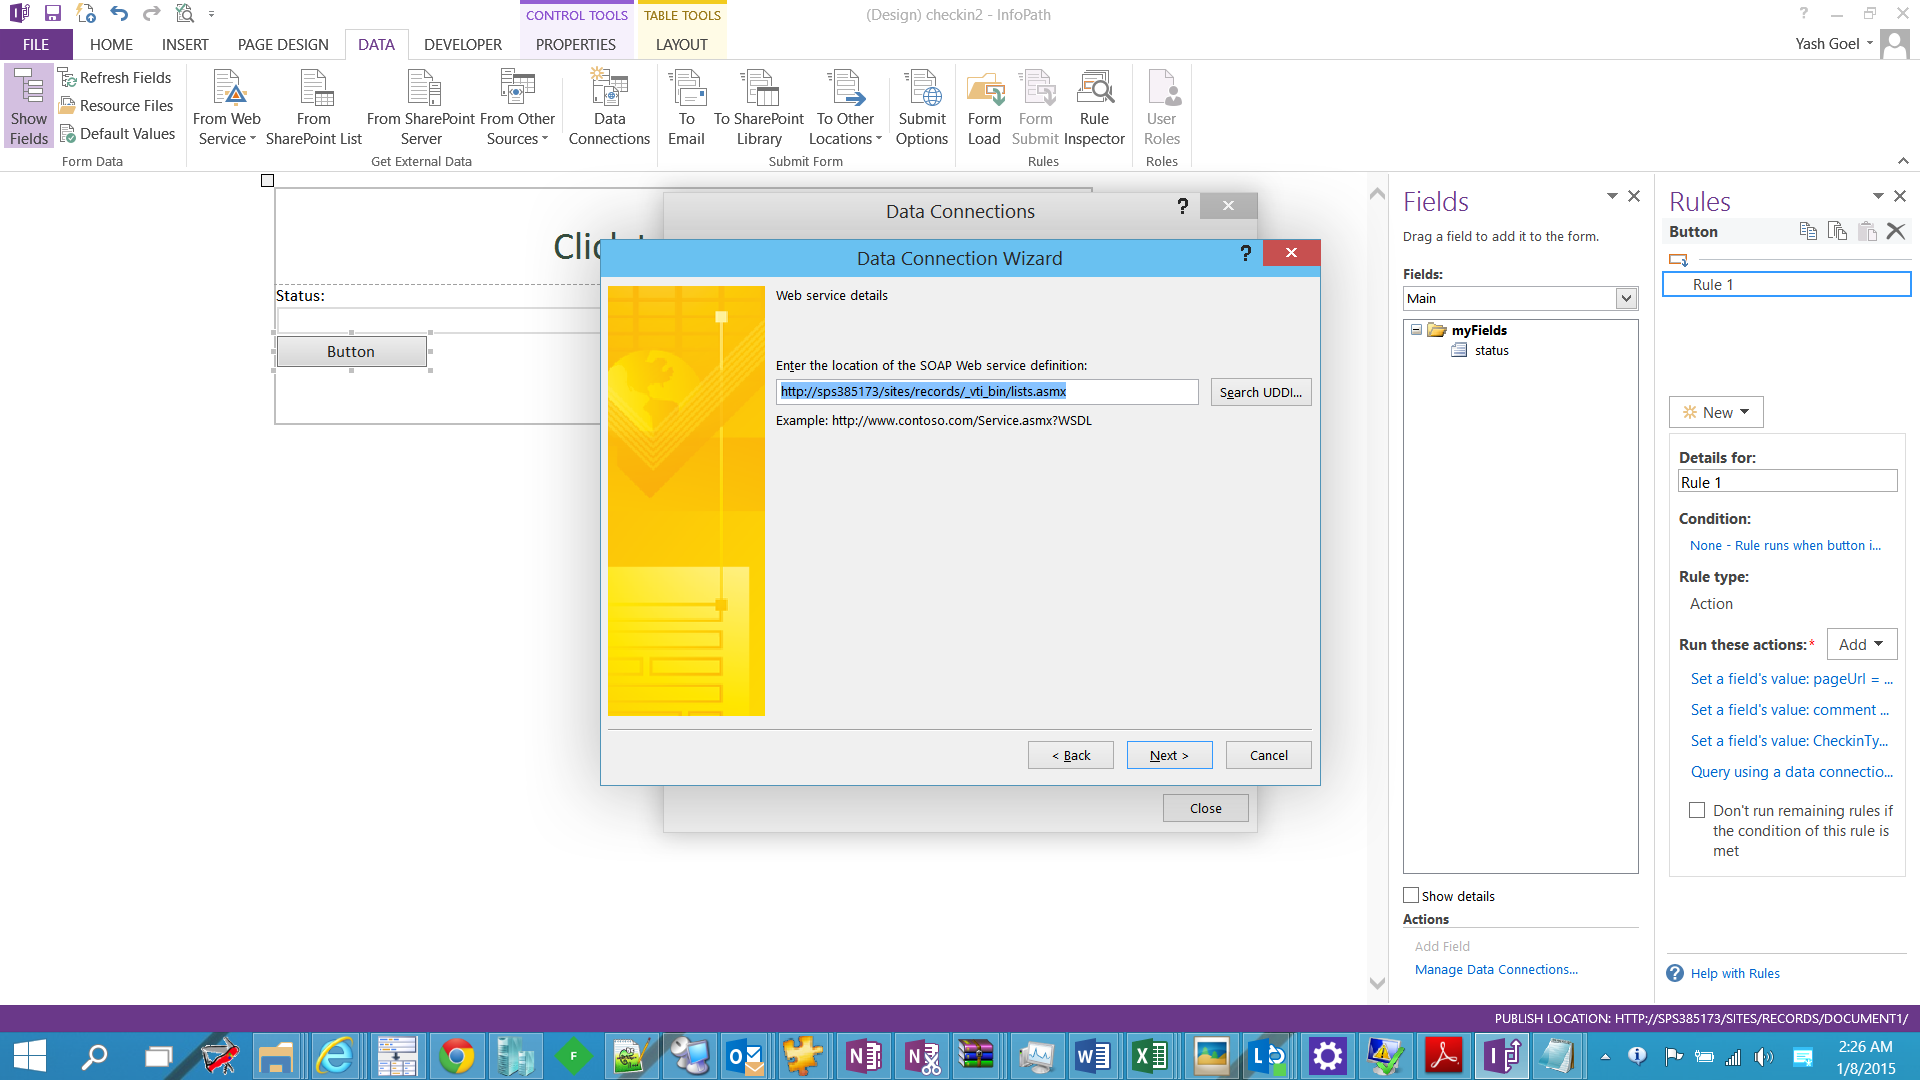
# Now we will create couple of SOAP based receive connections to lists.asmx.
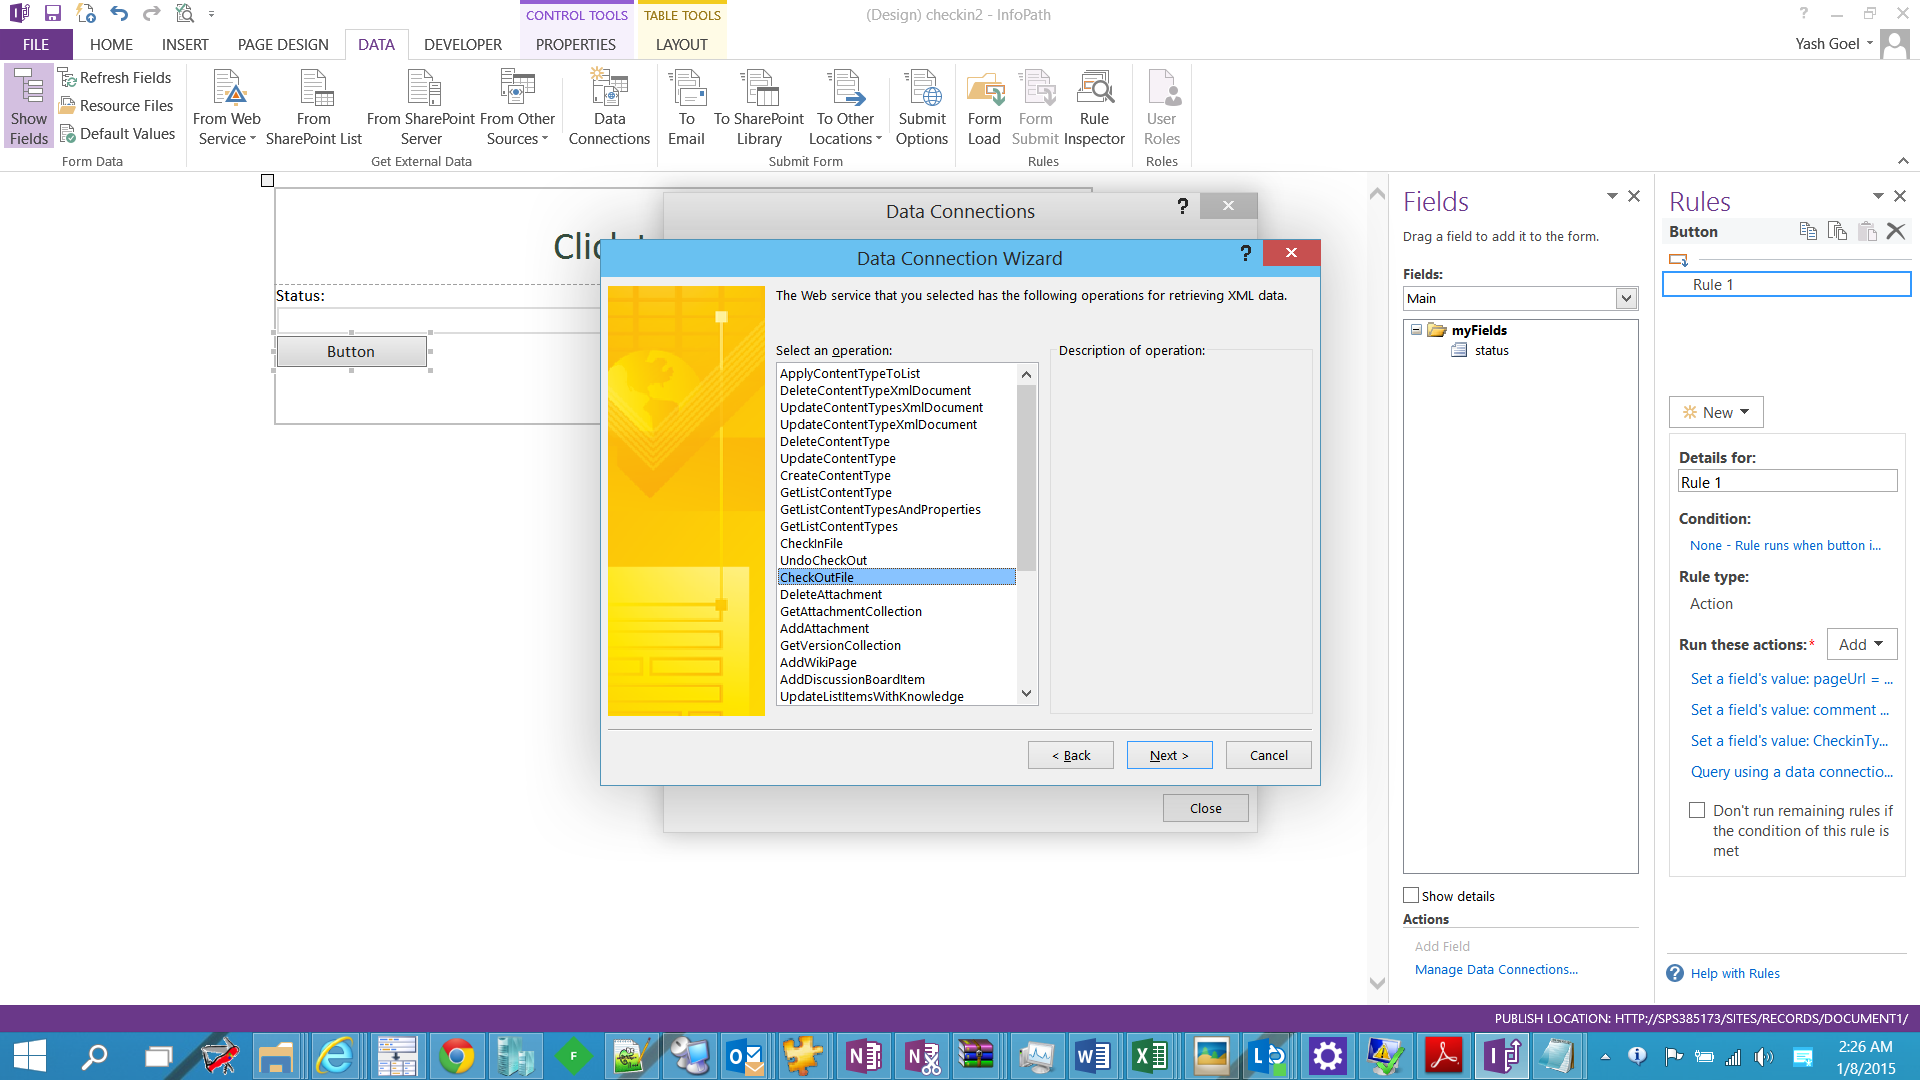
# checkout file connection
# select checkoutfile
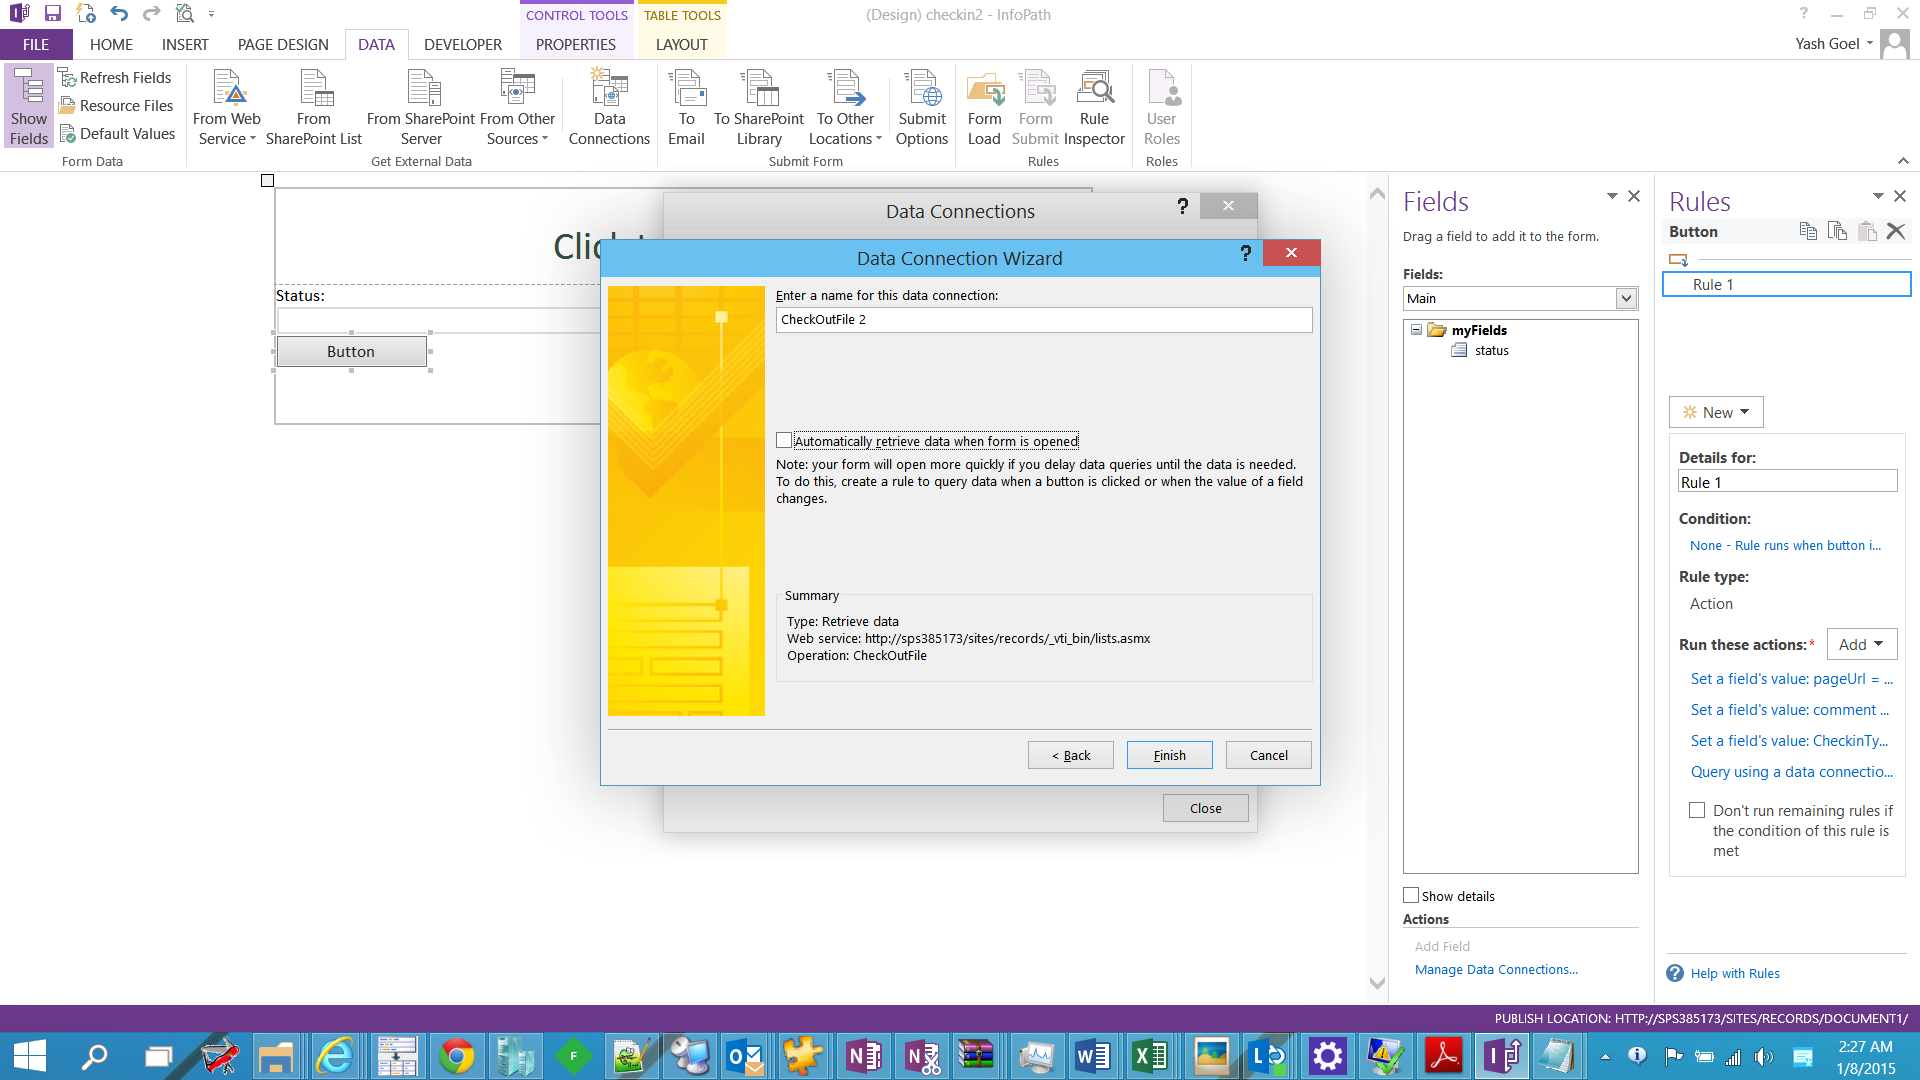
# couple of next and on the last screen, uncheck auto retrieval of data
# follow the same steps to create checkinfile connection
# add a dummy status field on the form ( this we will use as a dummy action for the rule that checks if the form is already checked out )
# Now we will create the rules for checkout operation
Form load --> rule1
Condition :
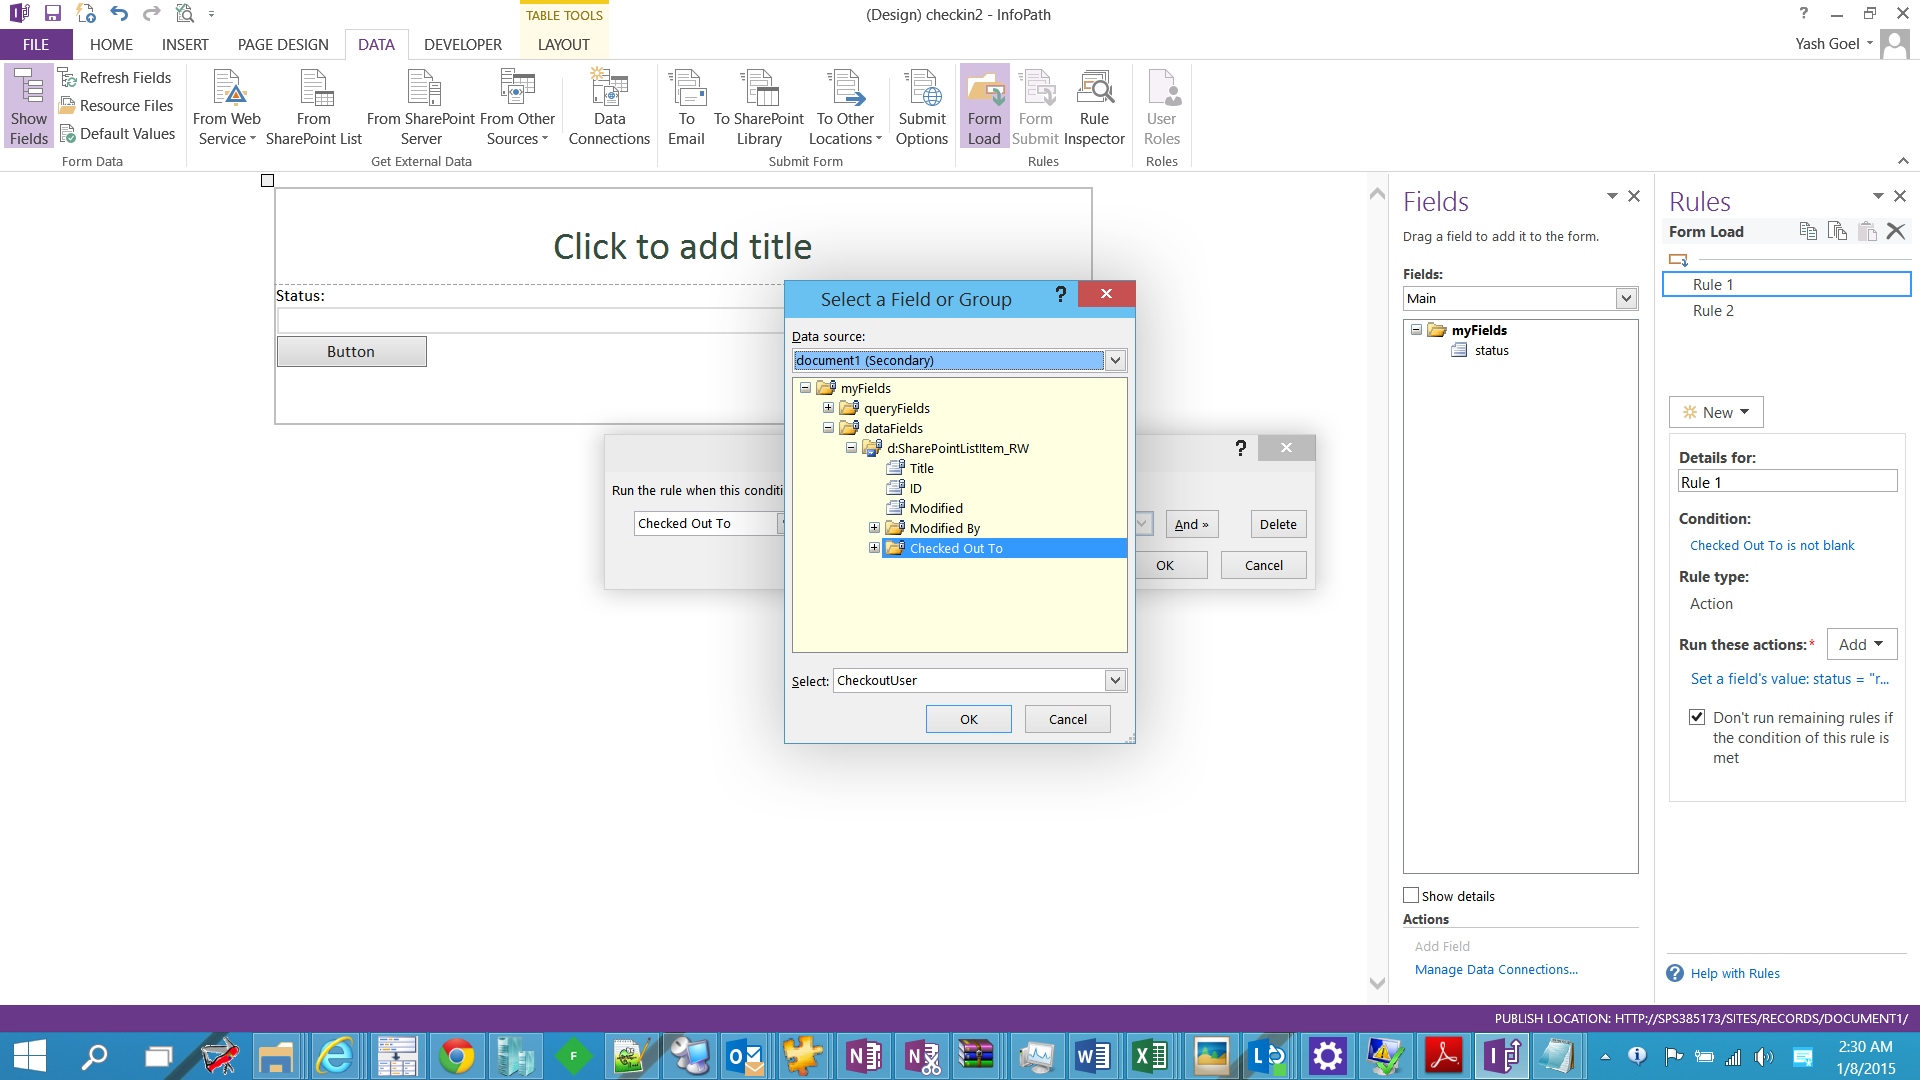
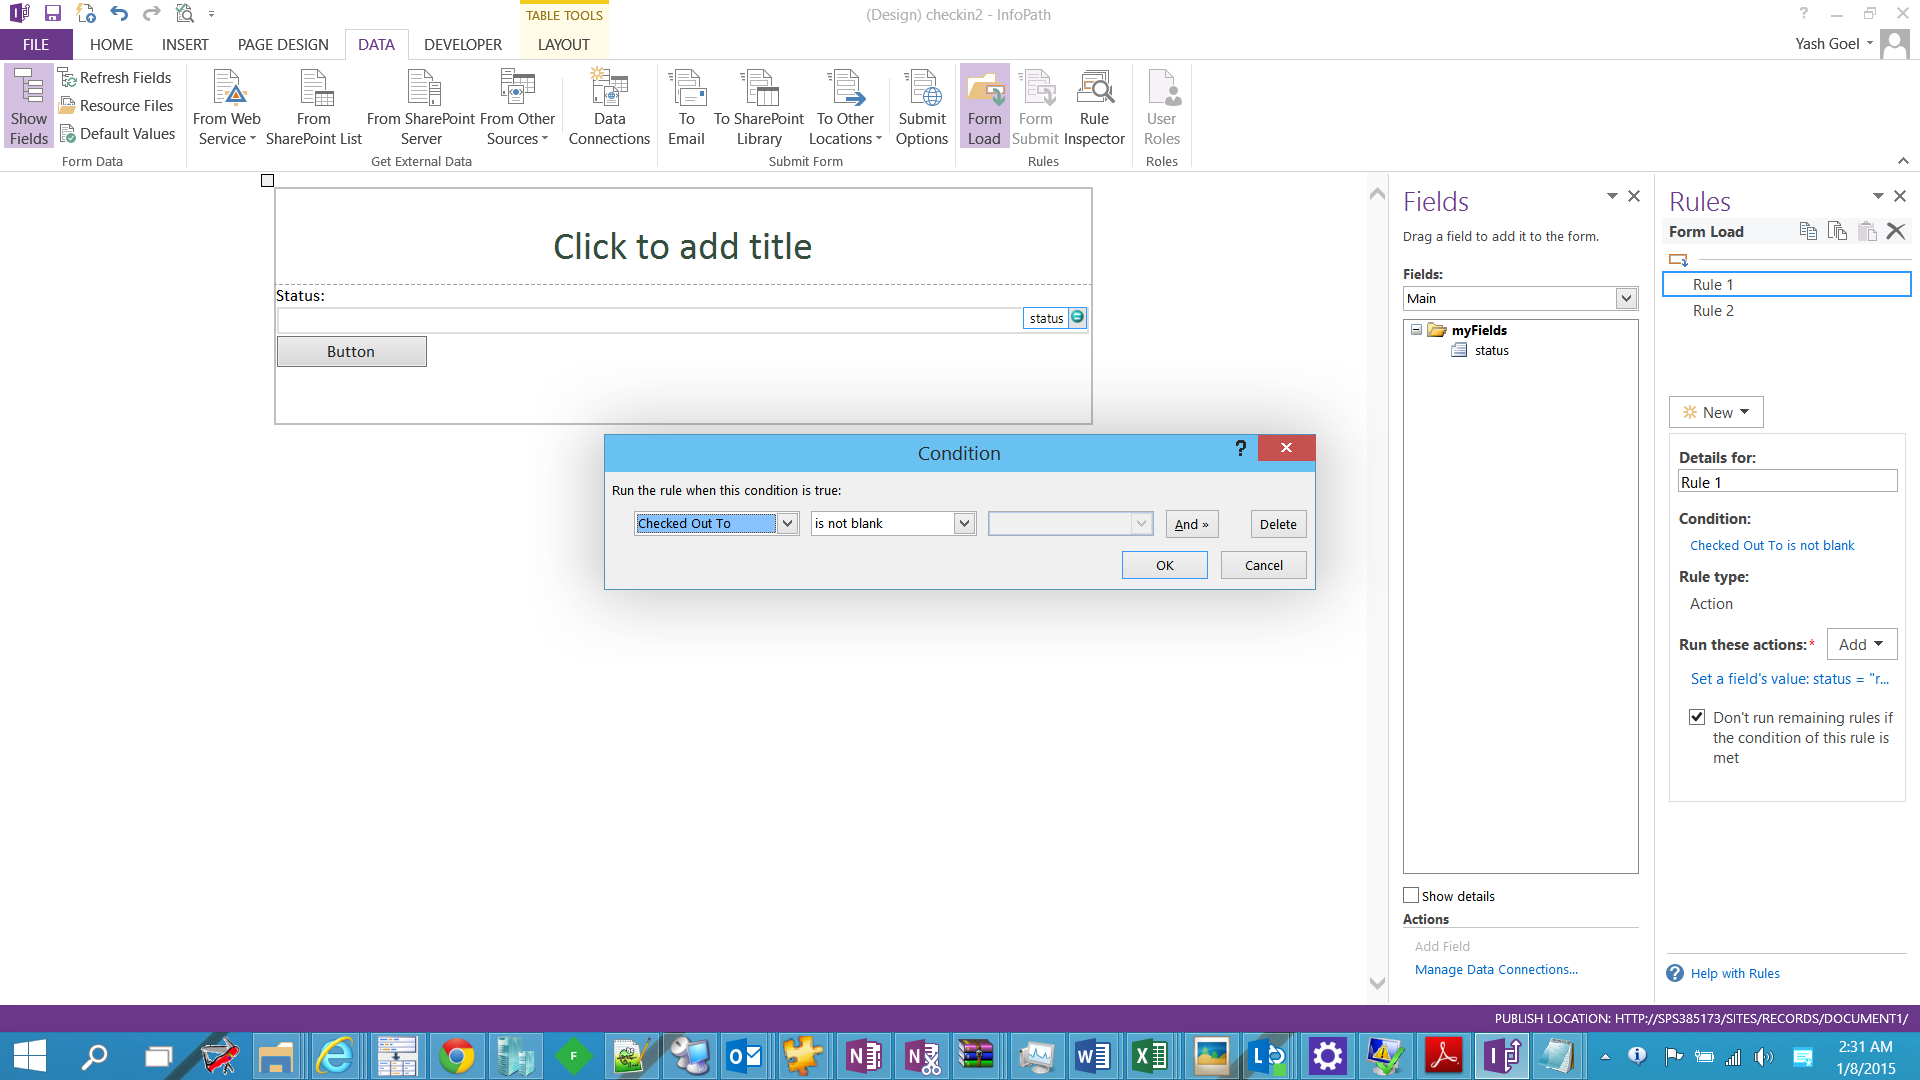
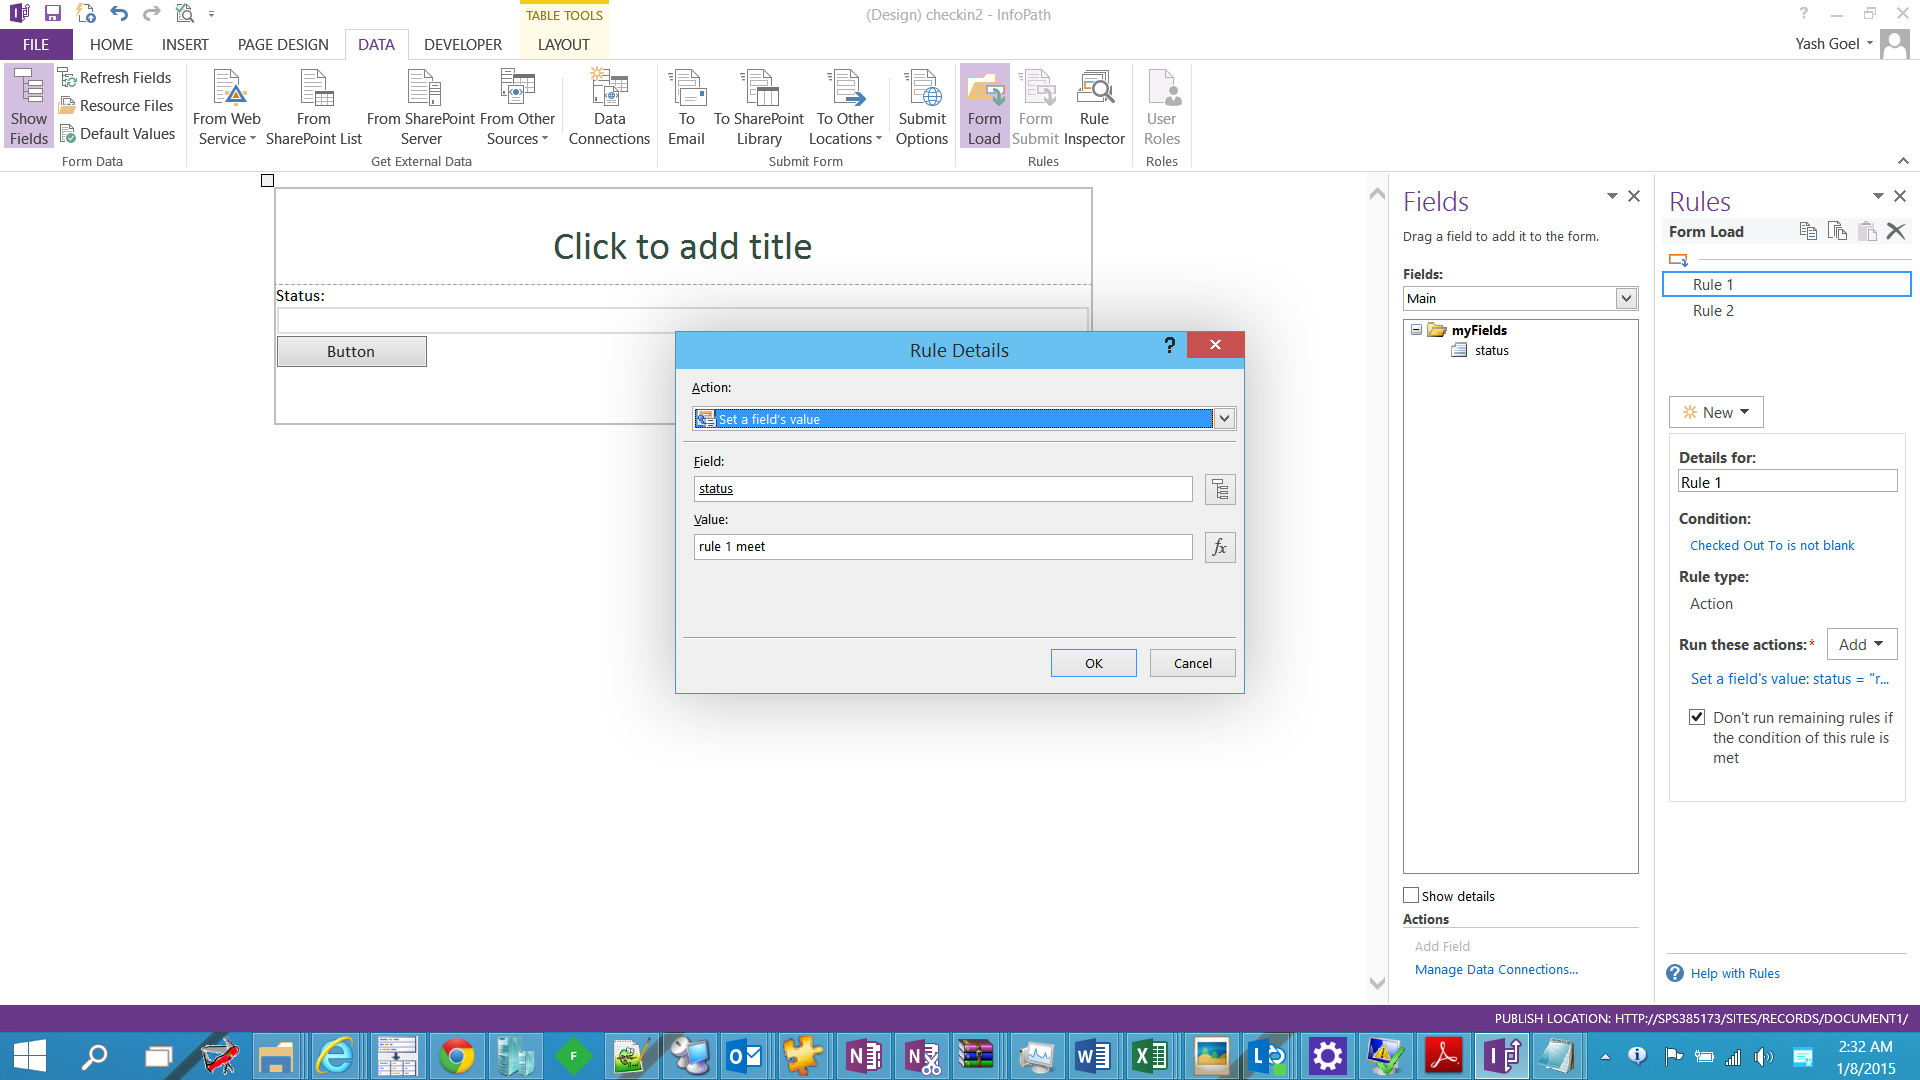
Action Set fields value : ( setting our dummy field to blah blah )
==
Select don’t run remaining rules
Rule2:
====
Condition
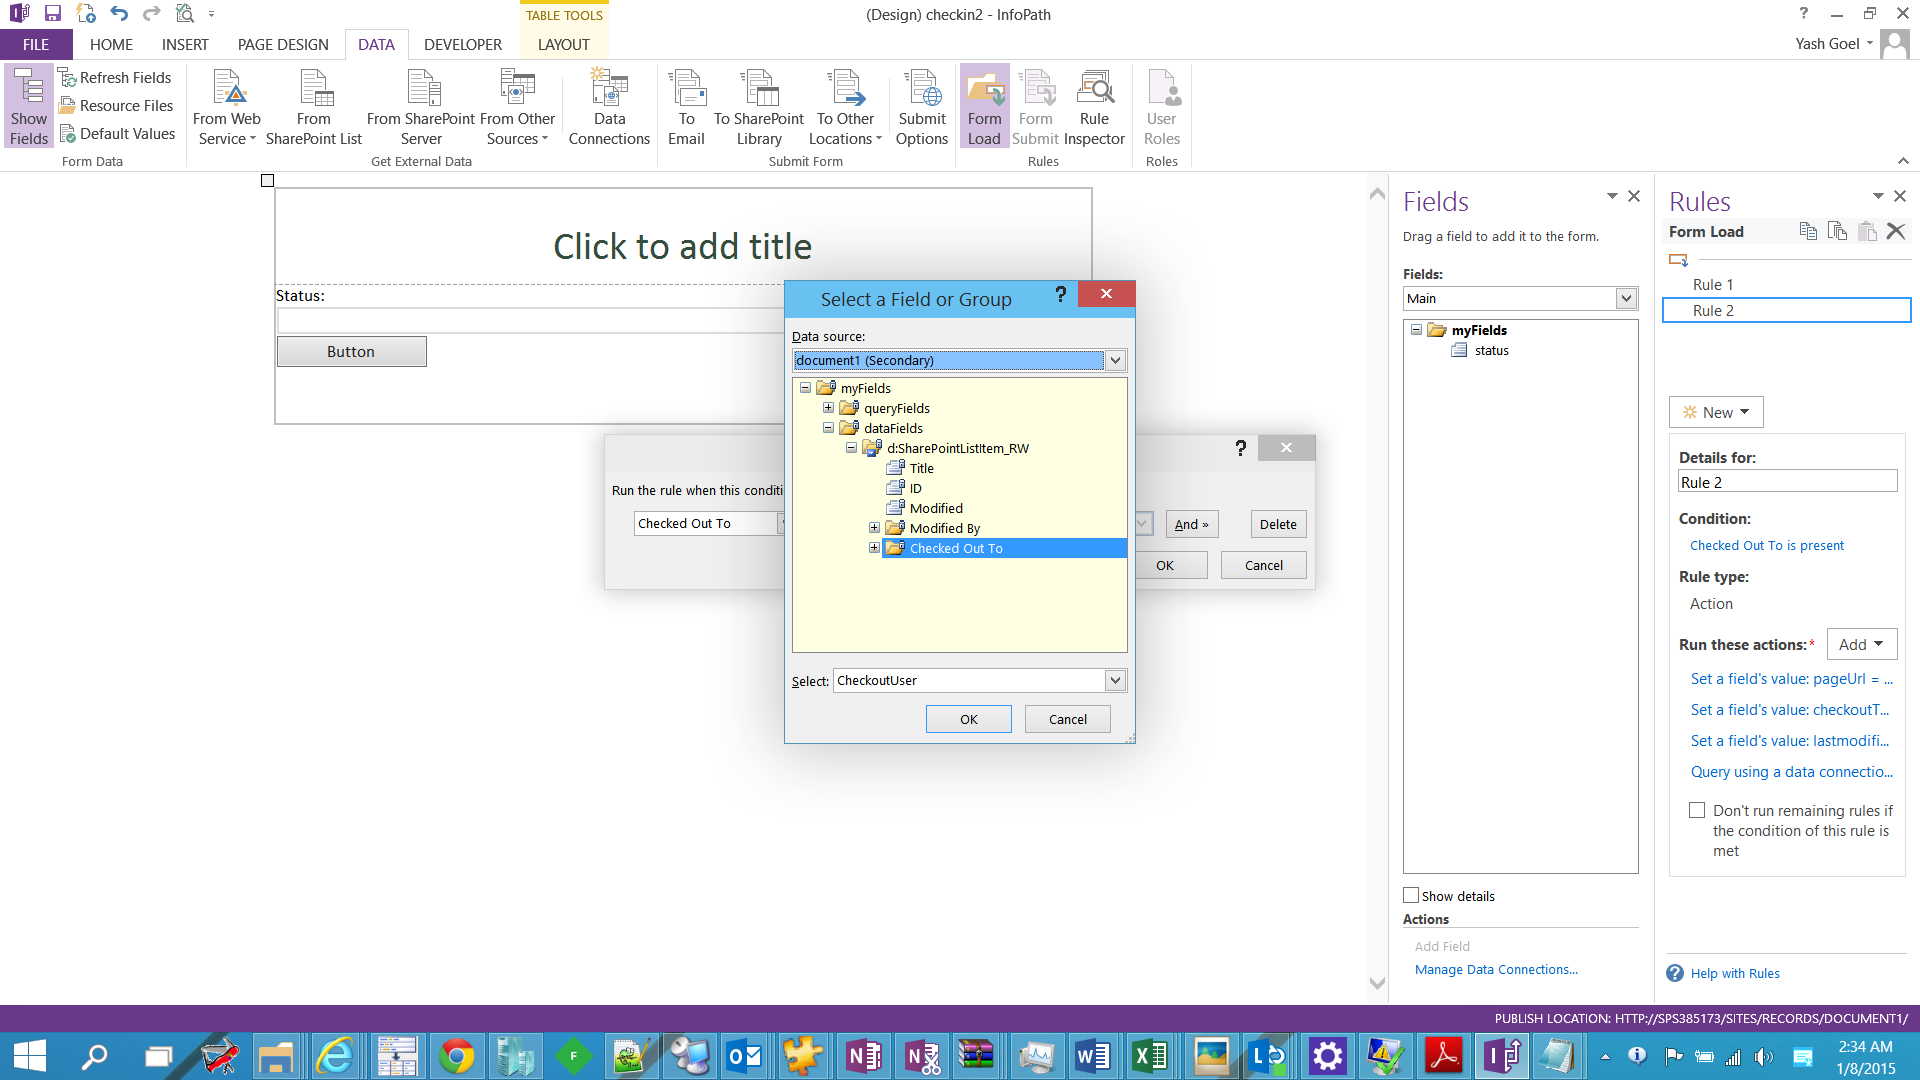
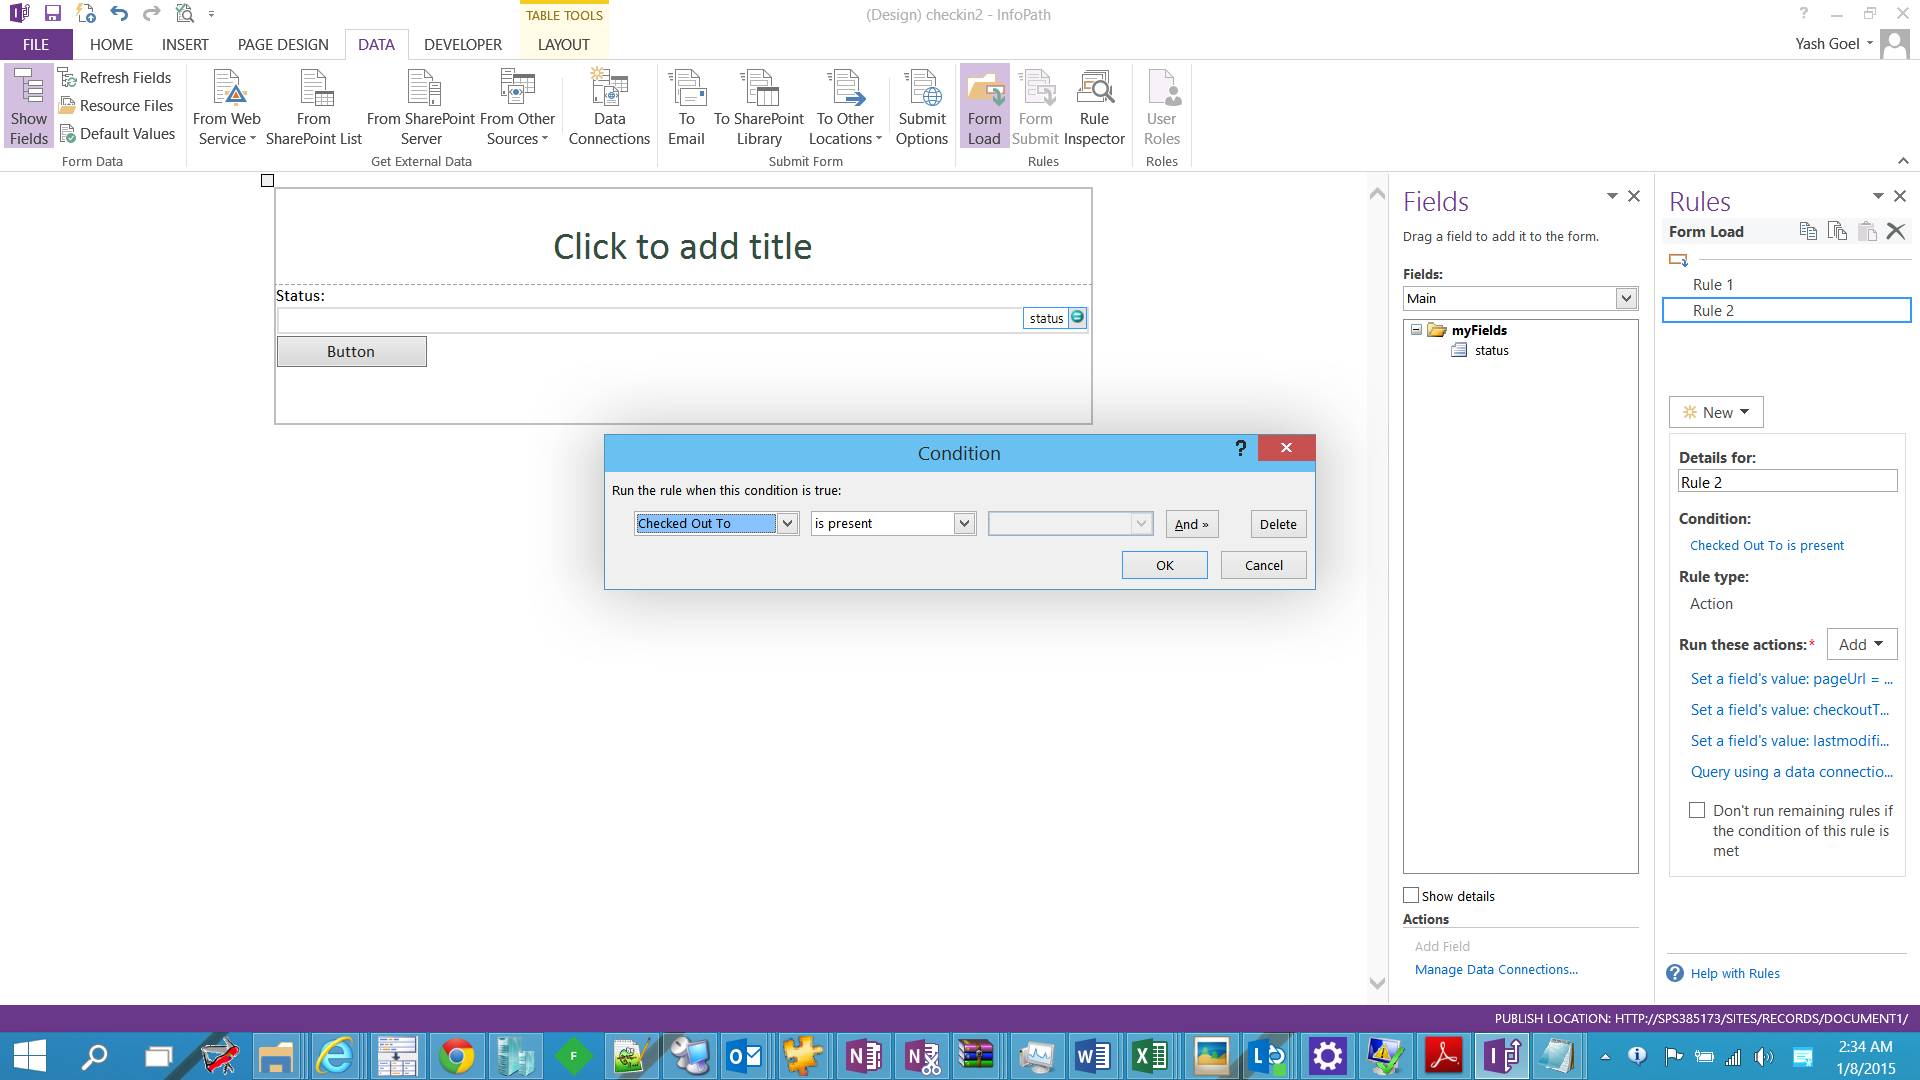
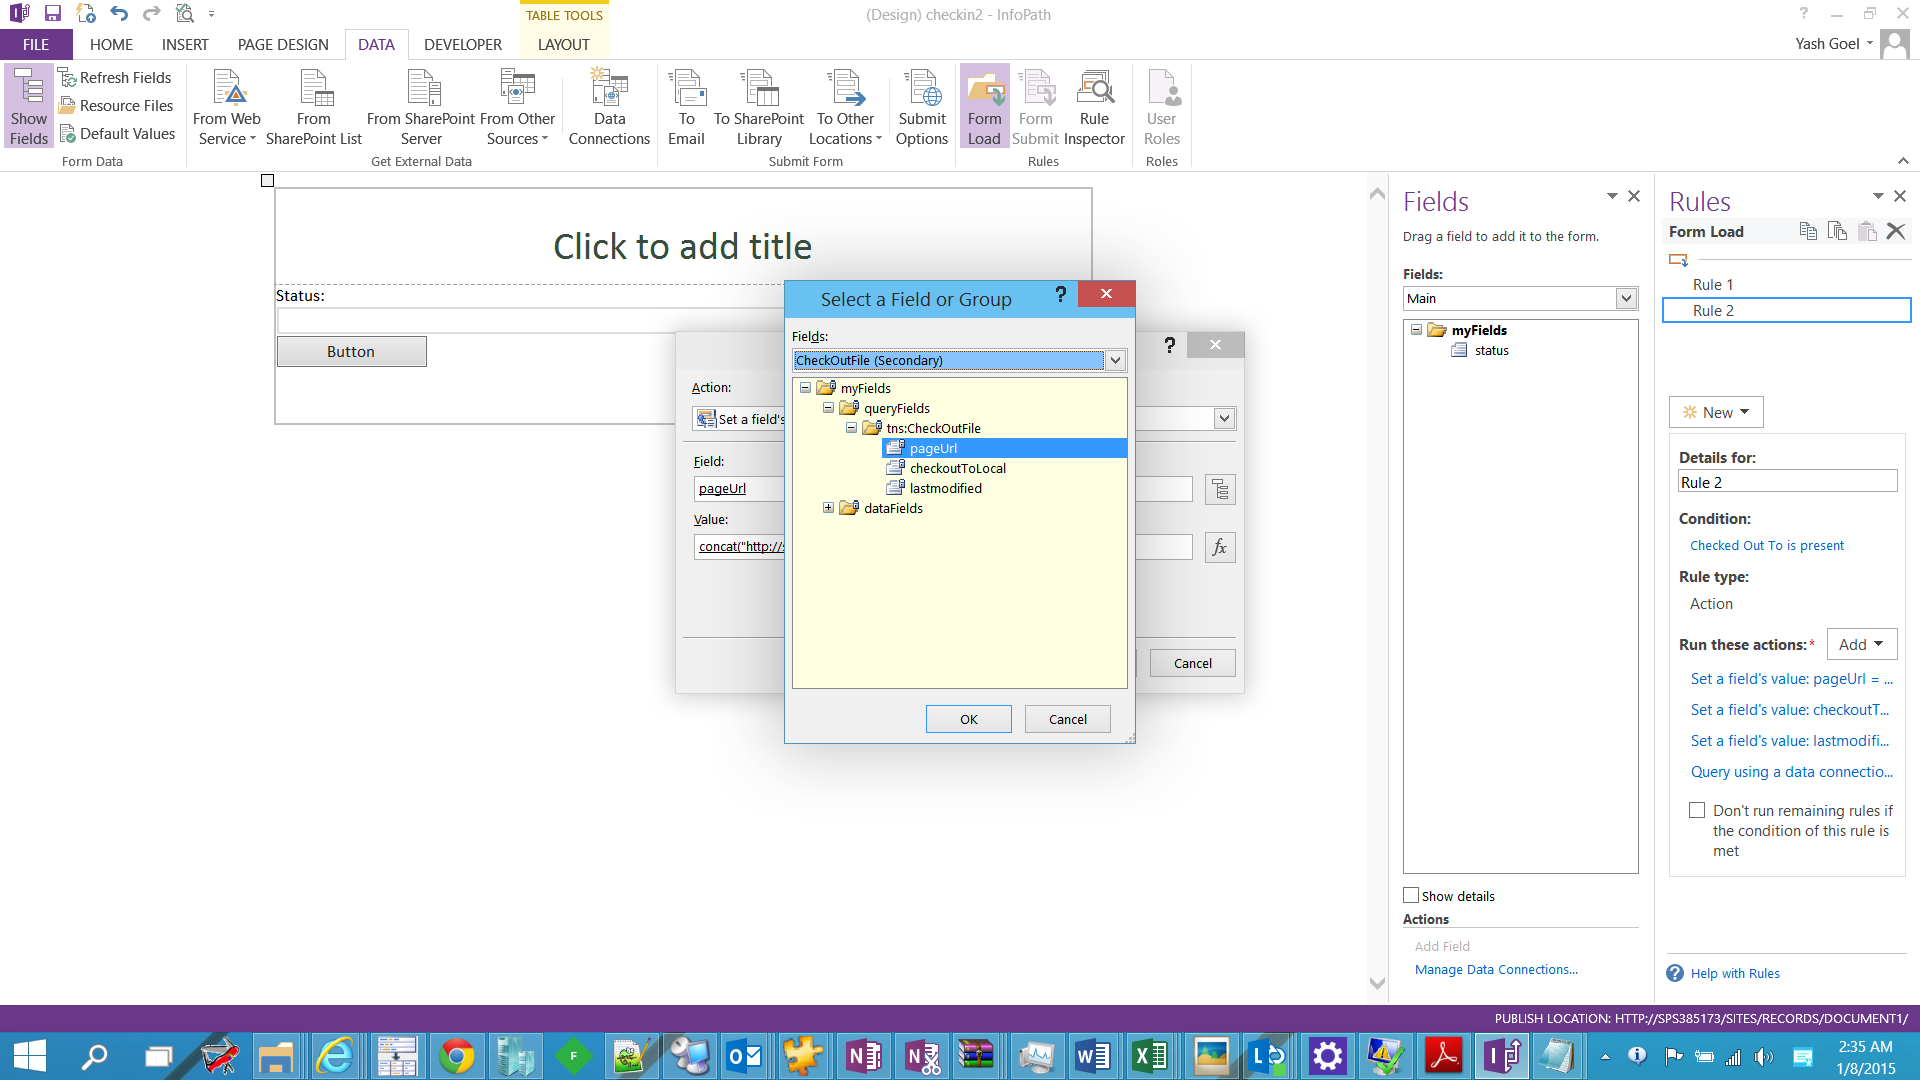
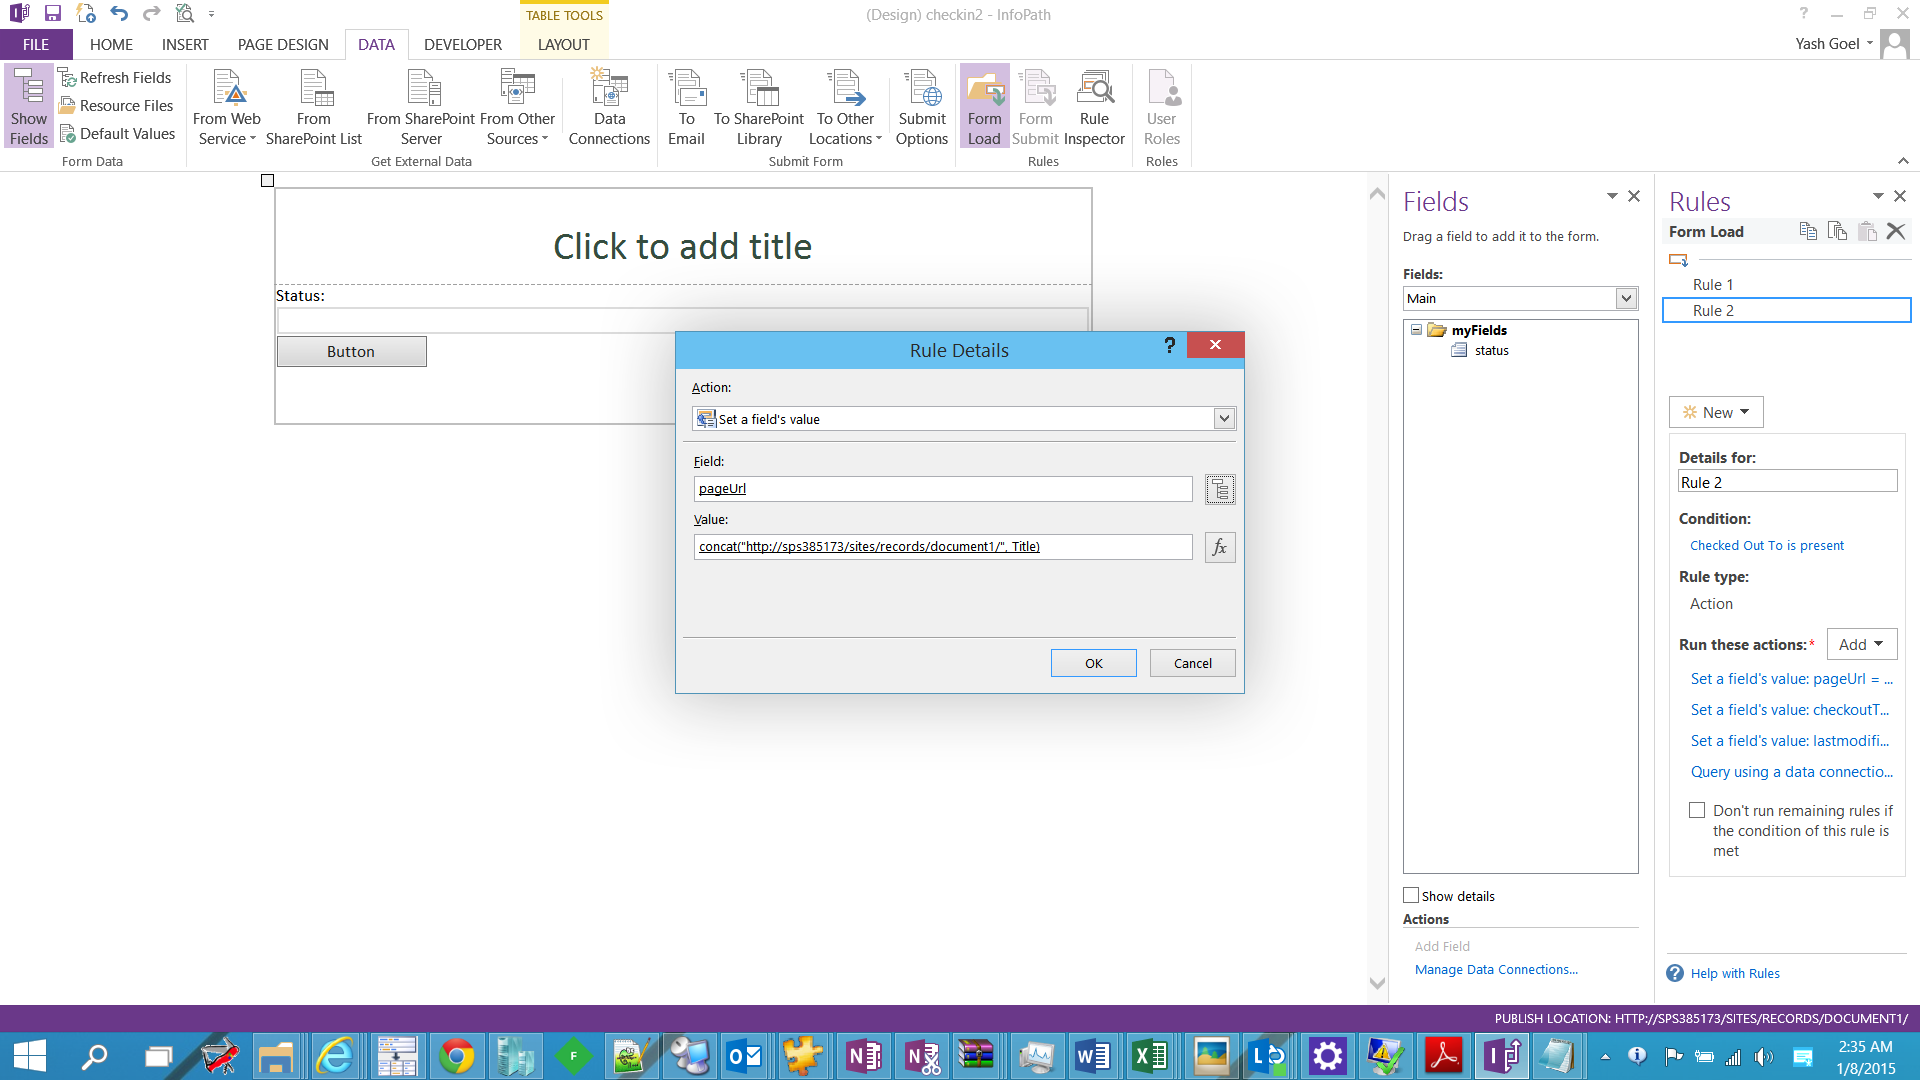
Actions : ( we have 4 of them, 3 set field values and 1 query data, maintain the sequence )
==
Set fields value
Set field value 2:


Set field value 3
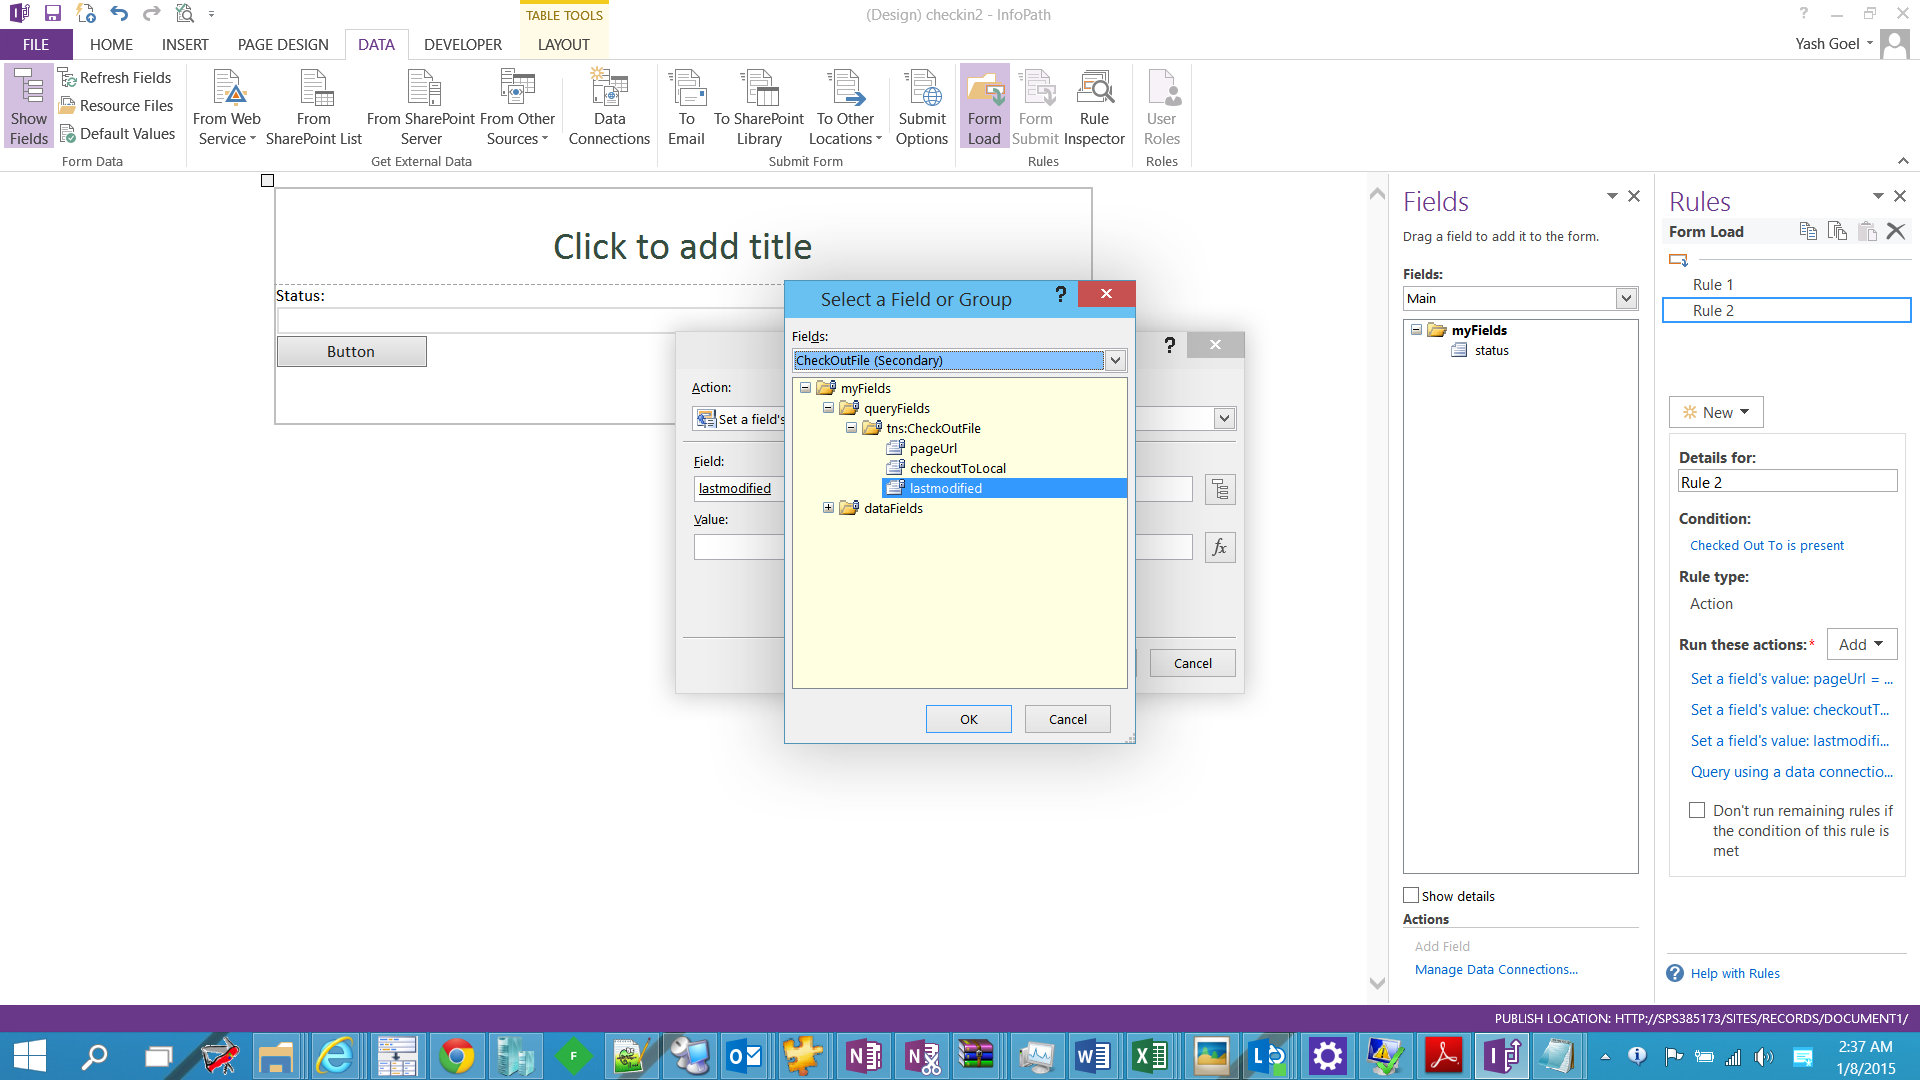
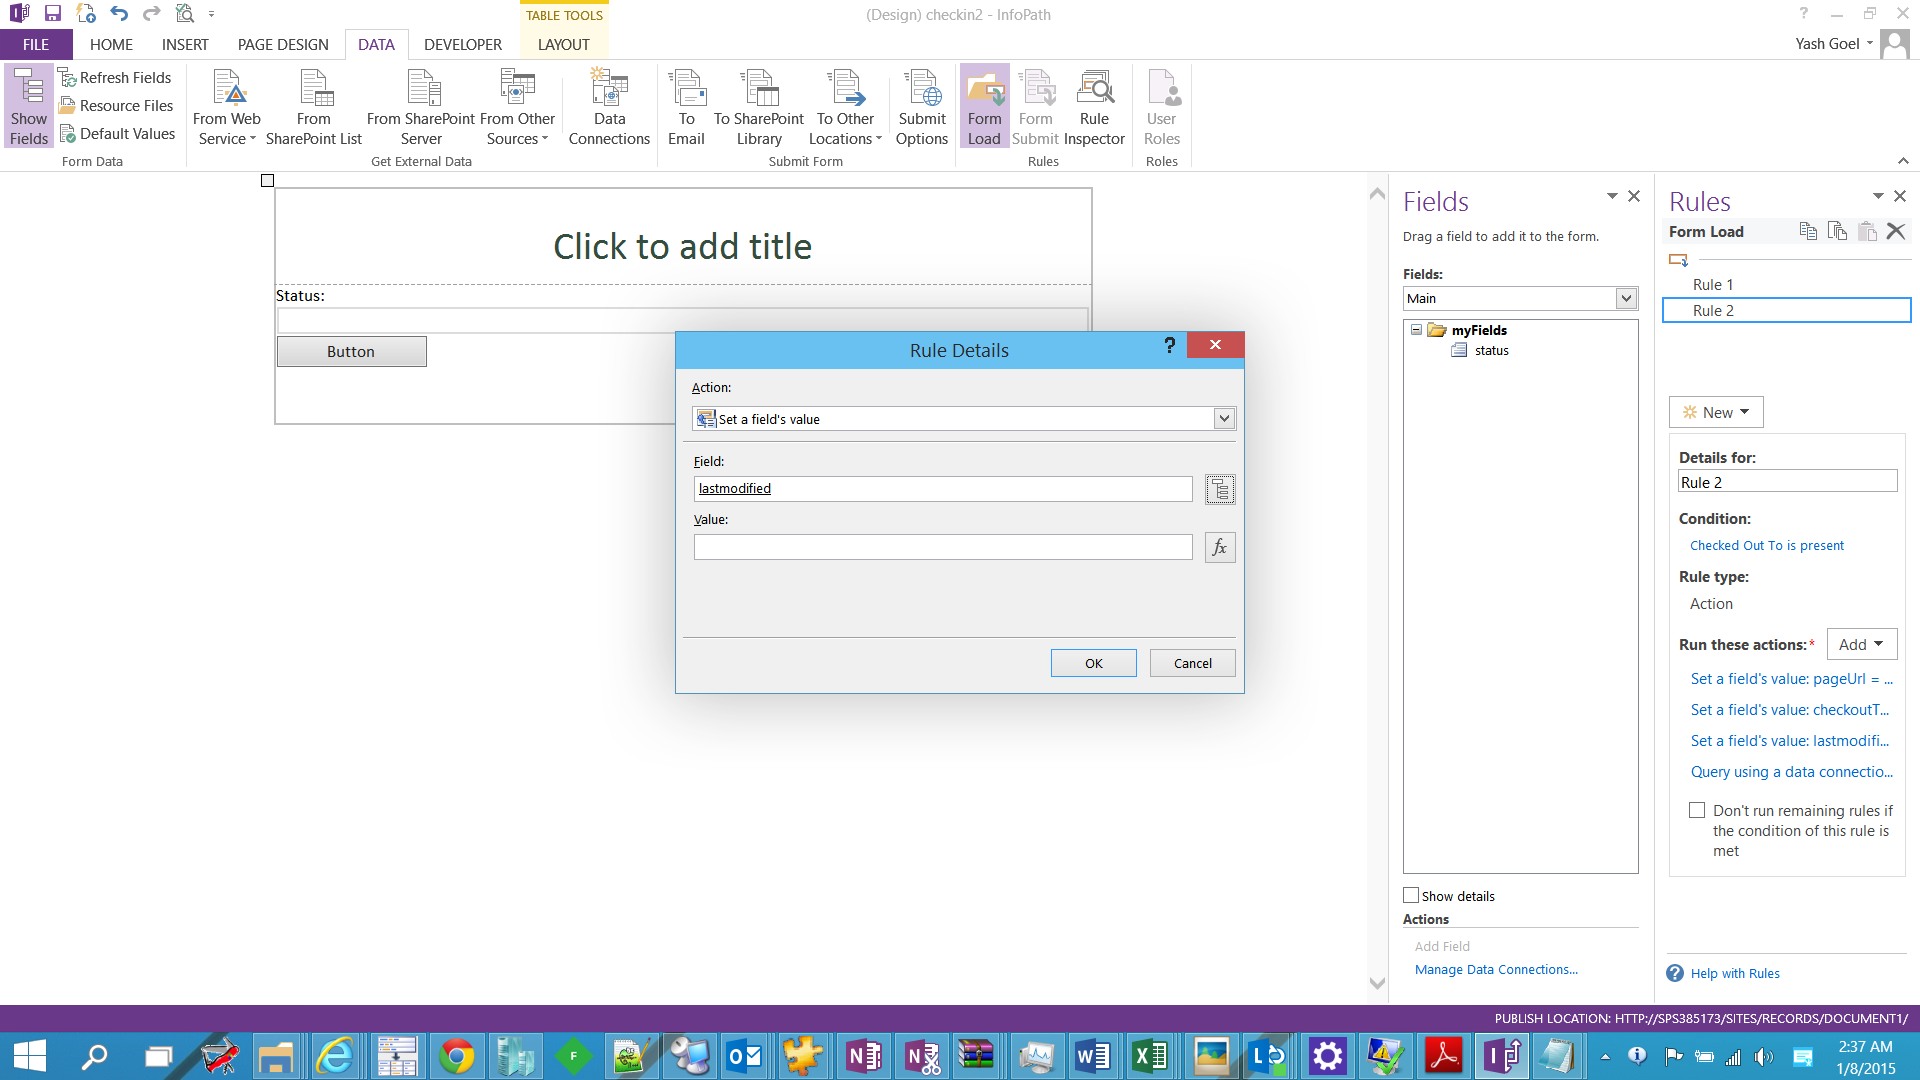
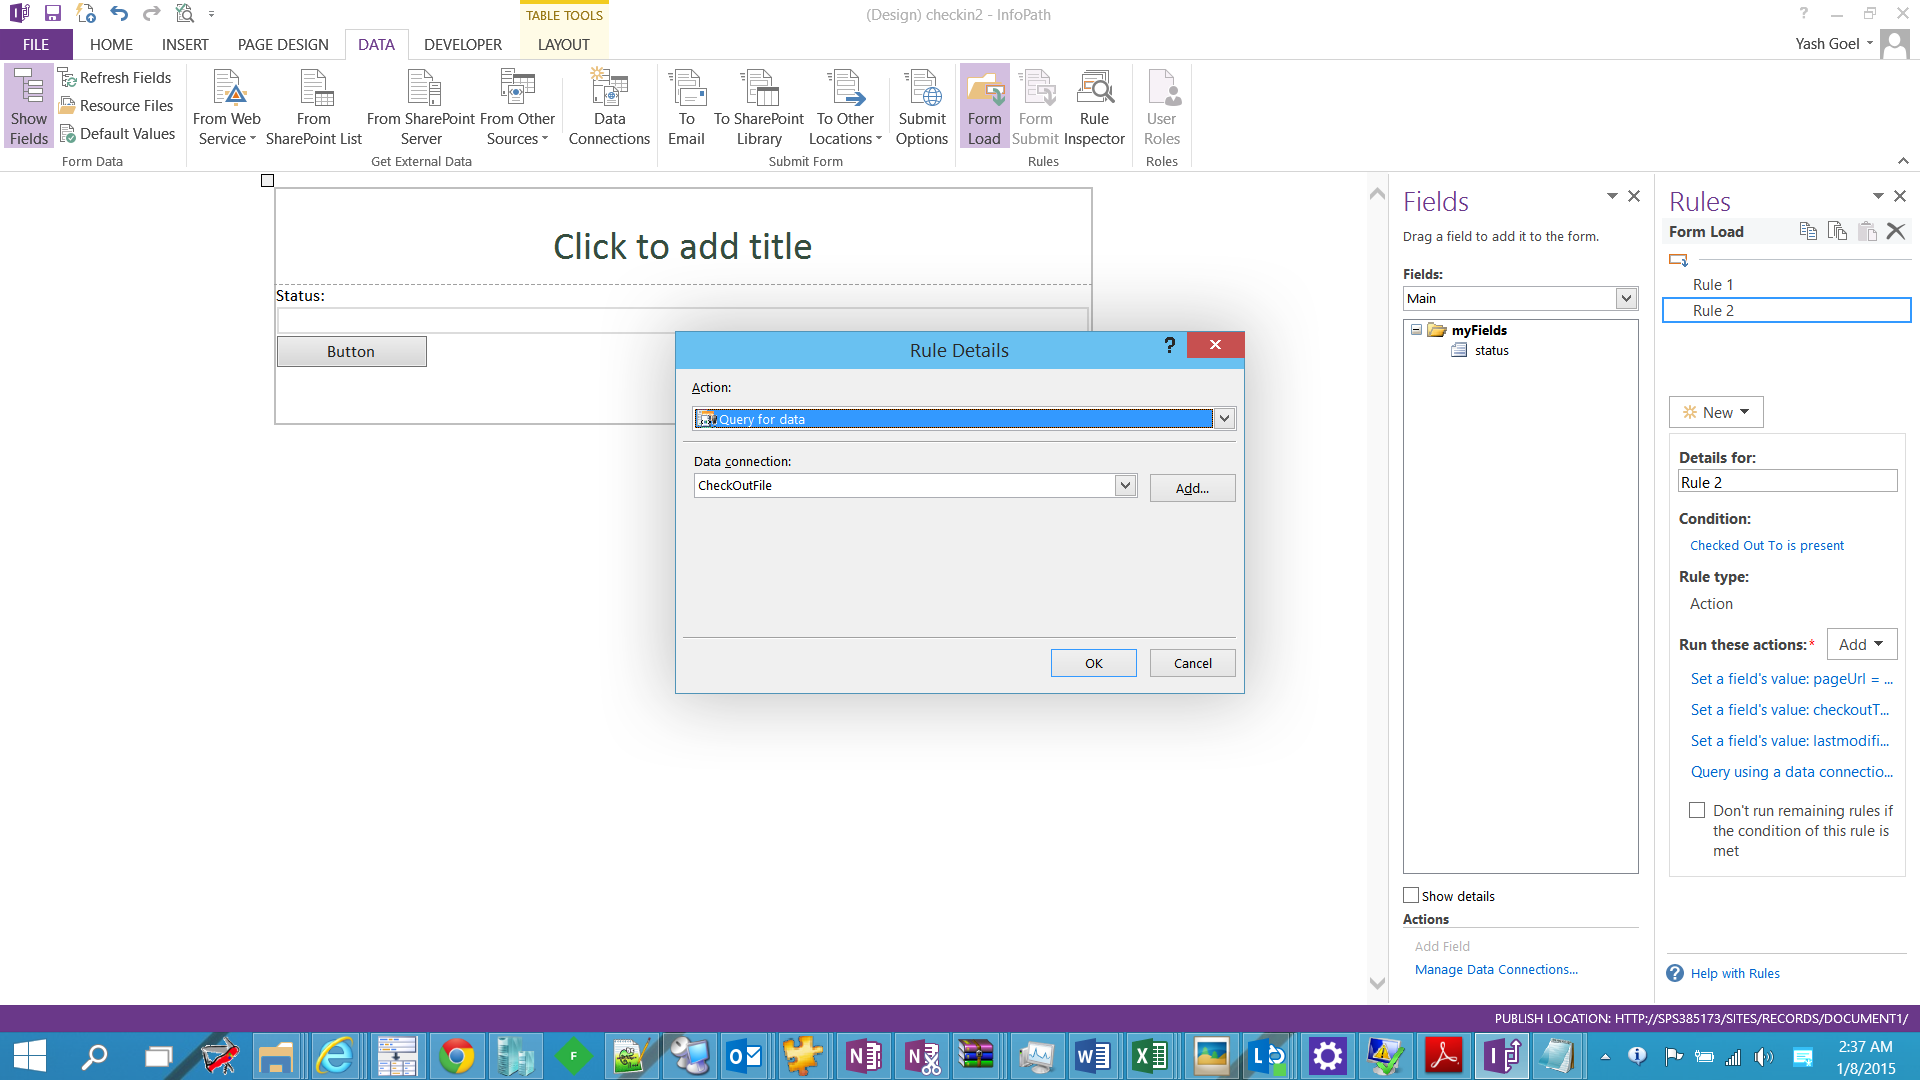
Query data
=============
Now for checkin :
======
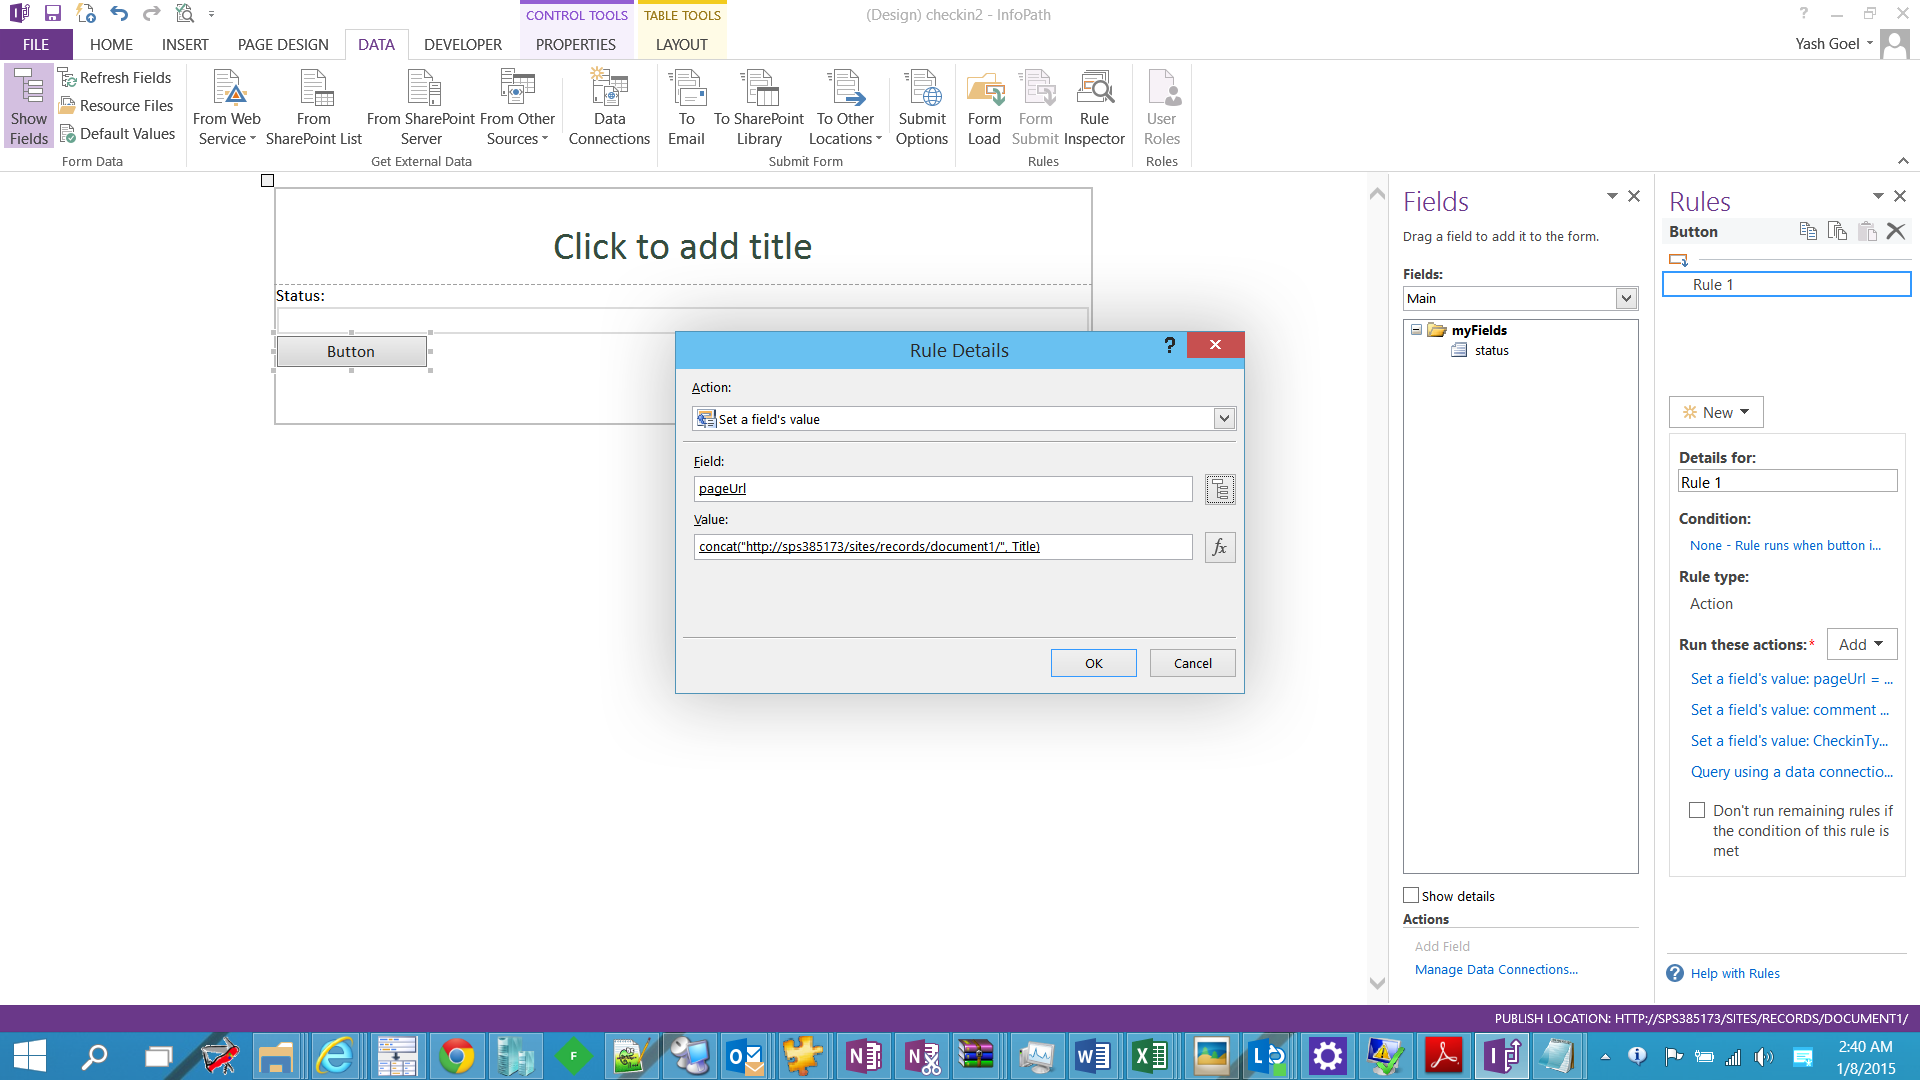
#Insert a button in the form:
==
# Add 1 rule with 3 set field actions and 1 query data ( maintain the sequence )
Condition : when the button is clicked
Actions :
Set field value 1

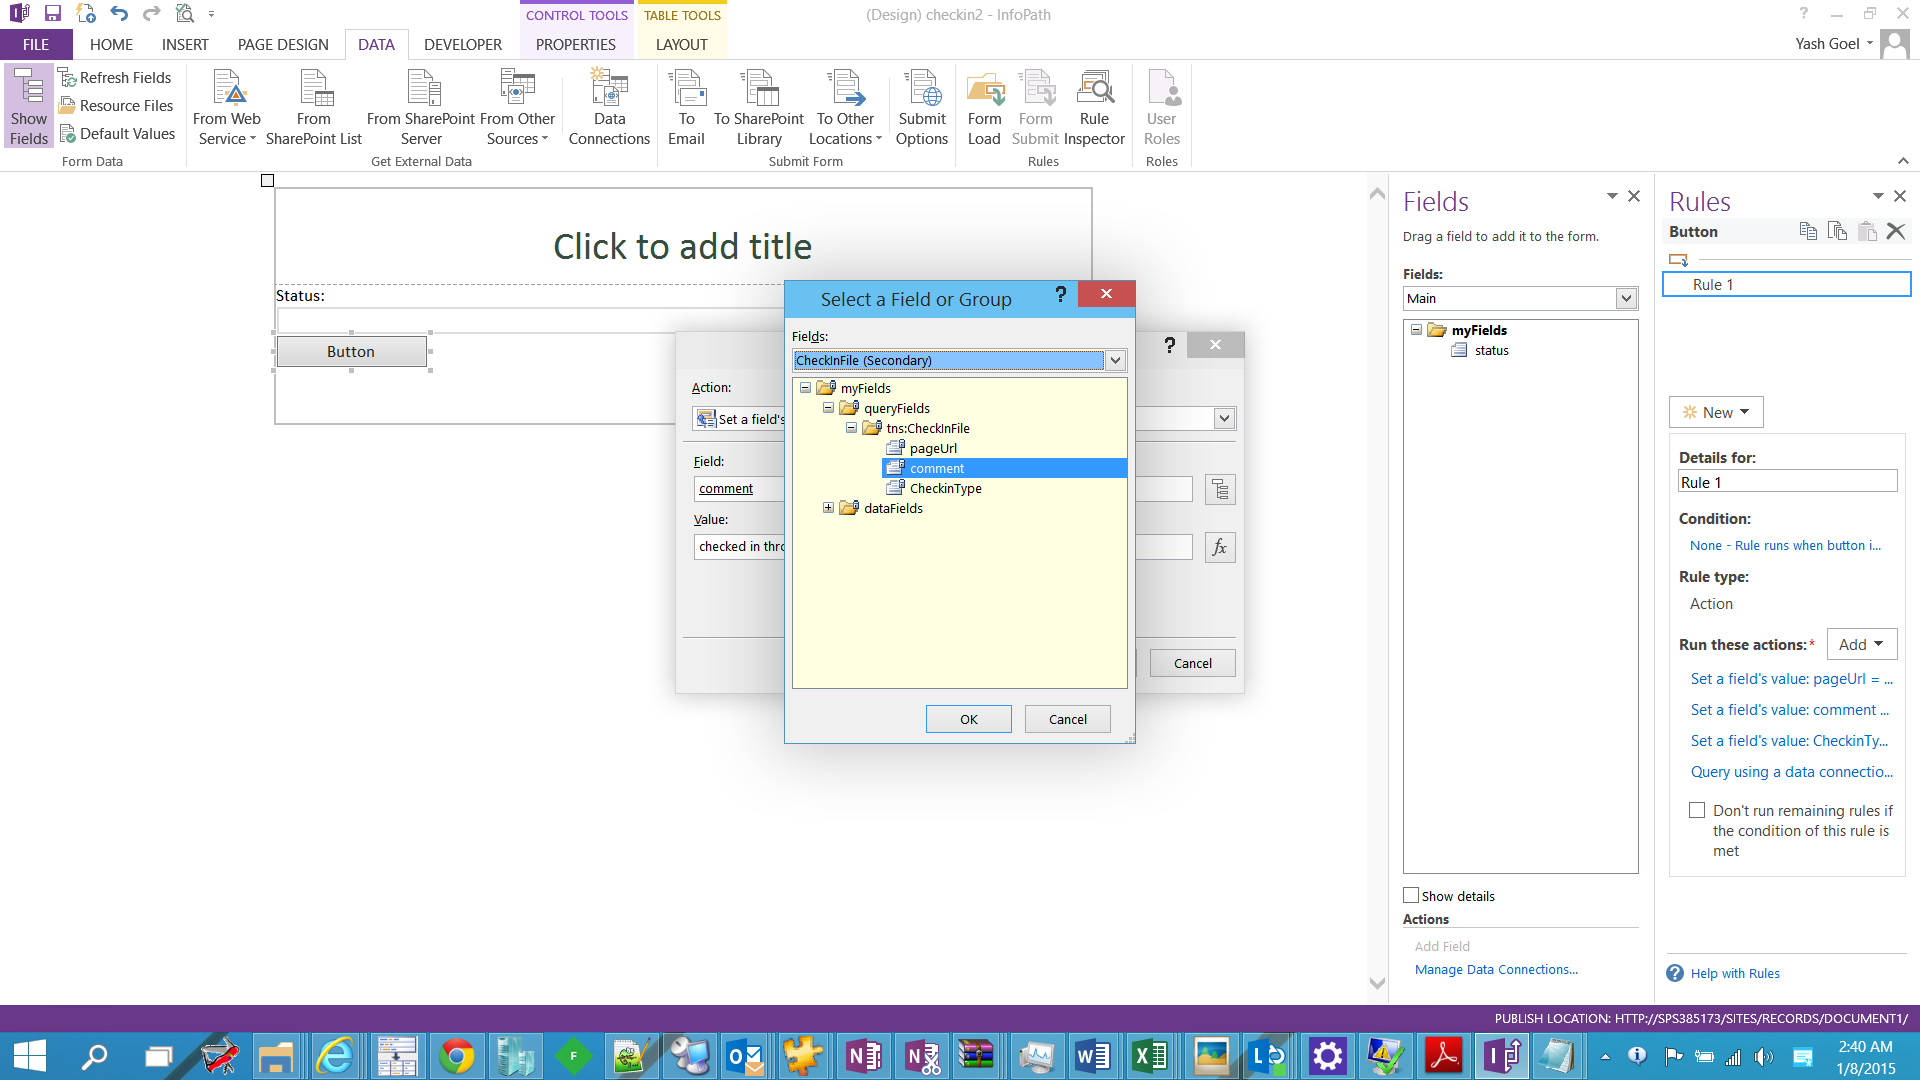
Set field value 2
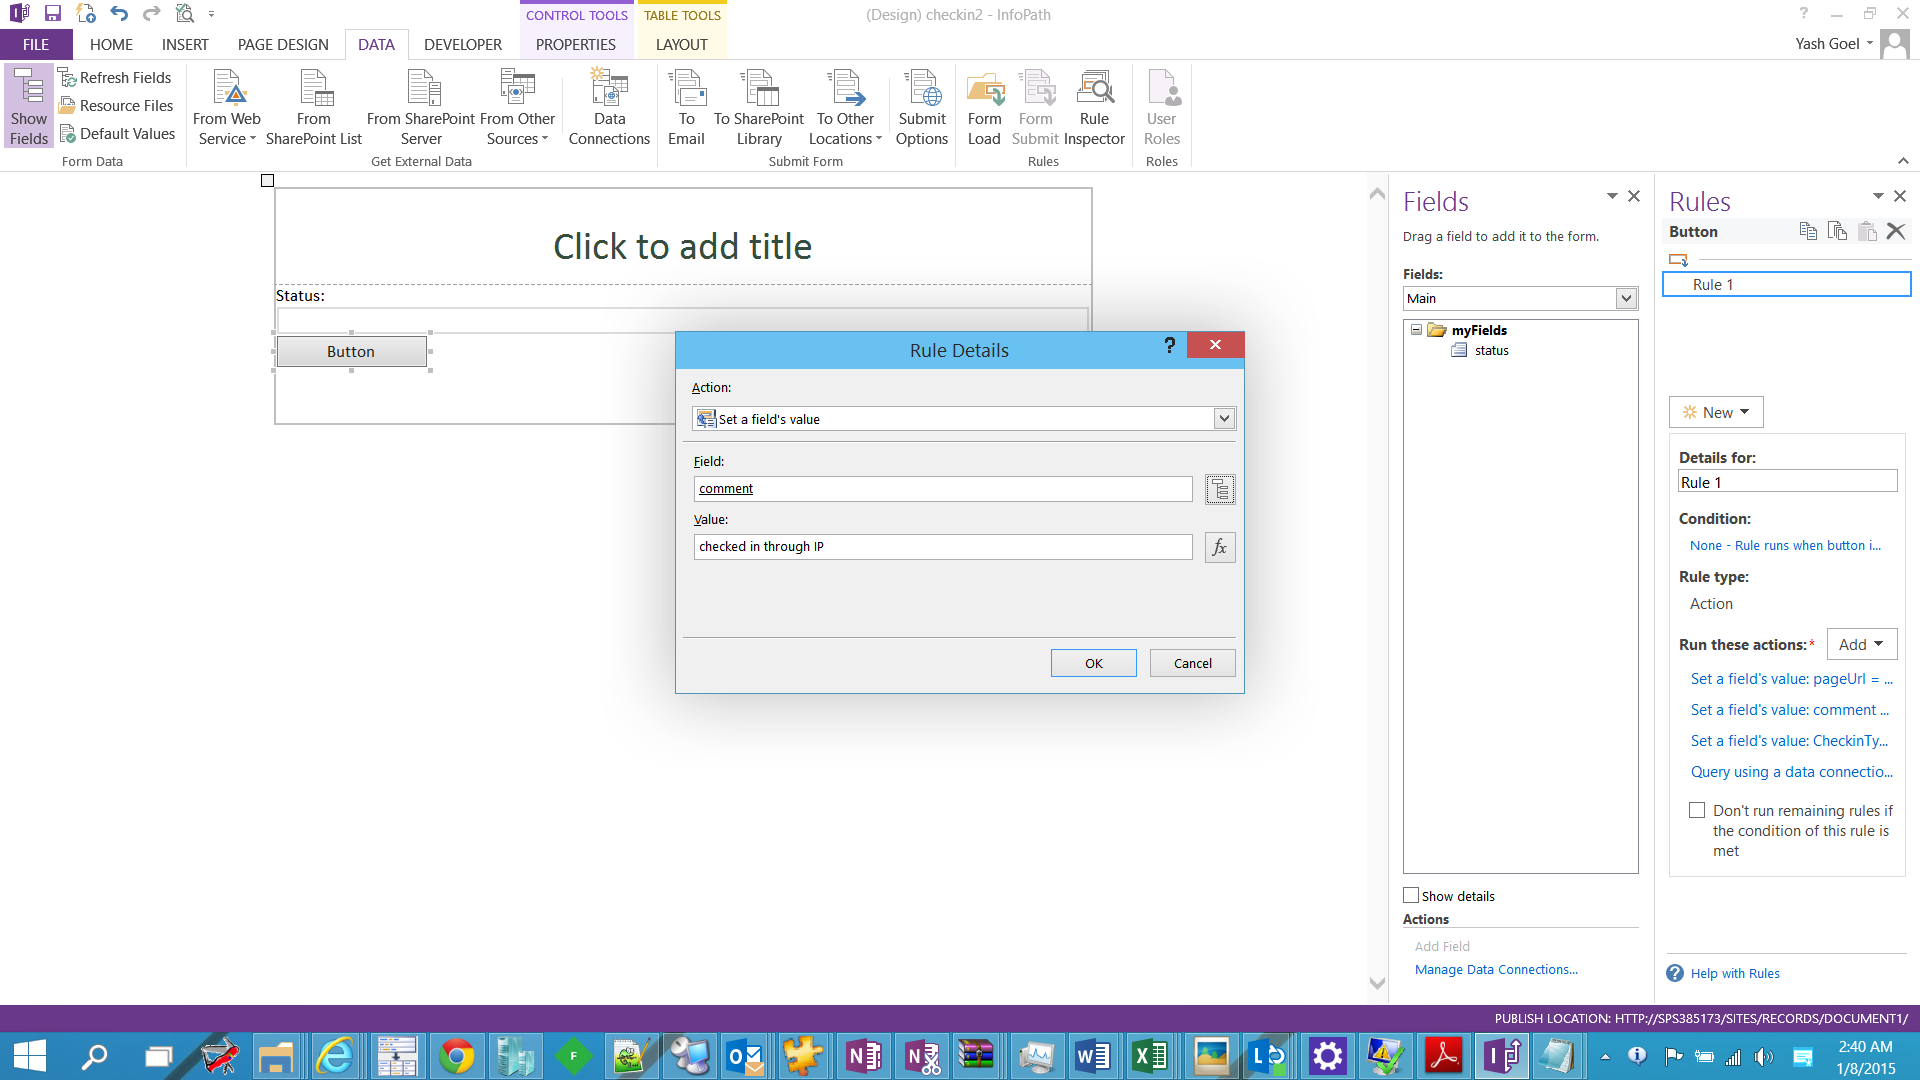
Set field value 3
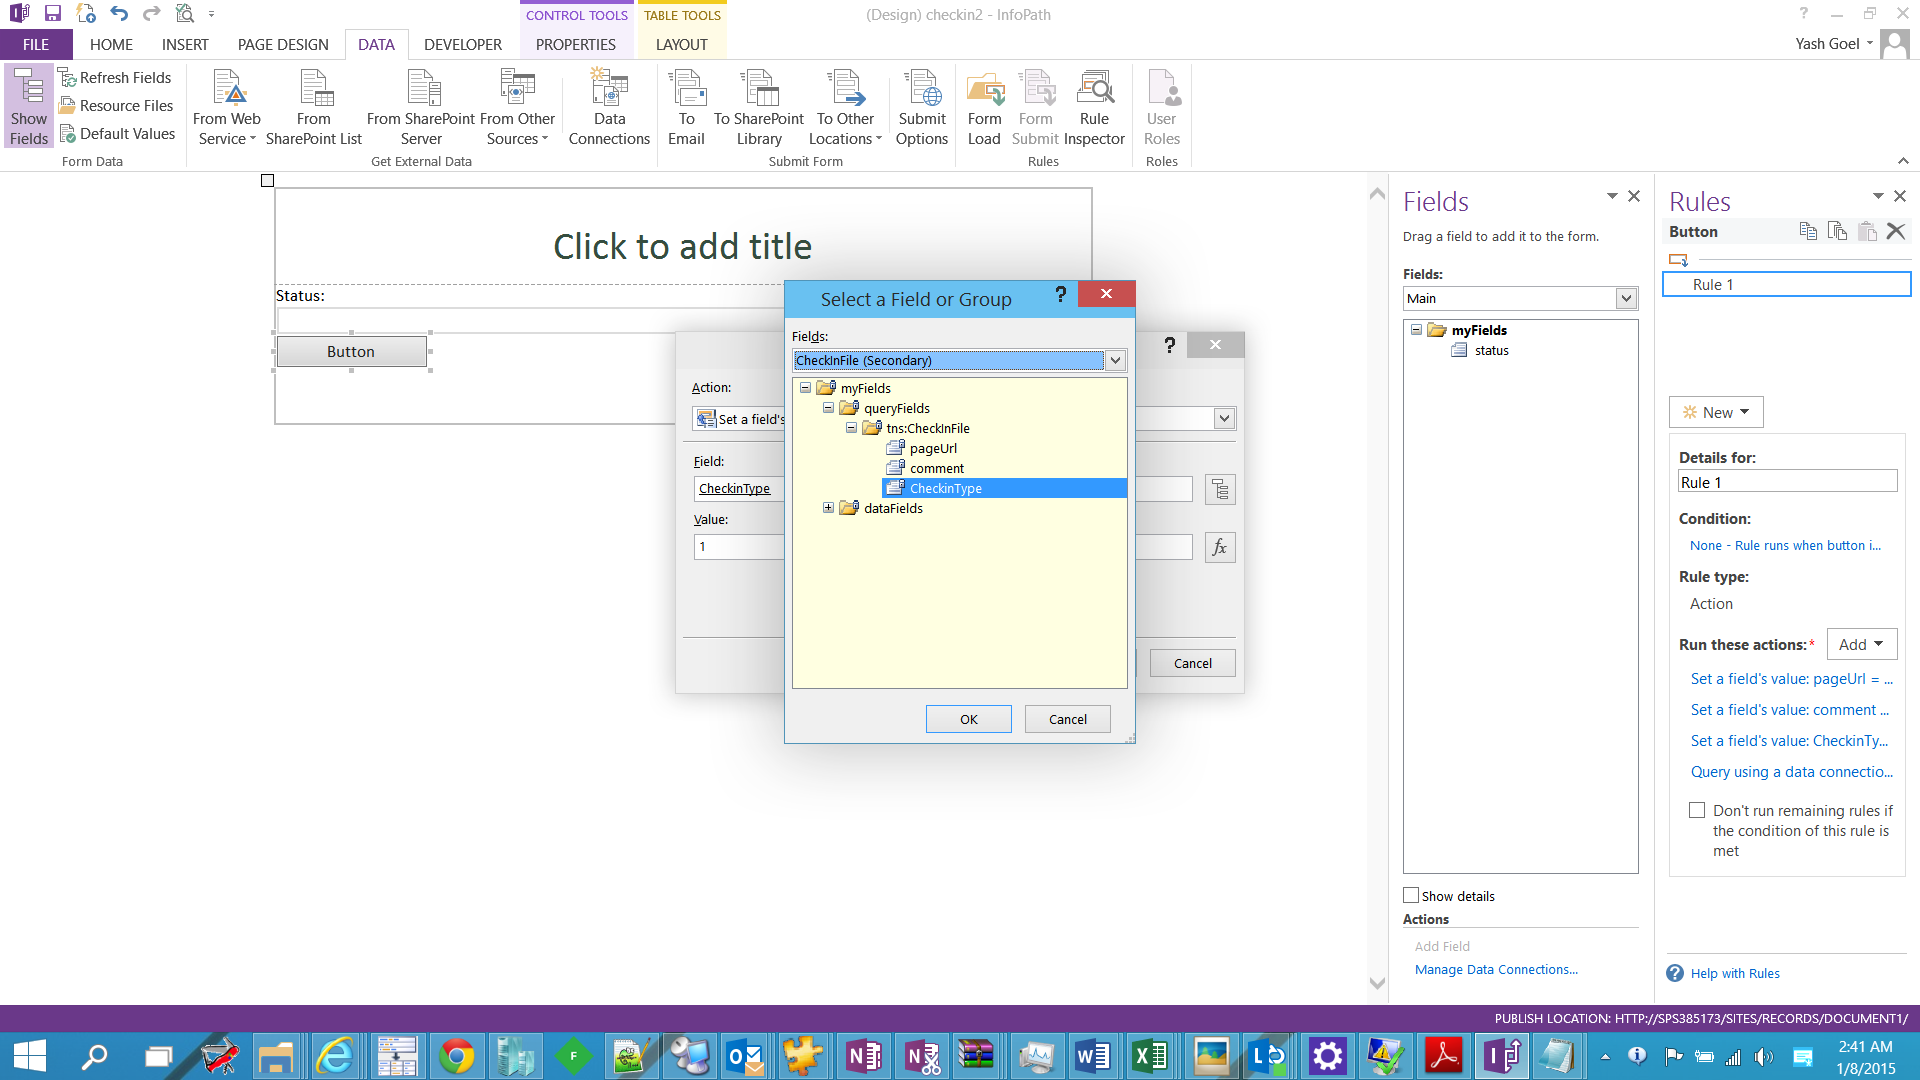
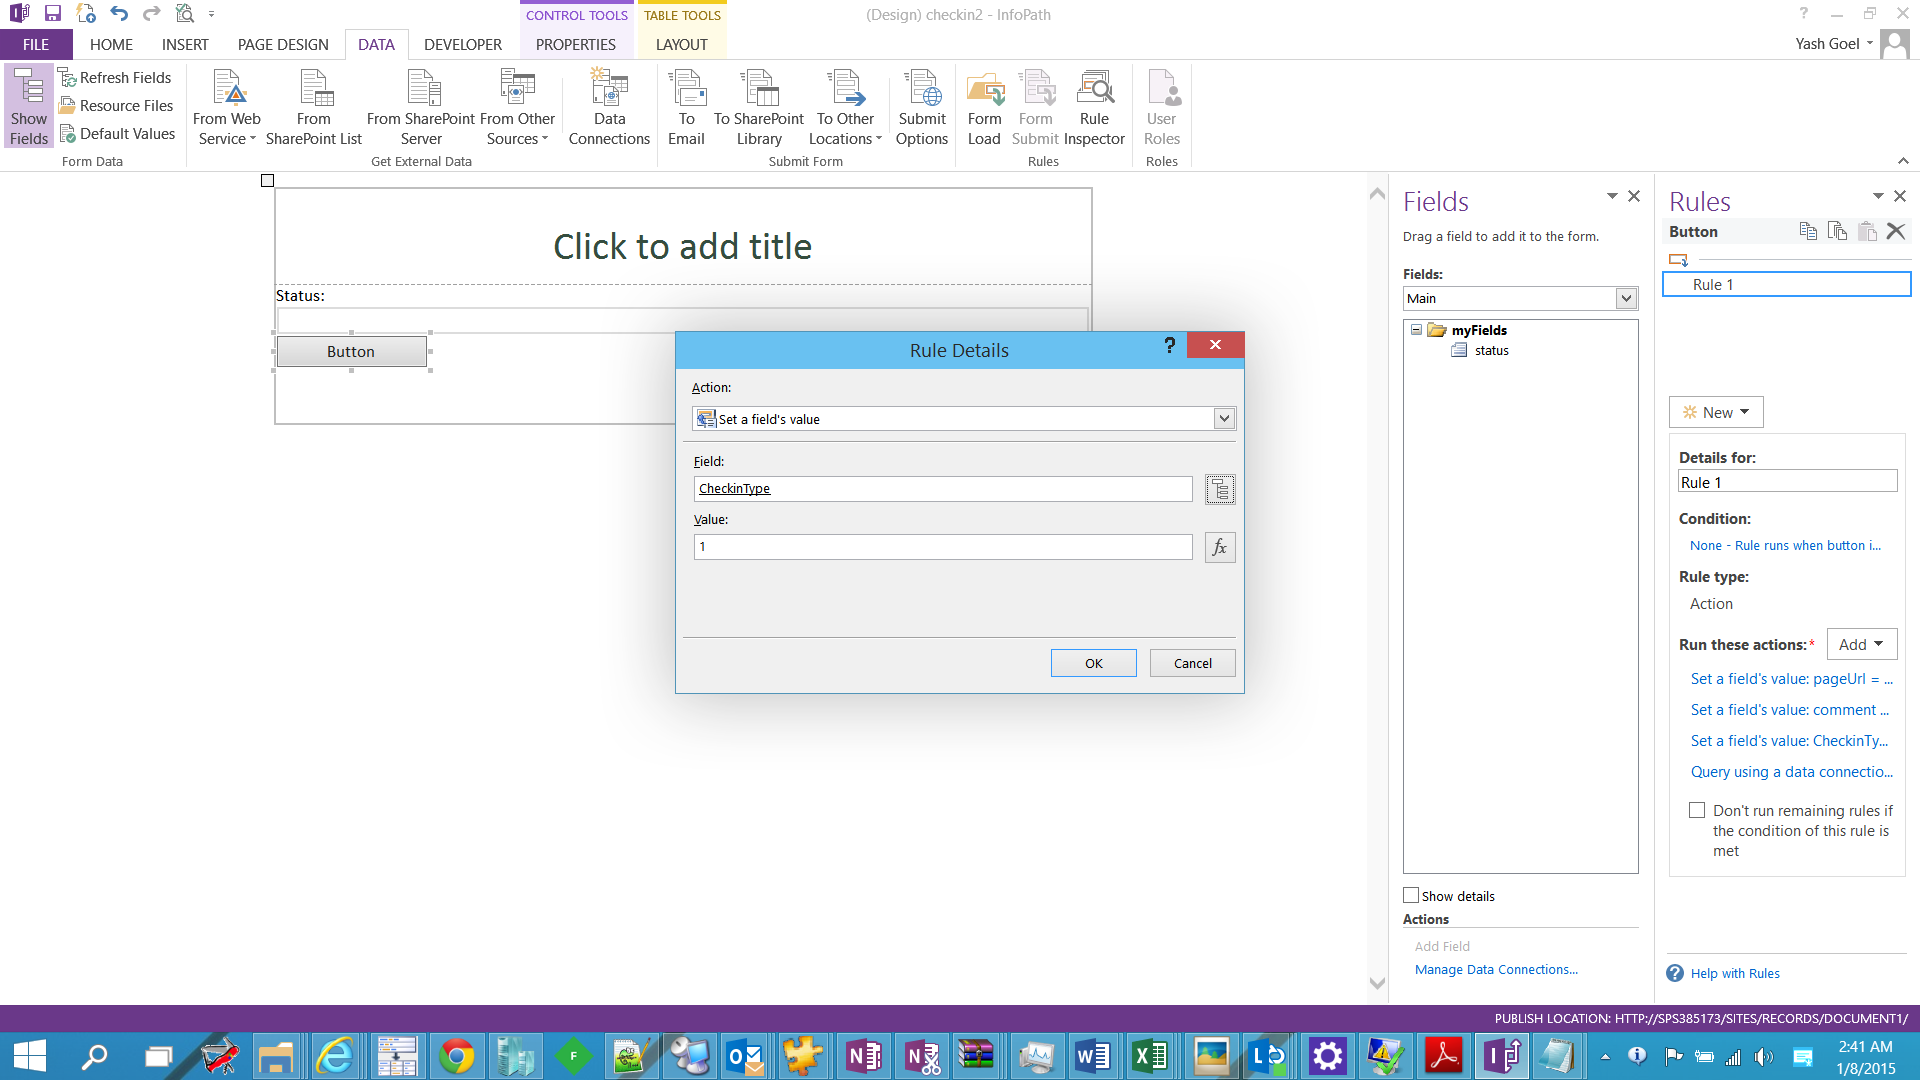
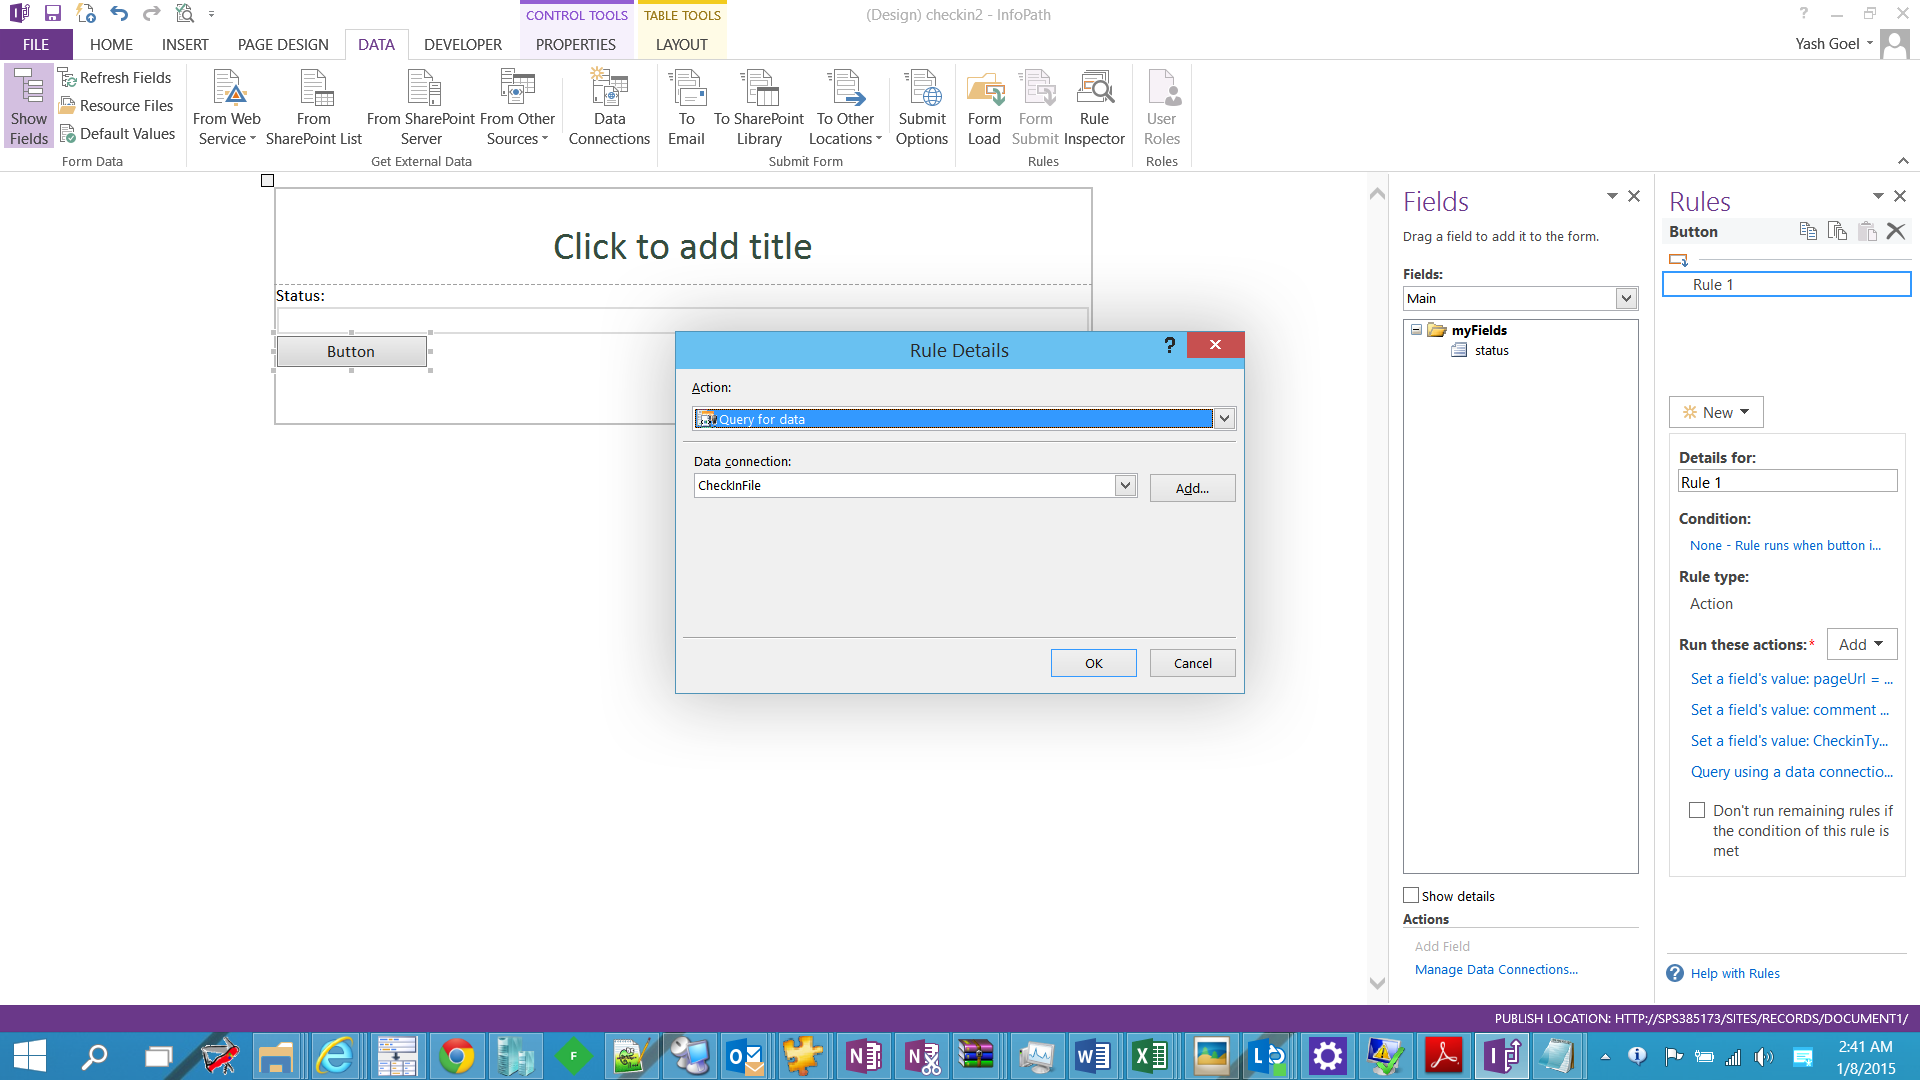
Query data :
# Now we are done with the connections and rules we need.
# convert both checkout file and checkin file connections to UDCX and upload both in the data connection library we created initially.
# download and edit both of them as follows and upload it back
Uncomment udc:authentication tag and povide APPid and CredentialType, APPID here is the targetapplicationID we created in secure store
<udc:Authentication><udc:SSO AppId='APPSA' CredentialType='NTLM' /></udc:Authentication>
# In Central admin configure infopath services select
Allow user form templates to use authentication information contained in data connection files
# publish the form again to the forms library