Uwaga
Dostęp do tej strony wymaga autoryzacji. Może spróbować zalogować się lub zmienić katalogi.
Dostęp do tej strony wymaga autoryzacji. Możesz spróbować zmienić katalogi.
W tym artykule opisano sposób dołączania połączenia do pokoju przy użyciu zestawów SDK połączeń internetowych lub natywnych dla urządzeń przenośnych.
Wymagania wstępne
- Konto platformy Azure z aktywną subskrypcją. Utwórz konto bezpłatnie.
- Aktywny zasób usług komunikacyjnych i parametry połączenia. Utwórz zasób usług komunikacyjnych.
- Dwie lub więcej tożsamości komunikacyjnych użytkowników. Tworzenie tokenów dostępu lub szybkie tworzenie tożsamości na potrzeby testowania i zarządzanie nimi.
- Utworzono pokój i dodano do niego uczestnika. Tworzenie pomieszczeń i zarządzanie nimi
Uzyskiwanie tokenu dostępu użytkownika
Jeśli już stworzyłeś użytkowników i dodałeś ich jako uczestników w pokoju zgodnie z sekcją "Konfigurowanie uczestników pokoju" na tej stronie, możesz użyć tych użytkowników, aby bezpośrednio dołączyć do pokoju.
W przeciwnym razie należy utworzyć token dostępu użytkownika dla każdego uczestnika połączenia. Dowiedz się, jak tworzyć tokeny dostępu użytkowników i zarządzać nimi. Możesz również użyć Azure CLI i uruchomić poniższe polecenie z użyciem ciągu połączenia, aby utworzyć użytkownika i token dostępu. Po utworzeniu użytkowników należy dodać je do pokoju jako uczestnicy, zanim będą mogli dołączyć do pokoju.
az communication identity token issue --scope voip --connection-string "yourConnectionString"
Aby uzyskać szczegółowe informacje, zobacz Tworzenie tokenów dostępu za pomocą interfejsu wiersza polecenia platformy Azure i zarządzanie nimi.
Uwaga
Dostęp do pomieszczeń można uzyskać przy użyciu biblioteki interfejsu użytkownika usług Azure Communication Services. Biblioteka interfejsu użytkownika umożliwia deweloperom dodanie klienta połączeń zgodnego z Rooms do ich aplikacji, używając zaledwie kilku linii kodu.
Implementowanie przykładowej aplikacji
Aby zaimplementować kod potrzebny do dołączenia uczestników do połączenia w pokojach, pobierz z usługi GitHub przykładową aplikację Room Call.
Wymagania wstępne sieci Web
- Musisz mieć Node.js 18. Aby go zainstalować, możesz użyć Instalatora Microsoft (MSI).
Konfigurowanie projektu
Tworzenie nowej aplikacji Node.js
Otwórz terminal lub okno polecenia utwórz nowy katalog dla aplikacji i przejdź do niego.
mkdir calling-rooms-quickstart && cd calling-rooms-quickstart
Uruchom polecenie npm init -y , aby utworzyć plik package.json z ustawieniami domyślnymi.
npm init -y
Instalowanie pakietu
Aby zainstalować SDK do wywołań Azure Communication Services dla JavaScript, użyj polecenia npm install.
Ważne
Ten przewodnik szybkiego startu wykorzystuje wersję 1.14.1 wywołań usługi SDK Azure Communication Services. Możliwość dołączania do połączenia grupowego i wyświetlania ról uczestników rozmowy jest dostępna w JavaScript SDK dla połączeń do przeglądarek internetowych w wersji 1.13.1 lub nowszej.
npm install @azure/communication-common --save
npm install @azure/communication-calling@1.14.1 --save
Konfigurowanie struktury aplikacji
W tym artykule użyto pakietu webpack do tworzenia pakietów zawartości aplikacji. Uruchom następujące polecenie, aby zainstalować pakiety npm webpack, webpack-cli i webpack-dev-server oraz wyświetlić je jako zależności deweloperskie w Twoim package.json.
npm install copy-webpack-plugin@^11.0.0 webpack@^5.88.2 webpack-cli@^5.1.4 webpack-dev-server@^4.15.1 --save-dev
Oto kod:
index.html Utwórz plik w katalogu głównym projektu. Użyj tego pliku, aby skonfigurować podstawowy układ, który umożliwia użytkownikowi dołączanie do rozmowy w pokojach.
<!-- index.html-->
<!DOCTYPE html>
<html>
    <head>
        <title>Azure Communication Services - Rooms Call Sample</title>
        <link rel="stylesheet" type="text/css" href="styles.css"/>
    </head>
    <body>
        <h4>Azure Communication Services - Rooms Call Sample</h4>
        <input id="user-access-token"
            type="text"
            placeholder="User access token"
            style="margin-bottom:1em; width: 500px;"/>
        <button id="initialize-call-agent" type="button">Initialize Call Agent</button>
        <br>
        <br>
        <input id="acs-room-id"
            type="text"
            placeholder="Enter Room Id"
            style="margin-bottom:1em; width: 500px; display: block;"/>
        <button id="join-room-call-button" type="button" disabled="true">Join Room Call</button>
        <button id="hangup-call-button" type="button" disabled="true">Hang up Call</button>
        <button id="start-video-button" type="button" disabled="true">Start Video</button>
        <button id="stop-video-button" type="button" disabled="true">Stop Video</button>
        <br>
        <br>
        <div id="connectedLabel" style="color: #13bb13;" hidden>Room Call is connected!</div>
        <br>
        <div id="remoteVideosGallery" style="width: 40%;" hidden>Remote participants' video streams:</div>
        <br>
        <div id="localVideoContainer" style="width: 30%;" hidden>Local video stream:</div>
        <!-- points to the bundle generated from client.js -->
        <script src="./main.js"></script>
    </body>
</html>
Utwórz plik w katalogu głównym projektu o nazwie index.js dla logiki aplikacji. Dodaj następujący kod do index.js:
// Make sure to install the necessary dependencies
const { CallClient, VideoStreamRenderer, LocalVideoStream } = require('@azure/communication-calling');
const { AzureCommunicationTokenCredential } = require('@azure/communication-common');
const { AzureLogger, setLogLevel } = require("@azure/logger");
// Set the log level and output
setLogLevel('verbose');
AzureLogger.log = (...args) => {
    console.log(...args);
};

// Calling web sdk objects
let callAgent;
let deviceManager;
let call;
let localVideoStream;
let localVideoStreamRenderer;

// UI widgets
let userAccessToken = document.getElementById('user-access-token');
let acsRoomId = document.getElementById('acs-room-id');
let initializeCallAgentButton = document.getElementById('initialize-call-agent');
let startCallButton = document.getElementById('join-room-call-button');
let hangUpCallButton = document.getElementById('hangup-call-button');
let startVideoButton = document.getElementById('start-video-button');
let stopVideoButton = document.getElementById('stop-video-button');
let connectedLabel = document.getElementById('connectedLabel');
let remoteVideosGallery = document.getElementById('remoteVideosGallery');
let localVideoContainer = document.getElementById('localVideoContainer');

/**
 * Using the CallClient, initialize a CallAgent instance with a CommunicationUserCredential which enable us to join a rooms call.
 */
initializeCallAgentButton.onclick = async () => {
    try {
        const callClient = new CallClient();
        tokenCredential = new AzureCommunicationTokenCredential(userAccessToken.value.trim());
        callAgent = await callClient.createCallAgent(tokenCredential)
        // Set up a camera device to use.
        deviceManager = await callClient.getDeviceManager();
        await deviceManager.askDevicePermission({ video: true });
        await deviceManager.askDevicePermission({ audio: true });

        startCallButton.disabled = false;
        initializeCallAgentButton.disabled = true;
    } catch(error) {
        console.error(error);
    }
}

startCallButton.onclick = async () => {
    try {
        const localVideoStream = await createLocalVideoStream();
        const videoOptions = localVideoStream ? { localVideoStreams: [localVideoStream] } : undefined;

        const roomCallLocator = { roomId: acsRoomId.value.trim() };
        call = callAgent.join(roomCallLocator, { videoOptions });

        // Subscribe to the call's properties and events.
        subscribeToCall(call);
    } catch (error) {
        console.error(error);
    }
}

/**
 * Subscribe to a call obj.
 * Listen for property changes and collection updates.
 */
subscribeToCall = (call) => {
    try {
        // Inspect the initial call.id value.
        console.log(`Call Id: ${call.id}`);
        //Subscribe to call's 'idChanged' event for value changes.
        call.on('idChanged', () => {
            console.log(`Call Id changed: ${call.id}`);
        });

        // Inspect the initial call.state value.
        console.log(`Call state: ${call.state}`);
        // Subscribe to call's 'stateChanged' event for value changes.
        call.on('stateChanged', async () => {
            console.log(`Call state changed: ${call.state}`);
            if(call.state === 'Connected') {
                connectedLabel.hidden = false;
                startCallButton.disabled = true;
                hangUpCallButton.disabled = false;
                startVideoButton.disabled = false;
                stopVideoButton.disabled = false;
                remoteVideosGallery.hidden = false;
            } else if (call.state === 'Disconnected') {
                connectedLabel.hidden = true;
                startCallButton.disabled = false;
                hangUpCallButton.disabled = true;
                startVideoButton.disabled = true;
                stopVideoButton.disabled = true;
                remoteVideosGallery.hidden = true;
                console.log(`Call ended, call end reason={code=${call.callEndReason.code}, subCode=${call.callEndReason.subCode}}`);
            }
        });
        call.on('isLocalVideoStartedChanged', () => {
            console.log(`isLocalVideoStarted changed: ${call.isLocalVideoStarted}`);
        });
        console.log(`isLocalVideoStarted: ${call.isLocalVideoStarted}`);
        call.localVideoStreams.forEach(async (lvs) => {
            localVideoStream = lvs;
            await displayLocalVideoStream();
        });
        call.on('localVideoStreamsUpdated', e => {
            e.added.forEach(async (lvs) => {
                localVideoStream = lvs;
                await displayLocalVideoStream();
            });
            e.removed.forEach(lvs => {
               removeLocalVideoStream();
            });
        });

        // Inspect the call's current remote participants and subscribe to them.
        call.remoteParticipants.forEach(remoteParticipant => {
            subscribeToRemoteParticipant(remoteParticipant);
        });
        // Subscribe to the call's 'remoteParticipantsUpdated' event to be
        // notified when new participants are added to the call or removed from the call.
        call.on('remoteParticipantsUpdated', e => {
            // Subscribe to new remote participants that are added to the call.
            e.added.forEach(remoteParticipant => {
                subscribeToRemoteParticipant(remoteParticipant)
            });
            // Unsubscribe from participants that are removed from the call
            e.removed.forEach(remoteParticipant => {
                console.log('Remote participant removed from the call.');
            });
        });
    } catch (error) {
        console.error(error);
    }
}

/**
 * Subscribe to a remote participant obj.
 * Listen for property changes and collection updates.
 */
subscribeToRemoteParticipant = (remoteParticipant) => {
    try {
        // Inspect the initial remoteParticipant.state value.
        console.log(`Remote participant state: ${remoteParticipant.state}`);
        // Subscribe to remoteParticipant's 'stateChanged' event for value changes.
        remoteParticipant.on('stateChanged', () => {
            console.log(`Remote participant state changed: ${remoteParticipant.state}`);
        });

        // Inspect the remoteParticipants's current videoStreams and subscribe to them.
        remoteParticipant.videoStreams.forEach(remoteVideoStream => {
            subscribeToRemoteVideoStream(remoteVideoStream)
        });
        // Subscribe to the remoteParticipant's 'videoStreamsUpdated' event to be
        // notified when the remoteParticipant adds new videoStreams and removes video streams.
        remoteParticipant.on('videoStreamsUpdated', e => {
            // Subscribe to new remote participant's video streams that were added.
            e.added.forEach(remoteVideoStream => {
                subscribeToRemoteVideoStream(remoteVideoStream)
            });
            // Unsubscribe from remote participant's video streams that were removed.
            e.removed.forEach(remoteVideoStream => {
                console.log('Remote participant video stream was removed.');
            })
        });
    } catch (error) {
        console.error(error);
    }
}

/**
 * Subscribe to a remote participant's remote video stream obj.
 * You have to subscribe to the 'isAvailableChanged' event to render the remoteVideoStream. If the 'isAvailable' property
 * changes to 'true', a remote participant is sending a stream. Whenever availability of a remote stream changes
 * you can choose to destroy the whole 'Renderer', a specific 'RendererView' or keep them, but this will result in displaying blank video frame.
 */
subscribeToRemoteVideoStream = async (remoteVideoStream) => {
    let renderer = new VideoStreamRenderer(remoteVideoStream);
    let view;
    let remoteVideoContainer = document.createElement('div');
    remoteVideoContainer.className = 'remote-video-container';

    const createView = async () => {
        // Create a renderer view for the remote video stream.
        view = await renderer.createView();
        // Attach the renderer view to the UI.
        remoteVideoContainer.appendChild(view.target);
        remoteVideosGallery.appendChild(remoteVideoContainer);
    }

    // Remote participant has switched video on/off
    remoteVideoStream.on('isAvailableChanged', async () => {
        try {
            if (remoteVideoStream.isAvailable) {
                await createView();
            } else {
                view.dispose();
                remoteVideosGallery.removeChild(remoteVideoContainer);
            }
        } catch (e) {
            console.error(e);
        }
    });

    // Remote participant has video on initially.
    if (remoteVideoStream.isAvailable) {
        try {
            await createView();
        } catch (e) {
            console.error(e);
        }
    }
}

/**
 * Start your local video stream.
 * This will send your local video stream to remote participants so they can view it.
 */
startVideoButton.onclick = async () => {
    try {
        const localVideoStream = await createLocalVideoStream();
        await call.startVideo(localVideoStream);
    } catch (error) {
        console.error(error);
    }
}

/**
 * Stop your local video stream.
 * This will stop your local video stream from being sent to remote participants.
 */
stopVideoButton.onclick = async () => {
    try {
        await call.stopVideo(localVideoStream);
    } catch (error) {
        console.error(error);
    }
}

/**
 * To render a LocalVideoStream, you need to create a new instance of VideoStreamRenderer, and then
 * create a new VideoStreamRendererView instance using the asynchronous createView() method.
 * You may then attach view.target to any UI element.
 */
createLocalVideoStream = async () => {
    const camera = (await deviceManager.getCameras())[0];
    if (camera) {
        return new LocalVideoStream(camera);
    } else {
        console.error(`No camera device found on the system`);
    }
}

/**
 * Display your local video stream preview in your UI
 */
displayLocalVideoStream = async () => {
    try {
        localVideoStreamRenderer = new VideoStreamRenderer(localVideoStream);
        const view = await localVideoStreamRenderer.createView();
        localVideoContainer.hidden = false;
        localVideoContainer.appendChild(view.target);
    } catch (error) {
        console.error(error);
    }
}

/**
 * Remove your local video stream preview from your UI
 */
removeLocalVideoStream = async() => {
    try {
        localVideoStreamRenderer.dispose();
        localVideoContainer.hidden = true;
    } catch (error) {
        console.error(error);
    }
}

/**
 * End current room call
 */
hangUpCallButton.addEventListener("click", async () => {
    await call.hangUp();
});
Dodaj kod serwera lokalnego webpack
Utwórz plik w katalogu głównym projektu o nazwie webpack.config.js, który będzie zawierał logikę serwera lokalnego dla tego szybkiego startu. Dodaj następujący kod do webpack.config.js:
const path = require('path');
const CopyPlugin = require("copy-webpack-plugin");

module.exports = {
    mode: 'development',
    entry: './index.js',
    output: {
        filename: 'main.js',
        path: path.resolve(__dirname, 'dist'),
    },
    devServer: {
        static: {
            directory: path.join(__dirname, './')
        },
    },
    plugins: [
        new CopyPlugin({
            patterns: [
                './index.html'
            ]
        }),
    ]
};
Uruchamianie kodu
Użyj polecenia , webpack-dev-server aby skompilować i uruchomić aplikację. Uruchom następujące polecenie, aby zgrupować hosta aplikacji w lokalnym serwerze sieciowym:
`npx webpack serve --config webpack.config.js`
- Otwórz przeglądarkę, przejdź do http://localhost:8080/.
- W pierwszym polu wejściowym wprowadź prawidłowy token dostępu użytkownika.
- Kliknij pozycję "Zainicjuj agenta połączeń" i wprowadź swój identyfikator pokoju.
- Kliknij Dołącz do rozmowy w pokoju.
Pomyślnie dołączyłeś do rozmowy w pokoju!
O tym, jak dołączyć do rozmowy w pokoju
Cały kod dodany do przykładowej aplikacji umożliwił pomyślne rozpoczęcie i dołączenie do rozmowy w pokoju. Poniżej przedstawiono więcej informacji na temat dodatkowych metod/procedur obsługi, do których można uzyskać dostęp w usłudze Rooms w celu rozszerzenia funkcji w aplikacji.
Aby wyświetlić rolę uczestników lokalnego lub zdalnego wywołania, zasubskrybuj program obsługi w następujący sposób.
// Subscribe to changes for your role in a call
 const callRoleChangedHandler = () => {
 	console.log(call.role);
 };

 call.on('roleChanged', callRoleChangedHandler);

// Subscribe to role changes for remote participants
 const subscribeToRemoteParticipant = (remoteParticipant) => {
 	remoteParticipant.on('roleChanged', () => {
 	    console.log(remoteParticipant.role);
 	});
 }
Aby uzyskać więcej informacji na temat ról uczestników rozmów w pokojach, zobacz Interfejs API pomieszczeń do spotkań strukturalnych.
Implementowanie przykładowej aplikacji
Aby zaimplementować kod potrzebny do dołączenia uczestników do połączenia w pokojach, pobierz z usługi GitHub przykładową aplikację Room Call.
Konfigurowanie projektu
Tworzenie projektu Xcode
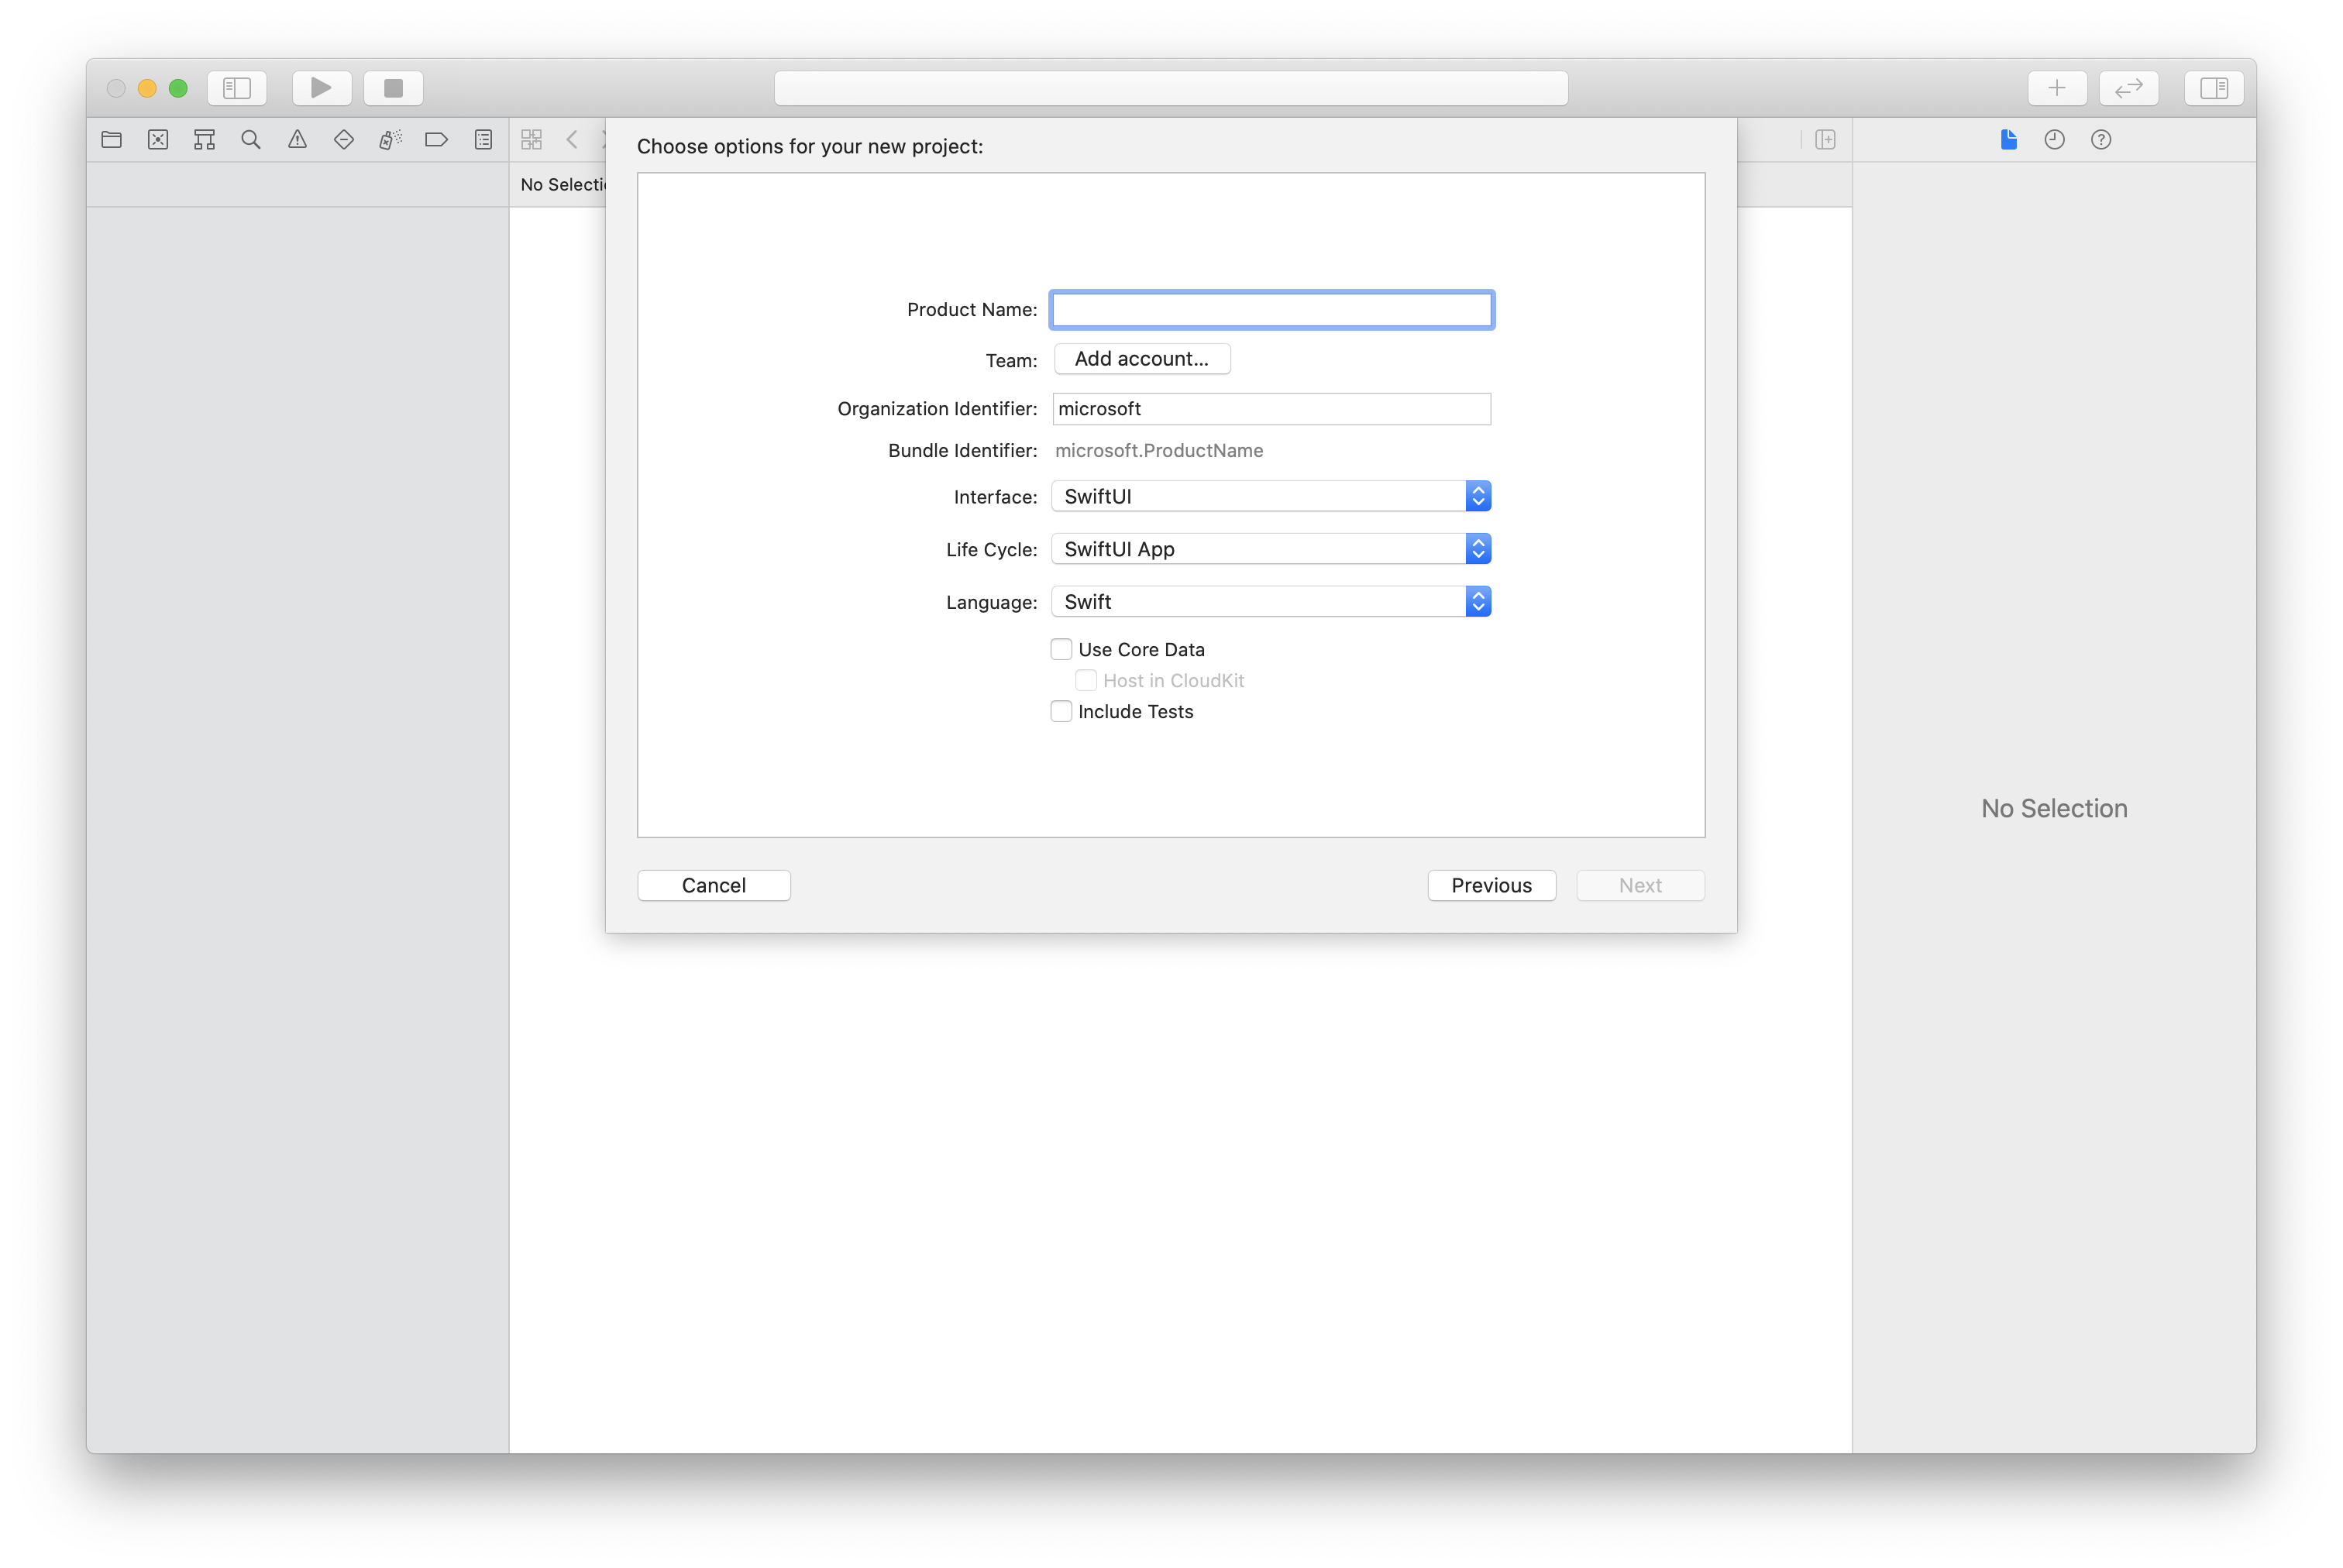
W programie Xcode utwórz nowy projekt systemu iOS i wybierz szablon Aplikacja z jednym widokiem. Ten samouczek używa frameworku SwiftUI, dlatego należy ustawić język na Swift i interfejs użytkownika na SwiftUI.
Instalowanie platformy CocoaPods
Skorzystaj z tego przewodnika, aby zainstalować narzędzie CocoaPods na komputerze Mac.
Instalowanie pakietu i zależności za pomocą narzędzia CocoaPods
Aby utworzyć plik Podfile dla aplikacji, otwórz terminal, przejdź do folderu projektu i uruchom polecenie pod init.
Dodaj następujący kod do pliku Podfile i zapisz:
platform :ios, '13.0'
use_frameworks!

target 'roomsquickstart' do
 pod 'AzureCommunicationCalling', '~> 2.5.0'
end
Uruchom pod install.
Otwórz plik
.xcworkspacew programie Xcode.
Żądanie dostępu do mikrofonu i kamery
Aby uzyskać dostęp do mikrofonu i aparatu urządzenia, należy zaktualizować listę właściwości informacji aplikacji za pomocą elementów NSMicrophoneUsageDescription i NSCameraUsageDescription. Ustaw skojarzoną wartość na ciąg, który ma być uwzględniony w oknie dialogowym, jakie system używa do zwracania się o dostęp do użytkownika.
Kliknij prawym przyciskiem myszy Info.plist element drzewa projektu i wybierz Otwórz jako > kod źródłowy. Dodaj następujące wiersze sekcji najwyższego poziomu <dict> , a następnie zapisz plik.
<key>NSMicrophoneUsageDescription</key>
<string>Need microphone access for VOIP calling.</string>
<key>NSCameraUsageDescription</key>
<string>Need camera access for video calling</string>
Konfigurowanie struktury aplikacji
Otwórz plik projektu ContentView.swift . W górnym pliku dodaj deklarację importu, aby zaimportować bibliotekę AzureCommunicationCalling i AVFoundation. Użyj AVFoundation, aby uzyskać uprawnienia do dźwięku z kodu.
import AzureCommunicationCalling
import AVFoundation
Model obiektów
Następujące klasy i interfejsy obsługują niektóre główne funkcje zestawu SDK wywołującego usługi Azure Communication Services dla systemu iOS.
| Nazwa/nazwisko | opis |
|---|---|
| CallClient | Obiekt CallClient jest głównym punktem wejścia do zestawu SDK Calling. |
| CallAgent | CallAgent służy do uruchamiania wywołań i zarządzania nimi. |
| CommunicationTokenCredential | Element CommunicationTokenCredential jest używany jako poświadczenie tokenu do zainicjowania CallAgent. |
| Identyfikator Komunikacji | Element CommunicationIdentifier służy do reprezentowania tożsamości użytkownika i może mieć jedną z następujących wartości: CommunicationUserIdentifier/PhoneNumberIdentifier/CallingApplication. |
| Lokalizator Połączeń w Pokoju | Funkcja RoomCallLocator jest używana przez CallAgent do dołączenia do rozmowy w pokoju |
Tworzenie agenta połączeń
Zastąp implementację struktury ContentView prostymi kontrolkami interfejsu użytkownika, które umożliwiają użytkownikowi zainicjowanie i zakończenie wywołania. W tym przykładzie dołączamy logikę biznesową do tych kontrolek.
struct ContentView: View {
 @State var roomId: String = ""
 @State var callObserver:CallObserver?
 @State var previewRenderer: VideoStreamRenderer? = nil
 @State var previewView: RendererView? = nil
 @State var sendingLocalVideo: Bool = false
 @State var speakerEnabled: Bool = false
 @State var muted: Bool = false
 @State var callClient: CallClient?
 @State var call: Call?
 @State var callHandler: CallHandler?
 @State var callAgent: CallAgent?
 @State var deviceManager: DeviceManager?
 @State var localVideoStreams: [LocalVideoStream]?
 @State var callState: String = "Unknown"
 @State var showAlert: Bool = false
 @State var alertMessage: String = ""
 @State var participants: [[Participant]] = [[]]

 var body: some View {
 NavigationView {
 ZStack {
 if (call == nil) {
 Form {
 Section {
 TextField("Room ID", text: $roomId)
 Button(action: joinRoomCall) {
 Text("Join Room Call")
 }
 }
 }
 .navigationBarTitle("Rooms Quickstart")
 } else {
 ZStack {
 VStack {
 ForEach(participants, id:\.self) { array in
 HStack {
 ForEach(array, id:\.self) { participant in
 ParticipantView(self, participant)
 }
 }
 .frame(maxWidth: .infinity, maxHeight: 200, alignment: .topLeading)
 }
 }
 .background(Color.black)
 .frame(maxWidth: .infinity, maxHeight: .infinity, alignment: .topLeading)
 VStack {
 if (sendingLocalVideo) {
 HStack {
 RenderInboundVideoView(view: $previewView)
 .frame(width:90, height:160)
 .padding(10)
 .background(Color.green)
 }
 .frame(maxWidth: .infinity, alignment: .trailing)
 }
 HStack {
 Button(action: toggleMute) {
 HStack {
 Text(muted ? "Unmute" : "Mute")
 }
 .frame(width:80)
 .padding(.vertical, 10)
 .background(Color(.lightGray))
 }
 Button(action: toggleLocalVideo) {
 HStack {
 Text(sendingLocalVideo ? "Video-Off" : "Video-On")
 }
 .frame(width:80)
 .padding(.vertical, 10)
 .background(Color(.lightGray))
 }
 }
 .frame(maxWidth: .infinity, alignment: .leading)
 .padding(.horizontal, 10)
 .padding(.vertical, 5)
 HStack {
 Button(action: leaveRoomCall) {
 HStack {
 Text("Leave Room Call")
 }
 .frame(width:80)
 .padding(.vertical, 10)
 .background(Color(.red))
 }
 }
 .frame(maxWidth: .infinity, alignment: .leading)
 .padding(.horizontal, 10)
 .padding(.vertical, 5)
 HStack {
 Text("Status:")
 Text(callState)
 }
 .padding(.vertical, 10)
 }
 .frame(maxWidth: .infinity, maxHeight: .infinity, alignment: .bottomLeading)
 }
 }
 }
 }
 .onAppear{
 // Authenticate the client
 // Initialize the CallAgent and access Device Manager
 // Ask for permissions
 }
 }
}

//Functions and Observers

struct HomePageView_Previews: PreviewProvider {
 static var previews: some View {
 HomePageView()
 }
}
Uwierzytelnianie użytkownika
Aby zainicjować instancję CallAgent, potrzebujemy tokenu dostępu użytkownika, który umożliwia uczestnikom dołączanie do rozmów w pokojach.
Po utworzeniu tokenu dodaj następujący kod do wywołania zwrotnego onAppear w ContentView.swift. Musisz zastąpić <USER ACCESS TOKEN> prawidłowym tokenem dostępu użytkownika dla zasobu:
var userCredential: CommunicationTokenCredential?
do {
 userCredential = try CommunicationTokenCredential(token: "<USER ACCESS TOKEN>")
} catch {
 print("ERROR: It was not possible to create user credential.")
 return
}
Zainicjalizuj CallAgent i uzyskaj dostęp do Menedżera urządzeń
Aby utworzyć wystąpienie callAgent z obiektu CallClient, użyj callClient.createCallAgent metody, która asynchronicznie zwraca obiekt CallAgent po zainicjowaniu. DeviceManager umożliwia wyliczanie urządzeń lokalnych, które mogą być używane w wywołaniu do przesyłania strumieni audio/wideo. Umożliwia również zażądanie uprawnień od użytkownika w celu uzyskania dostępu do mikrofonu/kamery.
self.callClient = CallClient()
self.callClient?.createCallAgent(userCredential: userCredential!) { (agent, error) in
 if error != nil {
 print("ERROR: It was not possible to create a call agent.")
 return
 } else {
 self.callAgent = agent
 print("Call agent successfully created.")
 self.callAgent!.delegate = callHandler
 self.callClient?.getDeviceManager { (deviceManager, error) in
 if (error == nil) {
 print("Got device manager instance")
 self.deviceManager = deviceManager
 } else {
 print("Failed to get device manager instance")
 }
 }
 }
}
Poproś o uprawnienia
Musimy dodać następujący kod do wywołania zwrotnego onAppear , aby poprosić o uprawnienia do audio i wideo.
AVAudioSession.sharedInstance().requestRecordPermission { (granted) in
 if granted {
 AVCaptureDevice.requestAccess(for: .video) { (videoGranted) in
 /* NO OPERATION */
 }
 }
}
Dołączanie do rozmowy w pokoju
Skonfiguruj metodę joinRoomCall jako akcję do wykonania, gdy uczestnik wybierze przycisk Dołącz do połączenia w pokoju. W tym przykładzie połączenia są domyślnie tylko audio, ale mogą mieć włączone wideo, gdy uczestnik dołączy do pokoju.
func joinRoomCall() {
 if self.callAgent == nil {
 print("CallAgent not initialized")
 return
 }

 if (self.roomId.isEmpty) {
 print("Room ID not set")
 return
 }

 // Join a call with a Room ID
 let options = JoinCallOptions()
 let audioOptions = AudioOptions()
 audioOptions.muted = self.muted

 options.audioOptions = audioOptions

 let roomCallLocator = RoomCallLocator(roomId: roomId)
 self.callAgent!.join(with: roomCallLocator, joinCallOptions: options) { (call, error) in
 self.setCallAndObserver(call: call, error: error)
 }
}
CallObserver służy do zarządzania zdarzeniami podczas rozmowy i uczestnikami zdalnymi. Ustawiamy obserwatorów w setCallAndObserver funkcji .
func setCallAndObserver(call:Call!, error:Error?) {
 if (error == nil) {
 self.call = call
 self.callObserver = CallObserver(view:self)

 self.call!.delegate = self.callObserver

 if (self.call!.state == CallState.connected) {
 self.callObserver!.handleInitialCallState(call: call)
 }
 } else {
 print("Failed to get call object")
 }
}
Wyjście z pokoju
Metoda leaveRoomCall jest ustawiona jako akcja, która ma być wykonywana, gdy uczestnik wybierze przycisk Opuszczam rozmowę w pokoju. Metoda obsługuje zakończenie połączenia i czyści wszystkie utworzone zasoby.
private func leaveRoomCall() {
 if (self.sendingLocalVideo) {
 self.call!.stopVideo(stream: self.localVideoStreams!.first!) { (error) in
 if (error != nil) {
 print("Failed to stop video")
 } else {
 self.sendingLocalVideo = false
 self.previewView = nil
 self.previewRenderer?.dispose()
 self.previewRenderer = nil
 }
 }
 }
 self.call?.hangUp(options: nil) { (error) in }
 self.participants.removeAll()
 self.call?.delegate = nil
 self.call = nil
}
Emisja wideo
Podczas rozmowy z pokoju użyj polecenia startVideo lub stopVideo , aby rozpocząć lub zatrzymać wysyłanie LocalVideoStream do uczestników zdalnych.
func toggleLocalVideo() {
 if (self.sendingLocalVideo) {
 self.call!.stopVideo(stream: self.localVideoStreams!.first!) { (error) in
 if (error != nil) {
 print("Cannot stop video")
 } else {
 self.sendingLocalVideo = false
 self.previewView = nil
 self.previewRenderer!.dispose()
 self.previewRenderer = nil
 }
 }
 } else {
 let availableCameras = self.deviceManager!.cameras
 let scalingMode:ScalingMode = .crop
 if (self.localVideoStreams == nil) {
 self.localVideoStreams = [LocalVideoStream]()
 }
 self.localVideoStreams!.append(LocalVideoStream(camera: availableCameras.first!))
 self.previewRenderer = try! VideoStreamRenderer(localVideoStream: self.localVideoStreams!.first!)
 self.previewView = try! previewRenderer!.createView(withOptions: CreateViewOptions(scalingMode:scalingMode))
 self.call!.startVideo(stream: self.localVideoStreams!.first!) { (error) in
 if (error != nil) {
 print("Cannot start video")
 }
 else {
 self.sendingLocalVideo = true
 }
 }
 }
}
Wyciszanie lokalnego dźwięku
Podczas rozmowy w pokoju możemy użyć mute lub unMute, aby wyciszyć lub wyłączyć wyciszenie mikrofonu.
func toggleMute() {
 if (self.muted) {
 call!.unmuteOutgoingAudio(completionHandler: { (error) in
 if error == nil {
 self.muted = false
 }
 })
 } else {
 call!.muteOutgoingAudio(completionHandler: { (error) in
 if error == nil {
 self.muted = true
 }
 })
 }
}
Obsługa aktualizacji połączeń
Aby obsługiwać aktualizacje wywołań, zaimplementuj element CallHandler do obsługi zdarzeń aktualizacji. Umieść następującą implementację w pliku CallHandler.swift.
final class CallHandler: NSObject, CallAgentDelegate {
 public var owner: ContentView?

 private static var instance: CallHandler?
 static func getOrCreateInstance() -> CallHandler {
 if let c = instance {
 return c
 }
 instance = CallHandler()
 return instance!
 }

 private override init() {}

 public func callAgent(_ callAgent: CallAgent, didUpdateCalls args: CallsUpdatedEventArgs) {
 if let removedCall = args.removedCalls.first {
 owner?.call = nil
 }
 }
}
Musimy utworzyć wystąpienie klasy CallHandler , dodając następujący kod do wywołania zwrotnego onAppear w pliku ContentView.swift:
self.callHandler = CallHandler.getOrCreateInstance()
self.callHandler.owner = self
Ustaw delegata dla callAgent po pomyślnym utworzeniu callAgent:
self.callAgent!.delegate = callHandler
Zdalne zarządzanie uczestnikami
Wszyscy uczestnicy zdalni mają typ RemoteParticipant i są dostępni poprzez kolekcję remoteParticipants w instancji połączenia. Możemy zaimplementować klasę Participant do zarządzania między innymi aktualizacjami zdalnych uczestników na ich strumieniach wideo.
class Participant: NSObject, RemoteParticipantDelegate, ObservableObject {
 private var videoStreamCount = 0
 private let innerParticipant:RemoteParticipant
 private let call:Call
 private var renderedRemoteVideoStream:RemoteVideoStream?

 @Published var state:ParticipantState = ParticipantState.disconnected
 @Published var isMuted:Bool = false
 @Published var isSpeaking:Bool = false
 @Published var hasVideo:Bool = false
 @Published var displayName:String = ""
 @Published var videoOn:Bool = true
 @Published var renderer:VideoStreamRenderer? = nil
 @Published var rendererView:RendererView? = nil
 @Published var scalingMode: ScalingMode = .fit

 init(_ call: Call, _ innerParticipant: RemoteParticipant) {
 self.call = call
 self.innerParticipant = innerParticipant
 self.displayName = innerParticipant.displayName

 super.init()

 self.innerParticipant.delegate = self

 self.state = innerParticipant.state
 self.isMuted = innerParticipant.isMuted
 self.isSpeaking = innerParticipant.isSpeaking
 self.hasVideo = innerParticipant.videoStreams.count > 0
 if(self.hasVideo) {
 handleInitialRemoteVideo()
 }
 }

 deinit {
 self.innerParticipant.delegate = nil
 }

 func getMri() -> String {
 Utilities.toMri(innerParticipant.identifier)
 }

 func set(scalingMode: ScalingMode) {
 if self.rendererView != nil {
 self.rendererView!.update(scalingMode: scalingMode)
 }
 self.scalingMode = scalingMode
 }

 func handleInitialRemoteVideo() {
 renderedRemoteVideoStream = innerParticipant.videoStreams[0]
 renderer = try! VideoStreamRenderer(remoteVideoStream: renderedRemoteVideoStream!)
 rendererView = try! renderer!.createView()
 }

 func toggleVideo() {
 if videoOn {
 rendererView = nil
 renderer?.dispose()
 videoOn = false
 }
 else {
 renderer = try! VideoStreamRenderer(remoteVideoStream: innerParticipant.videoStreams[0])
 rendererView = try! renderer!.createView()
 videoOn = true
 }
 }

 func remoteParticipant(_ remoteParticipant: RemoteParticipant, didUpdateVideoStreams args: RemoteVideoStreamsEventArgs) {
 let hadVideo = hasVideo
 hasVideo = innerParticipant.videoStreams.count > 0
 if videoOn {
 if hadVideo && !hasVideo {
 // Remote user stopped sharing
 rendererView = nil
 renderer?.dispose()
 } else if hasVideo && !hadVideo {
 // remote user started sharing
 renderedRemoteVideoStream = innerParticipant.videoStreams[0]
 renderer = try! VideoStreamRenderer(remoteVideoStream: renderedRemoteVideoStream!)
 rendererView = try! renderer!.createView()
 } else if hadVideo && hasVideo {
 if args.addedRemoteVideoStreams.count > 0 {
 if renderedRemoteVideoStream?.id == args.addedRemoteVideoStreams[0].id {
 return
 }

 // remote user added a second video, so switch to the latest one
 guard let rendererTemp = renderer else {
 return
 }
 rendererTemp.dispose()
 renderedRemoteVideoStream = args.addedRemoteVideoStreams[0]
 renderer = try! VideoStreamRenderer(remoteVideoStream: renderedRemoteVideoStream!)
 rendererView = try! renderer!.createView()
 } else if args.removedRemoteVideoStreams.count > 0 {
 if args.removedRemoteVideoStreams[0].id == renderedRemoteVideoStream!.id {
 // remote user stopped sharing video that we were rendering but is sharing
 // another video that we can render
 renderer!.dispose()

 renderedRemoteVideoStream = innerParticipant.videoStreams[0]
 renderer = try! VideoStreamRenderer(remoteVideoStream: renderedRemoteVideoStream!)
 rendererView = try! renderer!.createView()
 }
 }
 }
 }
 }

 func remoteParticipant(_ remoteParticipant: RemoteParticipant, didChangeDisplayName args: PropertyChangedEventArgs) {
 self.displayName = innerParticipant.displayName
 }
}

class Utilities {
 @available(*, unavailable) private init() {}

 public static func toMri(_ id: CommunicationIdentifier?) -> String {

 if id is CommunicationUserIdentifier {
 let communicationUserIdentifier = id as! CommunicationUserIdentifier
 return communicationUserIdentifier.identifier
 } else {
 return "<nil>"
 }
 }
}
Strumienie wideo uczestników zdalnych
Możemy utworzyć element ParticipantView do obsługi renderowania strumieni wideo uczestników zdalnych. Umieść implementację w ParticipantView.swift
struct ParticipantView : View, Hashable {
 static func == (lhs: ParticipantView, rhs: ParticipantView) -> Bool {
 return lhs.participant.getMri() == rhs.participant.getMri()
 }

 private let owner: HomePageView

 @State var showPopUp: Bool = false
 @State var videoHeight = CGFloat(200)
 @ObservedObject private var participant:Participant

 var body: some View {
 ZStack {
 if (participant.rendererView != nil) {
 HStack {
 RenderInboundVideoView(view: $participant.rendererView)
 }
 .background(Color(.black))
 .frame(height: videoHeight)
 .animation(Animation.default)
 } else {
 HStack {
 Text("No incoming video")
 }
 .background(Color(.red))
 .frame(height: videoHeight)
 }
 }
 }

 func hash(into hasher: inout Hasher) {
 hasher.combine(participant.getMri())
 }

 init(_ owner: HomePageView, _ participant: Participant) {
 self.owner = owner
 self.participant = participant
 }

 func resizeVideo() {
 videoHeight = videoHeight == 200 ? 150 : 200
 }

 func showAlert(_ title: String, _ message: String) {
 DispatchQueue.main.asyncAfter(deadline: .now() + 0.1) {
 self.owner.alertMessage = message
 self.owner.showAlert = true
 }
 }
}

struct RenderInboundVideoView: UIViewRepresentable {
 @Binding var view:RendererView!

 func makeUIView(context: Context) -> UIView {
 return UIView()
 }

 func updateUIView(_ uiView: UIView, context: Context) {
 for view in uiView.subviews {
 view.removeFromSuperview()
 }
 if (view != nil) {
 uiView.addSubview(view)
 }
 }
}
Subskrybowanie zdarzeń
Możemy zaimplementować klasę CallObserver , aby subskrybować kolekcję zdarzeń, aby otrzymywać powiadomienia, gdy wartości, takie jak remoteParticipants, zmieniają się podczas wywołania.
public class CallObserver : NSObject, CallDelegate
{
 private var owner: ContentView
 private var firstTimeCallConnected: Bool = true

 init(view: ContentView) {
 owner = view
 super.init()
 }

 public func call(_ call: Call, didChangeState args: PropertyChangedEventArgs) {
 let state = CallObserver.callStateToString(state:call.state)
 owner.callState = state
 if (call.state == CallState.disconnected) {
 owner.leaveRoomCall()
 }
 else if (call.state == CallState.connected) {
 if(self.firstTimeCallConnected) {
 self.handleInitialCallState(call: call);
 }
 self.firstTimeCallConnected = false;
 }
 }

 public func handleInitialCallState(call: Call) {
 // We want to build a matrix with max 2 columns

 owner.callState = CallObserver.callStateToString(state:call.state)
 var participants = [Participant]()

 // Add older/existing participants
 owner.participants.forEach { (existingParticipants: [Participant]) in
 participants.append(contentsOf: existingParticipants)
 }
 owner.participants.removeAll()

 // Add new participants to the collection
 for remoteParticipant in call.remoteParticipants {
 let mri = Utilities.toMri(remoteParticipant.identifier)
 let found = participants.contains { (participant) -> Bool in
 participant.getMri() == mri
 }

 if !found {
 let participant = Participant(call, remoteParticipant)
 participants.append(participant)
 }
 }

 // Convert 1-D array into a 2-D array with 2 columns
 var indexOfParticipant = 0
 while indexOfParticipant < participants.count {
 var newParticipants = [Participant]()
 newParticipants.append(participants[indexOfParticipant])
 indexOfParticipant += 1
 if (indexOfParticipant < participants.count) {
 newParticipants.append(participants[indexOfParticipant])
 indexOfParticipant += 1
 }
 owner.participants.append(newParticipants)
 }
 }

 public func call(_ call: Call, didUpdateRemoteParticipant args: ParticipantsUpdatedEventArgs) {
 var participants = [Participant]()
 // Add older/existing participants
 owner.participants.forEach { (existingParticipants: [Participant]) in
 participants.append(contentsOf: existingParticipants)
 }
 owner.participants.removeAll()

 // Remove deleted participants from the collection
 args.removedParticipants.forEach { p in
 let mri = Utilities.toMri(p.identifier)
 participants.removeAll { (participant) -> Bool in
 participant.getMri() == mri
 }
 }

 // Add new participants to the collection
 for remoteParticipant in args.addedParticipants {
 let mri = Utilities.toMri(remoteParticipant.identifier)
 let found = participants.contains { (view) -> Bool in
 view.getMri() == mri
 }

 if !found {
 let participant = Participant(call, remoteParticipant)
 participants.append(participant)
 }
 }

 // Convert 1-D array into a 2-D array with 2 columns
 var indexOfParticipant = 0
 while indexOfParticipant < participants.count {
 var array = [Participant]()
 array.append(participants[indexOfParticipant])
 indexOfParticipant += 1
 if (indexOfParticipant < participants.count) {
 array.append(participants[indexOfParticipant])
 indexOfParticipant += 1
 }
 owner.participants.append(array)
 }
 }

 private static func callStateToString(state:CallState) -> String {
 switch state {
 case .connected: return "Connected"
 case .connecting: return "Connecting"
 case .disconnected: return "Disconnected"
 case .disconnecting: return "Disconnecting"
 case .none: return "None"
 default: return "Unknown"
 }
 }
}
Uruchamianie kodu
Aplikację można skompilować i uruchomić w symulatorze systemu iOS, wybierając pozycję Uruchom produkt> lub za pomocą skrótu klawiaturowego .-R.
Możliwość dołączenia do rozmowy w pokoju i wyświetlania ról uczestników rozmowy jest dostępna w zestawie iOS Mobile Calling SDK w wersji 2.5.0 lub nowszej.
Aby uzyskać więcej informacji na temat ról uczestników rozmów w pokojach, zobacz Interfejs API pomieszczeń do spotkań strukturalnych.
Implementowanie przykładowej aplikacji
Aby zaimplementować kod potrzebny do dołączenia uczestników do połączenia w pokojach, pobierz z usługi GitHub przykładową aplikację Room Call.
Konfigurowanie projektu
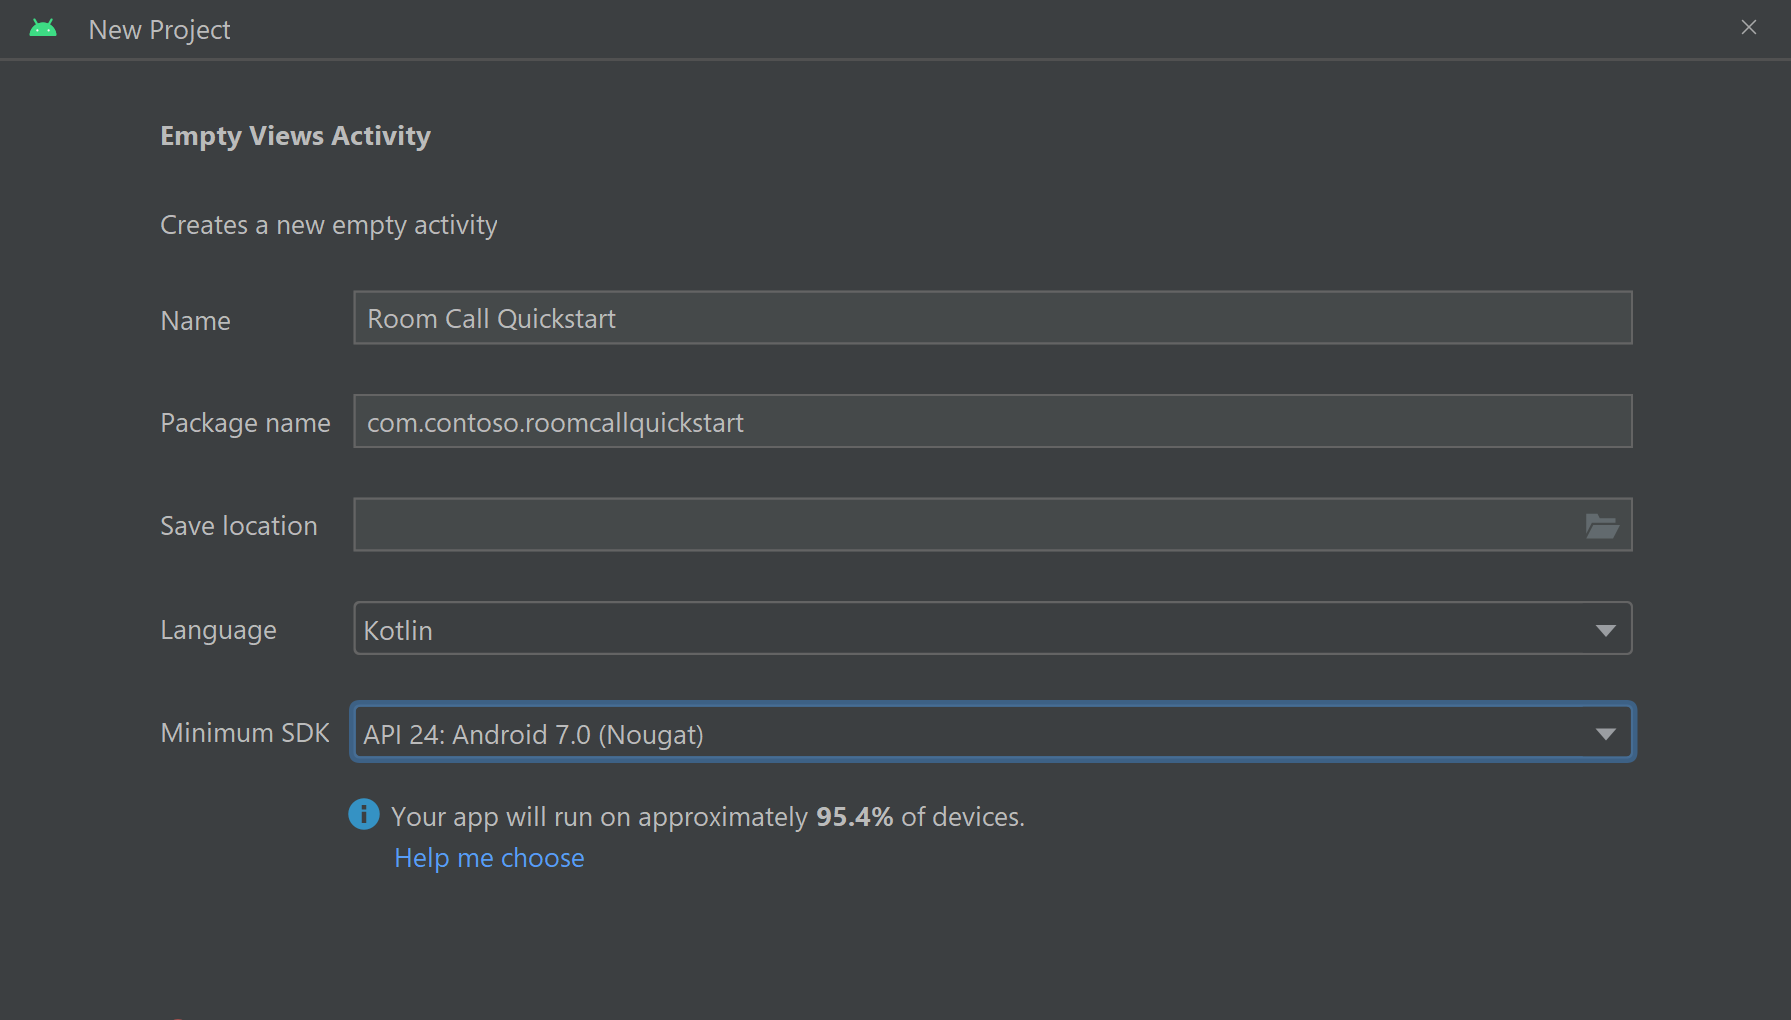
Tworzenie aplikacji systemu Android z pustym działaniem
W programie Android Studio utwórz nowy projekt:
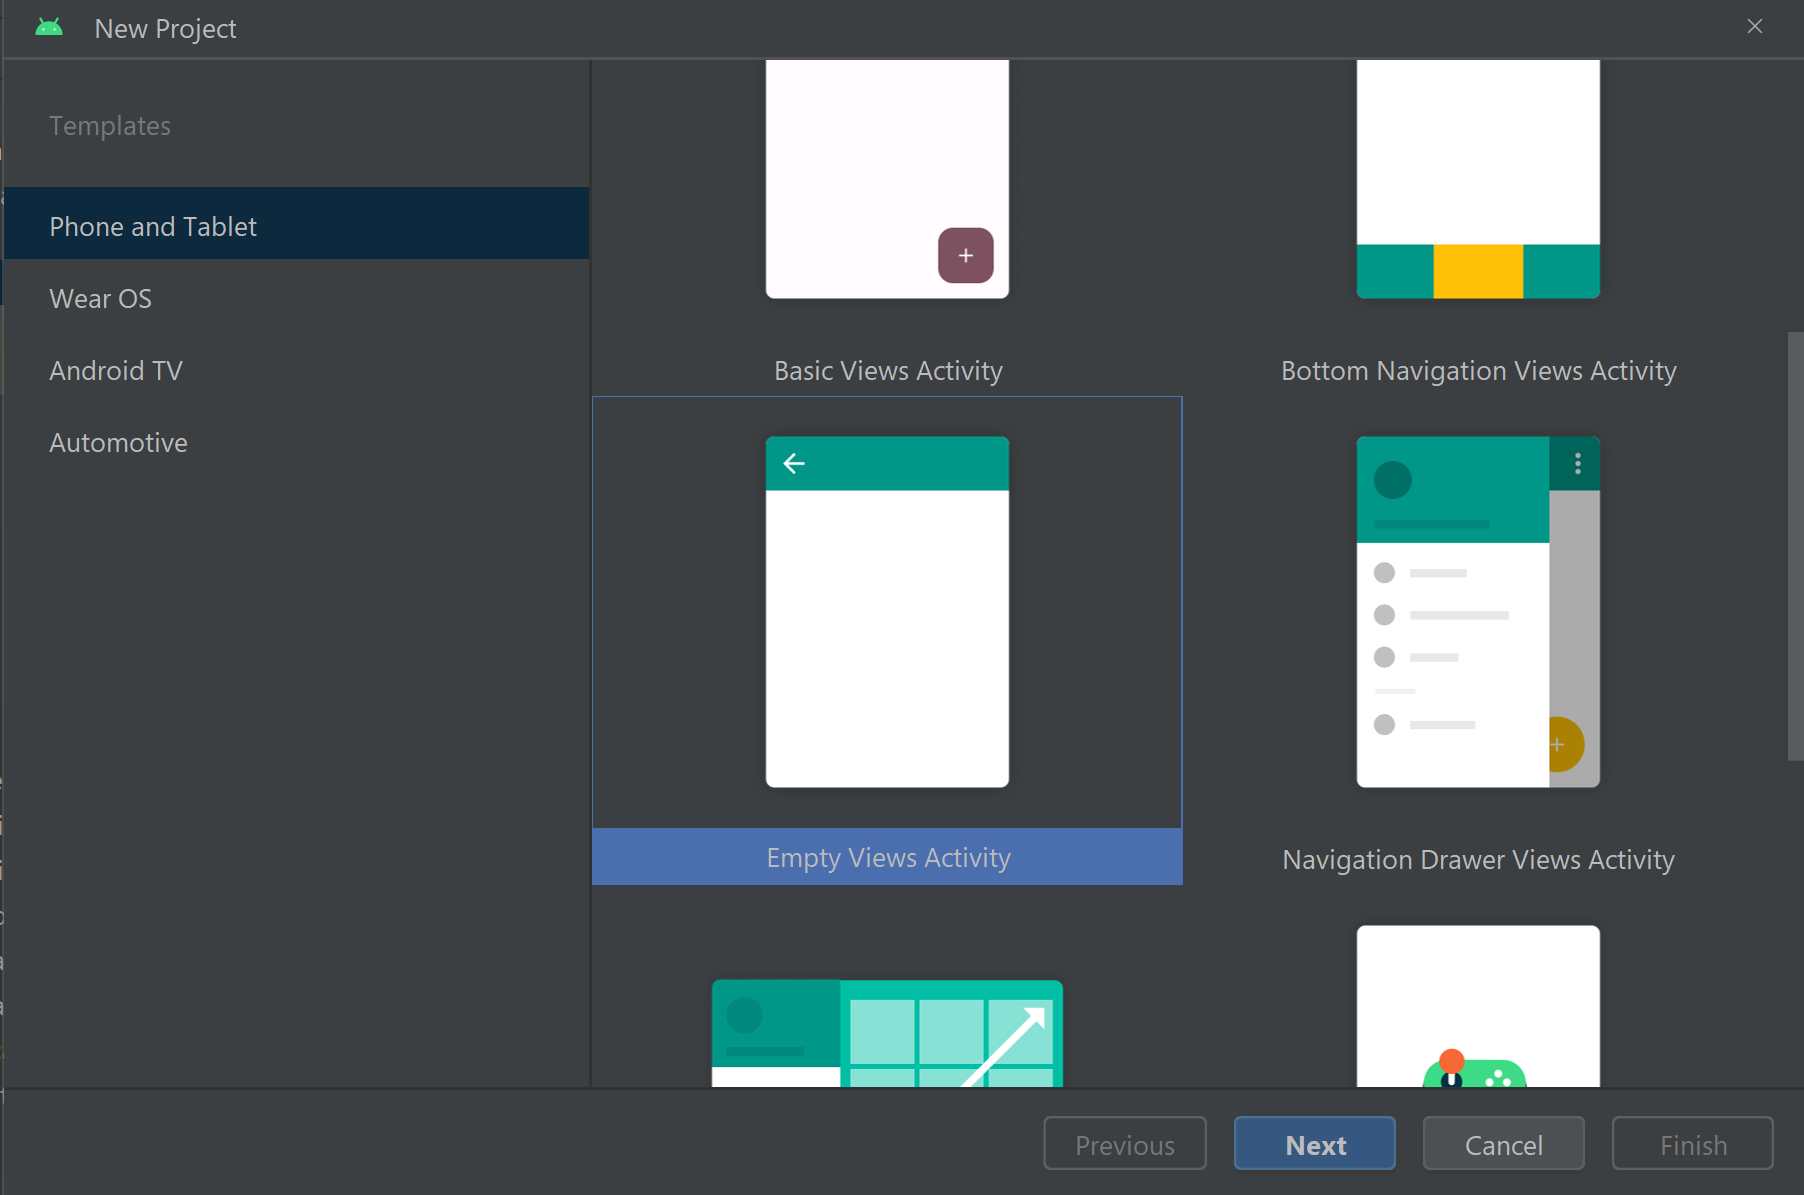
Nadaj projektowi nazwę Room Call Quickstart i wybierz pozycję Kotlin.
Instalowanie pakietu
W poziomie modułu build.gradle, dodaj następujący wiersz do sekcji dependencies.
dependencies {
    ...
    //Ability to join a Rooms calls is available in 2.4.0 or above.
    implementation 'com.azure.android:azure-communication-calling:2.4.0'
    ...
}
Dodawanie uprawnień do manifestu aplikacji
Aby zażądać uprawnień wymaganych do wywołania, najpierw zadeklaruj uprawnienia w manifeście aplikacji (app/src/main/AndroidManifest.xml). Skopiuj następujące elementy do pliku manifestu:
<?xml version="1.0" encoding="utf-8"?>
<manifest xmlns:android="http://schemas.android.com/apk/res/android">

    <uses-feature
        android:name="android.hardware.camera"
        android:required="false" />

    <uses-permission android:name="android.permission.INTERNET" />
    <uses-permission android:name="android.permission.ACCESS_NETWORK_STATE" />
    <uses-permission android:name="android.permission.ACCESS_WIFI_STATE" />
    <uses-permission android:name="android.permission.RECORD_AUDIO" />
    <uses-permission android:name="android.permission.CAMERA" />

    <application
        android:allowBackup="true"
        android:icon="@mipmap/ic_launcher"
        android:label="@string/app_name"
        android:roundIcon="@mipmap/ic_launcher_round"
        android:supportsRtl="true"
        android:theme="@style/Theme.AppTheme">

        <!--Our Calling SDK depends on the Apache HTTP SDK.
    When targeting Android SDK 28+, this library needs to be explicitly referenced.
    See https://developer.android.com/about/versions/pie/android-9.0-changes-28#apache-p-->
        <uses-library android:name="org.apache.http.legacy" android:required="false"/>
        <activity
            android:name=".MainActivity"
            android:exported="true">
            <intent-filter>
                <action android:name="android.intent.action.MAIN" />

                <category android:name="android.intent.category.LAUNCHER" />
            </intent-filter>
        </activity>
    </application>

</manifest>
Konfigurowanie układu aplikacji
Potrzebujesz pola tekstowego dla identyfikatora pokoju, przycisku do rozpoczęcia połączenia i dodatkowego przycisku do zakończenia połączenia.
app/src/main/res/layout/activity_main.xml Otwórz plik i zastąp zawartość pliku następującym kodem:
<?xml version="1.0" encoding="utf-8"?>
<androidx.constraintlayout.widget.ConstraintLayout
    xmlns:android="http://schemas.android.com/apk/res/android"
    xmlns:app="http://schemas.android.com/apk/res-auto"
    xmlns:tools="http://schemas.android.com/tools"
    android:layout_width="match_parent"
    android:layout_height="match_parent"
    tools:context=".MainActivity">

    <TextView
        android:id="@+id/text_role"
        android:layout_width="wrap_content"
        android:layout_height="wrap_content"
        android:text="Role:"
        android:textSize="16sp"
        android:textStyle="bold"
        app:layout_constraintTop_toTopOf="parent"
        app:layout_constraintStart_toStartOf="parent"
        app:layout_constraintEnd_toEndOf="parent"
        android:layout_marginTop="16dp" />

    <TextView
        android:id="@+id/text_call_status"
        android:layout_width="wrap_content"
        android:layout_height="wrap_content"
        android:text="Call Status"
        android:textSize="16sp"
        android:textStyle="bold"
        app:layout_constraintTop_toTopOf="parent"
        app:layout_constraintStart_toStartOf="parent"
        app:layout_constraintEnd_toEndOf="parent"
        android:layout_marginTop="48dp" />

    <EditText
        android:id="@+id/room_id"
        android:layout_width="match_parent"
        android:layout_height="wrap_content"
        android:ems="10"
        android:hint="Room ID"
        android:inputType="textPersonName"
        android:layout_marginTop="100dp"
        android:layout_marginHorizontal="20dp"
        app:layout_constraintTop_toTopOf="parent"
        app:layout_constraintStart_toStartOf="parent"
        app:layout_constraintEnd_toEndOf="parent" />

    <LinearLayout
        android:layout_width="match_parent"
        android:layout_height="wrap_content"
        android:layout_marginBottom="260dp"
        android:gravity="center"
        app:layout_constraintBottom_toBottomOf="parent"
        app:layout_constraintEnd_toEndOf="parent"
        app:layout_constraintStart_toStartOf="parent">

        <Button
            android:id="@+id/call_button"
            android:layout_width="wrap_content"
            android:layout_marginEnd="32dp"
            android:layout_height="wrap_content"
            android:text="Start Call" />

        <Button
            android:id="@+id/hangup_button"
            android:layout_width="wrap_content"
            android:layout_height="wrap_content"
            android:text="Hangup" />

    </LinearLayout>

</androidx.constraintlayout.widget.ConstraintLayout>
Tworzenie głównego działania
Po utworzeniu układu możesz dodać logikę do rozpoczęcia rozmowy w Room. Działanie obsługuje żądanie uprawnień środowiska uruchomieniowego, tworzenie agenta wywołania i umieszczanie wywołania, gdy uczestnik naciska przycisk.
Metoda onCreate wywołuje metodę getAllPermissions i createAgent, i dodaje powiązania dla przycisku wywołania.
To zdarzenie występuje tylko raz po utworzeniu działania. Aby uzyskać więcej informacji na temat onCreateprogramu , zobacz Omówienie cyklu życia działania.
MainActivity.kt Otwórz plik i zastąp zawartość następującym kodem:
package com.contoso.roomscallquickstart

import android.Manifest
import android.annotation.SuppressLint
import android.content.pm.PackageManager
import android.media.AudioManager
import android.os.Bundle
import android.widget.Button
import android.widget.EditText
import android.widget.TextView
import android.widget.Toast
import androidx.appcompat.app.AppCompatActivity
import androidx.core.app.ActivityCompat
import com.azure.android.communication.calling.Call
import com.azure.android.communication.calling.CallAgent
import com.azure.android.communication.calling.CallClient
import com.azure.android.communication.calling.HangUpOptions
import com.azure.android.communication.calling.JoinCallOptions
import com.azure.android.communication.calling.RoomCallLocator
import com.azure.android.communication.common.CommunicationTokenCredential
import java.util.concurrent.ExecutionException

class MainActivity : AppCompatActivity() {
    private val allPermissions = arrayOf(
        Manifest.permission.RECORD_AUDIO,
        Manifest.permission.CAMERA,
        Manifest.permission.READ_PHONE_STATE
    )

    private val userToken = "<ACS_USER_TOKEN>"
    private lateinit var callAgent: CallAgent
    private var call: Call? = null

    private lateinit var roleTextView: TextView
    private lateinit var statusView: TextView

    override fun onCreate(savedInstanceState: Bundle?) {
        super.onCreate(savedInstanceState)
        setContentView(R.layout.activity_main)

        getAllPermissions()
        createCallAgent()

        val callButton: Button = findViewById(R.id.call_button)
        callButton.setOnClickListener { startCall() }

        val hangupButton: Button = findViewById(R.id.hangup_button)
        hangupButton.setOnClickListener { endCall() }

        roleTextView = findViewById(R.id.text_role)
        statusView = findViewById(R.id.text_call_status)

        volumeControlStream = AudioManager.STREAM_VOICE_CALL
    }

    /**
     * Start a call
     */
    private fun startCall() {
        if (userToken.startsWith("<")) {
            Toast.makeText(this, "Please enter token in source code", Toast.LENGTH_SHORT).show()
            return
        }

        val roomIdView: EditText = findViewById(R.id.room_id)
        val roomId = roomIdView.text.toString()
        if (roomId.isEmpty()) {
            Toast.makeText(this, "Please enter room ID", Toast.LENGTH_SHORT).show()
            return
        }

        val joinCallOptions = JoinCallOptions()

        val roomCallLocator = RoomCallLocator(roomId)
        call = callAgent.join(applicationContext, roomCallLocator, joinCallOptions)

        call?.addOnStateChangedListener { setCallStatus(call?.state.toString()) }

        call?.addOnRoleChangedListener { setRoleText(call?.callParticipantRole.toString()) }
    }

    /**
     * Ends the call previously started
     */
    private fun endCall() {
        try {
            call?.hangUp(HangUpOptions())?.get()
        } catch (e: ExecutionException) {
            Toast.makeText(this, "Unable to hang up call", Toast.LENGTH_SHORT).show()
        }
    }

    /**
     * Create the call callAgent
     */
    private fun createCallAgent() {
            try {
                val credential = CommunicationTokenCredential(userToken)
                callAgent = CallClient().createCallAgent(applicationContext, credential).get()
            } catch (ex: Exception) {
                Toast.makeText(
                    applicationContext,
                    "Failed to create call callAgent.",
                    Toast.LENGTH_SHORT
                ).show()
            }
    }

    /**
     * Request each required permission if the app doesn't already have it.
     */
    private fun getAllPermissions() {
        val permissionsToAskFor = mutableListOf<String>()
        for (permission in allPermissions) {
            if (ActivityCompat.checkSelfPermission(this, permission) != PackageManager.PERMISSION_GRANTED) {
                permissionsToAskFor.add(permission)
            }
        }
        if (permissionsToAskFor.isNotEmpty()) {
            ActivityCompat.requestPermissions(this, permissionsToAskFor.toTypedArray(), 1)
        }
    }

    /**
     * Ensure all permissions were granted, otherwise inform the user permissions are missing.
     */
    override fun onRequestPermissionsResult(
        requestCode: Int,
        permissions: Array<out String>,
        grantResults: IntArray
    ) {
        super.onRequestPermissionsResult(requestCode, permissions, grantResults)
        var allPermissionsGranted = true
        for (result in grantResults) {
            allPermissionsGranted = allPermissionsGranted && (result == PackageManager.PERMISSION_GRANTED)
        }
        if (!allPermissionsGranted) {
            Toast.makeText(this, "All permissions are needed to make the call.", Toast.LENGTH_LONG).show()
            finish()
        }
    }

    @SuppressLint("SetTextI18n")
    private fun setCallStatus(status: String?) {
        runOnUiThread {
            statusView.text = "Call Status: $status"
        }
    }
    @SuppressLint("SetTextI18n")
    private fun setRoleText(role: String?) {
        runOnUiThread {
            roleTextView.text = "Role: $role"
        }
    }
}
Uwaga
Podczas projektowania aplikacji należy wziąć pod uwagę, kiedy musisz zażądać tych uprawnień. Zalecamy wnioskowanie o uprawnienia wtedy, gdy są potrzebne, a nie z wyprzedzeniem. Aby uzyskać więcej informacji, zobacz Przewodnik po uprawnieniach systemu Android.
Uruchamianie projektu
Przed uruchomieniem projektu zastąp wartość <ACS_USER_TOKEN> w pliku MainActivity.kt tokenem dostępu użytkownika usług Azure Communication Services.
private val userToken = "<ACS_USER_TOKEN>"
Uruchom projekt na emulatorze lub urządzeniu fizycznym.
Poszukaj pola do wprowadzenia identyfikatora pokoju oraz przycisku, aby rozpocząć rozmowę w pokoju. Wprowadź identyfikator pokoju i sprawdź, czy zmienił się zarówno stan połączenia, jak i Twoja rola.
O tym, jak dołączyć do rozmowy w pokoju
Cały kod, który dodałeś do aplikacji, pozwala pomyślnie rozpocząć i dołączyć do rozmowy grupowej. Musimy szczegółowo dowiedzieć się, jak to wszystko działa, oraz do jakich innych metod i obsług można uzyskać dostęp w ramach Rooms.
Połączenia do pokoi odbywają się za pomocą CallAgent, które jest tworzone z użyciem prawidłowego tokena użytkownika.
private fun createCallAgent() {
    try {
        val credential = CommunicationTokenCredential(userToken)
        callAgent = CallClient().createCallAgent(applicationContext, credential).get()
    } catch (ex: Exception) {
        Toast.makeText(
            applicationContext,
            "Failed to create call callAgent.",
            Toast.LENGTH_SHORT
        ).show()
    }
}
Uczestnicy mogą użyć CallAgent i RoomCallLocator do dołączenia do wywołania pokoju przy użyciu metody CallAgent.join, która zwraca obiekt Call:
 val joinCallOptions = JoinCallOptions()
 val roomCallLocator = RoomCallLocator(roomId)
 call = callAgent.join(applicationContext, roomCallLocator, joinCallOptions)
Możesz jeszcze bardziej dostosować plik MainActivity.kt, subskrybując zdarzenia Call aby otrzymywać aktualizacje:
call.addOnRemoteParticipantsUpdatedListener { args: ParticipantsUpdatedEvent? ->
    handleRemoteParticipantsUpdate(
        args!!
    )
}

call.addOnStateChangedListener { args: PropertyChangedEvent? ->
    this.handleCallOnStateChanged(
        args!!
    )
}
Można rozszerzyć MainActivity.kt , aby wyświetlić rolę uczestników lokalnego lub zdalnego wywołania, korzystając z tych metod i procedur obsługi:
// Get your role in the call
call.getCallParticipantRole();

// Subscribe to changes for your role in a call
private void isCallRoleChanged(PropertyChangedEvent propertyChangedEvent) {
    // handle self-role change
}

call.addOnRoleChangedListener(isCallRoleChanged);

// Subscribe to role changes for remote participants
private void isRoleChanged(PropertyChangedEvent propertyChangedEvent) {
    // handle remote participant role change
}

remoteParticipant.addOnRoleChangedListener(isRoleChanged);

// Get role of the remote participant
remoteParticipant.getCallParticipantRole();
Możliwość dołączenia do połączenia w pokoju i wyświetlania ról uczestników połączenia jest dostępna w zestawie Android Mobile Calling SDK w wersji 2.4.0 lub nowszej.
Aby uzyskać więcej informacji na temat ról uczestników rozmów w pokojach, zobacz Interfejs API pomieszczeń do spotkań strukturalnych.
Implementowanie przykładowej aplikacji
Aby dołączyć do rozmowy w pokoju, skonfiguruj aplikację systemu Windows, używając przewodnika Dodawanie wywołania wideo do aplikacji klienckiej.
Alternatywnie, aby zaimplementować kod potrzebny do dołączenia uczestników do rozmowy w pokojach, pobierz z usługi GitHub przykładową aplikację Room Call.
Utwórz element callAgent z prawidłowym tokenem użytkownika:
var creds = new CallTokenCredential("<user-token>");

CallAgentOptions callAgentOptions = new CallAgentOptions();
callAgentOptions.DisplayName = "<display-name>";
callAgent = await callClient.CreateCallAgentAsync(creds, callAgentOptions);
Użyj callAgent i RoomCallLocator , aby dołączyć do rozmowy w pokoju; metoda CallAgent.JoinAsync zwraca obiekt CommunicationCall.
RoomCallLocator roomCallLocator = new RoomCallLocator('<RoomId>');

CommunicationCall communicationCall = await callAgent.JoinAsync(roomCallLocator, joinCallOptions);
Subskrybuj zdarzenia CommunicationCall aby otrzymywać aktualizacje.
private async void CommunicationCall_OnStateChanged(object sender, PropertyChangedEventArgs args) {
	var call = sender as CommunicationCall;
	if (sender != null)
	{
		switch (call.State){
			// Handle changes in call state
		}
	}
}
Aby wyświetlić rolę uczestników połączeń, zasubskrybuj zmiany roli:
private void RemoteParticipant_OnRoleChanged(object sender, Azure.Communication.Calling.WindowsClient.PropertyChangedEventArgs args)
{
    _ = Windows.ApplicationModel.Core.CoreApplication.MainView.CoreWindow.Dispatcher.RunAsync(CoreDispatcherPriority.Normal, () =>
    {
        System.Diagnostics.Trace.WriteLine("Raising Role change, new Role: " + remoteParticipant_.Role);
        PropertyChanged(this, new System.ComponentModel.PropertyChangedEventArgs("RemoteParticipantRole"));
    });
}
Możliwość dołączenia do połączenia pokoju i wyświetlania ról uczestników połączeń jest dostępna w wersji NuGet systemu Windows w wersji 1.1.0 lub nowszej.
Aby uzyskać więcej informacji na temat ról uczestników rozmów w pokojach, zobacz Interfejs API pomieszczeń do spotkań strukturalnych.
Następne kroki
W tej sekcji przedstawiono, jak wykonać następujące działania:
- Dodawanie wywołania wideo do aplikacji
- Przekazywanie identyfikatora pokoju do wywołującego zestawu SDK
- Dołączanie połączenia pokoju z aplikacji
Możesz również wykonać następujące czynności:
- Dowiedz się więcej na temat koncepcji pomieszczeń
- Dowiedz się o koncepcjach połączeń głosowych i wideo
- Dowiedz się więcej o pojęciach dotyczących uwierzytelniania