Notatka
Dostęp do tej strony wymaga autoryzacji. Może spróbować zalogować się lub zmienić katalogi.
Dostęp do tej strony wymaga autoryzacji. Możesz spróbować zmienić katalogi.
The Service Fabric Reliable Services extension for VS Code makes it easy to build Java Service Fabric applications on Windows, Linux, and macOS operating systems.
This article shows you how to build, deploy, and debug a Java Service Fabric application using Visual Studio Code.
Ważne
Aplikacje Java usługi Service Fabric można opracowywać na maszynach z systemem Windows, ale można je wdrażać tylko w klastrach systemu Linux platformy Azure. Debugowanie aplikacji Java nie jest obsługiwane w systemie Windows.
Wymagania wstępne
W tym artykule założono, że masz już zainstalowany program VS Code, rozszerzenie usługi Service Fabric Reliable Services dla programu VS Code i wszelkie zależności wymagane dla środowiska projektowego. Aby dowiedzieć się więcej, zobacz Wprowadzenie.
Pobierz przykład
This article uses the Voting application in the Service Fabric Java application quickstart sample GitHub repository.
Aby sklonować repozytorium na maszynę dewelopera, uruchom następujące polecenie w oknie terminalu (okno poleceń w systemie Windows):
git clone https://github.com/Azure-Samples/service-fabric-java-quickstart.git
Otwieranie aplikacji w programie VS Code
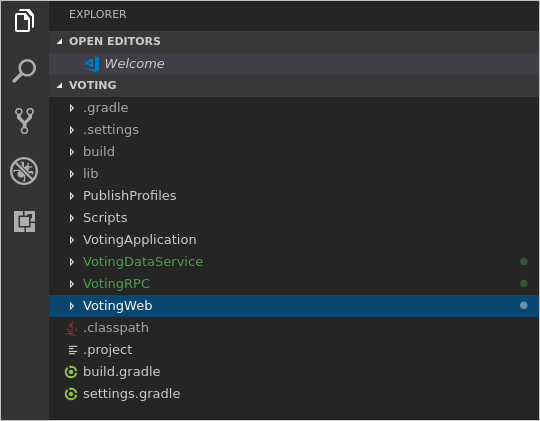
Otwórz program VS Code. Click the Explorer icon in the Activity Bar and click Open Folder, or click File -> Open Folder. Navigate to the ./service-fabric-java-quickstart/Voting directory in the folder where you cloned the repository then click OK. The workspace should contain the same files shown in the screenshot below.
Kompilowanie aplikacji
Naciśnij (Ctrl + Shift + p), aby otworzyć paletę poleceń w programie VS Code.
Wyszukaj i wybierz polecenie Service Fabric: Build Application (Skompiluj aplikację). Dane wyjściowe kompilacji są wysyłane do zintegrowanego terminalu.

Wdrażanie aplikacji w klastrze lokalnym
Po skompilowania aplikacji można ją wdrożyć w klastrze lokalnym.
Ważne
Wdrażanie aplikacji Java w klastrze lokalnym nie jest obsługiwane na maszynach z systemem Windows.
Z palety poleceń wybierz polecenie Service Fabric: Deploy Application (Localhost). Dane wyjściowe procesu instalacji są wysyłane do zintegrowanego terminalu.

Po zakończeniu wdrażania uruchom przeglądarkę i otwórz program Service Fabric Explorer:
http://localhost:19080/Explorer. Powinien zostać wyświetlony komunikat, że aplikacja jest uruchomiona. Może to zająć trochę czasu, więc bądź cierpliwy.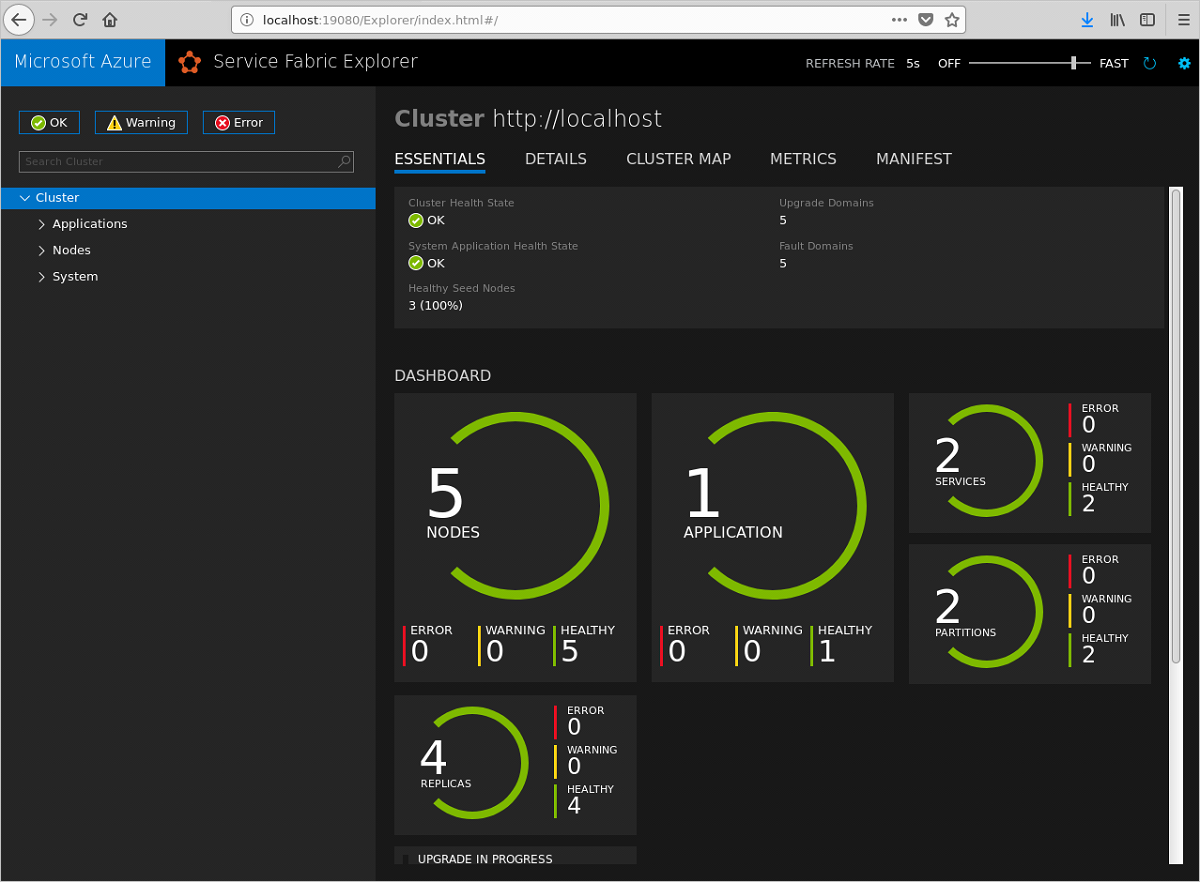
After you've verified that the application is running, launch a browser and open this page:
http://localhost:8080. Jest to fronton internetowy aplikacji. You can add items and click on them to vote.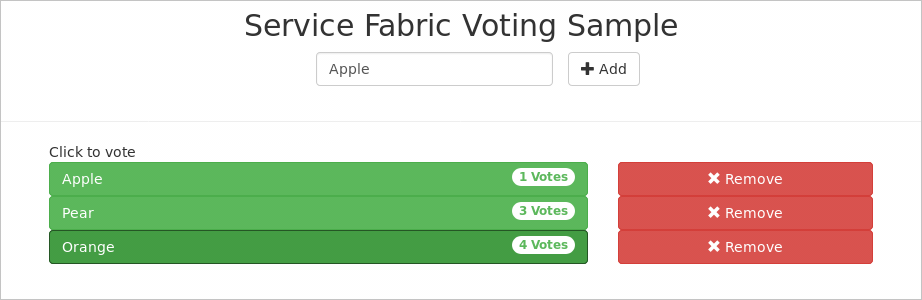
To remove the application from the cluster, select the Service Fabric: Remove Application command from the Command Palette. The output of the uninstall process is sent to the integrated terminal. You can use Service Fabric Explorer to verify that the application has been removed from the local cluster.
Debugowanie aplikacji
Podczas debugowania aplikacji w programie VS Code aplikacja musi być uruchomiona w klastrze lokalnym. Punkty przerwania można następnie dodać do kodu.
Ważne
Debugging Java applications is not supported on Windows machines.
To prepare the VotingDataService and the Voting application for debugging, complete the following steps:
Update the Voting/VotingApplication/VotingDataServicePkg/Code/entryPoint.sh file. Comment out the command on line 6 (use '#') and add the following command to the bottom of the file:
java -Xdebug -Xrunjdwp:transport=dt_socket,address=8001,server=y,suspend=n -Djava.library.path=$LD_LIBRARY_PATH -jar VotingDataService.jarUpdate the Voting/VotingApplication/ApplicationManifest.xml file. Set the MinReplicaSetSize and the TargetReplicaSetSize attributes to "1" in the StatefulService element:
<StatefulService MinReplicaSetSize="1" ServiceTypeName="VotingDataServiceType" TargetReplicaSetSize="1">Kliknij ikonę Debuguj na pasku działań , aby otworzyć widok debugera w programie VS Code. Click the gear icon at the top of the debugger view and select Java from the dropdown environment menu. Plik launch.json otwiera się.
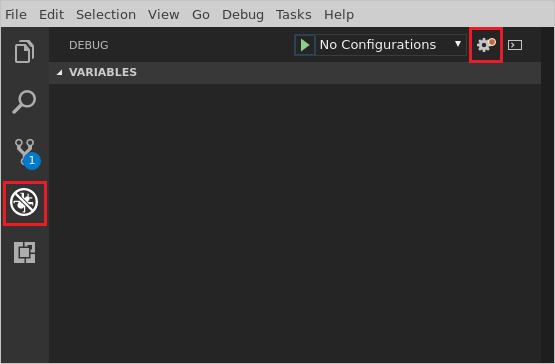
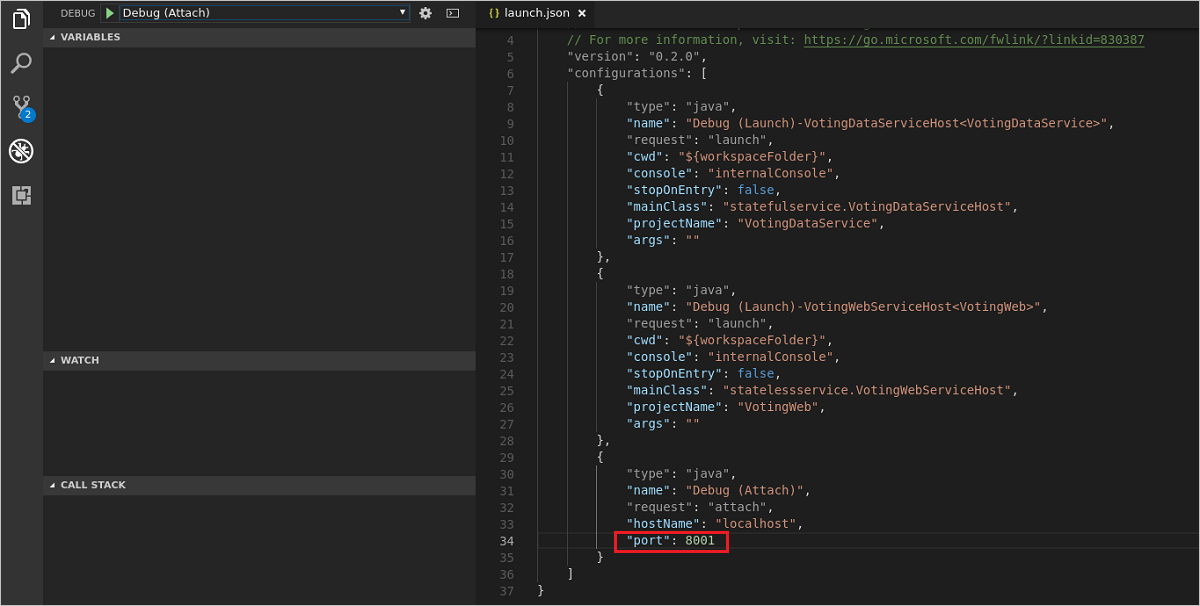
In the launch.json file, set the port value in the configuration named Debug (Attach) to 8001. Zapisz plik.
Deploy the application to the local cluster by using the Service Fabric: Deploy Application (Localhost) command. Verify that the application is running in Service Fabric Explorer. Your application is now ready to be debugged.
To set a breakpoint, complete the following steps:
In Explorer, open the /Voting/VotingDataService/src/statefulservice/VotingDataService.java file. Set a breakpoint on first line of code in the
tryblock in theaddItemmethod (line 80).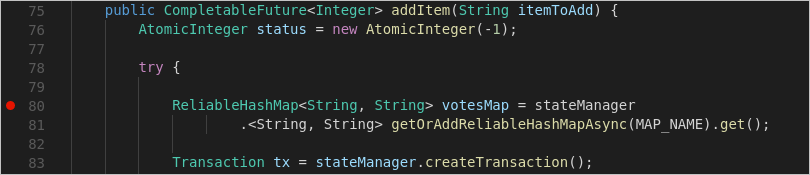
Ważne
Make sure you set breakpoints on executable lines of code. For example breakpoints set on method declarations,
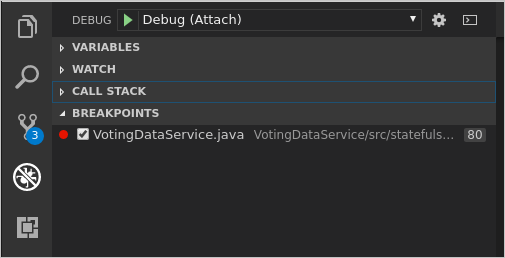
trystatements, orcatchstatements will be missed by the debugger.To begin debugging, click the Debug icon in the Activity Bar, select the Debug (Attach) configuration from the debug menu, and click the run button (green arrow).
In a web browser, go to
http://localhost:8080. Type a new item in the text box and click + Add. Your breakpoint should be hit. You can use the Debug toolbar at the top of VS Code to continue execution, step over lines, step into methods, or step out of the current method.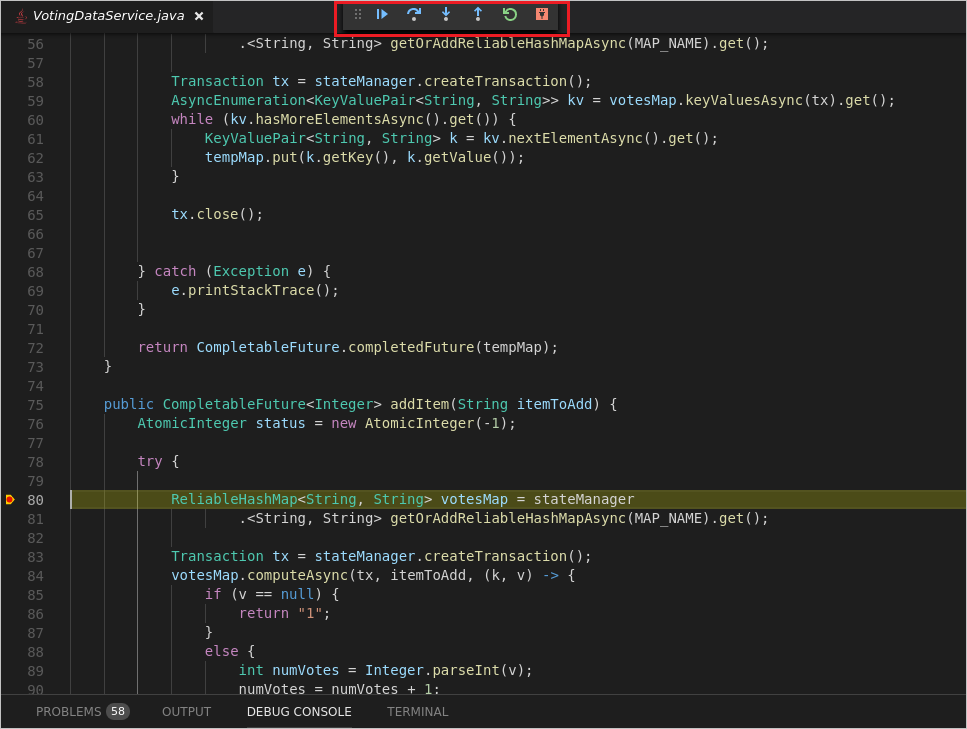
To end the debugging session, click the plug icon on the Debug toolbar at the top of VS Code.

When you've finished debugging, you can use the Service Fabric: Remove Application command to remove the Voting application from your local cluster.