Notatka
Dostęp do tej strony wymaga autoryzacji. Może spróbować zalogować się lub zmienić katalogi.
Dostęp do tej strony wymaga autoryzacji. Możesz spróbować zmienić katalogi.
Forms in model-driven apps provide the user interface (UI) that people use to create, view, or edit table records. This article explains how to create or edit forms programmatically by using the SystemForm table and form designer in customization tools. You learn how to access form definitions, understand form properties, and implement forms through code examples.
Access form definitions
The SystemForm table stores forms along with dashboards and visualizations. You can inspect the form definitions for a table in two ways:
Include the table in an unmanaged solution and export the solution.
Query the
SystemFormtable.
View FormXML from an exported table
An exported managed solution includes only definitions of system forms that you customize. To view the definition of a system form, you must either change the form or create a new form by saving the existing form with a new name.
After you export the solution, extract the contents and view the customizations.xml file. You find the definition of the forms in ImportExportXml > Entities > Entity > FormXml.
In the <FormXml> node, each type of form is grouped in a <forms> element with the type parameter specifying the type of form.
Form properties
The following table describes key SystemForm table columns and the corresponding data included in the XML elements exported with the solution.
| SystemForm property | FormXML element | Description |
|---|---|---|
AncestorFormId |
<ancestor> |
Unique identifier of the parent form. Set this property when you create a new form by using Save As for an existing form or by using the SDK for .NET CopySystemFormRequest class or Web API CopySystemForm action. |
CanBeDeleted |
<CanBeDeleted> |
Information that specifies whether this component can be deleted. This managed property only applies if you create the form by importing a managed solution. |
Description |
<Descriptions> |
Description is a string and <Descriptions> contains any localized labels for the description of the form.You can retrieve the localized labels by using the RetrieveLocLabelsRequest. |
FormActivationState |
<FormActivationState> |
Specifies the state of the form. Only forms of type "main" can be deactivated. Valid values: -0: Inactive-1: Active |
FormId |
<formid> |
Unique identifier of the form |
FormPresentation |
<FormPresentation> |
Specifies whether this form is in the updated UI layout in Microsoft Dataverse. |
FormXml |
<form> |
XML representation of the form layout. |
IntroducedVersion |
<IntroducedVersion> |
Version of the solution that the form was added in. |
IsAIRMerged |
N/A | Specifies whether this form is merged with the updated UI layout in Dataverse. |
IsCustomizable |
<IsCustomizable> |
Information that specifies whether this component can be customized. This managed property only applies if you create the form by importing a managed solution. |
IsDefault |
N/A | Information that specifies whether the form or the dashboard is the system default. |
Name |
<LocalizedNames> |
Name is a string and <LocalizedNames> contains any localized labels for the name of the form.You can retrieve the localized labels by using the RetrieveLocLabelsRequest. |
ObjectTypeCode |
The form is a descendant of the Entity element. |
The ObjectTypeCode value is the table logical name. |
Type |
<forms> element type parameter |
Valid values for forms are: - 2: main-5: mobile-6: quick-7: quickCreate |
Create and edit forms
You can create new forms only for tables where EntityMetadata.CanCreateForms allows it.
Create new forms by creating them directly or by using the CopySystemForm message. Use the SDK for .NET CopySystemFormRequest class or the Web API CopySystemForm action. When you use the CopySystemForm message or Save As in the form editor, there's no inheritance between forms. Therefore, changes to the base form don't automatically apply to any forms created from it.
You can edit form definitions by exporting a managed solution, editing the form definitions, and then reimporting the solution. When you manually edit forms, use an XML editor that supports schema validation. For more information, see Edit the customizations XML file with schema validation.
Open main form in a dialog by using client API
To open the main form in a dialog by using client API, call the Xrm.Navigation.navigateTo method. The Xrm.Navigation.navigateTo API method opens the dialog with several options, including the size and position.
Note
The Xrm.Navigation.openForm method doesn't support opening a main form as a dialog.
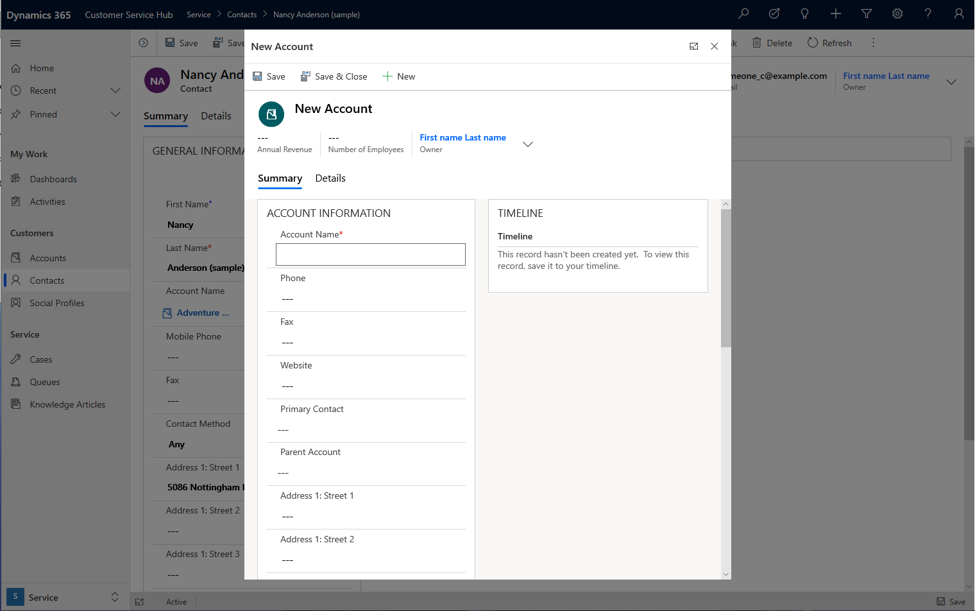
Example: Open a new record
In this example, the dialog opens a new account form for creating a new record. The dialog pops up in the center by using up to 50% of the available window as a modal on top of the form it was invoked or called from.
var pageInput = {
    pageType: "entityrecord",
    entityName: "account",
    formType: 2,
};
var navigationOptions = {
    target: 2,
    width: {value: 50, unit:"%"},
    position: 1
};
Xrm.Navigation.navigateTo(pageInput, navigationOptions);
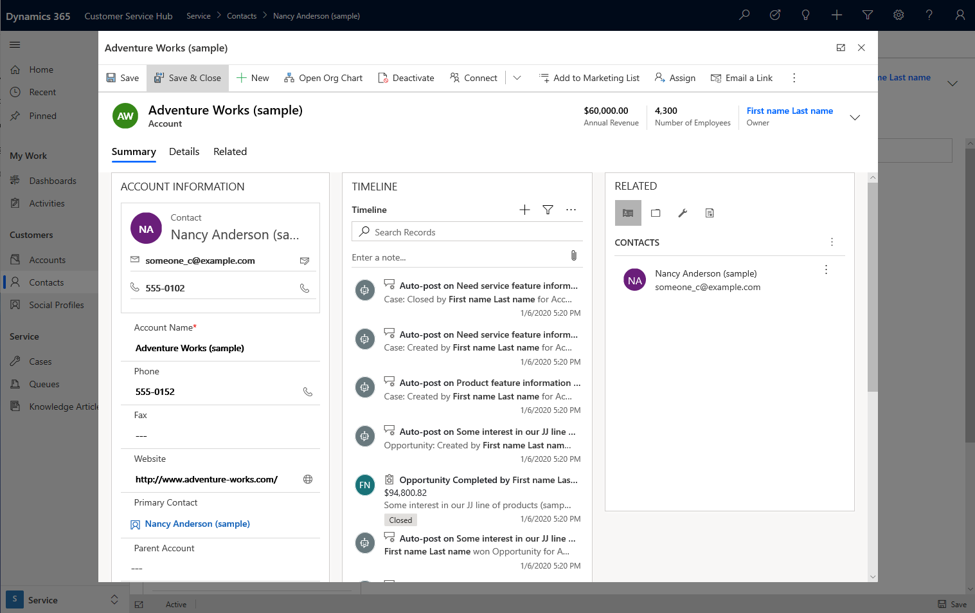
Example: Open an existing record
In this example, the dialog opens an existing account record by using the account ID value over the contact form. Replace the ID with any record ID value to open the record in the dialog.
var pageInput = {
    pageType: "entityrecord",
    entityName: "account",
    formType: 2,
    entityId: "00aa00aa-bb11-cc22-dd33-44ee44ee44ee" //replace with actual ID
};
var navigationOptions = {
    target: 2,
    width: {value: 80, unit:"%"},
    position: 1
};
Xrm.Navigation.navigateTo(pageInput, navigationOptions);
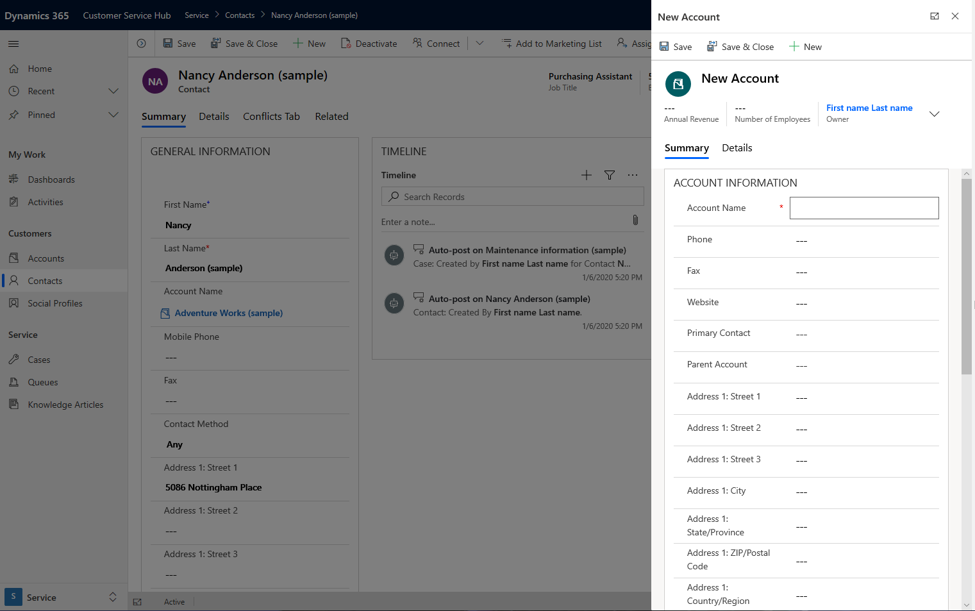
Example: Open a new record on the side pane
In this example, the dialog opens a new record in the right corner of the window. You can achieve this behavior by using the pixel options.
var pageInput = {
    pageType: "entityrecord",
    entityName: "account",
    formType: 2,
};
var navigationOptions = {
    target: 2,
    width: {value: 500, unit:"px"},
    position: 2
};
Xrm.Navigation.navigateTo(pageInput, navigationOptions);
Example: Open main form in a dialog with callback method
This example shows how to invoke a main form dialog with a callback method after saving a record and closing the dialog.
var pageInput = {
    pageType: "entityrecord",
    entityName: "account",
    formType: 2
};
var navigationOptions = {
    target: 2,
    width: {value: 80, unit:"%"},
    position: 2
};
Xrm.Navigation.navigateTo(pageInput, navigationOptions).then(
    function success(result) {
            console.log("Record created with ID: " + result.savedEntityReference[0].id +
            " Name: " + result.savedEntityReference[0].name)
            // Handle dialog closed
    },
    function error() {
            // Handle errors
    }
);
See also
Create and design forms
SystemForm table
Form XML schema
Xrm.Navigation.navigateTo