Install Release Management server and client
| TFS 2015 | Previous version

Important
Release Management features have been integrated into Azure Pipelines and Team Foundation Server (TFS). For more information, see Build and Release in Azure Pipelines.
The newer web-based version is the recommended alternative to the server and client version described in this topic. If you do not already have Release Management installed, we encourage you to use the web-based version in TFS 2015 Update 2 and above or Azure Pipelines instead of the version described here. If you are already using an earlier server and client version, you should be aware that no new features will be added to these versions.
These are the instructions for installing the Release Management server and the client. Each tool has its own permission requirements. For the server, you'll need access to a SQL Server instance to complete the install. You can use the same SQL Server instance that you use for TFS or you can download SQL Server Express.
If you are upgrading to the latest version of Release Management, first uninstall the previous update of the Release Management server and client. No data will be lost when you uninstall because the SQL Server instance is not removed. Then install the latest server and client. When you configure the latest update for your Release Management server, use the same SQL Server instance that you used before for the database server.
Tip
If you installed TFS Express or basic, you have an instance of SQL Server Express available to you. If you installed TFS, you already have the necessary permissions on the SQL Server. If you don't know if you're using SQL Express, look at the Application Tier node in the TFS administration console. Scroll down to Data Tier Summary and look for SQLServerExpress to confirm.
Install the Release Management server
Before you install Release Management Server, confirm that you are a member of the Windows Administrators security group on the computer where you will install the Release Management server and a member of sysadmin server role in SQL Server.
If you have not already downloaded the Release Management server, do this now.
Note that this is a 90-day trial version of Release Management. For information about obtaining a non-trial version, see How to buy Release Management or Release Management Licensing. If you are an MSDN subscriber, you can download a non-trial version from the MSDN Subscriber website.
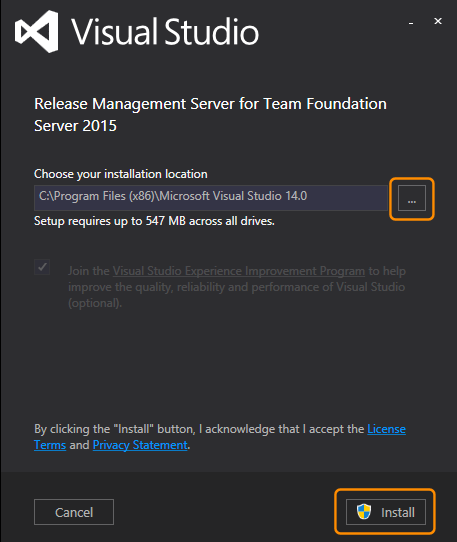
Launch rm_Server.exe. If you want to install to a specific location in the file system, choose the browse button (...) next to the default install location. Then choose Install.

Restart your computer, if prompted, and then choose Launch.
Tip
If you join the Visual Studio Experience Improvement Program, you can opt out at any time.
Specify the SQL Server instance to host the Release Management Server database and then choose Test to verify connectivity. Accept the default values for the service account and web port (Network Service and port 1000) or specify alternates. For more information, see Ports required for installation of Team Foundation Server and Accounts required for installation of Team Foundation Server. Release Management server uses the identity set here for its Application Pools in IIS and the Release Management Monitor Windows service.
Important: If you specify an alternative account as the identity for the service, this must be in the form domain\user. Do not use the format user@domain.
Choose Apply settings.

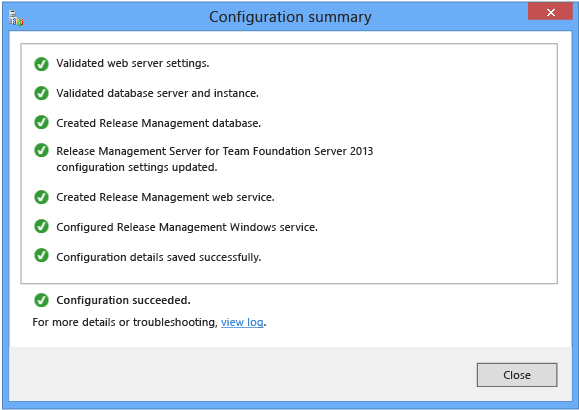
After the success message appears, close the configuration summary and the server console and then install the Release Management client (as described next). Most configuration and administration tasks take place in the client.
Install the Release Management client
Before you install Release Management Server, confirm that you are a member of the Windows Administrators security group on the computer where you will install the Release Management client.
If you have not already downloaded the Release Management client, do this now.
Note that this is a 90-day trial version of Release Management. For information about obtaining a non-trial version, see How to buy Release Management or Release Management Licensing. If you are an MSDN subscriber, you can download a non-trial version from the MSDN Subscriber website.
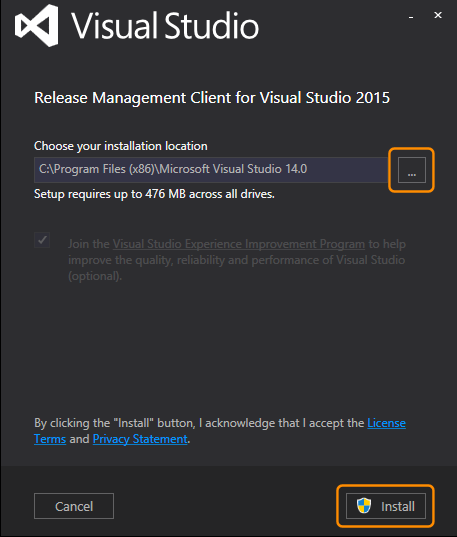
Launch rm_Client.exe. If you want to install to a specific location in the file system, choose the browse button (...) next to the default install location. Then choose Install.

Restart your computer, if prompted, and then choose Launch.
Tip
If you join the Visual Studio Experience Improvement Program, you can opt out at any time.
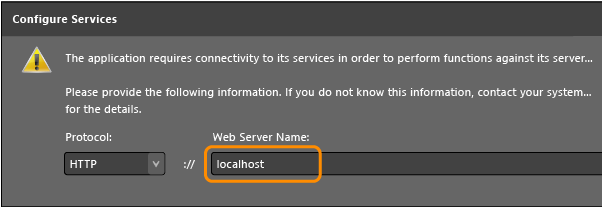
Enter the name of the Release Management server. If you're installing the client on the same computer that is running Release Management server, you can use localhost to connect to the server.

Tip
If you changed any of the default options in your Release Management server setup, you can change the protocol or port number here so that you can connect to the server.
Related topics
- Overview of Release Management
- System requirements for Release Management
- Install Release Management
- Install deployment agents
- Connect Release Management to TFS
- Manage users, groups, and permissions
- Manage your release
Help and support
Visit the Developer Community.
