Create a shopping list card
In this tutorial, you'll create a card that displays a shopping list and lets you add items. You'll use the card designer, variables, and Power Fx.
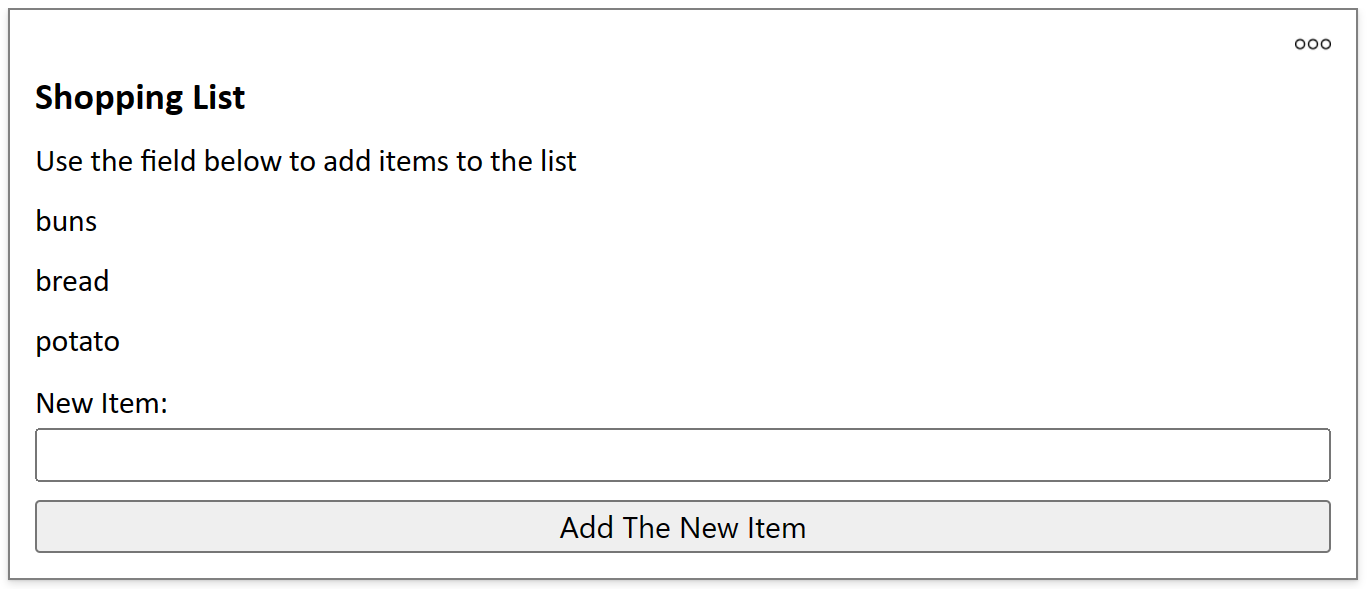
At the end of the tutorial, your shopping list card should look like the following example:
Prerequisites
- A Power Apps account
Create a card
Sign in to Power Apps and select your environment.
In the left pane, select Cards. If the item isn’t in the side panel pane, select …More and then select the item you want.
Select + Create a card.
Under Card name, type SimpleShoppingCard, and then select Create.
Select the text Your card title goes here. In the text label properties pane, set Text to Shopping List.
Select the text Add and remove element to customize your new card. In the text label properties pane, set Text to Use the box below to add items to the list.
Add a variable
The shopping list will hold individual items in separate lines of text. It looks like a table with a single column, with one grocery item in each row. That suggests you'll need to create a table variable to store your list.
In the left pane, select Variables.
Select + New variable.
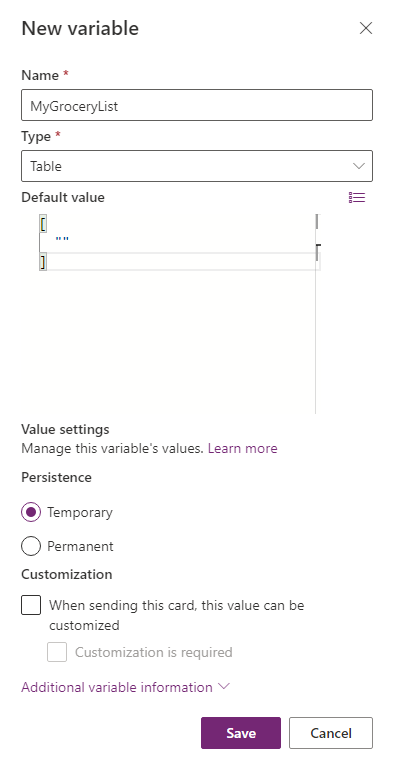
In the New variable window, enter MyGroceryList under Name. Set Type to Table.
Select the curly brackets to the right of Default value and enter "" between the brackets. This indicates that our table holds text values in a column implicitly called Value
Select Save.
Add a list to the card
In the left pane, select Insert.
In the tool pane, select Display to expand the category, and then select Text label.
In the text label properties pane, select the Advanced tab.
Set Repeat for every to MyGroceryList.
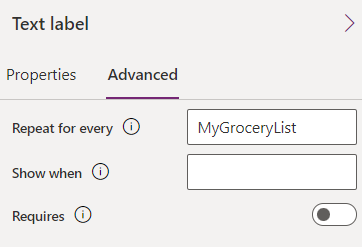
Setting a text label's Repeat for every property repeats the text label for every item in the specified table. In this example, the table,
MyGroceryList, is the variable you created. In other words, a separate text label is created in the card for every item in the grocery list.Select the Properties tab. Set Text to ThisItem.Value.
Assigning the system-defined variable
ThisItem.Valueto the text label displays the value of the current item in theMyGroceryListarray as the label text. Array is another term for a table variable. You can enter the variable name in the formula bar or the properties pane.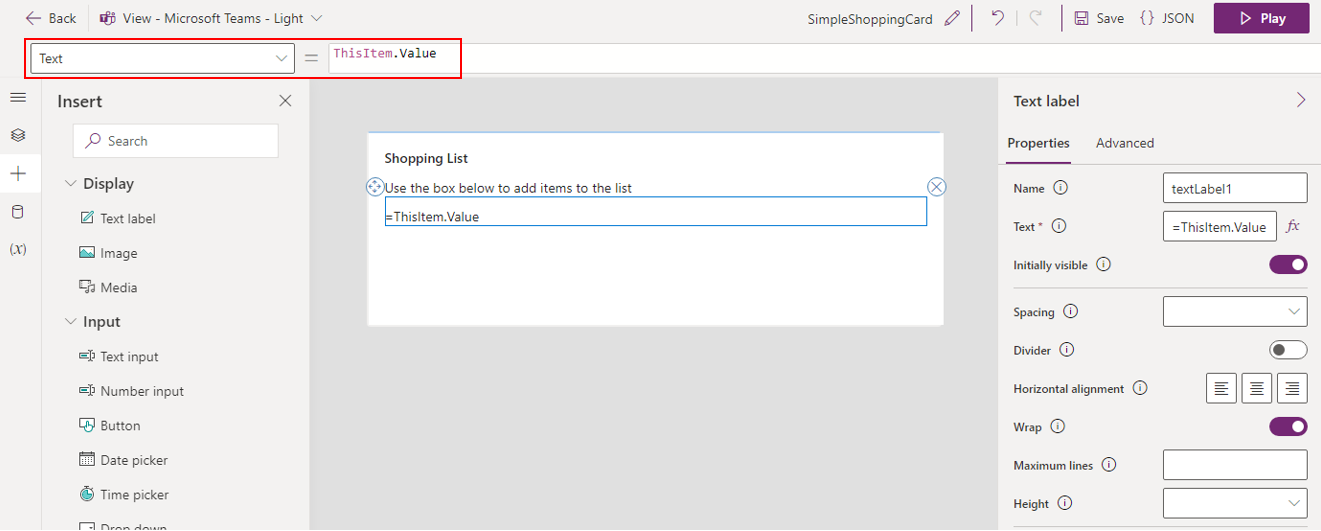
Add an input box
The list you created is empty, so in the final step, you'll give the user the ability to add items.
In the left pane, select Insert.
In the tool pane, select Input to expand the category, and then select Text input.
In the text input properties pane, set Name to NewItem and set Label to New Item:.
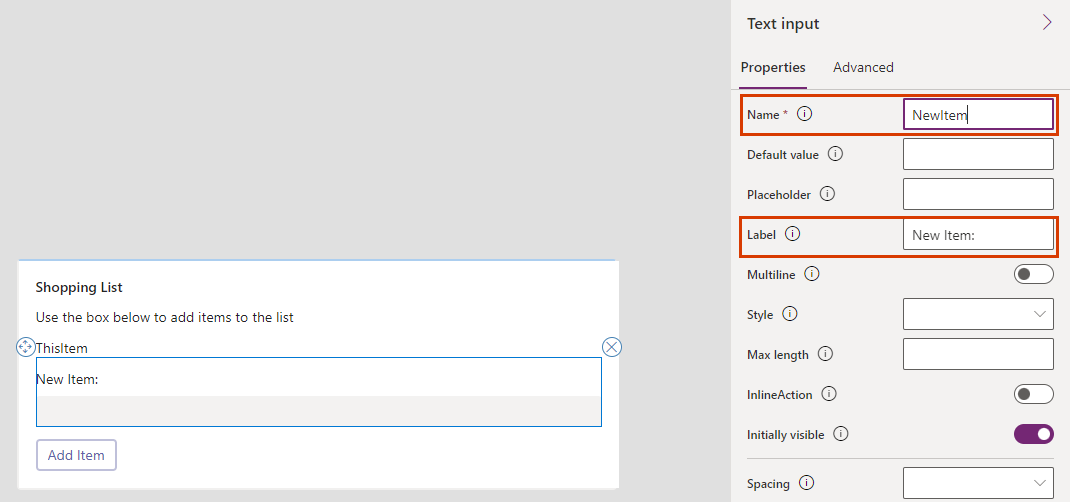
The Name property lets you refer to the control in a Power Fx expression. It has to be one word, with no spaces or special characters. The Label property is displayed in the card. The name and label of a control don't have to be similar, as they are here, but using similar names makes it easier to keep track of controls.
Add a Power Fx button
In the left pane, select Insert.
In the tool pane, select Input to expand the category, and then select Button.
In the button properties pane, set Title to Add Item.
In the properties pane, select PowerFx to place your cursor in the formula bar.
Type the following Power Fx expression in the formula bar: Collect(MyGroceryList, {Value: NewItem})
This expression uses the Power Fx function Collect to append the value of the user's input,
NewItem, to theMyGroceryListtable variable in the implicit Value column. Since the expression is bound to the button's OnSelect property, it runs when the user selects the button.
Test the card
You should always save your changes before you play a card. Select Save, and then select Play.
Test your card by adding a few items to the grocery list.
Next steps
Learn how to make a more complex card with Microsoft Dataverse connectors.
Feedback
Coming soon: Throughout 2024 we will be phasing out GitHub Issues as the feedback mechanism for content and replacing it with a new feedback system. For more information see: https://aka.ms/ContentUserFeedback.
Submit and view feedback for