Note
Access to this page requires authorization. You can try signing in or changing directories.
Access to this page requires authorization. You can try changing directories.
Most of the articles in this section of the documentation cover the runtime performance of apps as experienced by the people who use them. This article covers app performance as experienced by the people who make them.
As apps become larger and more complex, Power Apps Studio needs to load and manage larger numbers of controls, formulas, and data sources, all with interdependencies that grow exponentially. Power Apps Studio can take longer to load, and features such as IntelliSense and color coding can lag. Use the recommendations that follow to better work with large and complex apps in Power Apps Studio. They can also help to improve your apps' runtime performance.
The examples in this article use the Hospital Emergency Response sample solution.
Use App.Formulas instead of App.OnStart
Tip
You can use With function and canvas component custom output properties as an alternative to named formulas.
The best way to reduce loading time for both Power Apps Studio and your app is to replace variable and collection initialization in App.OnStart with named formulas in App.Formulas.
Let's look at the following example, which uses App.OnStart.
// Get the color of text on a dark background.
Set(varColorOnDark,RGBA(0, 0, 0, 1));

// Get the color of the menu icons.
Set(varColorMenuIcon,"#0070a9");

// Get the styles for a form.
Set(varFormStyle,
    {
        DataCard: { Height: 50 },
        Title: { Height: 50, Size: 21, Color: varColorOnDark },
        Control: { Height: 50, Size: 18 },
        Label: { Size: 18, Color: varColorOnDark }
    }
);

ClearCollect(
    FacilitiesList,
    ForAll(
        Facilities,
        { Name: 'Facility Name', Id: Facility }
    )
);
If(
    Not IsBlank(Param("FacilityID")),
    Set(ParamFacility,
        LookUp(
            FacilitiesList,
            Id = GUID(Param("FacilityID"))
        ).Name
    );
);
Because they're a sequence of statements, your app must evaluate these Set and Collect calls in order before it can display the first screen, which makes the app load more slowly. And because the entire App.OnStart must be considered as a whole, order preserved, and errors aggregated before returning the final result, the formula is complex for Power Apps Studio to analyze.
There's a better way. Use App.Formulas instead and define these variables and collections as named formulas, as in the following example.
// Get the color of text on a dark background.
varColorOnDark = RGBA(0, 0, 0, 1);

// Get the color of the menu icons.
varColorMenuIcon = "#0070a9";

// Get the styles for a form.
varFormStyle =
    {
        DataCard: { Height: 50 },
        Title: { Height: 50, Size: 21, Color: varColorOnDark },
        Control: { Height: 50, Size: 18 },
        Label: { Size: 18, Color: varColorOnDark }
    };

FacilitiesList =
    ForAll(
        Facilities,
        { Name: 'Facility Name', Id: Facility }
    );

ParamFacility =
    If( Not IsBlank(Param("FacilityID")),
        LookUp(
            FacilitiesList,
            Id = GUID(Param("FacilityID"))
        ).Name,
        Blank()
    );
This change may seem small, but it can have a huge impact. Because each named formula is independent of the others, Power Apps Studio can analyze them independently, effectively splitting a large App.OnStart into smaller pieces. We've seen Power Apps Studio load time drop by as much as 80% with this change alone.
Your app also loads faster because it doesn't have to evaluate these formulas until it needs the result. The first screen of the app is displayed immediately.
Named formulas can't be used in all situations because you can't modify them or use them with Set. Some situations require the use of a state variable that can be modified. Set is perfect for these situations and you should continue to use it. But, more often than not, you're using global variables in OnStart to set up static values that don't change. In those cases, a named formula is the better choice.
Since named formulas are immutable, the prefix var (short for "variable") as a naming convention is no longer appropriate. We didn't change the names in this example because it would require changes to the rest of the app to match.
It's tempting to place a named formula in App.OnStart, but don't. They don't belong there. As an On behavior property, App.OnStart evaluates each of its statements in order, creating global variables, and talking to databases only once, when the app is loaded. Named formulas are formulas that define how to calculate something whenever needed and are always true. It's this formula nature that allows them to be independent and allows the app to finish loading before they're evaluated.
Split up long formulas
App.OnStart is one of the worst offenders for long formulas and definitely where you should start, but it isn't the only case.
Our studies have shown that nearly all apps with a long load time for Power Apps Studio have at least one formula of more than 256,000 characters. Some apps with the longest load times have formulas of more than 1 million characters. Formulas that long put a significant strain on Power Apps Studio.
To make matters worse, copying and pasting a control with a long formula duplicates the formula in the control's properties without it being realized. Power Apps is modeled after Excel, where multiple copies of a formula are common. However, in Excel formulas are limited to one expression and are capped at 8,000 characters. Power Apps formulas can grow much longer with the introduction of imperative logic and the chaining operator (; or ;;, depending on locale).
The general solution is to split long formulas into smaller parts and reuse the parts, as we did in the previous section when we changed Set/Collect statements in App.OnStart to named formulas in App.Formulas. In other programming languages, reusable parts are often referred to as subroutines or user-defined functions. You can think of named formulas as a simple form of user-defined function with no parameters or side-effects.
Use named formulas everywhere
In the earlier example, we used named formulas as a replacement for App.OnStart. However, you can use them to replace a calculation anywhere in an app.
For example, one of the screens in the Hospital Emergency Response sample solution includes this logic in Screen.OnVisible:
ClearCollect(
    MySplashSelectionsCollection,
    {
        MySystemCol: First(
            Filter(
                Regions,
                Region = MyParamRegion
            )
        ).System.'System Name',
        MyRegionCol: First(
            Filter(
                Regions,
                Region = MyParamRegion
            )
        ).'Region Name',
        MyFacilityCol: ParamFacility,
          MyFacilityColID:  LookUp(
            FacilitiesList,
            Id = GUID(Param("FacilityID"))
        ).Id
    }
);
This formula can be split into a set of named formulas. It also makes the formula easier to read.
MyRegion = LookUp(
                    Regions,
                    Region = MyParamRegion
           );

MyFacility = LookUp(
                    FacilitiesList,
                    Id = GUID(Param("FacilityID")
            );

MySplashSelectionsCollection =
    {
        MySystemCol: MyRegion.System.'System Name',
        MyRegionCol: MyRegion.'Region Name',
        MyFacilityCol: ParamFacility,
        MyFacilityColID:  MyFacility.Id
    };
We extracted ParamFacility as a named formula earlier when we moved most of the Set calls from App.OnStart to named formulas in App.Formulas.
Named formulas are evaluated only when their values are needed. If the original intent of using Screen.OnVisible was to defer work until the screen is shown, then the work is still deferred as global named formulas in App.Formulas.
Use the With function
You can also use the With function in a formula to split up logic. Create a record in the first parameter with the values you want to use as fields, and then use those fields in the second parameter to calculate the return value from With. For example, the previous example can be written as just one named formula:
MySplashSelectionsCollection =
    With( { MyRegion: LookUp(
                            Regions,
                            Region = MyParamRegion
                      ),
            MyFacility: LookUp(
                            FacilitiesList,
                            Id = GUID(Param("FacilityID")
                      )
           },
           {
                MySystemCol: MyRegion.System.'System Name',
                MyRegionCol: MyRegion.'Region Name',
                MyFacilityCol: ParamFacility,
                MyFacilityColID:  MyFacility.Id
           }
    )
One downside to using With this way is that MyFacility can't use MyRegion because they're defined in the same With function, a problem that's not present with named formulas. One solution is to nest With functions and use the As keyword to name the record for each to give easy access to all the With variables.
Use canvas components
Canvas components are most often used to create a UI control that can be placed on the canvas just like a control. You can also use them without placing them in the UI to perform calculations with custom output properties as an alternative to named formulas. Canvas components are easy to share across apps with component libraries and, unlike named formulas, are fully supported. However, they're harder to configure and use than named formulas.
To split logic:
- In Power Apps Studio, switch to the Components tab in the Tree view.
- Create a new component.
- In the Properties pane, turn on Access app scope.
- Add a custom property.
- Set the Property type to Output and the Data type as appropriate.
- Select Create.
- In the property picker next to the formula bar at the top of the screen, select the new property.
- Write the formula for the logic to split and reuse.
To use the logic:
- Switch to the Screens tab in the Tree view.
- In the Insert pane, expand Custom and insert your component.
- To calculate a value with the property, use ComponentName.PropertyName.
Use Select with a hidden control for imperative logic
Imperative logic is used to modify state with Set and Collect, notify the user with Notify, navigate to another screen or app with Navigate and Launch, and write values to a database with Patch, SubmitForm, or RemoveIf.
Named formulas and canvas component custom output properties don't support imperative logic. A common way to split up imperative logic is to use the OnSelect property of a hidden control.
- Add a Button control to a screen.
- Set the OnSelect property to the imperative logic you want to execute.
- Set the Visible property to false, since there's no need for the user to see or interact with it.
- Call
Select( Button )when you want to execute the imperative logic.
For example, one of the screens in our sample has the following OnSelect property on a Button control. (This simple example is for illustration purposes only. Normally, you would only use this technique for longer formulas.)
btnAction_17.OnSelect =
    Trace("Feedback Screen: Submit Button",TraceSeverity.Information);
    If(
        // Proceed if all forms are validated.
        And(
            FormFeedback.Valid
        ),

        // Set the updates to static variables.
        Set(updatesFeedback,Patch(Defaults('App Feedbacks'), FormFeedback.Updates));
        // Submit the first form. Subsequent actions can be found in the OnSuccess.
        SubmitForm(FormFeedback);
        ,

        Notify("Please complete all fields before proceeding",
               NotificationType.Warning,2000)
    );
To split this logic into parts, we can put portions onto separate Button controls and Select them from the original:
btnTrace.OnSelect =
    Trace("Feedback Screen: Submit Button",TraceSeverity.Information);

btnSubmit.OnSelect =
    If(
        // Proceed if all forms are validated.
        And(
            FormFeedback.Valid
        ),

        // Set the updates to static variables.
        Set(updatesFeedback,Patch(Defaults('App Feedbacks'), FormFeedback.Updates));
        // Submit the first form. Subsequent actions can be found in OnSuccess.
        SubmitForm(FormFeedback);
        ,

        Notify("Please complete all fields before proceeding",
               NotificationType.Warning,2000)
    );

btnAction_17.OnSelect =
    Select( btnTrace );
    Select( btnSubmit );
This technique only works on the same screen. Other techniques that are slightly more complicated work across screens, like using the Toggle control, setting OnCheck to the logic you want to run, and setting Default to a global variable and then toggling the global variable with Set( global, true ); Set( global, false ) at the point you want to run the logic.
In this example, some logic splitting had already been done. The comment mentions that "Subsequent actions can be found in OnSuccess." This event runs imperative logic after the record has been successfully submitted, a solution specific to the SubmitForm function.
Partition the app
Some apps grow to thousands of controls and hundreds of data sources, which slows Power Apps Studio. As with long formulas, large apps can be split into smaller sections that work together to create one user experience.
Separate canvas apps
One approach is to implement sections in separate canvas apps and use the Launch function to navigate between the separate apps and pass needed context.
This approach was used in the Hospital Emergency Response sample solution. Separate apps manage each of the major areas of the overall app. The apps share a common switchboard component through a component library that each app shows on its startup screen:
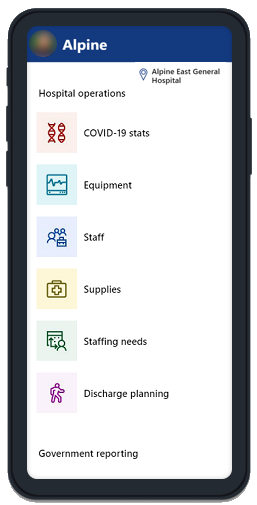
When the user selects an area, the component uses metadata about the apps available and which app is hosting the component. If the desired screen is in this app (that is, ThisItem.Screen is not blank), then a Navigate call is made. But if the desired screen is in a different app (that is, ThisItem.PowerAppID is not blank), then a Launch function is used with the App ID of the target and the FacilityID context:
If(
    IsBlank(ThisItem.Screen),
    If(IsBlank(ThisItem.PowerAppID),
        Launch(ThisItem.URL),
        Launch("/providers/Microsoft.PowerApps/apps/" & ThisItem.PowerAppID,
               "FacilityID", Home_Facility_DD.Selected.Id)
    ),
    Navigate(
        ThisItem.Screen,
        Fade
    )
);
State in the original app is lost when another app is launched. Be sure to save any state before you call the Launch function. Write it to a database, call SaveData, or pass state to the target app with parameters that are read with the Param function.
Model-driven app with custom pages
Sections can also be implemented as custom pages. Custom pages act as a mini canvas app with a model-driven app container for navigation.