Note
Access to this page requires authorization. You can try signing in or changing directories.
Access to this page requires authorization. You can try changing directories.
This article explains how to code sign for iOS. You need to sign your app for iOS if you selected iOS as one of the platforms while creating and building your wrap project.
Important
Using Xcode to digitally sign your wrapped mobile apps for iOS is not supported. Follow the instructions below to sign your wrapped mobile app packages for iOS correctly.
Before you begin
Prerequisites
Before you start, make sure you have:
- App ID
- Device UDIDs (only for testing and development purposes)
- A macOS device to code sign for iOS
Set up your Mac
- Install Xcode. More information: Xcode
- Install PowerShell for macOS. More information: Installing PowerShell on macOS
- Enroll in the Apple Developer Program
- For organization distribution, sign up for the Apple Enterprise Developer Program
Create App ID
Sign in to your developer account at https://developer.apple.com and select the Account tab.

Select + to create a new identifier.

Select App IDs, then select Continue.
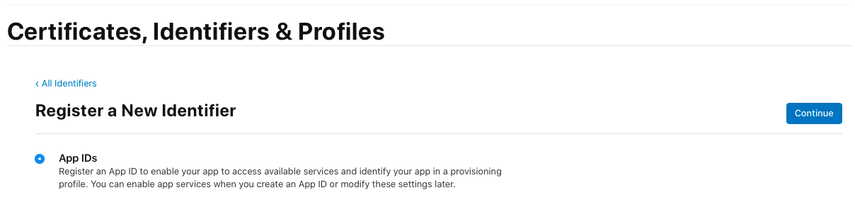
Select the type as App, then select Continue.
Register an App ID:
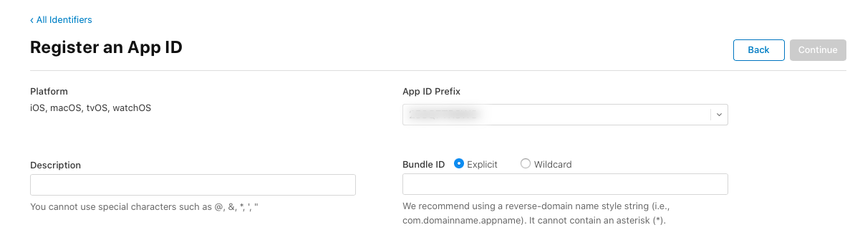
- Description - Name of your app.
- Bundle ID - Select Explicit Bundle ID.
- Enter the bundle ID that you used while creating the wrap project. More information: Bundle ID
- Enable these capabilities:
- Associated Domains
- iCloud
- NFC Tag Reading
- Push Notifications
- Select Continue.
Review and register the App ID.
Create distribution certificate
Create Certificate Signing Request (CSR)
On your Mac, go to the Applications folder > Utilities > open Keychain Access.
Select Keychain Access > Certificate Assistant > Request a Certificate from a Certificate Authority.
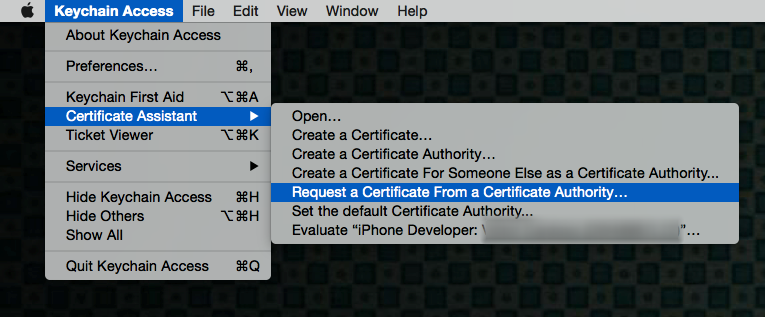
Fill out the Certificate Information:
- In the User Email Address field, enter your Apple ID email address.
- In the Common Name field, enter your name.
- In the Request group, select Saved to disk.
- Save the file to your Mac.
- Select Continue.
Upload and install certificate
Sign in to your developer account at https://developer.apple.com by selecting the Account tab.
Select + to create a new certificate.
Select App Store and Ad Hoc > Continue.
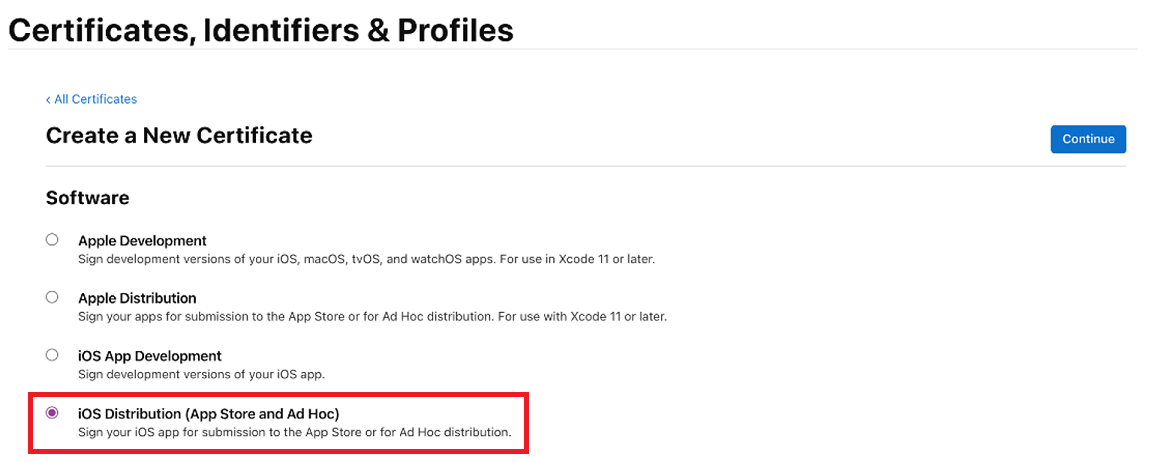
Note
If you have an Enterprise Developer Account, you'll have the option to create an Enterprise Distribution certificate.
Upload the Certificate Signing Request (CSR) file that you generated in the previous steps.
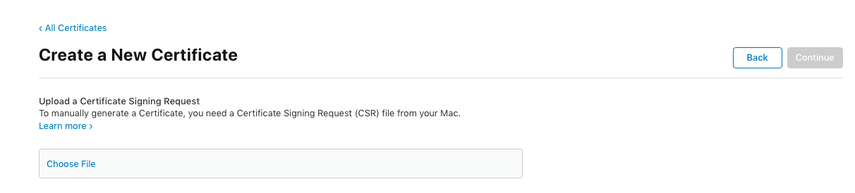
Select Continue, and download the certificate to your Mac.
Double-click the downloaded .cer file to install it in Keychain Access.
Make note of the Name of the certificate (usually formatted as iPhone Distribution: Name (Team ID)). This value is the code signing identity needed for signing.
Register devices for testing
Note
This step is only necessary if you're distributing the app to external users. It's not required if the app is only for internal users.
Sign in to your developer account at https://developer.apple.com by selecting the Account tab.
Select + to register one or more devices.
Enter the Device Name and Device ID (UDID).
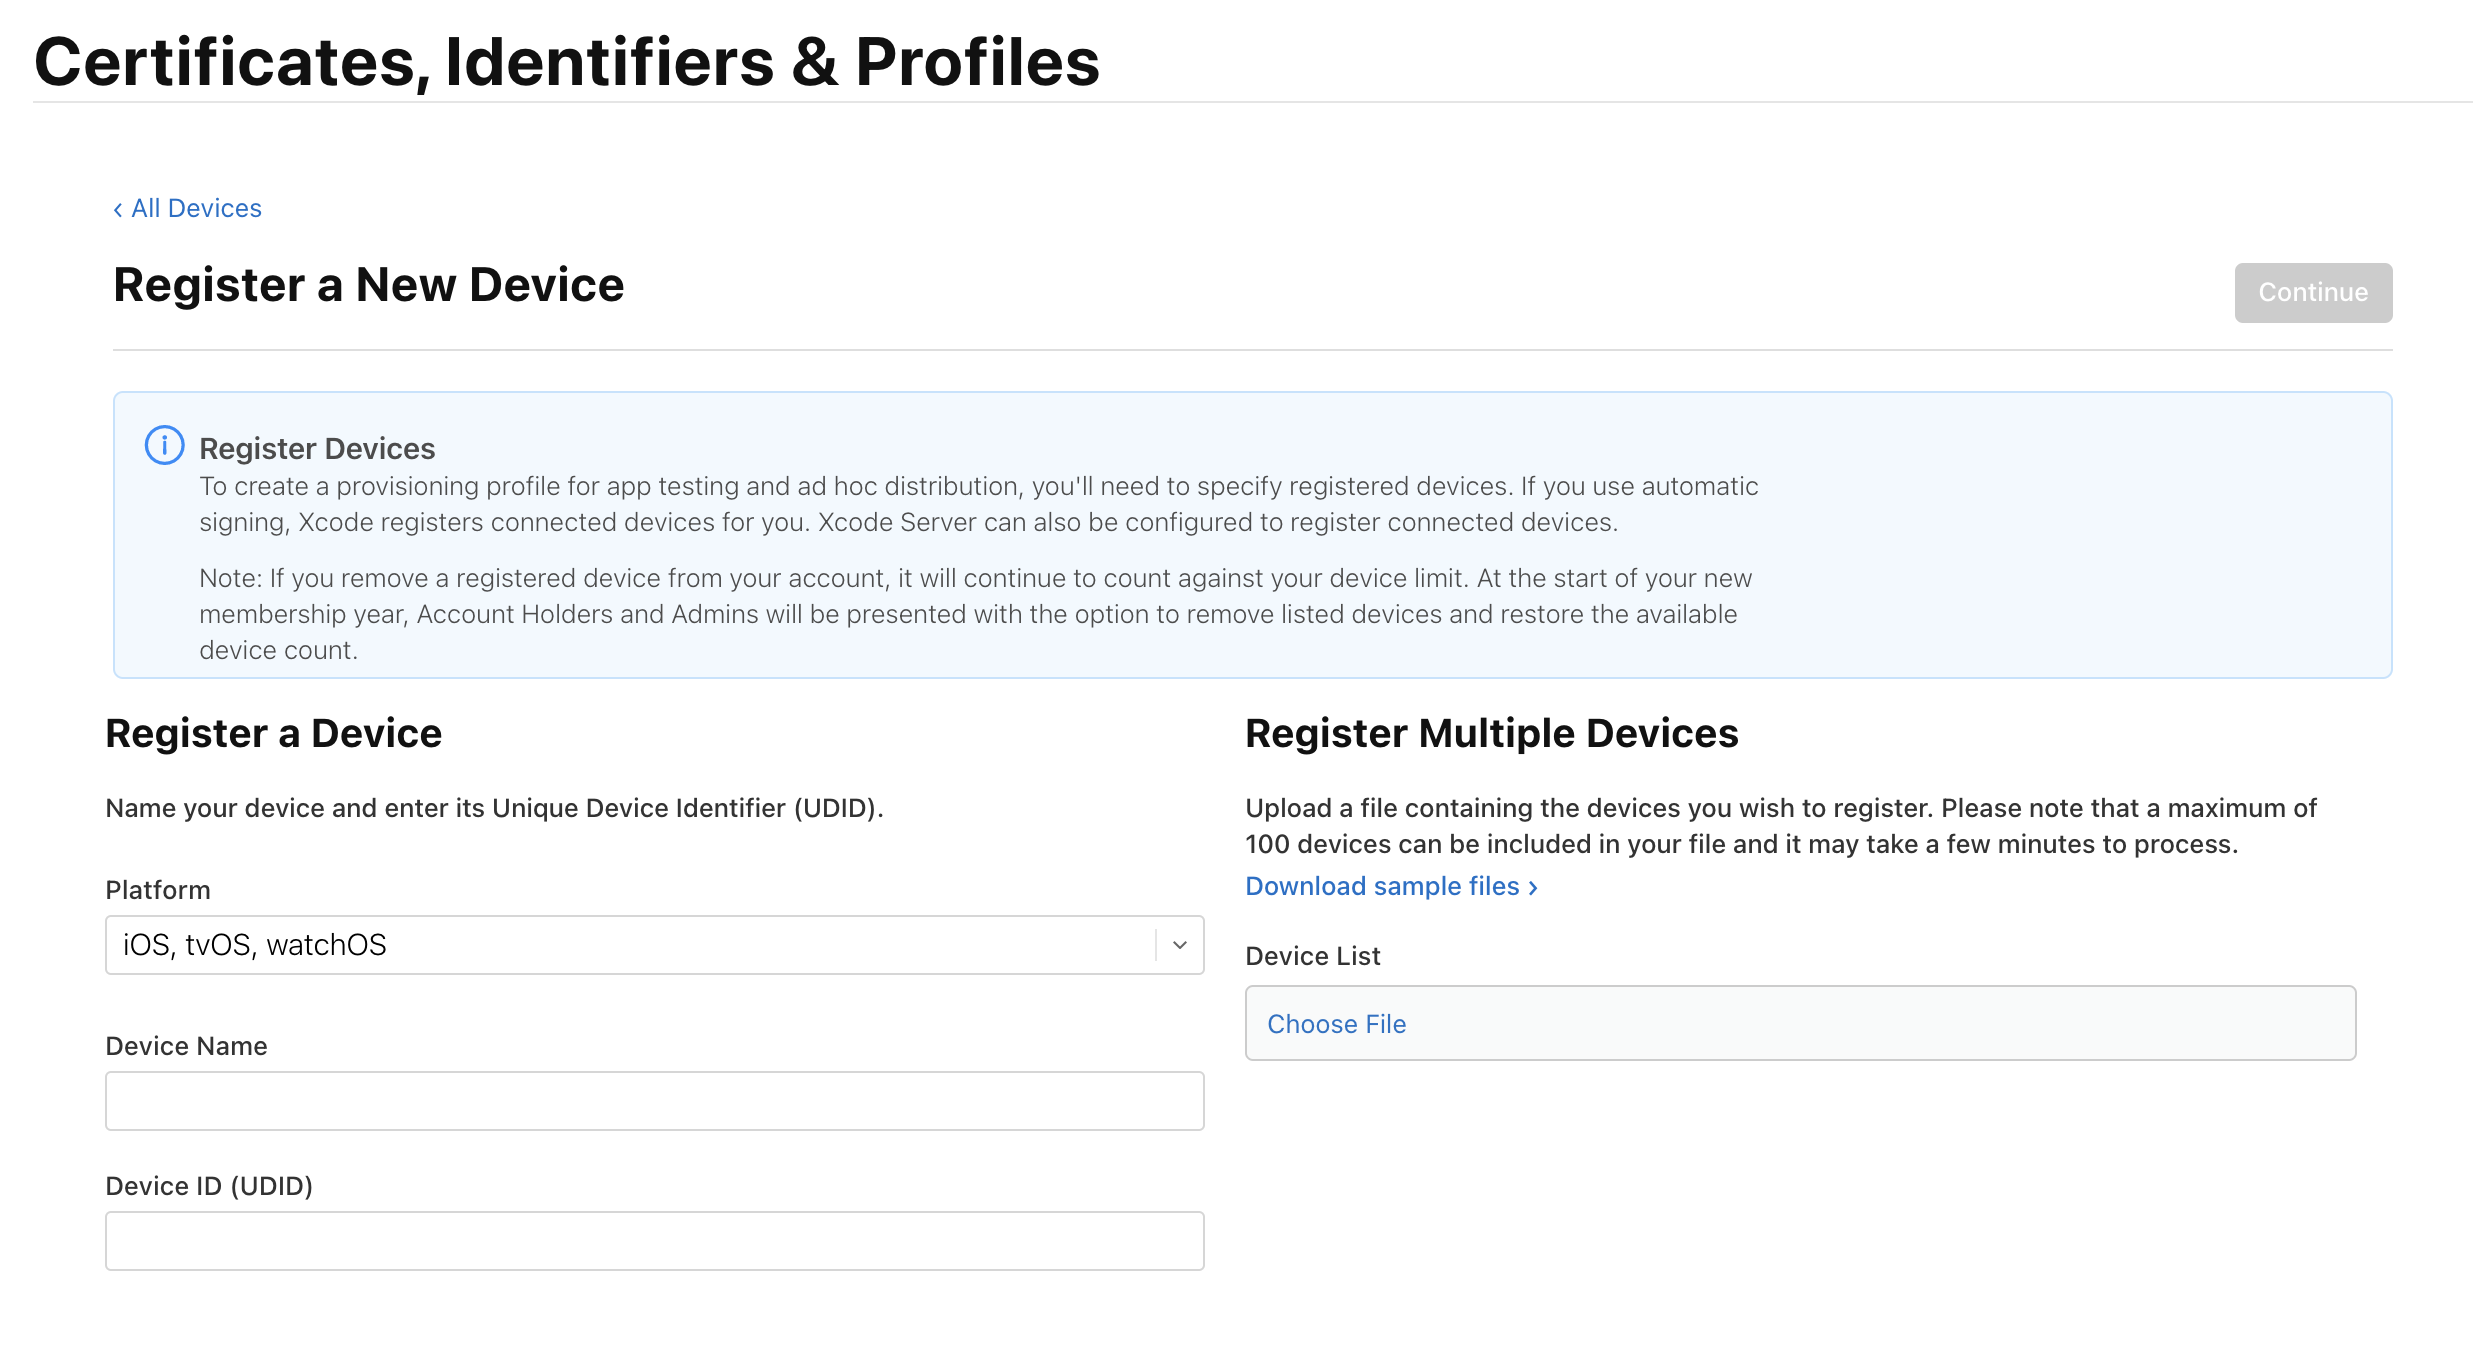
Select Save.
Tip
You can register multiple devices at once by uploading a list of UDIDs.
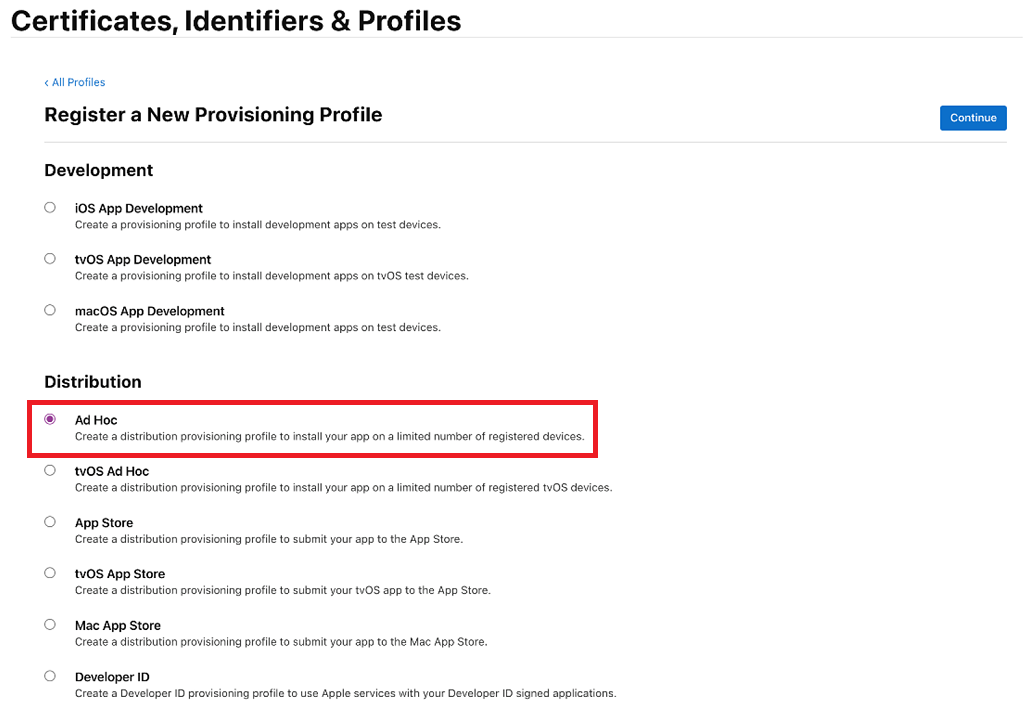
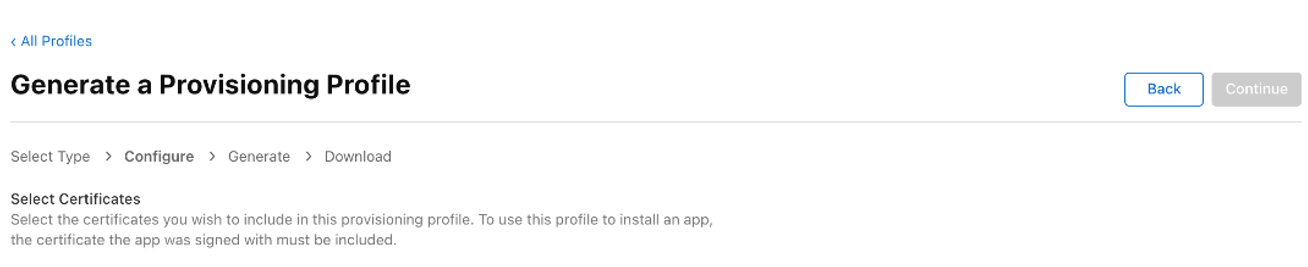
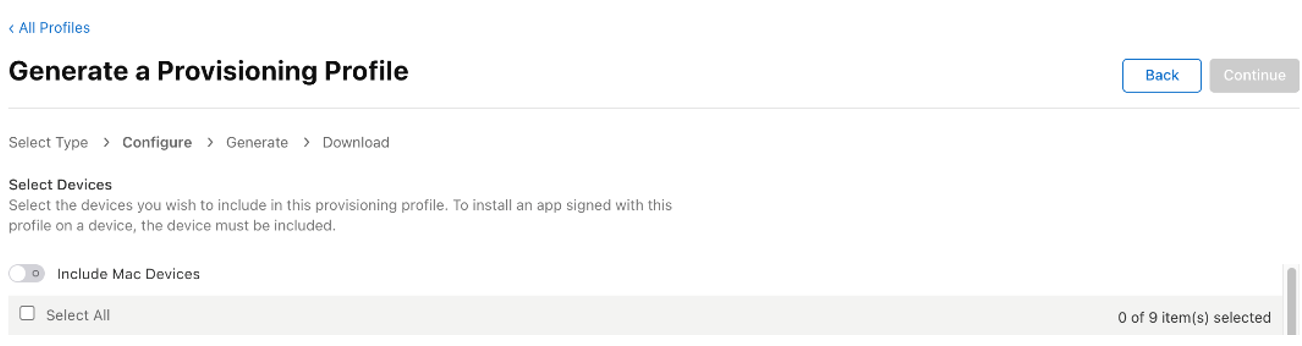
Create iOS Provisioning Profile
Sign in to your developer account at https://developer.apple.com and select the Account tab.
Select + to create a new profile.
Select Ad Hoc > Continue.
Note
For production use, select the App Store distribution method.
Select the App ID you created earlier, then select Continue.
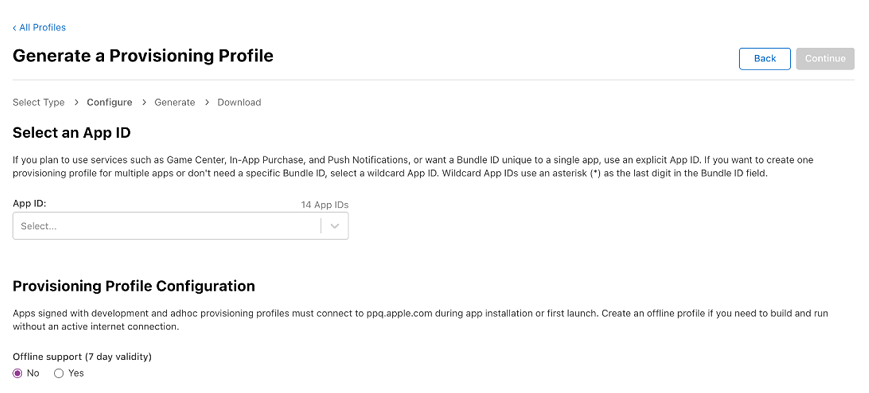
Select the certificate you created earlier, then select Continue.
Select all the test devices where you want to install your app, then select Continue.
Name your provisioning profile and note down the name.
Select Generate and download the profile to your Mac.
Double-click the downloaded file (*.mobileprovision) to register it with Xcode.
Sign the iOS Archive
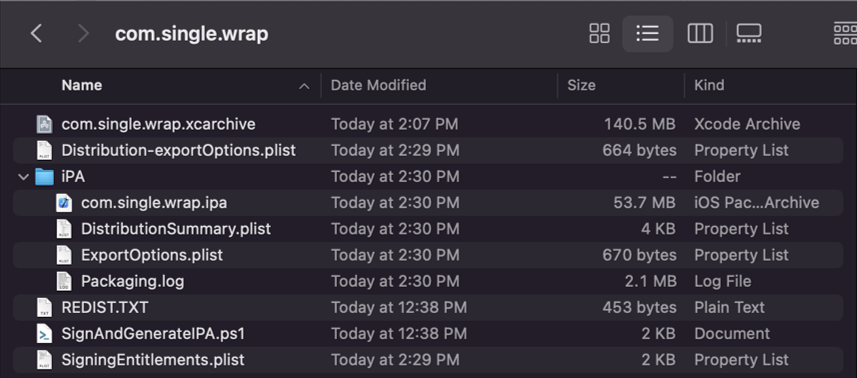
Download and unzip the iOS-Archive.zip file from your Azure blob storage. This creates a folder named after the Bundle ID. In the example below, the Bundle ID is com.single.wrap.
For enterprise signing only: Open the file Distribution-exportOptions.plist with Xcode and change the value for the method field to enterprise.
Note
Enterprise signing is not supported with Key Vault signing.
Open Terminal and change directory to the unzipped folder.
Enter
pwshto start PowerShell in the terminal.Run the PowerShell script with your certificate and provisioning profile information:
./SignAndGenerateIPA.ps1 -CodeSigningIdentity "YOUR_CODE_SIGNING_IDENTITY" -ProvisioningProfilePath "PATH_TO_PROVISIONING_PROFILE"Note
To find your CodeSigningIdentity value, right-click on the .mobileprovision file, select More Info > Preview. Look for the Name field under Certificates.
Tip
The ProvisioningProfilePath is the path to the .mobileprovision file you downloaded. For example:
/Users/username/Downloads/MyProvisioningProfile.mobileprovision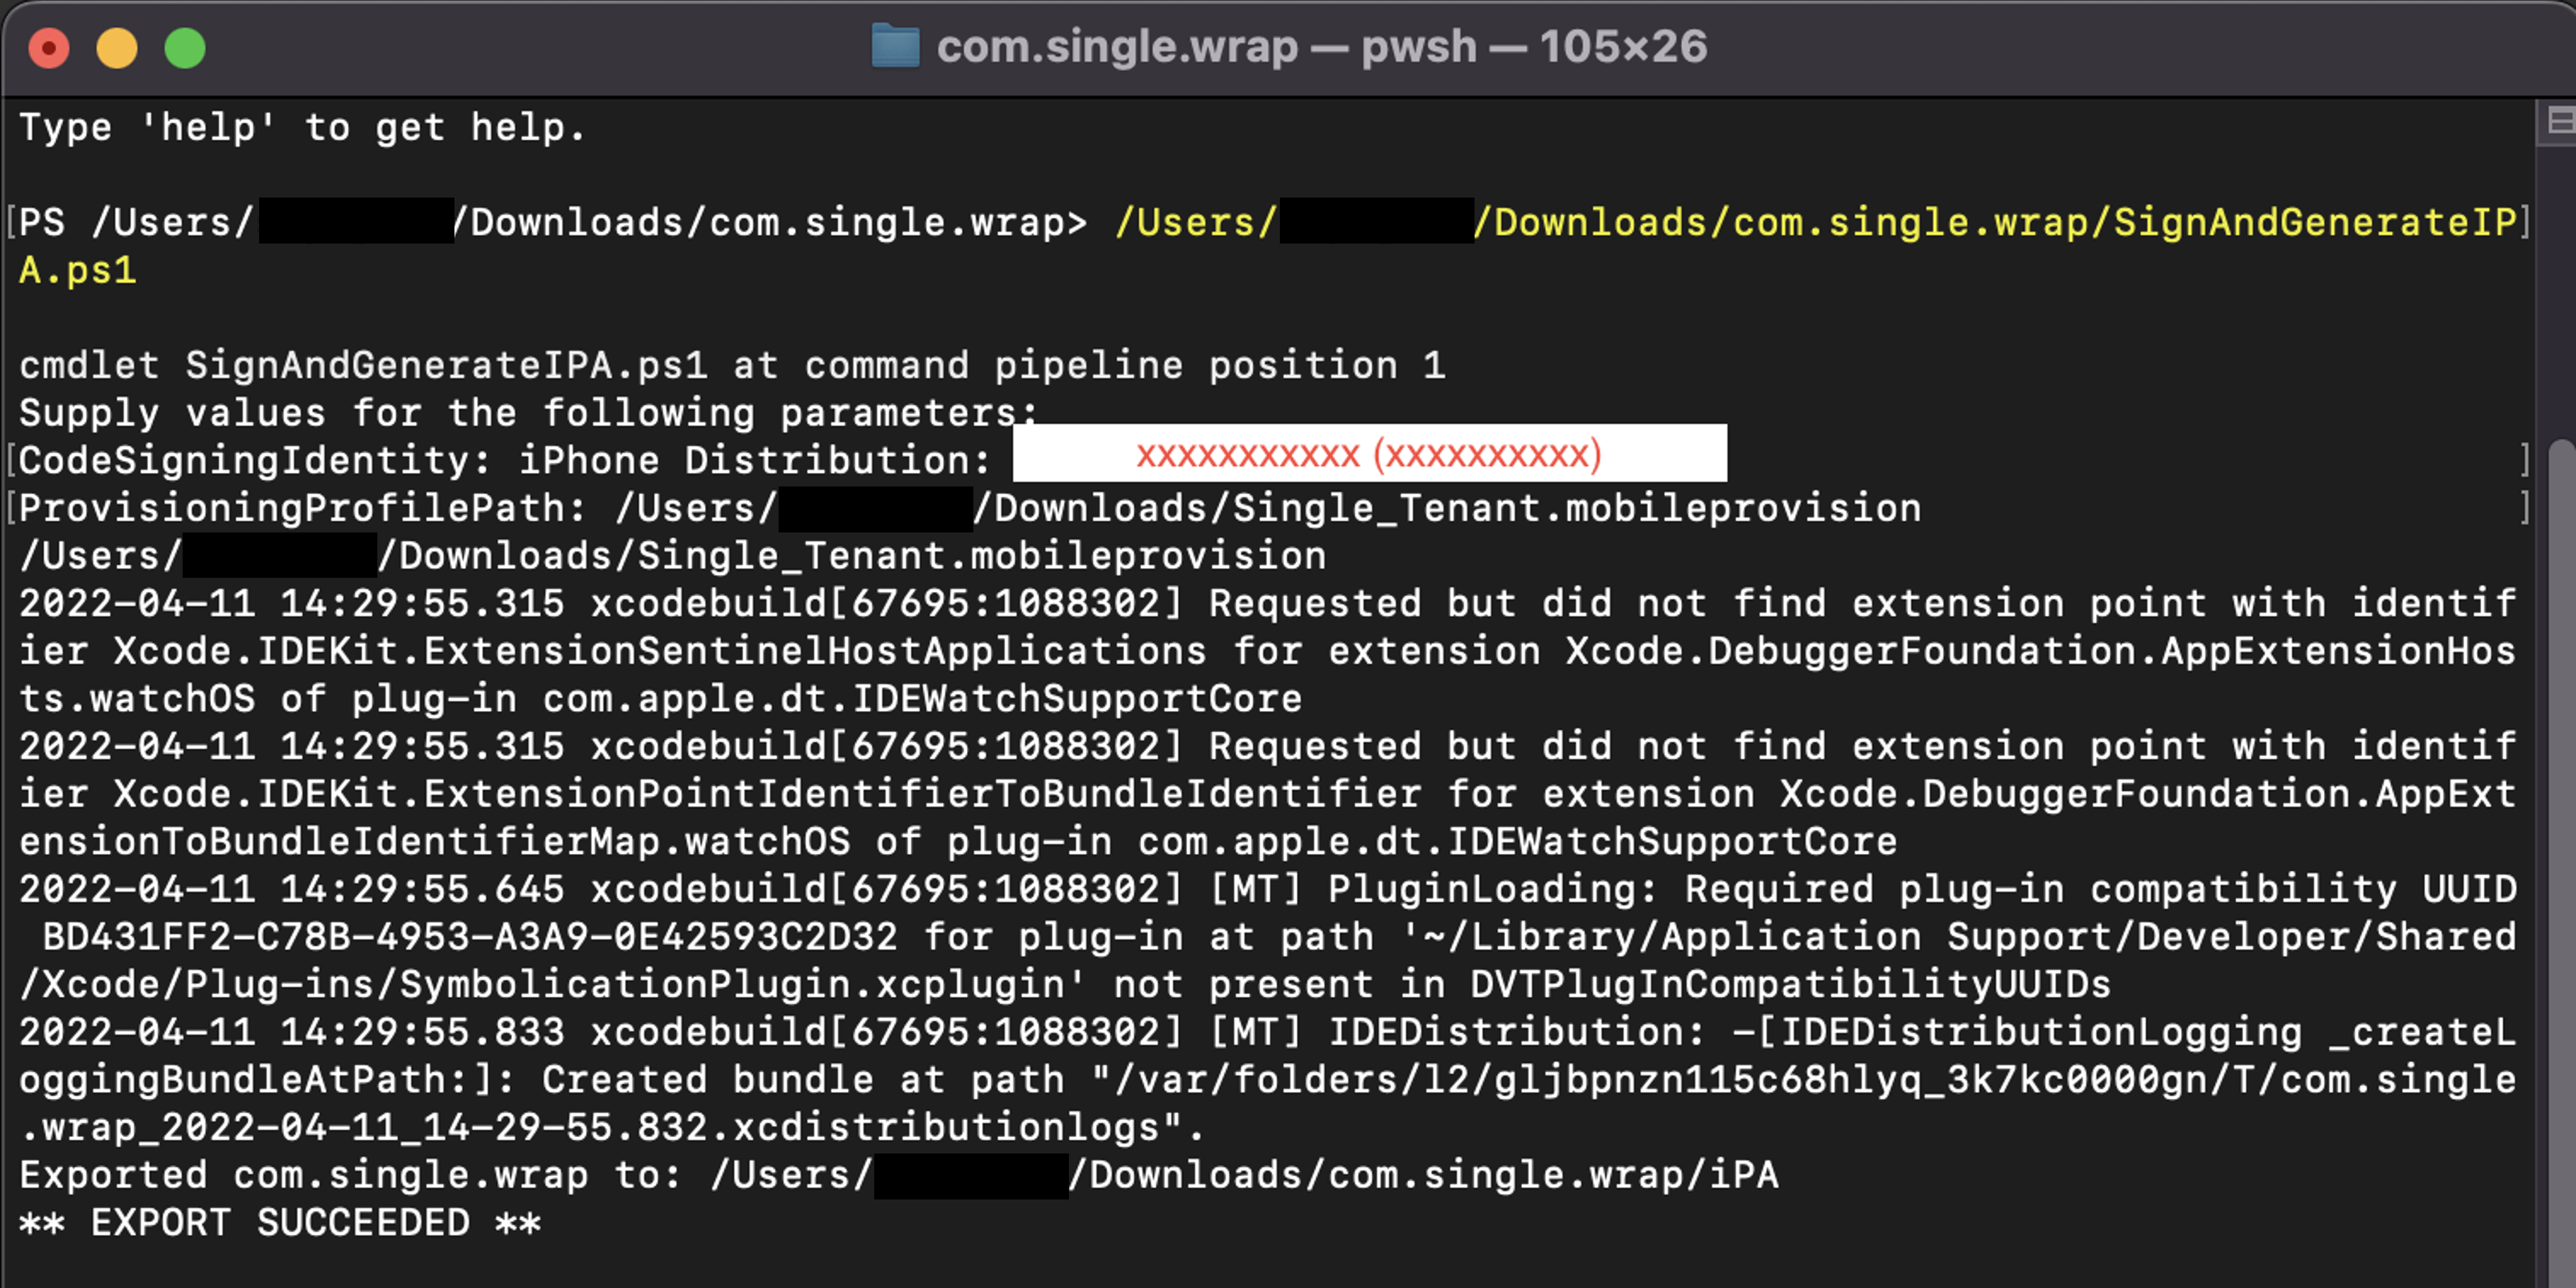
When the script completes, a .ipa file is created (for example, com.single.wrap.ipa).
Important
If the script fails, delete the unzipped folder and files as they might be corrupted. Unzip iOS-Archive.zip again before retrying.
Distribute the app
Install the .ipa file on registered devices using the Finder app.
For enterprise distribution with Microsoft Intune:
- Add an iOS/iPadOS line-of-business app to Microsoft Intune
- Give your app access to the Intune app protection service