Note
Access to this page requires authorization. You can try signing in or changing directories.
Access to this page requires authorization. You can try changing directories.
Azure key vault is a cloud-based service that securely stores secrets like certificates, passwords, keys, and other sensitive information. To learn more, see Introduction to Azure key vault. Set up Azure key vault to create Azure blob storage and use the automatic signing process in wrap.
This article explains how to use an existing Azure Key Vault or create a new one in the Azure portal.
Prerequisites
- Microsoft Entra subscription to create a key vault.
- Admin access for your tenant.
- An Apple account enrolled in the Apple Developer Program or Apple Enterprise Developer Program.
- Create a distribution certificate, ad-hoc provisioning profile, or enterprise provisioning profile.
Configure key vault
Important
Before configuring the Key Vault, you need to create an Azure Key Vault. Follow the steps in Create a vault.
Create a service principal for Wrap KeyVault Access App
Sign in to your tenant as an admin and run the following PowerShell commands:
Connect-AzureAD -TenantId <your tenant ID>
New-AzureADServicePrincipal -AppId 4e1f8dc5-5a42-45ce-a096-700fa485ba20 -DisplayName "Wrap KeyVault Access App"
Assign Reader role to the service principal
Add a Reader role assignment to the Wrap Key Vault Access App in the Access Control (IAM) of your subscription and the Key Vault.
In the Azure portal, select Access control (IAM) and then Add > Add role assignment.
Go to the Members tab, select Job function roles, and ensure Reader is selected.

On the Members tab, select Select member and search for Wrap Key Vault Access App.

Select Wrap Key Vault Access App and then Review + assign to assign the Reader role.

Create or access an existing Key Vault. More information: Create a key vault using the Azure portal.
Add access policies for the Key Vault
For Secret permissions and Certificate permissions, select Get and List.

Upload certificates and secrets
Choose your platform and follow the steps below:
Android
Generate the .pfx file and upload it to the certificate section of the Key Vault. More information: Generate keys
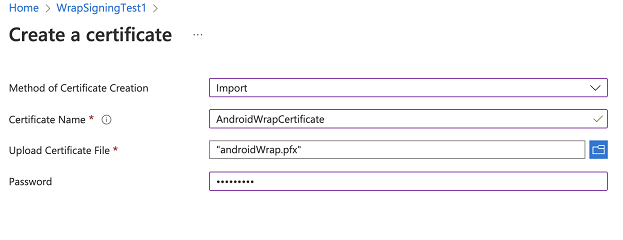
Note
Ensure the certificate name is included in the tag step and the password matches the store pass parameter used when creating the .pfx file.
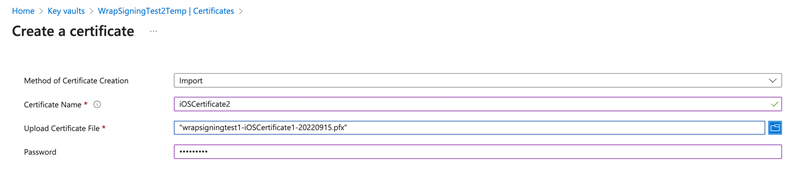
iOS
- Install the .cer file using Keychain Access. See Create the distribution certificate.
- Export the certificate as a .p12 file, then rename the extension to .pfx (required by Key Vault).
- When uploading to Key Vault, provide the password set for the .p12 file.
- Create the provisioning profile and encode it to base64:
- Mac:
base64 -i example.mobileprovision - Windows:
certutil -encode data.txt tmp.b64
- Mac:
- Upload the base64 string as a Key Vault secret, then upload the .pfx file as a Key Vault certificate.
Add tags for certificates
After uploading iOS or Android certificates, add three tags with the name as the bundle ID and the value as the uploaded certificate name(s). Use the same bundle ID as in the wrap wizard.

A video for configuring key vault is available at How to configure access to key vault
Troubleshoot
For troubleshooting, see Troubleshoot issues with the wrap feature in Power Apps.