Using Autoscale with Power BI Premium
Power BI Premium offers scale and performance for Power BI content in your organization. Power BI Premium offers improvements such as enhanced performance, greater scale, improved metrics. In addition, Premium enables customers to automatically add compute capacity to avoid slowdowns under heavy use, using Autoscale.
Autoscale uses an Azure subscription to automatically use more v-cores (virtual CPU cores) when the computing load on your Power BI Premium subscription would otherwise be slowed by its capacity. This article describes the steps necessary to get Autoscale working for your Power BI Premium subscription and the conditions under which Autoscale is enabled. Autoscale only works with Power BI Premium.
To enable Autoscale, the following steps need to be completed:
The following sections describe the steps in detail.
Note
- Autoscale isn’t available for Microsoft 365 Government Community Cloud (GCC), due to the use of the commercial Azure cloud. For more information about which features are available and which are not, see Power BI feature availability for U.S. Government customers.
- Power BI Embedded doesn't provide an out-of-the-box vertical Autoscale feature. To learn about alternative Autoscale options for Power BI Embedded, see Autoscaling in Power BI Embedded.
Configure an Azure subscription to use with Autoscale
To select and configure an Azure subscription to work with Autoscale, you need to have contributor rights for the selected Azure subscription. Any user with Account admin rights for the Azure subscription can add a user as a contributor. In addition, you must be an admin for the Power BI tenant to enable Autoscale.
To select an Azure subscription to work with Autoscale, take the following steps:
Sign on to the Azure portal and in the search box type and select Subscriptions.
From the Subscriptions page, select the subscription you want to work with Autoscale.

From the Settings selections for your selected subscription, select Resource groups.

Select Create to create a resource group to use with Autoscale.

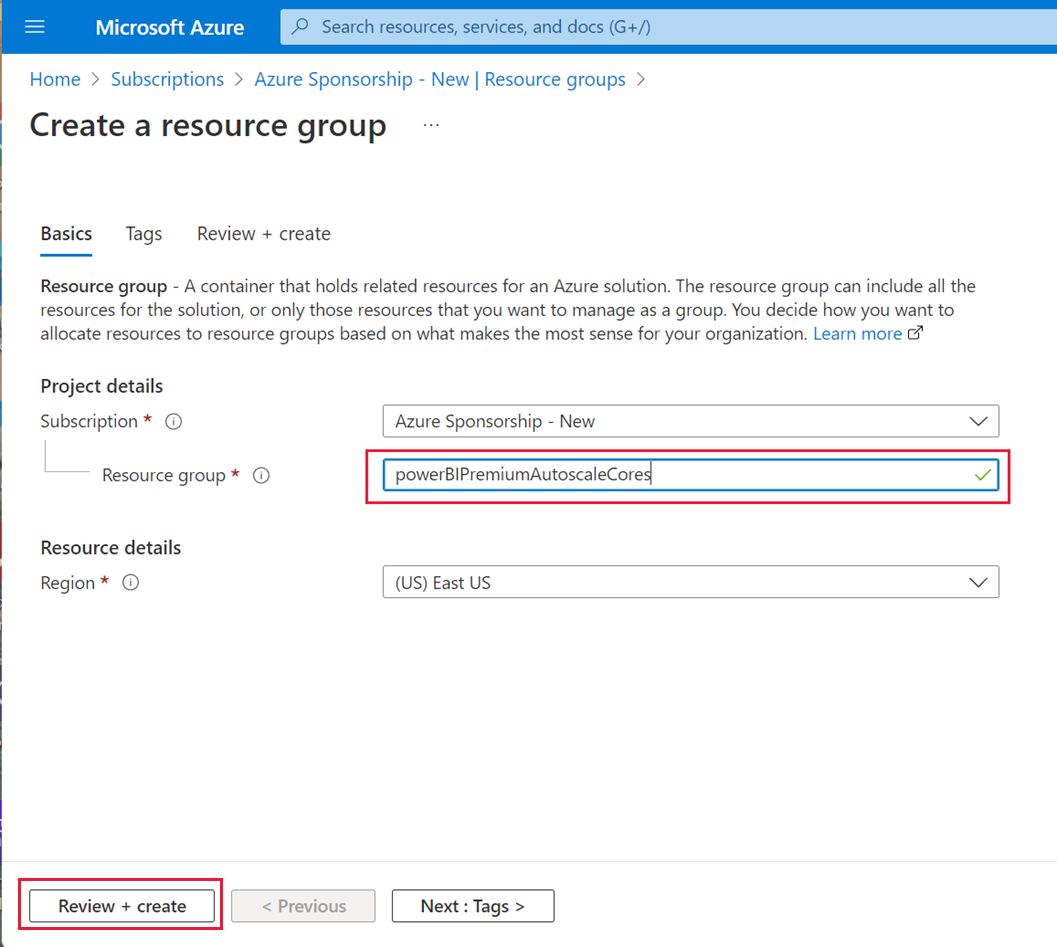
Name your resource group and select Review + create. The following image shows an example resource group named powerBIPremiumAutoscaleCores. You can name your resource group whatever you want. Make a note of the name of the subscription, and the name of your resource group. You'll need to select it from a list when you configure Autoscale in the Power BI Admin portal.
Azure validates the information. After the validation process completes successfully, select Create. You receive a notification in the upper-right corner of the Azure portal when the action completes.


Enable Autoscale in the Power BI Admin portal
After you've selected the Azure subscription to use with Autoscale, and created a resource group as described in the previous section, you're ready to enable Autoscale and associate it with the resource group you created. The person configuring Autoscale must be at least a contributor for the Azure subscription to successfully complete these steps. You can learn more about assigning a user to a contributor role for an Azure subscription.
Note
After creating the subscription and enabling Autoscale in the admin portal, a Microsoft.PowerBIDedicated/autoScaleVCores resource is created. Make sure that you don't have any Azure policies that prevent Power BI Premium from provisioning, updating or deleting the Microsoft.PowerBIDedicated/autoScaleVCores resource.
The following steps show you how to enable and associate Autoscale with the resource group.
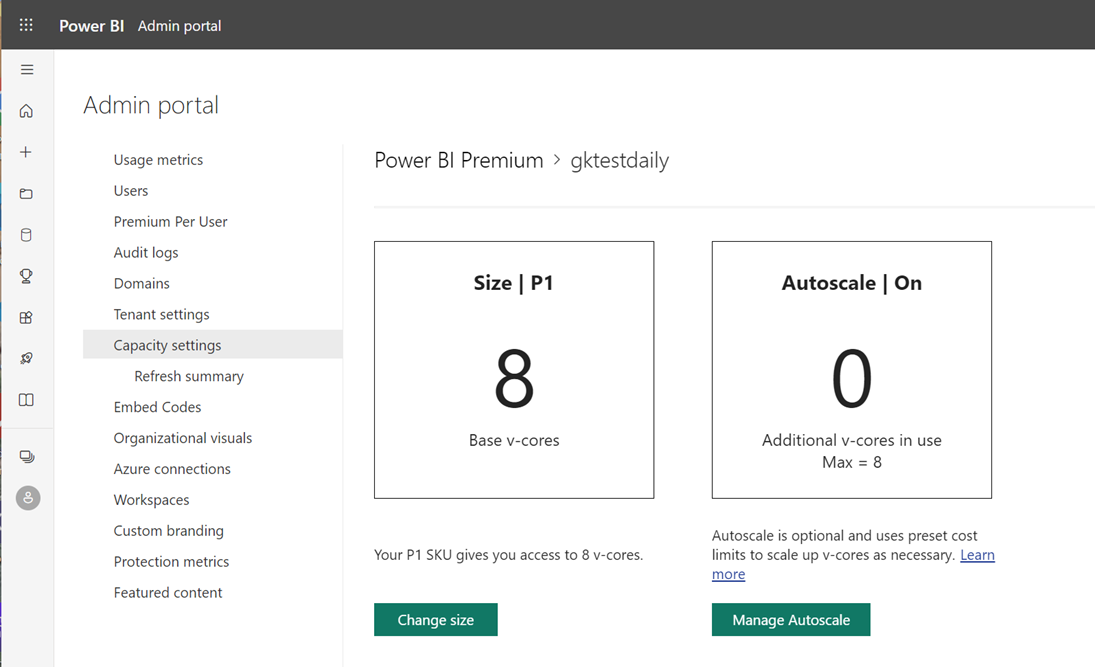
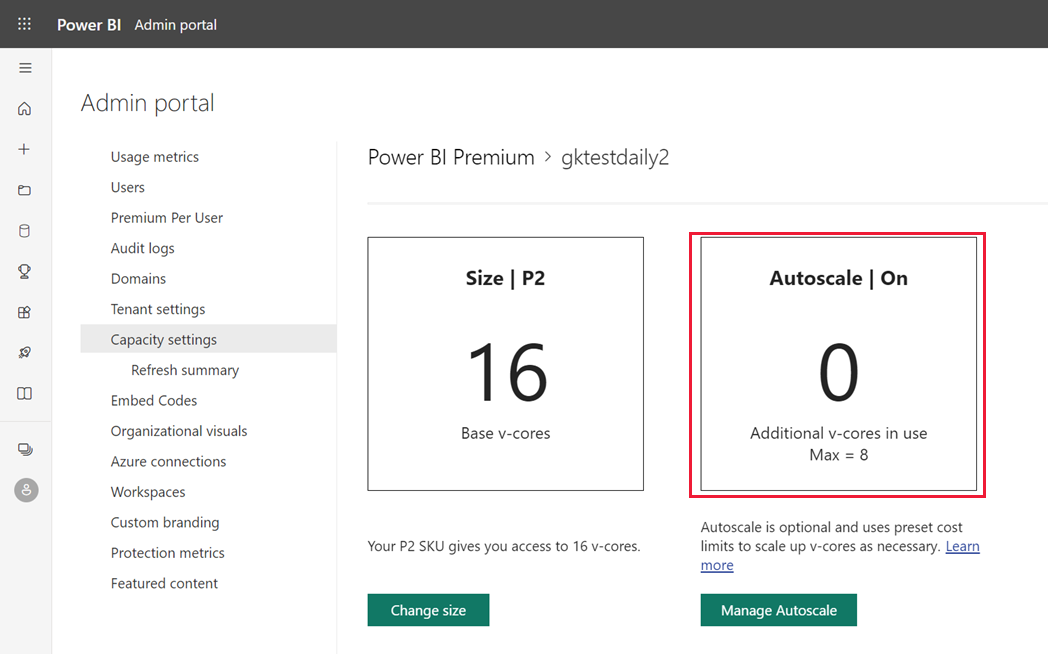
Open the Power BI Admin portal and select Capacity settings from the left pane. Information about your Power BI Premium capacity appears.
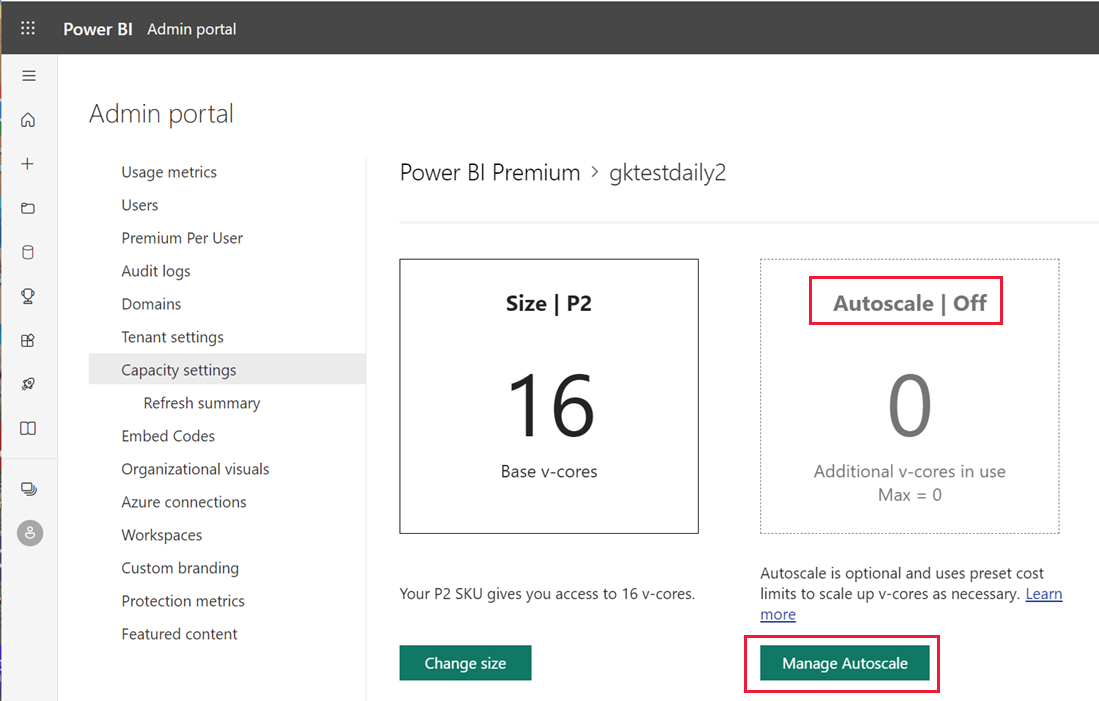
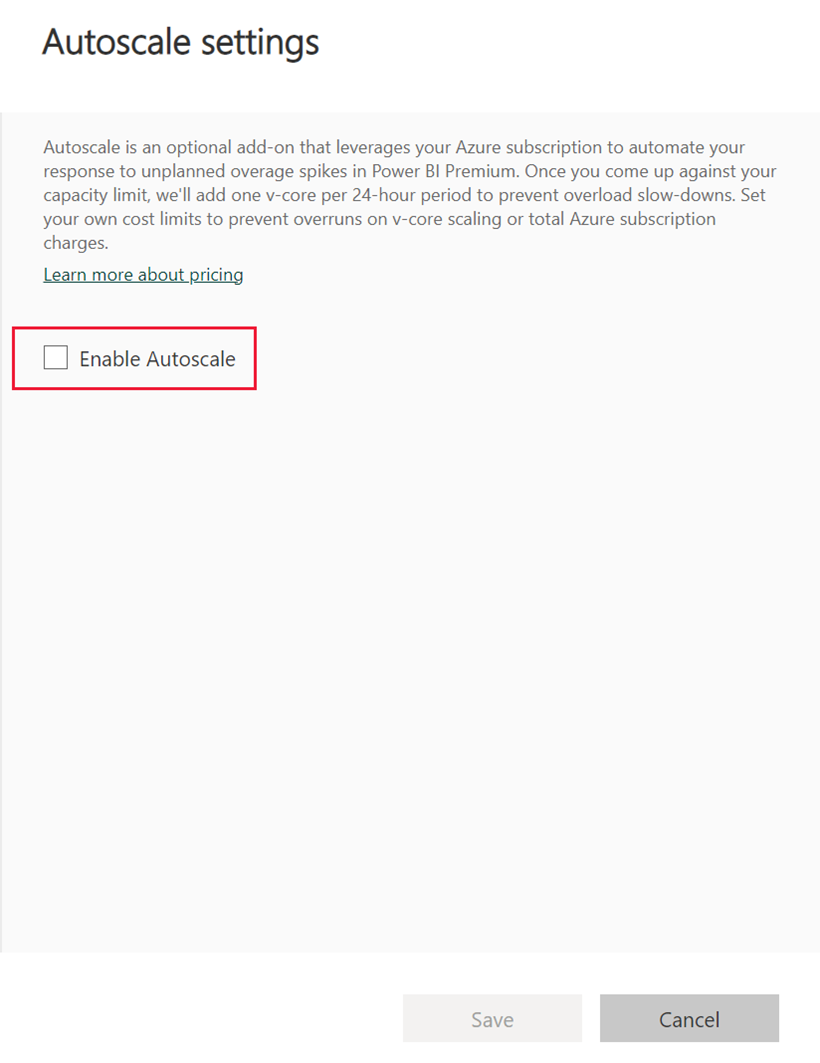
Select Manage Autoscale to enable and configure Autoscale. The Autoscale settings pane appears. Select Enable Autoscale.
Select the Azure subscription to use with Autoscale. Only subscriptions available to the current user are displayed, which is why you must be at least a contributor for the subscription. Once your subscription is selected, choose the Resource group you created in the previous section, from the list of resource groups available to the subscription. Assign the maximum number of v-cores to use for Autoscale, and then select Save.
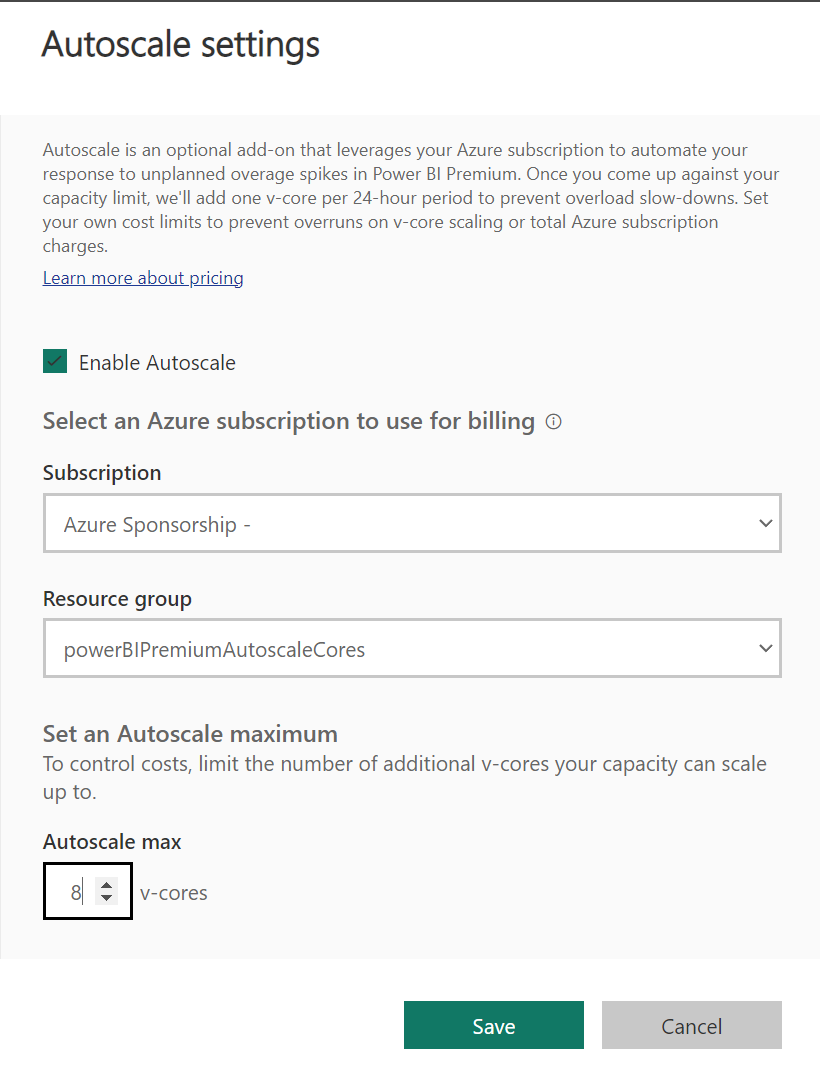
Power BI applies your changes, then closes the pane and returns the view to Capacity settings with the settings you applied. The following image shows the maximum v-cores configured for Autoscale.
The following short video shows how quickly you can configure Autoscale for Power BI Premium:
When is Autoscale triggered?
You only pay for autoscale when it's triggered. Autoscale is triggered when interactive throttling is implemented on your capacity. When interactive operations on your capacity are delayed, autoscale v-cores are added to cover the overage. As long as the overage is not covered, v-cores are added to the capacity every 30 seconds, until the number of v-cores you allocated for autoscale is reached. Once an autoscale core is added, it remains active for a minimum of 24 hours. After 24 hours, your capacity's throttling state is evaluated and if the capacity isn't throttled, autoscale usage returns to zero.
Disable Autoscale
To disable Autoscale, follow these steps:
Open the Power BI Admin portal and select Capacity settings.
Select the capacity you want to disable Autoscale for.
Select Manage Autoscale
Clear the Enable Autoscale checkbox.
Related content
Feedback
Coming soon: Throughout 2024 we will be phasing out GitHub Issues as the feedback mechanism for content and replacing it with a new feedback system. For more information see: https://aka.ms/ContentUserFeedback.
Submit and view feedback for