Note
Access to this page requires authorization. You can try signing in or changing directories.
Access to this page requires authorization. You can try changing directories.
[This topic is prerelease documentation and is subject to change.]
In this article, learn how to migrate your existing standard data model site to enhanced data model.
Important
- This feature is a preview feature.
- Preview features aren’t meant for production use and may have restricted functionality. These features are available before an official release so that customers can get early access and provide feedback.
Prerequisites
- You must install Microsoft Power Platform CLI with version 1.31.6 or higher to migrate your sites to enhanced data model. More information: Install latest Power Platform CLI
- Dataverse base portal package 9.3.2307.x or higher.
- Power Pages Core package 1.0.2309.63 or higher. More information: Update the Power Pages solution
- You'll need to understand how to use Power Platform CLI in Power Pages to complete the migration steps. If you aren't familiar with Power Platform CLI in Power Pages, you may want to review this Power Platform CLI tutorial and reference the PAC CLI commands for working with Power Pages.
- For an environment set up in administration mode, enable background operations.
Step 1. Download and check customization for existing standard site metadata
Open a command prompt.
Use the following command to authenticate to the Dataverse organization for your Power Platform environment to download the website record for migration.
pac auth create -u [Dataverse URL]Example
pac auth create -u https://contoso-org.crm.dynamics.comMore information: pac auth create
Use the following command to generate a list of websites in the current organization.
pac pages listMore information: pac pages list
Use the following command to download the customization report.
pac pages migrate-datamodel --webSiteId [WebSiteId-GUID] --siteCustomizationReportPath [PATH]Example
pac pages migrate-datamodel --webSiteId 076bf556-9ae6-ee11-a203-6045bdf0328e --siteCustomizationReportPath "c:\\pac-powerpages\\downloads"
If you find any customization in the downloaded report, follow the guidance in the report to fix it post-migration to enhanced data model. More information: Considerations for site customization when migrating sites from standard to enhanced data model
Step 2. Migrate the site data from standard to enhanced data model
Use the following command to migrate your site data to the enhanced data model.
pac pages migrate-datamodel --webSiteId [WebSiteId-GUID] –-mode [type-of-data]
The Mode can have 3 values:
configurationData: migrate the metadata for website. More information: List of tables to store configuration data
configurationDataReferences: migrate the transactional data for website. More information: List of tables to store nonconfiguration data
all: migrate both types of data.
Example
pac pages migrate-datamodel --webSiteId 076bf556-9ae6-ee11-a203-6045bdf0328e –-mode all
The migration tool verifies the solutions. If there’s a standard data model solution present without a respective enhanced data model solution for the mentioned template, a warning is displayed: Found template <template-name>. One of the prerequisite for migrate needs Enchanged data model template
There are specific templates, such as Program registration and Schedule and Manage meetings, which require matching enhanced data model packages to ensure the migrated website functions properly. To obtain these enhanced data model packages, you must create a new site for the corresponding template (the environment should be enabled for the enhanced data model) to provide enhanced data model compatible solutions for migration.
Supported templates for migration
Sites with following templates are supported for migration:
- Starter layout 1-5
- Application processing
- Blank page
- Program registration
- Schedule and manage meetings
- FAQ
Important
Enhanced data model supports new site creation for the Community (Dynamics 365), Customer Self Service Portal (Dynamics 365), Employee Self Service Portal (Dynamics 365), and Partner Portal (Dynamics 365) templates, but sites previously created with these templates using the standard data model can't be migrated yet.
Step 3. Verify the migration status
Use the following command to verify your site's migration status:
pac pages migrate-datamodel --webSiteId [WebSiteId-GUID] --checkMigrationStatus
Example
pac pages migrate-datamodel --webSiteId 076bf556-9ae6-ee11-a203-6045bdf0328e --checkMigrationStatus
Note
If your site migration is taking longer than anticipated, it may be due to the volume of data. If your command prompt closes, open a new command prompt and use the command in this step to verify your site's status.
Step 4. Update site data model version after successful data migration
Use the following command update site data model version:
pac pages migrate-datamodel --webSiteId [WebSiteId-GUID] --updateDatamodelVersion --portalId [Portal-GUID]
Note
- You can find the Portal id by navigating to the website with '/_services/about' appended to the URL of the website. In order to view these options, user should have a web role with all website access permissions assigned.
- After the site data model version is updated, the website record linked to the standard data model will be deactivated. Instead, the site will now refer to the website record associated with the enhanced data model.
- User should have any one of the following roles to execute migration command with
updateDatamodelVersionorrevertToStandardDataModelarguments. As this will perform admin action to switch your site to enahance data model or vice versa.
Example
pac pages migrate-datamodel --webSiteId 076bf556-9ae6-ee11-a203-6045bdf0328e --updateDatamodelVersion --portalId 04435d71-c45a-4a05-9702-8f127559e48e
Revert migrated site from enhanced to standard data model
Use the following command to revert a standard data model site to enhanced data model after migration:
pac pages migrate-datamodel --webSiteId [WebSiteId-GUID] --revertToStandardDataModel --portalId [Portal-GUID]
Note
When you switch a migrated site from the enhanced data model back to the standard data model, the website record associated with the enhanced data model will be deactivated, and the website record for the standard data model will be reactivated.
Example
pac pages migrate-datamodel --webSiteId 076bf556-9ae6-ee11-a203-6045bdf0328e --revertToStandardDataModel --portalId 07f35d71-c45a-4a05-9702-8f127559e48e
Migrate a production site from standard to enhanced data model
Before migrating a production site, we recommend creating full copy of the production site. We also recommend production site migration to be conducted during nonbusiness hours.
Use these steps to migrate your production site to the enhanced data model:
- Try out the migration on the site in the copied environment using the PAC CLI
migrate-datamodelcommand. - Add site configuration data to managed solution and import it production environment.
- Use PAC CLI commands to migrate nonconfiguration data and finish it by updating data model version for production.
Note
For migration the source and production website id are same.
Considerations for site customization when migrating sites from standard to enhanced data model
This section provides guidance fixing customization for a site migration from standard to enhanced data model.
There are five types of site customizations on adx metadata tables:
- Custom columns on adx metadata tables
- Relationship between custom tables and adx tables
- Adx table references in liquid code snippet
- Adx table references in fetch xml
- Custom workflow and plugins on adx tables
Note
All customization related fixes will be done after migration to the enhanced data model.
Custom columns on adx metadata tables
To fix this customization in enhanced data model, create a relationship between system tables and new custom table and migrate the data to the new table.
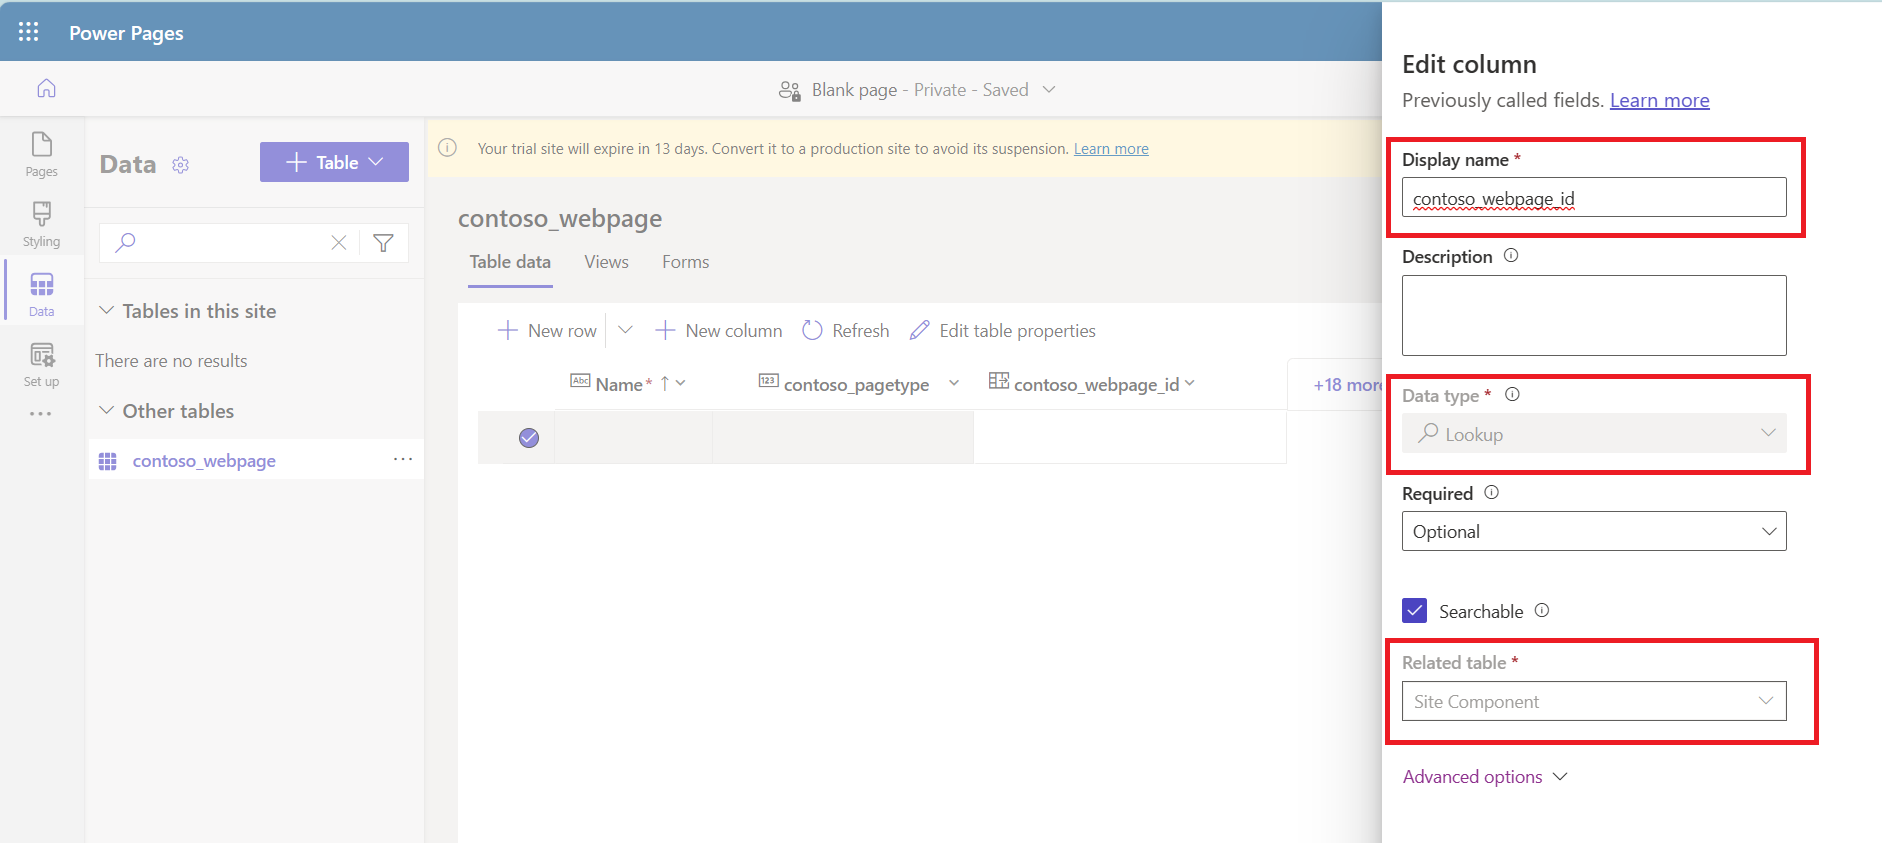
Standard data model: The table adx_webpage contains a custom column as contoso_pagetype.
Enhanced data model: Create a new table named contoso_webpage. This will include a column called contoso_pagetype and a lookup column contoso_webpage_id that is associated with powerpagescomponent. Utilize the Data workspace for table creation.
Relationship between custom tables and adx tables
To fix this customization in enhanced data model, create a relationship between custom tables and system tables.
Standard data model: The table adx_webpage has a relationship named adx_webpage_contoso_pagelogs with the contoso_pagelogs table.
Enhanced data model: Create a new relationship named powerpagecomponent_contoso_pagelogs with the contoso_webpage table. Utilize the Data workspace for table creation.
Adx table references in liquid code snippet
To fix this customization in enhanced data model, replace the adx table references in liquid code with enhanced data model virtual tables mspp references. Alternatively, you can use the Site Component (logical name powerpagecomponent) table along with the Component Type (logical name powerpagecomponenttype) attribute to retrieve the corresponding references.
Standard data model: entities liquid tag is used to access weblinks values in {% assign app_weblinks= entities['adx_weblinks'] %} code.
Enhanced data model: Instead of using weblinks via entities liquid tag, use respective liquid objects. entities[adx_weblinks] directly. In this case entities['adx_weblinks'] can be replaced with weblinks liquid object.
Adx table references in fetch xml
To fix this customization in enhanced data model, replace the adx table references in fetch xml with enhanced data model virtual tables direct references. Alternatively, you can use the Site Component (logical name powerpagecomponent) table along with the Component Type (logical name powerpagecomponenttype) attribute to retrieve the corresponding references.
Standard data model: The table name adx_webrole is used within the fetch xml query.
{% fetchxml app_webroles %}
<fetch>
 <entity name='adx_webrole'>
  <attribute name='adx_name'/>
 <entity>
</fetch>
{% endfetchxml %}
Enhanced data model: Use Site Component (logical name powerpagecomponent) in conjunction with the Component Type (logical name powerpagecomponenttype) attribute to retrieve the corresponding references.
{% fetchxml app_webroles %}
<fetch>
 <entity name='powerpagecomponent'>
  <attribute name='adx_name'/>
  <filter type='and'>
   <condition attribute ='powerpagecomponenttype' operator ='eq' value ='11'/>
  <entity>
</fetch>
{% endfetchxml %}
Site component type and values
| Component Type | Value |
|---|---|
| Publishing State | 1 |
| Web Page | 2 |
| Web File | 3 |
| Web Link Set | 4 |
| Web Link | 5 |
| Page Template | 6 |
| Content Snippet | 7 |
| Web Template | 8 |
| Site Setting | 9 |
| Web Page Access Control Rule | 10 |
| Web Role | 11 |
| Website Access | 12 |
| Site Marker | 13 |
| Basic Form | 15 |
| Basic Form Metadata | 16 |
| List | 17 |
| Table Permission | 18 |
| Advanced Form | 19 |
| Advanced Form Step | 20 |
| Advanced Form Metadata | 21 |
| Poll Placement | 24 |
| Ad Placement | 26 |
| Bot Consumer | 27 |
| Column Permission Profile | 28 |
| Column Permission | 29 |
| Redirect | 30 |
| Publishing State Transition Rule | 31 |
| Shortcut | 32 |
| Cloud Flow | 33 |
| UX Component | 34 |
Custom workflow and plugins on adx tables
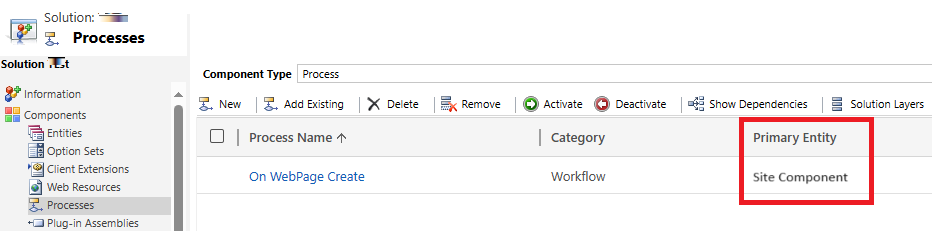
To fix this customization in enhanced data model, the workflow and plugin logic needs to refactored and re-registered on the site's respective table.
For instance, if a user registered the workflow/plugin to the Primary Entity as Web Page (logical name adx_webpage) table in the standard data model, then the code within the workflow/plugin must be modified to Site Component (logical name powerpagecomponent) table and its attributes for the enhanced data model.
Known issues
The migration command is only processing a batch of 5K records from the standard data model to the enhanced data model.