Create a Git branch in Visual Studio
Applies to: ![]() Visual Studio
Visual Studio ![]() Visual Studio for Mac
Visual Studio for Mac
Note
This article applies to Visual Studio 2017. If you're looking for the latest Visual Studio documentation, see Visual Studio documentation. We recommend upgrading to the latest version of Visual Studio. Download it here
It's easy to create a new branch in Visual Studio; all you have to do is base it off an existing branch.
Here's how.
To start, make sure you've got a previously created or cloned repo open.
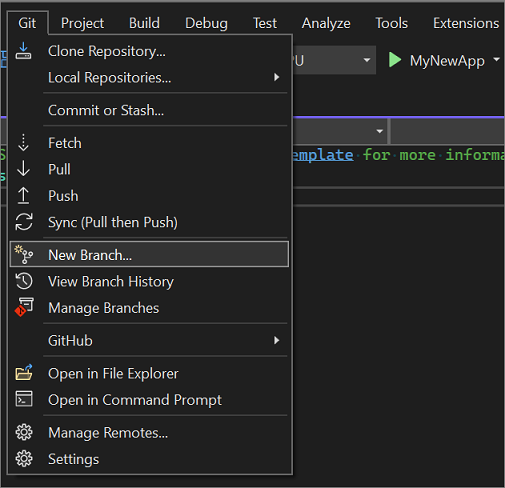
From the Git menu, select New Branch.
In the Create a new branch dialog box, enter a branch name.
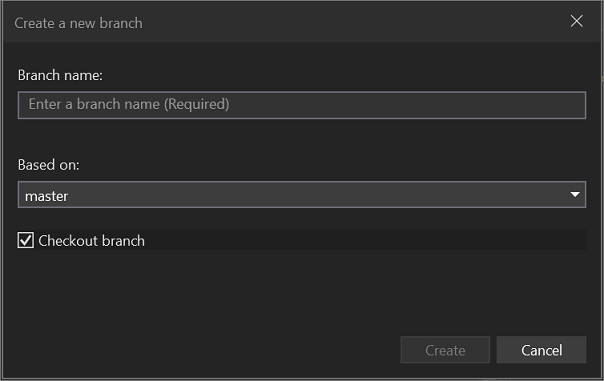
In the Based on section, use the drop-down list to choose whether you want to base your new branch off an existing local branch or a remote branch.
The Checkout branch checkbox, which is on by default, automatically switches to the newly created branch. Toggle this option if you want to remain in the current branch.
There you have it; you've created a new branch.
Tip
The equivalent command for this action is git checkout -b <new-branch> <existing-branch>.
Next steps
To continue your journey, visit the Make a commit page. And to learn more about how to manage branches in Visual Studio, see Merge and rebase branches.