Observação
O acesso a essa página exige autorização. Você pode tentar entrar ou alterar diretórios.
O acesso a essa página exige autorização. Você pode tentar alterar os diretórios.
A partir do iOS 8, o UIAlertController substituiu UIActionSheet e UIAlertView, que agora foram preteridos.
Ao contrário das classes que substituiu, que são subclasses de UIView, UIAlertController é uma subclasse de UIViewController.
Use UIAlertControllerStyle para indicar o tipo de alerta a ser exibido. Esses tipos de alertas são:
- UIAlertControllerStyleActionSheet
- Antes do iOS 8, isso teria sido um UIActionSheet
- UIAlertControllerStyleAlert
- Antes do iOS 8, isso teria sido UIAlertView
Há três etapas necessárias a serem executadas ao criar um Controlador de Alerta:
Crie e configure o Alerta com:
- title
- mensagem
- preferredStyle
(Opcional) Adicionar um campo de texto
Adicionar as ações necessárias
Apresentar o controlador de exibição
O alerta mais simples contém um único botão, como mostrado nesta captura de tela:
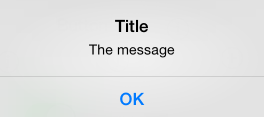
O código para exibir um alerta simples é o seguinte:
okayButton.TouchUpInside += (sender, e) => {

    //Create Alert
    var okAlertController = UIAlertController.Create ("Title", "The message", UIAlertControllerStyle.Alert);

    //Add Action
    okAlertController.AddAction (UIAlertAction.Create ("OK", UIAlertActionStyle.Default, null));

    // Present Alert
    PresentViewController (okAlertController, true, null);
};
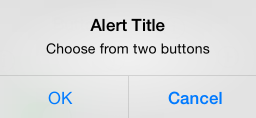
A exibição de um alerta com várias opções é feita de maneira semelhante, mas adiciona duas ações. Por exemplo, a captura de tela a seguir mostra um alerta com dois botões:
okayCancelButton.TouchUpInside += ((sender, e) => {

    //Create Alert
    var okCancelAlertController = UIAlertController.Create("Alert Title", "Choose from two buttons", UIAlertControllerStyle.Alert);

    //Add Actions
    okCancelAlertController.AddAction(UIAlertAction.Create("OK", UIAlertActionStyle.Default, alert => Console.WriteLine ("Okay was clicked")));
    okCancelAlertController.AddAction(UIAlertAction.Create("Cancel", UIAlertActionStyle.Cancel, alert => Console.WriteLine ("Cancel was clicked")));

    //Present Alert
    PresentViewController(okCancelAlertController, true, null);
});
Os alertas também podem exibir uma folha de ação, semelhante à captura de tela abaixo:

Os botões são adicionados ao alerta com o AddAction método:
actionSheetButton.TouchUpInside += ((sender, e) => {

    // Create a new Alert Controller
    UIAlertController actionSheetAlert = UIAlertController.Create("Action Sheet", "Select an item from below", UIAlertControllerStyle.ActionSheet);

    // Add Actions
    actionSheetAlert.AddAction(UIAlertAction.Create("OK",UIAlertActionStyle.Default, (action) => Console.WriteLine ("Item One pressed.")));

    actionSheetAlert.AddAction(UIAlertAction.Create("custom button 1",UIAlertActionStyle.Default, (action) => Console.WriteLine ("Item Two pressed.")));

    actionSheetAlert.AddAction(UIAlertAction.Create("Cancel",UIAlertActionStyle.Cancel, (action) => Console.WriteLine ("Cancel button pressed.")));

    // Required for iPad - You must specify a source for the Action Sheet since it is
    // displayed as a popover
    UIPopoverPresentationController presentationPopover = actionSheetAlert.PopoverPresentationController;
    if (presentationPopover!=null) {
        presentationPopover.SourceView = this.View;
        presentationPopover.PermittedArrowDirections = UIPopoverArrowDirection.Up;
    }

    // Display the alert
    this.PresentViewController(actionSheetAlert,true,null);
});