Nota
O acesso a esta página requer autorização. Pode tentar iniciar sessão ou alterar os diretórios.
O acesso a esta página requer autorização. Pode tentar alterar os diretórios.
Este artigo descreve como configurar o Microsoft Azure Backup Server (MABS) para proteger bases de dados SQL Server no Azure Stack.
Fluxo de trabalho de proteção de bases de dados SQL Server
A gestão do backup da base de dados SQL Server para o Azure e a recuperação a partir do Azure envolvem:
- Criar uma política de backup para proteger bases de dados SQL Server
- Criar cópias de segurança sob demanda
- Recuperar a base de dados a partir de Discos e do Azure
Cenários suportados e limitações para backup do SQL Server no Azure Stack
Antes de fazer backup do SQL Server no Azure Stack, reveja os seguintes cenários suportados e limitações:
- Se você tiver um banco de dados com arquivos em um compartilhamento de arquivos remoto, a proteção falhará com a ID de erro 104. O MABS não oferece suporte à proteção de dados do SQL Server em um compartilhamento de arquivos remoto.
- O MABS não pode proteger bancos de dados armazenados em compartilhamentos SMB remotos.
- Certifique-se de que as réplicas do grupo de disponibilidade estejam configuradas como somente leitura.
- Você deve adicionar explicitamente a conta do sistema NTAuthority\System ao grupo Sysadmin no SQL Server.
- Ao executar uma recuperação de local alternativo para um banco de dados parcialmente contido, você deve garantir que a instância SQL de destino tenha o recurso Bancos de Dados Contidos habilitado.
- Ao executar uma recuperação de local alternativo para um banco de dados de fluxo de arquivos, você deve garantir que a instância SQL de destino tenha o recurso de banco de dados de fluxo de arquivos habilitado.
- Proteção para SQL Server Always On:
- O MABS deteta Grupos de Disponibilidade ao efetuar uma consulta durante a criação de um grupo de proteção.
- O MABS deteta um failover e continua a proteção do banco de dados.
- O MABS oferece suporte a configurações de cluster multissite para uma instância do SQL Server.
- Quando você protege bancos de dados que usam o recurso Always On, o MABS tem as seguintes limitações:
- O MABS honrará a política de backup para grupos de disponibilidade definida no SQL Server com base nas preferências de backup, da seguinte maneira:
- Preferir secundário - Os backups devem ocorrer em uma réplica secundária, exceto quando a réplica primária for a única réplica online. Se existirem múltiplas réplicas secundárias disponíveis, então o nó com a maior prioridade de backup será selecionado para backup. Se apenas a réplica primária estiver disponível, então o backup deve ocorrer na réplica primária.
- Apenas secundário - O backup não deve ser executado na réplica primária. Se a réplica principal for a única que está online, o backup não deve ocorrer.
- Principal - Os backups devem sempre ocorrer na réplica primária.
- Qualquer Réplica - Os backups podem ser realizados em qualquer uma das réplicas de disponibilidade no grupo de disponibilidade. O nó a partir do qual será feito o backup será determinado com base nas prioridades de backup de cada um dos nós.
-
Observação
- Os backups podem ocorrer a partir de qualquer réplica legível, ou seja, primária, secundária síncrona, secundária assíncrona.
- Se qualquer réplica for excluída do backup, por exemplo , Excluir réplica estiver habilitada ou marcada como não legível, essa réplica não será selecionada para backup em nenhuma das opções.
- Se houver múltiplas réplicas disponíveis e legíveis, então o nó com a maior prioridade de backup será selecionado para backup.
- Se o backup falhar no nó selecionado, a operação de backup falhará.
- A recuperação para o local original não é suportada.
- O MABS honrará a política de backup para grupos de disponibilidade definida no SQL Server com base nas preferências de backup, da seguinte maneira:
- Problemas de backup do SQL Server 2014 ou superior:
- O SQL Server 2014 adicionou uma nova funcionalidade para criar uma base de dados para SQL Server local no Microsoft Azure Blob storage. O MABS não pode ser usado para proteger essa configuração.
- Existem alguns problemas conhecidos com a preferência de backup "Preferir secundário" para a opção SQL Always On. O MABS aceita sempre um backup do secundário. Se nenhum secundário puder ser encontrado, o backup falhará.
Pré-requisitos
Antes de fazeres backup do SQL Server no Azure Stack, instala e prepara o Azure Backup Server.
Crie uma política de backup para bases de dados SQL Server no Azure Stack
Para criar uma política de backup para proteger bases de dados SQL Server no Azure, siga estes passos:
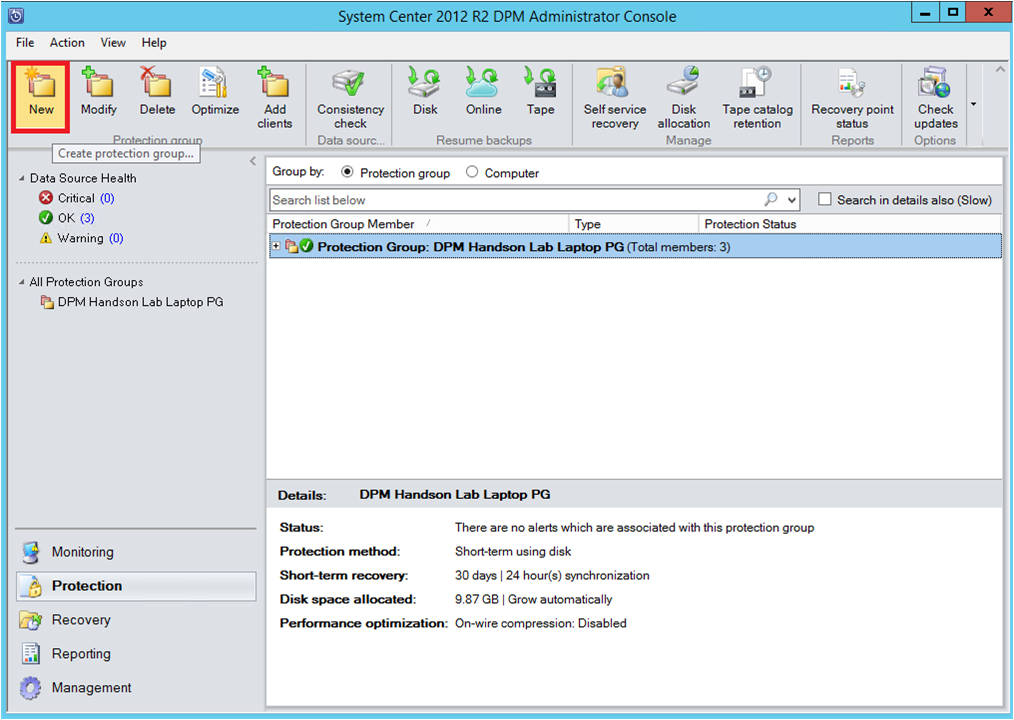
No Azure Backup Server, selecione o espaço de trabalho de Proteção .
No menu de ferramentas, selecione Novo para criar um novo grupo de proteção.
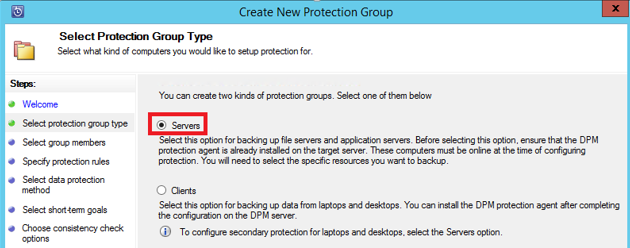
O Azure Backup Server inicia o assistente de Grupo de Proteção, que o guia através da criação de um Grupo de Protecção. Selecione Seguinte.
Na lâmina Selecionar Tipo de Grupo de Proteção , selecione Servidores.
Na lâmina Membros do Grupo Selecionado , a lista de Membros Disponíveis mostra as várias fontes de dados. Selecione + para expandir uma pasta e revelar as subpastas. Seleciona a caixa de seleção para selecionar um item.
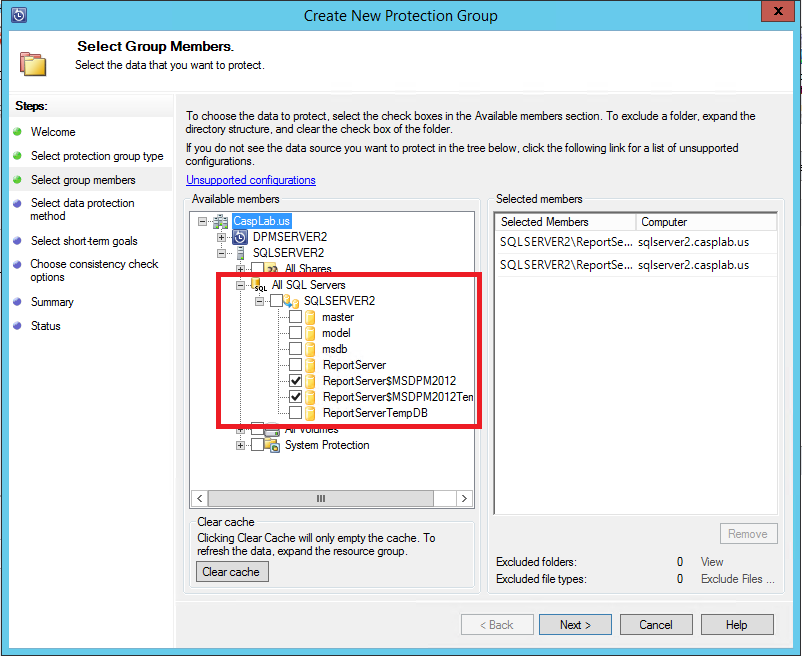
Todos os itens selecionados aparecem na lista de membros selecionados. Depois de selecionar os servidores ou bases de dados que pretende proteger, selecione Próximo.
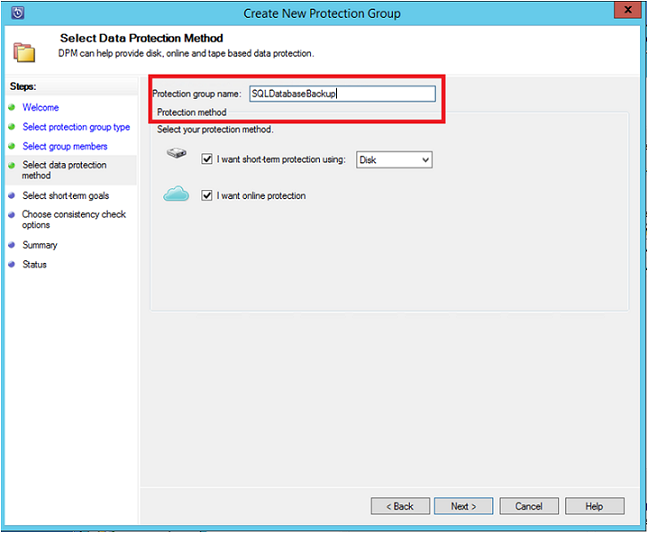
Na lâmina Selecionar Método de Proteção de Dados , forneça um nome para o grupo de proteção e selecione a caixa de seleção Quero Proteção Online .
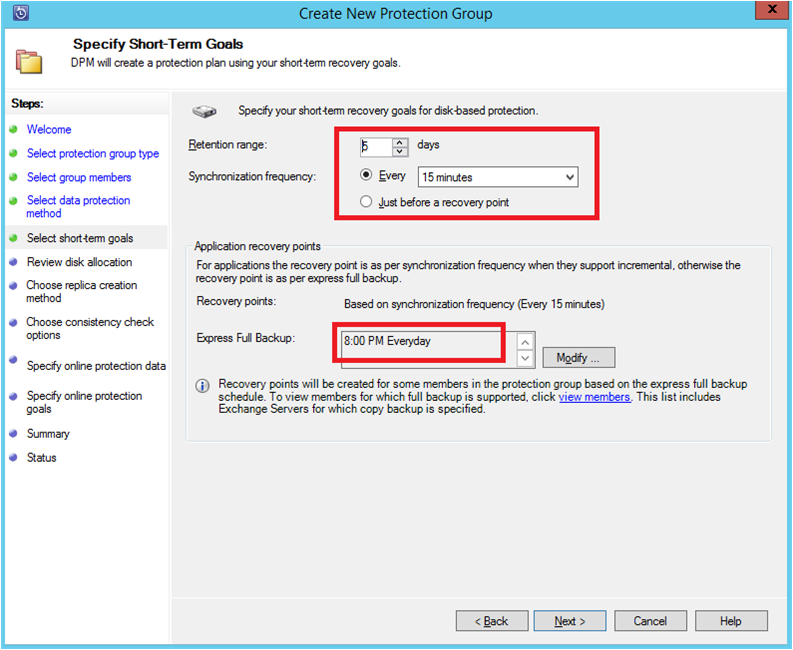
Na lâmina Especificar Short-Term Metas, inclua as entradas necessárias para criar pontos de backup no disco e selecione Próximo.
No exemplo, o intervalo de retenção é de 5 dias, a frequência de sincronização é uma vez a cada 15 minutos, que é a frequência de backup. O Express Full Backup está marcado para as 20:00.
Observação
No exemplo mostrado, às 20:00 todos os dias é criado um ponto de backup transferindo os dados modificados do ponto de backup das 20:00 do dia anterior. Este processo é chamado Express Full Backup. Os registos de transações são sincronizados a cada 15 minutos. Se precisares de recuperar a base de dados às 21h00, o ponto é criado a partir dos registos do último ponto de backup completo expresso (20h neste caso).
Na lâmina de Revisão da alocação de disco, verifique o espaço total de armazenamento disponível e o espaço potencial em disco. Selecione Seguinte.
No Escolher Método de Criação de Réplicas, opte por como criar o seu primeiro ponto de recuperação. Pode transferir manualmente o backup inicial (fora da rede) para evitar congestionamento de largura de banda ou através da rede. Se optar por esperar para transferir a primeira cópia de segurança, pode especificar a hora da transferência inicial. Selecione Seguinte.
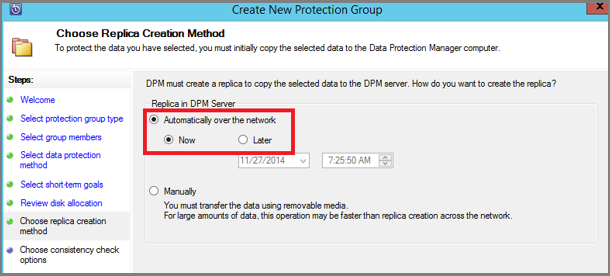
A cópia inicial de backup requer a transferência de toda a fonte de dados (base de dados SQL Server) do servidor de produção (computador SQL Server) para o Azure Backup Server. Estes dados podem ser grandes, e a transferência dos dados pela rede pode exceder a largura de banda. Por esta razão, pode optar por transferir o backup inicial: manualmente (usando suportes removíveis) para evitar congestionamento de largura de banda, ou automaticamente pela rede (a uma hora especificada).
Uma vez concluído o backup inicial, os restantes backups são backups incrementais na cópia de backup inicial. Os backups incrementais tendem a ser pequenos e são facilmente transferidos pela rede.
Escolhe quando queres que o teste de consistência seja executado e seleciona Próximo.
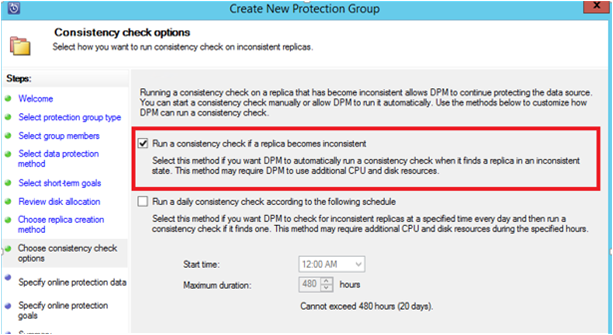
O Azure Backup Server realiza uma verificação de consistência da integridade do ponto de backup. O Azure Backup Server calcula a soma de verificação do ficheiro de backup no servidor de produção (computador SQL Server neste cenário) e os dados de backup desse ficheiro. Se houver um conflito, assume-se que o ficheiro de backup no Azure Backup Server está corrompido. O Azure Backup Server corrige os dados guardados enviando os blocos correspondentes à incompatibilidade de checksum. Como as verificações de consistência são intensivas em desempenho, pode agendar a verificação de consistência ou executá-la automaticamente.
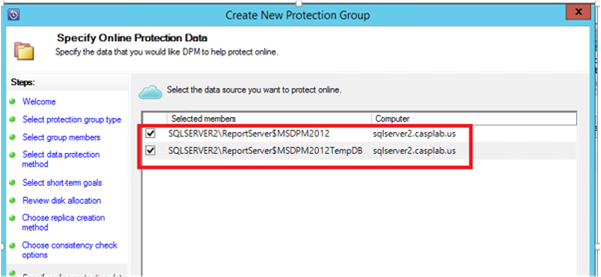
Para especificar a proteção online das fontes de dados, selecione as bases de dados a proteger no Azure e selecione Próximo.
Escolha agendas de backup e políticas de retenção que se adequem às políticas da organização.
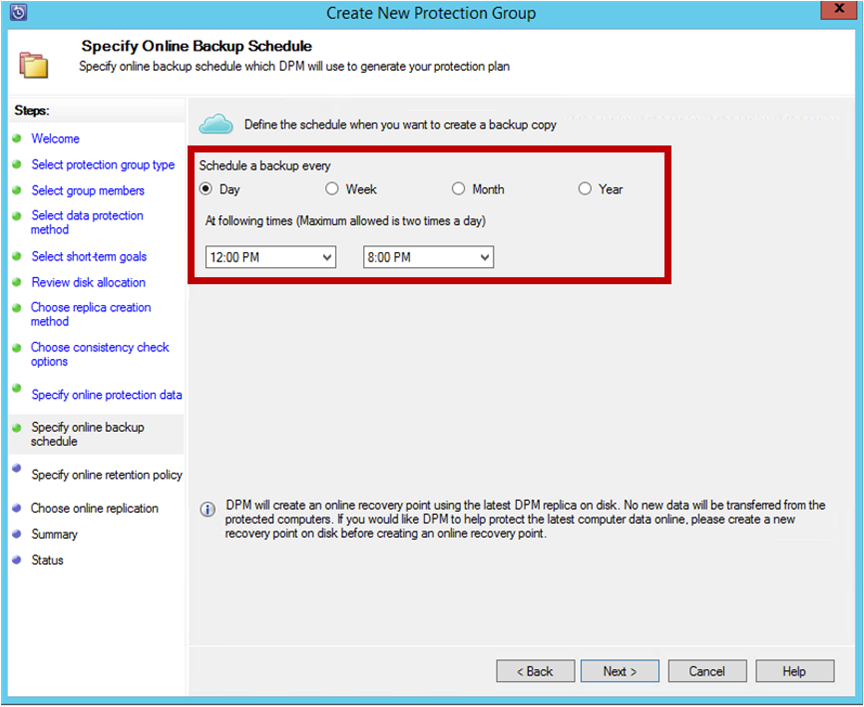
Neste exemplo, as cópias de segurança são feitas uma vez por dia, às 12:00 e às 20:00.
Observação
É uma boa prática ter alguns pontos de recuperação de curto prazo no disco, para uma recuperação rápida. Esses pontos de recuperação são usados para recuperação operacional. O Azure serve como um bom local fora do local, com SLAs mais altos e disponibilidade garantida.
Boa Prática: Se agendares backups para Azure para começarem depois de terminarem os backups locais de disco, os backups mais recentes são sempre copiados para Azure.
Escolha o calendário da política de retenção. Os detalhes sobre como funciona a política de retenção são fornecidos no artigo Use Azure Backup para substituir a infraestrutura da sua fita.
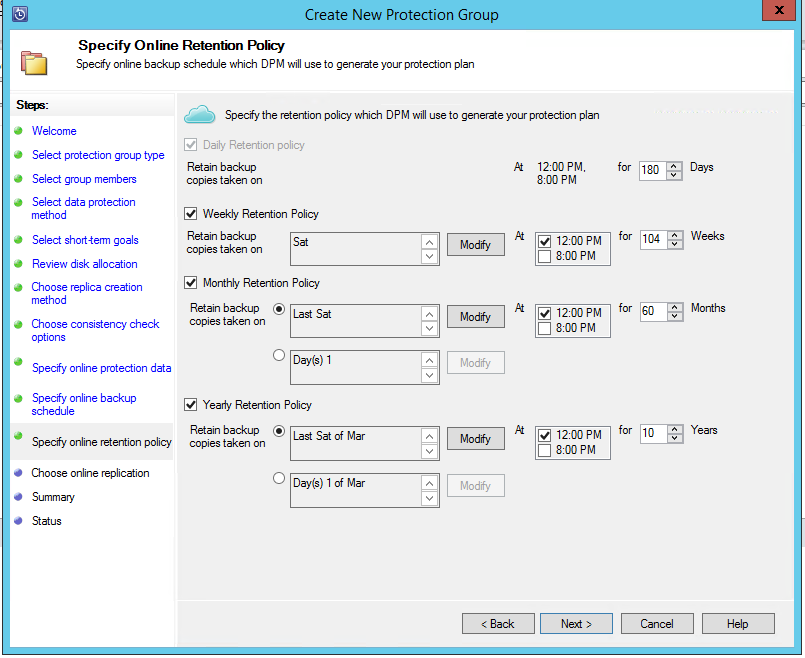
Neste exemplo:
- Os backups são feitos uma vez por dia, às 12:00 e às 20:00, e são mantidos durante 180 dias.
- A cópia de segurança no sábado às 12:00 da tarde mantém-se por 104 semanas
- A cópia de segurança de sábado passado às 12:00 é mantida por 60 meses.
- O backup no último sábado de março às 12:00 P.M. é mantido por 10 anos.
Selecione Próximo e selecione a opção apropriada para transferir a cópia de backup inicial para o Azure. Pode escolher Automaticamente pela rede
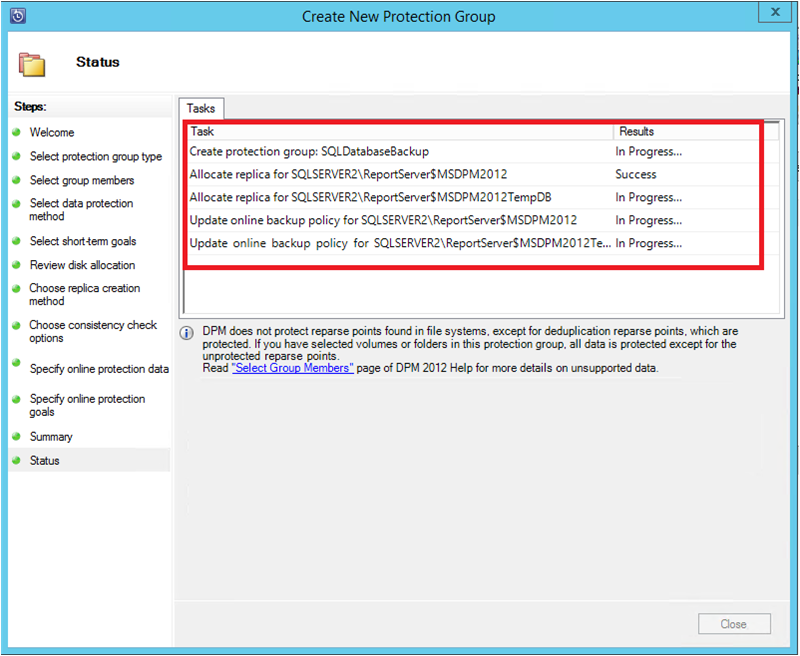
Depois de rever os detalhes da política na lâmina Resumo , selecione Criar grupo para completar o fluxo de trabalho. Pode selecionar Fechar e monitorizar o progresso do trabalho no espaço de trabalho de monitorização.
Execute uma cópia de segurança on-demand para bases de dados SQL Server no Azure Stack
Um ponto de recuperação é criado apenas quando ocorre a primeira cópia de segurança. Depois de criar uma política de backup, pode ativar manualmente a criação de um ponto de recuperação, em vez de esperar que o agendador aceite o backup.
Para executar uma cópia de segurança on-demand de uma base de dados SQL Server, siga estes passos:
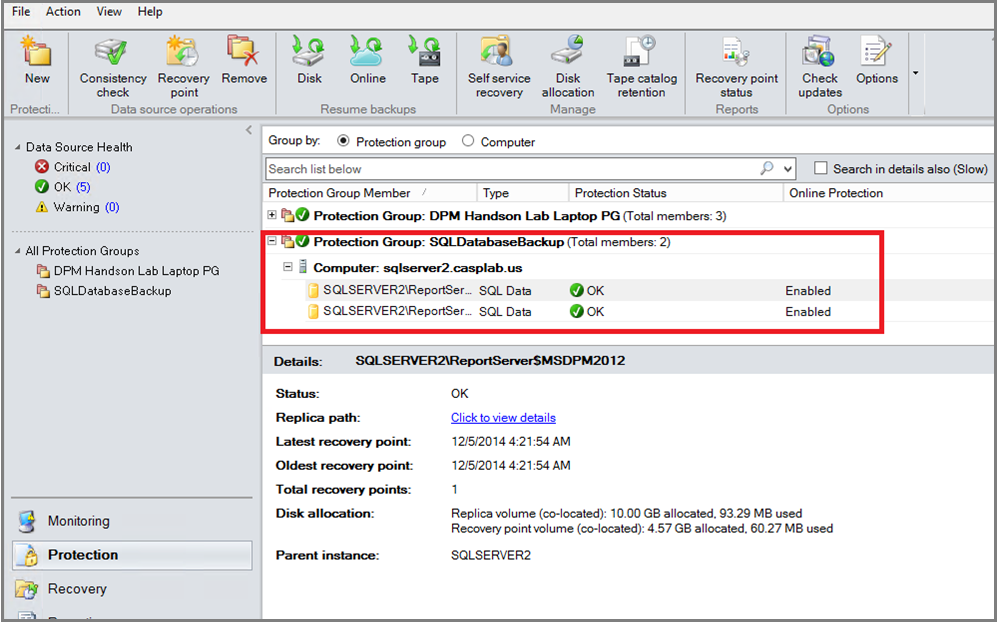
Espere até que o estado do grupo de proteção mostre OK antes de criar um ponto de recuperação para a base de dados.
Clique com o botão direito na base de dados e selecione Criar Ponto de Recuperação.
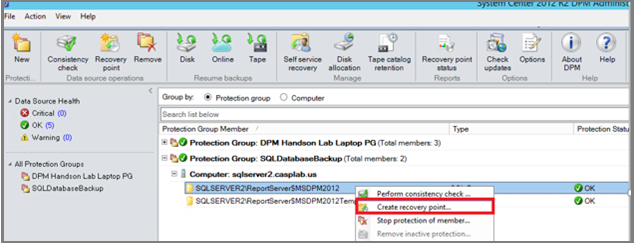
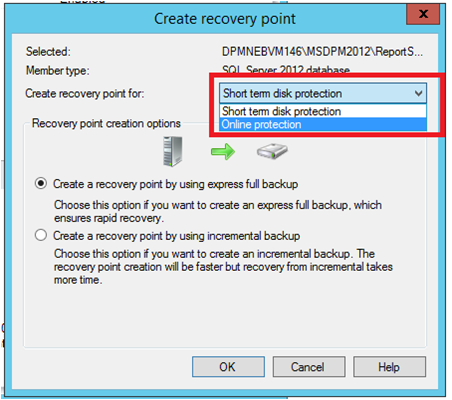
Escolha Proteção Online no menu suspenso e selecione OK para iniciar a criação de um ponto de recuperação no Azure.
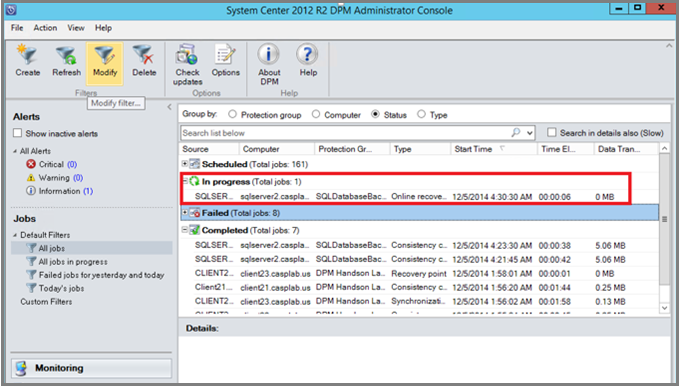
Veja o progresso da tarefa no espaço de Monitorização.
Recuperar a base de dados SQL Server no Azure Stack a partir do Azure
Para recuperar uma entidade protegida (base de dados SQL Server) do Azure, siga estes passos:
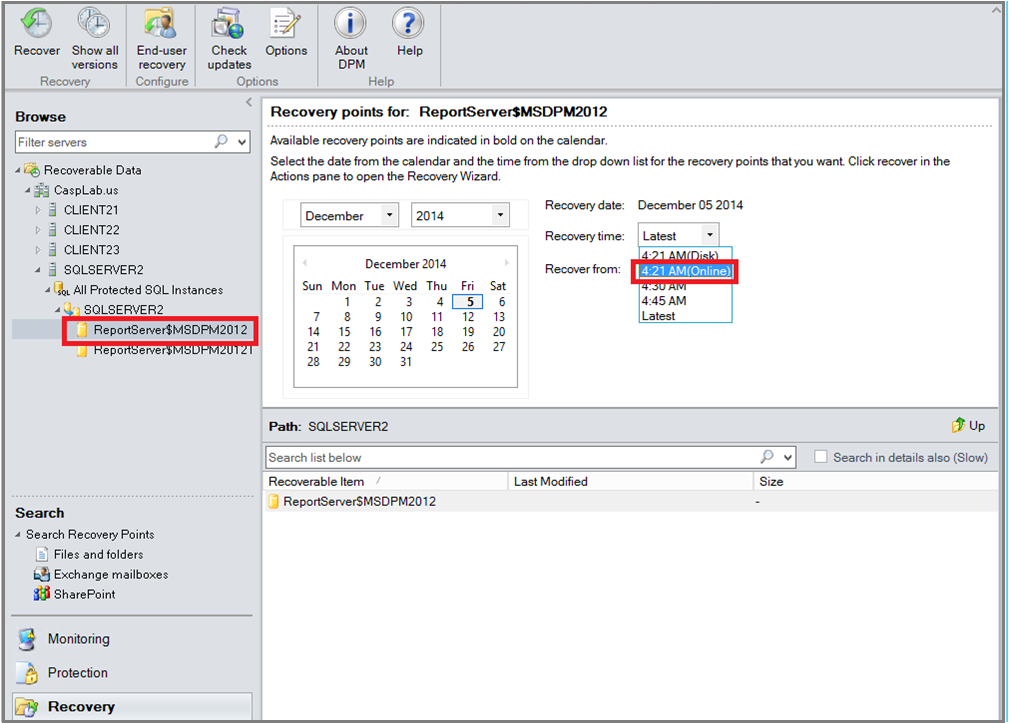
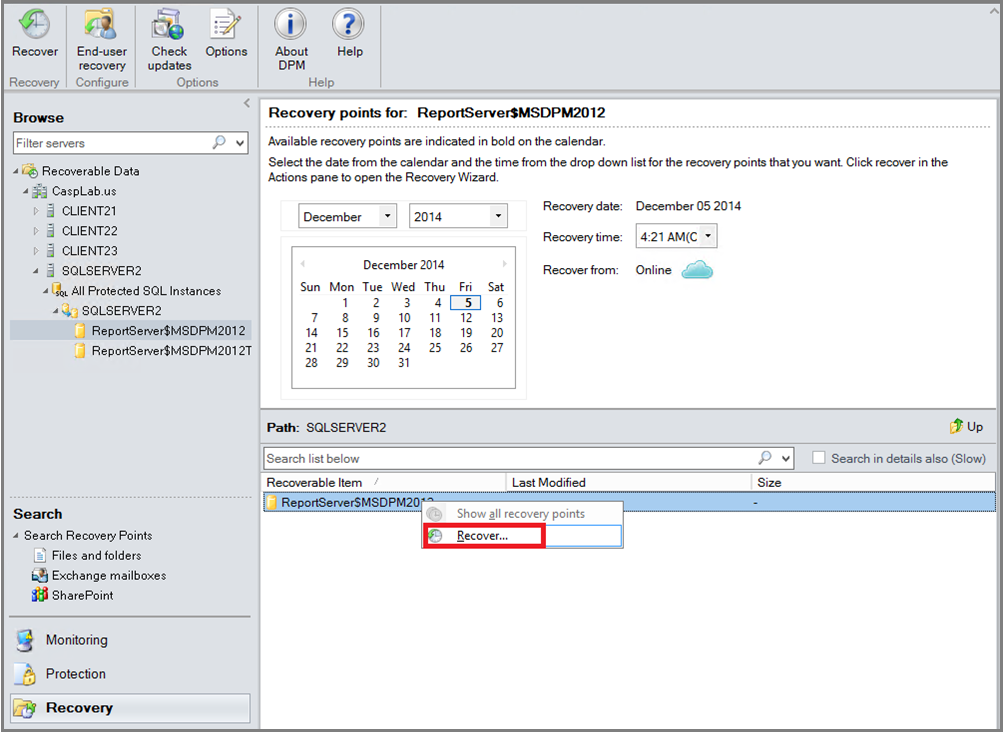
Abra a Consola de Gestão do Azure Backup Server. Navegue até ao espaço de trabalho de Recuperação , onde pode ver os servidores protegidos. Navegue pela base de dados necessária (neste caso ReportServer$MSDPM2012). Escolha uma hora de Recuperação especificada como ponto online.
Clique com o botão direito do mouse no nome do banco de dados e selecione Recuperar.
O MABS mostra os detalhes do ponto de recuperação. Selecione Seguinte. Para substituir o banco de dados, selecione o tipo de recuperação Recuperar para a instância original do SQL Server. Selecione Seguinte.
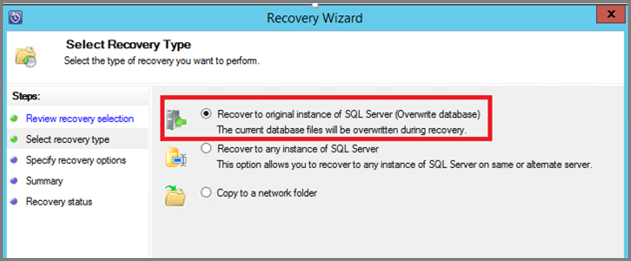
Neste exemplo, o MABS recupera a base de dados para outra instância do SQL Server, ou para uma pasta de rede autónoma.
Na lâmina Especificar opções de Recuperação, pode selecionar as opções de recuperação, como a limitação da largura de banda de rede, para controlar a largura de banda usada pela recuperação. Selecione Seguinte.
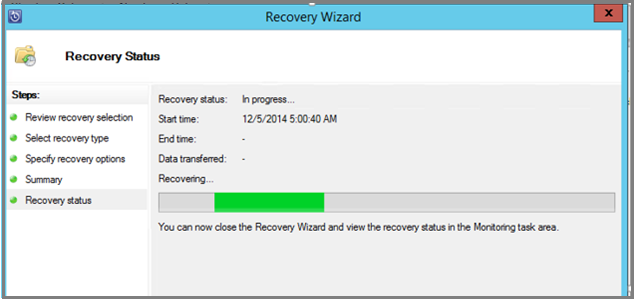
Na aba Resumo, vê todas as configurações de recuperação fornecidas até agora. Selecione Recuperar.
O estado de recuperação mostra a base de dados a ser recuperada. Pode selecionar Fechar para fechar o assistente e ver o progresso no espaço de monitorização.
Uma vez concluída a recuperação, a base de dados restaurada é consistente com a aplicação.