Nota
O acesso a esta página requer autorização. Pode tentar iniciar sessão ou alterar os diretórios.
O acesso a esta página requer autorização. Pode tentar alterar os diretórios.
Este artigo descreve como ingressar em uma chamada de sala usando SDKs de chamada móvel nativos ou da Web.
Pré-requisitos
- Uma conta do Azure com uma subscrição ativa. Crie uma conta gratuitamente.
- Um recurso ativo dos Serviços de Comunicação e uma cadeia de conexão. Crie um recurso de Serviços de Comunicação.
- Duas ou mais identidades de usuário de comunicação. Crie e gerencie tokens de acesso ou identidades de criação rápida para teste.
- Uma sala criada e um participante adicionado a ela. Criar e gerir salas
Obter token de acesso de usuário
Se você já criou usuários e os adicionou como participantes na sala seguindo a seção "Configurar participantes da sala" nesta página, então você pode usar diretamente esses usuários para ingressar na sala.
Caso contrário, você precisará criar um Token de Acesso de Usuário para cada participante da chamada. Saiba como criar e gerenciar tokens de acesso de usuário. Você também pode usar a CLI do Azure e executar o comando abaixo com sua cadeia de conexão para criar um usuário e um token de acesso. Depois que os usuários forem criados, você precisará adicioná-los à sala como participantes antes que eles possam entrar na sala.
az communication identity token issue --scope voip --connection-string "yourConnectionString"
Para obter detalhes, consulte Usar a CLI do Azure para criar e gerenciar tokens de acesso.
Nota
Você pode acessar salas usando a Biblioteca de Interface do Usuário dos Serviços de Comunicação do Azure. A Biblioteca de Interface permite que os desenvolvedores adicionem um cliente de chamada compatível com salas na sua aplicação com apenas algumas linhas de código.
Implementar o aplicativo de exemplo
Para implementar o código necessário para unir os participantes a uma chamada de salas, baixe do GitHub o aplicativo de exemplo Room Call.
Pré-requisitos da Web
- Você precisa ter Node.js 18. Você pode usar o Microsoft Installer (MSI) para instalá-lo.
Configurar o projeto
Criar uma nova aplicação Node.js
Abra o terminal ou a janela de comando, crie um novo diretório para seu aplicativo e navegue até ele.
mkdir calling-rooms-quickstart && cd calling-rooms-quickstart
Execute npm init -y para criar um arquivo package.json com as configurações padrão.
npm init -y
Instalar o pacote
Use o npm install comando para instalar o SDK de Chamada dos Serviços de Comunicação do Azure para JavaScript.
Importante
Este guia de início rápido usa a versão 1.14.1 do SDK de Chamada dos Serviços de Comunicação do Azure. A capacidade de participar numa chamada de sala e exibir os papéis dos participantes da chamada está disponível no SDK de Chamada JavaScript para navegadores da Web na versão 1.13.1 e superior.
npm install @azure/communication-common --save
npm install @azure/communication-calling@1.14.1 --save
Configurar a estrutura do aplicativo
Este artigo usa o webpack para agrupar os ativos do aplicativo. Execute o seguinte comando para instalar os pacotes npm webpack, webpack-cli e webpack-dev-server e listá-los como dependências de desenvolvimento no seu package.json.
npm install copy-webpack-plugin@^11.0.0 webpack@^5.88.2 webpack-cli@^5.1.4 webpack-dev-server@^4.15.1 --save-dev
Aqui está o código:
Crie um index.html arquivo no diretório raiz do seu projeto. Use este ficheiro para configurar um layout básico que permita ao utilizador participar numa chamada em salas.
<!-- index.html-->
<!DOCTYPE html>
<html>
    <head>
        <title>Azure Communication Services - Rooms Call Sample</title>
        <link rel="stylesheet" type="text/css" href="styles.css"/>
    </head>
    <body>
        <h4>Azure Communication Services - Rooms Call Sample</h4>
        <input id="user-access-token"
            type="text"
            placeholder="User access token"
            style="margin-bottom:1em; width: 500px;"/>
        <button id="initialize-call-agent" type="button">Initialize Call Agent</button>
        <br>
        <br>
        <input id="acs-room-id"
            type="text"
            placeholder="Enter Room Id"
            style="margin-bottom:1em; width: 500px; display: block;"/>
        <button id="join-room-call-button" type="button" disabled="true">Join Room Call</button>
        <button id="hangup-call-button" type="button" disabled="true">Hang up Call</button>
        <button id="start-video-button" type="button" disabled="true">Start Video</button>
        <button id="stop-video-button" type="button" disabled="true">Stop Video</button>
        <br>
        <br>
        <div id="connectedLabel" style="color: #13bb13;" hidden>Room Call is connected!</div>
        <br>
        <div id="remoteVideosGallery" style="width: 40%;" hidden>Remote participants' video streams:</div>
        <br>
        <div id="localVideoContainer" style="width: 30%;" hidden>Local video stream:</div>
        <!-- points to the bundle generated from client.js -->
        <script src="./main.js"></script>
    </body>
</html>
Crie um arquivo no diretório raiz do seu projeto chamado index.js para a lógica do aplicativo. Adicione o seguinte código ao index.js:
// Make sure to install the necessary dependencies
const { CallClient, VideoStreamRenderer, LocalVideoStream } = require('@azure/communication-calling');
const { AzureCommunicationTokenCredential } = require('@azure/communication-common');
const { AzureLogger, setLogLevel } = require("@azure/logger");
// Set the log level and output
setLogLevel('verbose');
AzureLogger.log = (...args) => {
    console.log(...args);
};

// Calling web sdk objects
let callAgent;
let deviceManager;
let call;
let localVideoStream;
let localVideoStreamRenderer;

// UI widgets
let userAccessToken = document.getElementById('user-access-token');
let acsRoomId = document.getElementById('acs-room-id');
let initializeCallAgentButton = document.getElementById('initialize-call-agent');
let startCallButton = document.getElementById('join-room-call-button');
let hangUpCallButton = document.getElementById('hangup-call-button');
let startVideoButton = document.getElementById('start-video-button');
let stopVideoButton = document.getElementById('stop-video-button');
let connectedLabel = document.getElementById('connectedLabel');
let remoteVideosGallery = document.getElementById('remoteVideosGallery');
let localVideoContainer = document.getElementById('localVideoContainer');

/**
 * Using the CallClient, initialize a CallAgent instance with a CommunicationUserCredential which enable us to join a rooms call.
 */
initializeCallAgentButton.onclick = async () => {
    try {
        const callClient = new CallClient();
        tokenCredential = new AzureCommunicationTokenCredential(userAccessToken.value.trim());
        callAgent = await callClient.createCallAgent(tokenCredential)
        // Set up a camera device to use.
        deviceManager = await callClient.getDeviceManager();
        await deviceManager.askDevicePermission({ video: true });
        await deviceManager.askDevicePermission({ audio: true });

        startCallButton.disabled = false;
        initializeCallAgentButton.disabled = true;
    } catch(error) {
        console.error(error);
    }
}

startCallButton.onclick = async () => {
    try {
        const localVideoStream = await createLocalVideoStream();
        const videoOptions = localVideoStream ? { localVideoStreams: [localVideoStream] } : undefined;

        const roomCallLocator = { roomId: acsRoomId.value.trim() };
        call = callAgent.join(roomCallLocator, { videoOptions });

        // Subscribe to the call's properties and events.
        subscribeToCall(call);
    } catch (error) {
        console.error(error);
    }
}

/**
 * Subscribe to a call obj.
 * Listen for property changes and collection updates.
 */
subscribeToCall = (call) => {
    try {
        // Inspect the initial call.id value.
        console.log(`Call Id: ${call.id}`);
        //Subscribe to call's 'idChanged' event for value changes.
        call.on('idChanged', () => {
            console.log(`Call Id changed: ${call.id}`);
        });

        // Inspect the initial call.state value.
        console.log(`Call state: ${call.state}`);
        // Subscribe to call's 'stateChanged' event for value changes.
        call.on('stateChanged', async () => {
            console.log(`Call state changed: ${call.state}`);
            if(call.state === 'Connected') {
                connectedLabel.hidden = false;
                startCallButton.disabled = true;
                hangUpCallButton.disabled = false;
                startVideoButton.disabled = false;
                stopVideoButton.disabled = false;
                remoteVideosGallery.hidden = false;
            } else if (call.state === 'Disconnected') {
                connectedLabel.hidden = true;
                startCallButton.disabled = false;
                hangUpCallButton.disabled = true;
                startVideoButton.disabled = true;
                stopVideoButton.disabled = true;
                remoteVideosGallery.hidden = true;
                console.log(`Call ended, call end reason={code=${call.callEndReason.code}, subCode=${call.callEndReason.subCode}}`);
            }
        });
        call.on('isLocalVideoStartedChanged', () => {
            console.log(`isLocalVideoStarted changed: ${call.isLocalVideoStarted}`);
        });
        console.log(`isLocalVideoStarted: ${call.isLocalVideoStarted}`);
        call.localVideoStreams.forEach(async (lvs) => {
            localVideoStream = lvs;
            await displayLocalVideoStream();
        });
        call.on('localVideoStreamsUpdated', e => {
            e.added.forEach(async (lvs) => {
                localVideoStream = lvs;
                await displayLocalVideoStream();
            });
            e.removed.forEach(lvs => {
               removeLocalVideoStream();
            });
        });

        // Inspect the call's current remote participants and subscribe to them.
        call.remoteParticipants.forEach(remoteParticipant => {
            subscribeToRemoteParticipant(remoteParticipant);
        });
        // Subscribe to the call's 'remoteParticipantsUpdated' event to be
        // notified when new participants are added to the call or removed from the call.
        call.on('remoteParticipantsUpdated', e => {
            // Subscribe to new remote participants that are added to the call.
            e.added.forEach(remoteParticipant => {
                subscribeToRemoteParticipant(remoteParticipant)
            });
            // Unsubscribe from participants that are removed from the call
            e.removed.forEach(remoteParticipant => {
                console.log('Remote participant removed from the call.');
            });
        });
    } catch (error) {
        console.error(error);
    }
}

/**
 * Subscribe to a remote participant obj.
 * Listen for property changes and collection updates.
 */
subscribeToRemoteParticipant = (remoteParticipant) => {
    try {
        // Inspect the initial remoteParticipant.state value.
        console.log(`Remote participant state: ${remoteParticipant.state}`);
        // Subscribe to remoteParticipant's 'stateChanged' event for value changes.
        remoteParticipant.on('stateChanged', () => {
            console.log(`Remote participant state changed: ${remoteParticipant.state}`);
        });

        // Inspect the remoteParticipants's current videoStreams and subscribe to them.
        remoteParticipant.videoStreams.forEach(remoteVideoStream => {
            subscribeToRemoteVideoStream(remoteVideoStream)
        });
        // Subscribe to the remoteParticipant's 'videoStreamsUpdated' event to be
        // notified when the remoteParticipant adds new videoStreams and removes video streams.
        remoteParticipant.on('videoStreamsUpdated', e => {
            // Subscribe to new remote participant's video streams that were added.
            e.added.forEach(remoteVideoStream => {
                subscribeToRemoteVideoStream(remoteVideoStream)
            });
            // Unsubscribe from remote participant's video streams that were removed.
            e.removed.forEach(remoteVideoStream => {
                console.log('Remote participant video stream was removed.');
            })
        });
    } catch (error) {
        console.error(error);
    }
}

/**
 * Subscribe to a remote participant's remote video stream obj.
 * You have to subscribe to the 'isAvailableChanged' event to render the remoteVideoStream. If the 'isAvailable' property
 * changes to 'true', a remote participant is sending a stream. Whenever availability of a remote stream changes
 * you can choose to destroy the whole 'Renderer', a specific 'RendererView' or keep them, but this will result in displaying blank video frame.
 */
subscribeToRemoteVideoStream = async (remoteVideoStream) => {
    let renderer = new VideoStreamRenderer(remoteVideoStream);
    let view;
    let remoteVideoContainer = document.createElement('div');
    remoteVideoContainer.className = 'remote-video-container';

    const createView = async () => {
        // Create a renderer view for the remote video stream.
        view = await renderer.createView();
        // Attach the renderer view to the UI.
        remoteVideoContainer.appendChild(view.target);
        remoteVideosGallery.appendChild(remoteVideoContainer);
    }

    // Remote participant has switched video on/off
    remoteVideoStream.on('isAvailableChanged', async () => {
        try {
            if (remoteVideoStream.isAvailable) {
                await createView();
            } else {
                view.dispose();
                remoteVideosGallery.removeChild(remoteVideoContainer);
            }
        } catch (e) {
            console.error(e);
        }
    });

    // Remote participant has video on initially.
    if (remoteVideoStream.isAvailable) {
        try {
            await createView();
        } catch (e) {
            console.error(e);
        }
    }
}

/**
 * Start your local video stream.
 * This will send your local video stream to remote participants so they can view it.
 */
startVideoButton.onclick = async () => {
    try {
        const localVideoStream = await createLocalVideoStream();
        await call.startVideo(localVideoStream);
    } catch (error) {
        console.error(error);
    }
}

/**
 * Stop your local video stream.
 * This will stop your local video stream from being sent to remote participants.
 */
stopVideoButton.onclick = async () => {
    try {
        await call.stopVideo(localVideoStream);
    } catch (error) {
        console.error(error);
    }
}

/**
 * To render a LocalVideoStream, you need to create a new instance of VideoStreamRenderer, and then
 * create a new VideoStreamRendererView instance using the asynchronous createView() method.
 * You may then attach view.target to any UI element.
 */
createLocalVideoStream = async () => {
    const camera = (await deviceManager.getCameras())[0];
    if (camera) {
        return new LocalVideoStream(camera);
    } else {
        console.error(`No camera device found on the system`);
    }
}

/**
 * Display your local video stream preview in your UI
 */
displayLocalVideoStream = async () => {
    try {
        localVideoStreamRenderer = new VideoStreamRenderer(localVideoStream);
        const view = await localVideoStreamRenderer.createView();
        localVideoContainer.hidden = false;
        localVideoContainer.appendChild(view.target);
    } catch (error) {
        console.error(error);
    }
}

/**
 * Remove your local video stream preview from your UI
 */
removeLocalVideoStream = async() => {
    try {
        localVideoStreamRenderer.dispose();
        localVideoContainer.hidden = true;
    } catch (error) {
        console.error(error);
    }
}

/**
 * End current room call
 */
hangUpCallButton.addEventListener("click", async () => {
    await call.hangUp();
});
Adicionar o código do servidor local do webpack
Crie um arquivo no diretório raiz do seu projeto chamado webpack.config.js para conter a lógica do servidor local para este início rápido. Adicione o seguinte código ao webpack.config.js:
const path = require('path');
const CopyPlugin = require("copy-webpack-plugin");

module.exports = {
    mode: 'development',
    entry: './index.js',
    output: {
        filename: 'main.js',
        path: path.resolve(__dirname, 'dist'),
    },
    devServer: {
        static: {
            directory: path.join(__dirname, './')
        },
    },
    plugins: [
        new CopyPlugin({
            patterns: [
                './index.html'
            ]
        }),
    ]
};
Executar o código
Use o webpack-dev-server para criar e executar seu aplicativo. Execute o seguinte comando para agrupar o host do aplicativo em um servidor Web local:
`npx webpack serve --config webpack.config.js`
- Abra o navegador, navegue até http://localhost:8080/.
- No primeiro campo de entrada, insira um token de acesso de usuário válido.
- Clique em "Inicializar Call Agent" e insira o ID da sua sala.
- Clique em Participar na Chamada na Sala.
Entrou com sucesso numa chamada Rooms!
Noções básicas sobre como participar de uma chamada de sala
Todo o código que você adicionou ao aplicativo de exemplo permitiu que você iniciasse e participasse com êxito de uma chamada de sala. Aqui estão mais informações sobre quais mais métodos/manipuladores você pode acessar para que o Rooms estenda a funcionalidade em seu aplicativo.
Para exibir a função dos participantes da chamada local ou remota, inscreva-se no manipulador da seguinte maneira.
// Subscribe to changes for your role in a call
 const callRoleChangedHandler = () => {
 	console.log(call.role);
 };

 call.on('roleChanged', callRoleChangedHandler);

// Subscribe to role changes for remote participants
 const subscribeToRemoteParticipant = (remoteParticipant) => {
 	remoteParticipant.on('roleChanged', () => {
 	    console.log(remoteParticipant.role);
 	});
 }
Para obter mais informações sobre as funções dos participantes da chamada de sala, consulte API de salas para reuniões estruturadas.
Implementar o aplicativo de exemplo
Para implementar o código necessário para unir os participantes a uma chamada de salas, baixe do GitHub o aplicativo de exemplo Room Call.
Configurar o projeto
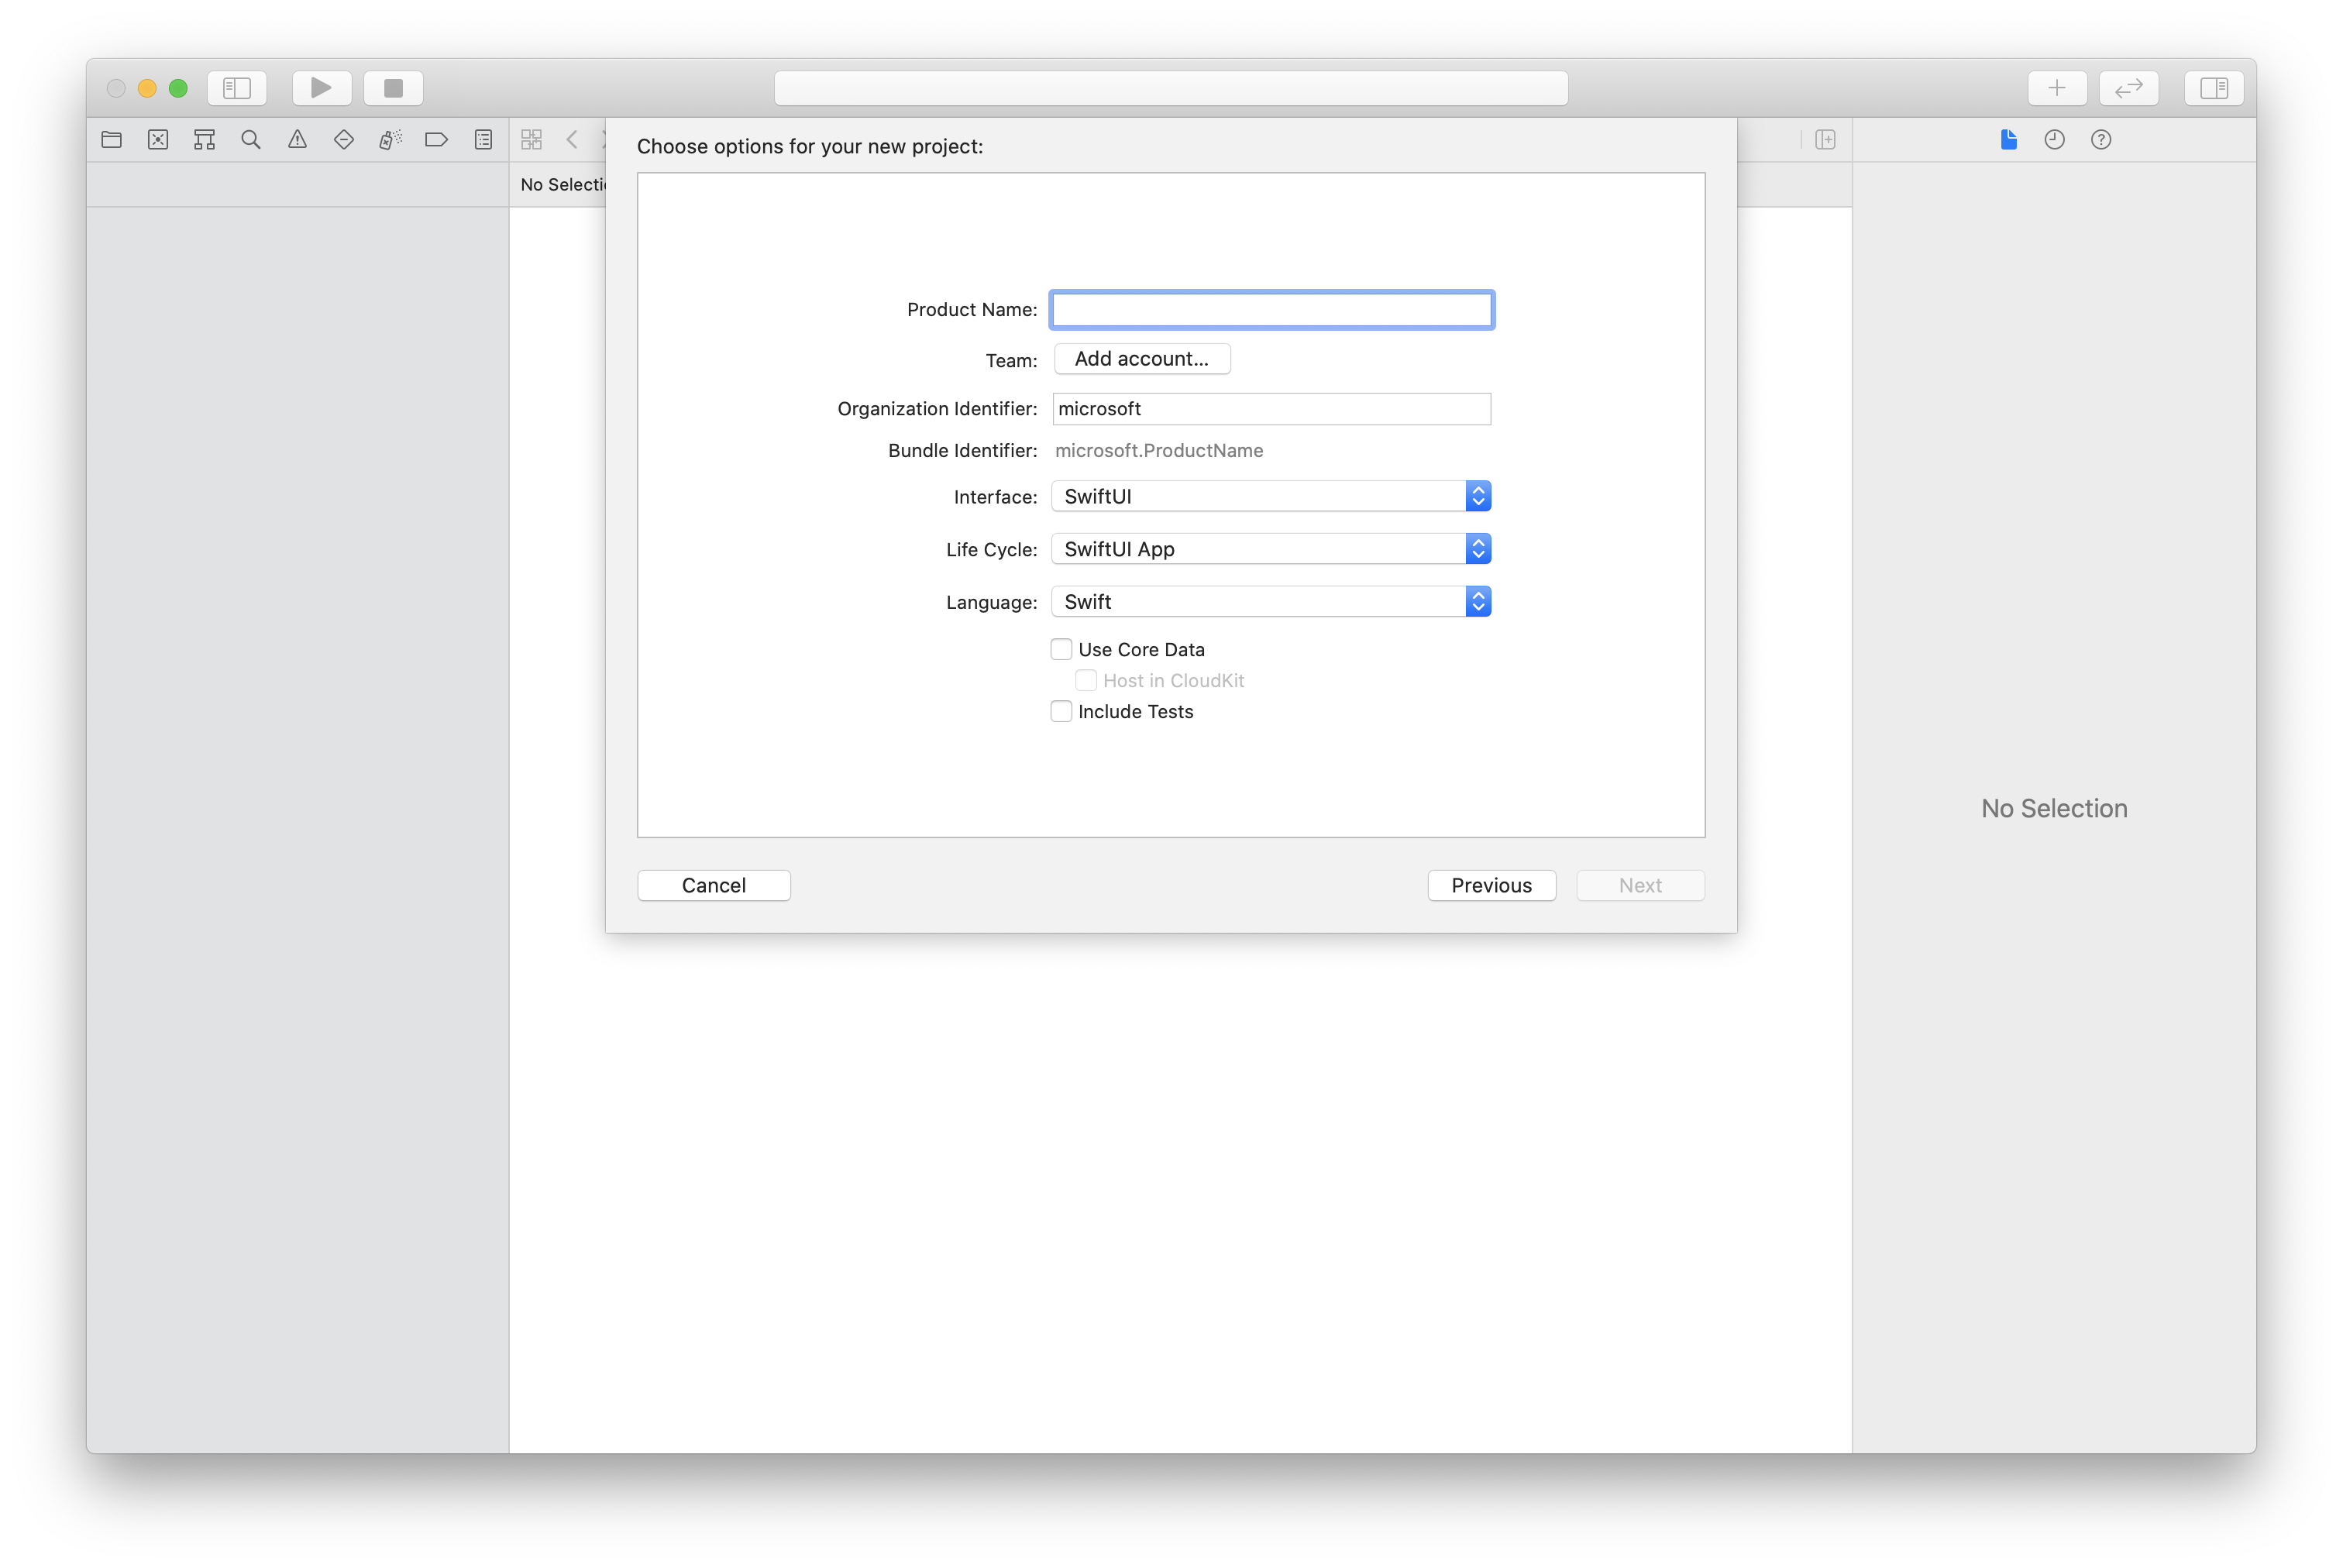
Criando o projeto Xcode
No Xcode, crie um novo projeto iOS e selecione o modelo Single View App. Este tutorial usa a estrutura SwiftUI, portanto, você deve definir o idioma como Swift e a interface do usuário como SwiftUI.
Instalação do CocoaPods
Use este guia para instalar o CocoaPods no seu Mac.
Instale o pacote e as dependências com o CocoaPods
Para criar um Podfile para seu aplicativo, abra o terminal e navegue até a pasta do projeto e execute o pod init.
Adicione o seguinte código ao Podfile e salve:
platform :ios, '13.0'
use_frameworks!

target 'roomsquickstart' do
 pod 'AzureCommunicationCalling', '~> 2.5.0'
end
Execute a instalação do pod.
Abra o ficheiro
.xcworkspacecom o Xcode.
Solicitar acesso ao microfone e à câmara
Para acessar o microfone e a câmera do dispositivo, você precisa atualizar a Lista de Propriedades de Informações do seu aplicativo com NSMicrophoneUsageDescription e NSCameraUsageDescription. Defina o valor associado como uma cadeia de caracteres para incluir na caixa de diálogo que o sistema usa para solicitar acesso do usuário.
Clique com o botão direito do mouse na Info.plist entrada da árvore do projeto e selecione Abrir como > código-fonte. Adicione as seguintes linhas à secção de nível <dict> superior e, em seguida, guarde o ficheiro.
<key>NSMicrophoneUsageDescription</key>
<string>Need microphone access for VOIP calling.</string>
<key>NSCameraUsageDescription</key>
<string>Need camera access for video calling</string>
Configurar a estrutura do aplicativo
Abra o ficheiro ContentView.swift do seu projeto. No início do arquivo, adicione uma declaração de importação para importar a biblioteca AzureCommunicationCalling e AVFoundation. Use AVFoundation para capturar permissão de áudio do código.
import AzureCommunicationCalling
import AVFoundation
Modelo de objeto
As classes e interfaces a seguir lidam com alguns dos principais recursos do SDK de Chamada dos Serviços de Comunicação do Azure para iOS.
| Nome | Descrição |
|---|---|
| CallClient | O CallClient é o principal ponto de entrada para o SDK de chamada. |
| Agente de Chamadas | O CallAgent é usado para iniciar e gerenciar chamadas. |
| CommunicationTokenCredential | O CommunicationTokenCredential é usado como a credencial de token para instanciar o CallAgent. |
| Identificador de Comunicação | O CommunicationIdentifier é usado para representar a identidade do usuário e pode ter um dos seguintes valores: CommunicationUserIdentifier/PhoneNumberIdentifier/CallingApplication. |
| Localizador de Chamadas de Sala | O RoomCallLocator é usado pelo CallAgent para participar de uma chamada de sala |
Criar o Agente de Chamadas
Substitua a implementação da estrutura ContentView por alguns controles de interface do usuário simples que permitem que um usuário inicie e termine uma chamada. Neste exemplo, anexamos a lógica de negócios a esses controles.
struct ContentView: View {
 @State var roomId: String = ""
 @State var callObserver:CallObserver?
 @State var previewRenderer: VideoStreamRenderer? = nil
 @State var previewView: RendererView? = nil
 @State var sendingLocalVideo: Bool = false
 @State var speakerEnabled: Bool = false
 @State var muted: Bool = false
 @State var callClient: CallClient?
 @State var call: Call?
 @State var callHandler: CallHandler?
 @State var callAgent: CallAgent?
 @State var deviceManager: DeviceManager?
 @State var localVideoStreams: [LocalVideoStream]?
 @State var callState: String = "Unknown"
 @State var showAlert: Bool = false
 @State var alertMessage: String = ""
 @State var participants: [[Participant]] = [[]]

 var body: some View {
 NavigationView {
 ZStack {
 if (call == nil) {
 Form {
 Section {
 TextField("Room ID", text: $roomId)
 Button(action: joinRoomCall) {
 Text("Join Room Call")
 }
 }
 }
 .navigationBarTitle("Rooms Quickstart")
 } else {
 ZStack {
 VStack {
 ForEach(participants, id:\.self) { array in
 HStack {
 ForEach(array, id:\.self) { participant in
 ParticipantView(self, participant)
 }
 }
 .frame(maxWidth: .infinity, maxHeight: 200, alignment: .topLeading)
 }
 }
 .background(Color.black)
 .frame(maxWidth: .infinity, maxHeight: .infinity, alignment: .topLeading)
 VStack {
 if (sendingLocalVideo) {
 HStack {
 RenderInboundVideoView(view: $previewView)
 .frame(width:90, height:160)
 .padding(10)
 .background(Color.green)
 }
 .frame(maxWidth: .infinity, alignment: .trailing)
 }
 HStack {
 Button(action: toggleMute) {
 HStack {
 Text(muted ? "Unmute" : "Mute")
 }
 .frame(width:80)
 .padding(.vertical, 10)
 .background(Color(.lightGray))
 }
 Button(action: toggleLocalVideo) {
 HStack {
 Text(sendingLocalVideo ? "Video-Off" : "Video-On")
 }
 .frame(width:80)
 .padding(.vertical, 10)
 .background(Color(.lightGray))
 }
 }
 .frame(maxWidth: .infinity, alignment: .leading)
 .padding(.horizontal, 10)
 .padding(.vertical, 5)
 HStack {
 Button(action: leaveRoomCall) {
 HStack {
 Text("Leave Room Call")
 }
 .frame(width:80)
 .padding(.vertical, 10)
 .background(Color(.red))
 }
 }
 .frame(maxWidth: .infinity, alignment: .leading)
 .padding(.horizontal, 10)
 .padding(.vertical, 5)
 HStack {
 Text("Status:")
 Text(callState)
 }
 .padding(.vertical, 10)
 }
 .frame(maxWidth: .infinity, maxHeight: .infinity, alignment: .bottomLeading)
 }
 }
 }
 }
 .onAppear{
 // Authenticate the client
 // Initialize the CallAgent and access Device Manager
 // Ask for permissions
 }
 }
}

//Functions and Observers

struct HomePageView_Previews: PreviewProvider {
 static var previews: some View {
 HomePageView()
 }
}
Autenticar o cliente
Para inicializar uma instância do CallAgent, precisamos de um Token de Acesso de Usuário que permita que os participantes participem de chamadas de sala.
Depois de ter um token, adicione o seguinte código ao callback em onAppear em ContentView.swift. Você precisa substituir <USER ACCESS TOKEN> por um token de acesso de usuário válido para seu recurso:
var userCredential: CommunicationTokenCredential?
do {
 userCredential = try CommunicationTokenCredential(token: "<USER ACCESS TOKEN>")
} catch {
 print("ERROR: It was not possible to create user credential.")
 return
}
Inicialize o CallAgent e acesse o Gerenciador de dispositivos
Para criar uma instância CallAgent a partir de um CallClient, use o método que retorna de forma assíncrona callClient.createCallAgent um objeto CallAgent depois de inicializado. O DeviceManager permite enumerar dispositivos locais que podem ser usados em uma chamada para transmitir fluxos de áudio/vídeo. Ele também permite que você solicite permissão de um usuário para acessar microfone / câmera.
self.callClient = CallClient()
self.callClient?.createCallAgent(userCredential: userCredential!) { (agent, error) in
 if error != nil {
 print("ERROR: It was not possible to create a call agent.")
 return
 } else {
 self.callAgent = agent
 print("Call agent successfully created.")
 self.callAgent!.delegate = callHandler
 self.callClient?.getDeviceManager { (deviceManager, error) in
 if (error == nil) {
 print("Got device manager instance")
 self.deviceManager = deviceManager
 } else {
 print("Failed to get device manager instance")
 }
 }
 }
}
Pedir permissões
Precisamos adicionar o seguinte código à função de callback onAppear para pedir permissões para áudio e vídeo.
AVAudioSession.sharedInstance().requestRecordPermission { (granted) in
 if granted {
 AVCaptureDevice.requestAccess(for: .video) { (videoGranted) in
 /* NO OPERATION */
 }
 }
}
Participar numa chamada de sala
Configure o joinRoomCall método como a ação a ser executada quando um participante selecionar o botão Entrar na chamada da sala. Neste exemplo, as chamadas são áudio apenas por padrão, mas podem ter o vídeo habilitado quando um participante entra em uma sala.
func joinRoomCall() {
 if self.callAgent == nil {
 print("CallAgent not initialized")
 return
 }

 if (self.roomId.isEmpty) {
 print("Room ID not set")
 return
 }

 // Join a call with a Room ID
 let options = JoinCallOptions()
 let audioOptions = AudioOptions()
 audioOptions.muted = self.muted

 options.audioOptions = audioOptions

 let roomCallLocator = RoomCallLocator(roomId: roomId)
 self.callAgent!.join(with: roomCallLocator, joinCallOptions: options) { (call, error) in
 self.setCallAndObserver(call: call, error: error)
 }
}
CallObserver é usado para gerenciar eventos de chamada intermediária e participantes remotos. Colocamos na função setCallAndObserver os observadores.
func setCallAndObserver(call:Call!, error:Error?) {
 if (error == nil) {
 self.call = call
 self.callObserver = CallObserver(view:self)

 self.call!.delegate = self.callObserver

 if (self.call!.state == CallState.connected) {
 self.callObserver!.handleInitialCallState(call: call)
 }
 } else {
 print("Failed to get call object")
 }
}
Sair de uma chamada de sala
O leaveRoomCall método é definido como a ação a ser realizada quando um participante seleciona o botão Sair da sala de chamada. O método lida com terminar uma chamada e limpa quaisquer recursos que foram criados.
private func leaveRoomCall() {
 if (self.sendingLocalVideo) {
 self.call!.stopVideo(stream: self.localVideoStreams!.first!) { (error) in
 if (error != nil) {
 print("Failed to stop video")
 } else {
 self.sendingLocalVideo = false
 self.previewView = nil
 self.previewRenderer?.dispose()
 self.previewRenderer = nil
 }
 }
 }
 self.call?.hangUp(options: nil) { (error) in }
 self.participants.removeAll()
 self.call?.delegate = nil
 self.call = nil
}
Transmissão de vídeo
Durante uma chamada de sala, use startVideo ou stopVideo para iniciar ou parar o envio LocalVideoStream para participantes remotos.
func toggleLocalVideo() {
 if (self.sendingLocalVideo) {
 self.call!.stopVideo(stream: self.localVideoStreams!.first!) { (error) in
 if (error != nil) {
 print("Cannot stop video")
 } else {
 self.sendingLocalVideo = false
 self.previewView = nil
 self.previewRenderer!.dispose()
 self.previewRenderer = nil
 }
 }
 } else {
 let availableCameras = self.deviceManager!.cameras
 let scalingMode:ScalingMode = .crop
 if (self.localVideoStreams == nil) {
 self.localVideoStreams = [LocalVideoStream]()
 }
 self.localVideoStreams!.append(LocalVideoStream(camera: availableCameras.first!))
 self.previewRenderer = try! VideoStreamRenderer(localVideoStream: self.localVideoStreams!.first!)
 self.previewView = try! previewRenderer!.createView(withOptions: CreateViewOptions(scalingMode:scalingMode))
 self.call!.startVideo(stream: self.localVideoStreams!.first!) { (error) in
 if (error != nil) {
 print("Cannot start video")
 }
 else {
 self.sendingLocalVideo = true
 }
 }
 }
}
Silenciar o áudio local
Durante uma chamada de sala, podemos usar mute ou unMute silenciar ou desativar o som do microfone.
func toggleMute() {
 if (self.muted) {
 call!.unmuteOutgoingAudio(completionHandler: { (error) in
 if error == nil {
 self.muted = false
 }
 })
 } else {
 call!.muteOutgoingAudio(completionHandler: { (error) in
 if error == nil {
 self.muted = true
 }
 })
 }
}
Tratamento de atualizações de chamadas
Para lidar com atualizações de chamada, implemente um CallHandler para gerir eventos de atualização. Coloque a seguinte implementação em CallHandler.swift.
final class CallHandler: NSObject, CallAgentDelegate {
 public var owner: ContentView?

 private static var instance: CallHandler?
 static func getOrCreateInstance() -> CallHandler {
 if let c = instance {
 return c
 }
 instance = CallHandler()
 return instance!
 }

 private override init() {}

 public func callAgent(_ callAgent: CallAgent, didUpdateCalls args: CallsUpdatedEventArgs) {
 if let removedCall = args.removedCalls.first {
 owner?.call = nil
 }
 }
}
Precisamos criar uma instância de CallHandler adicionando o seguinte código ao callback em onAppear no ContentView.swift:
self.callHandler = CallHandler.getOrCreateInstance()
self.callHandler.owner = self
Defina um delegado para o CallAgent após a criação bem-sucedida do CallAgent:
self.callAgent!.delegate = callHandler
Gestão remota de participantes
Todos os participantes remotos têm o tipo RemoteParticipant e estão disponíveis através da coleção remoteParticipants numa instância de chamada. Podemos implementar uma Participant classe para gerenciar as atualizações em fluxos de vídeo remotos de participantes remotos, entre outras coisas.
class Participant: NSObject, RemoteParticipantDelegate, ObservableObject {
 private var videoStreamCount = 0
 private let innerParticipant:RemoteParticipant
 private let call:Call
 private var renderedRemoteVideoStream:RemoteVideoStream?

 @Published var state:ParticipantState = ParticipantState.disconnected
 @Published var isMuted:Bool = false
 @Published var isSpeaking:Bool = false
 @Published var hasVideo:Bool = false
 @Published var displayName:String = ""
 @Published var videoOn:Bool = true
 @Published var renderer:VideoStreamRenderer? = nil
 @Published var rendererView:RendererView? = nil
 @Published var scalingMode: ScalingMode = .fit

 init(_ call: Call, _ innerParticipant: RemoteParticipant) {
 self.call = call
 self.innerParticipant = innerParticipant
 self.displayName = innerParticipant.displayName

 super.init()

 self.innerParticipant.delegate = self

 self.state = innerParticipant.state
 self.isMuted = innerParticipant.isMuted
 self.isSpeaking = innerParticipant.isSpeaking
 self.hasVideo = innerParticipant.videoStreams.count > 0
 if(self.hasVideo) {
 handleInitialRemoteVideo()
 }
 }

 deinit {
 self.innerParticipant.delegate = nil
 }

 func getMri() -> String {
 Utilities.toMri(innerParticipant.identifier)
 }

 func set(scalingMode: ScalingMode) {
 if self.rendererView != nil {
 self.rendererView!.update(scalingMode: scalingMode)
 }
 self.scalingMode = scalingMode
 }

 func handleInitialRemoteVideo() {
 renderedRemoteVideoStream = innerParticipant.videoStreams[0]
 renderer = try! VideoStreamRenderer(remoteVideoStream: renderedRemoteVideoStream!)
 rendererView = try! renderer!.createView()
 }

 func toggleVideo() {
 if videoOn {
 rendererView = nil
 renderer?.dispose()
 videoOn = false
 }
 else {
 renderer = try! VideoStreamRenderer(remoteVideoStream: innerParticipant.videoStreams[0])
 rendererView = try! renderer!.createView()
 videoOn = true
 }
 }

 func remoteParticipant(_ remoteParticipant: RemoteParticipant, didUpdateVideoStreams args: RemoteVideoStreamsEventArgs) {
 let hadVideo = hasVideo
 hasVideo = innerParticipant.videoStreams.count > 0
 if videoOn {
 if hadVideo && !hasVideo {
 // Remote user stopped sharing
 rendererView = nil
 renderer?.dispose()
 } else if hasVideo && !hadVideo {
 // remote user started sharing
 renderedRemoteVideoStream = innerParticipant.videoStreams[0]
 renderer = try! VideoStreamRenderer(remoteVideoStream: renderedRemoteVideoStream!)
 rendererView = try! renderer!.createView()
 } else if hadVideo && hasVideo {
 if args.addedRemoteVideoStreams.count > 0 {
 if renderedRemoteVideoStream?.id == args.addedRemoteVideoStreams[0].id {
 return
 }

 // remote user added a second video, so switch to the latest one
 guard let rendererTemp = renderer else {
 return
 }
 rendererTemp.dispose()
 renderedRemoteVideoStream = args.addedRemoteVideoStreams[0]
 renderer = try! VideoStreamRenderer(remoteVideoStream: renderedRemoteVideoStream!)
 rendererView = try! renderer!.createView()
 } else if args.removedRemoteVideoStreams.count > 0 {
 if args.removedRemoteVideoStreams[0].id == renderedRemoteVideoStream!.id {
 // remote user stopped sharing video that we were rendering but is sharing
 // another video that we can render
 renderer!.dispose()

 renderedRemoteVideoStream = innerParticipant.videoStreams[0]
 renderer = try! VideoStreamRenderer(remoteVideoStream: renderedRemoteVideoStream!)
 rendererView = try! renderer!.createView()
 }
 }
 }
 }
 }

 func remoteParticipant(_ remoteParticipant: RemoteParticipant, didChangeDisplayName args: PropertyChangedEventArgs) {
 self.displayName = innerParticipant.displayName
 }
}

class Utilities {
 @available(*, unavailable) private init() {}

 public static func toMri(_ id: CommunicationIdentifier?) -> String {

 if id is CommunicationUserIdentifier {
 let communicationUserIdentifier = id as! CommunicationUserIdentifier
 return communicationUserIdentifier.identifier
 } else {
 return "<nil>"
 }
 }
}
Fluxos de vídeo de participantes remotos
Podemos criar um ParticipantView para lidar com a renderização de fluxos de vídeo de participantes remotos. Coloque a implementação em ParticipantView.swift
struct ParticipantView : View, Hashable {
 static func == (lhs: ParticipantView, rhs: ParticipantView) -> Bool {
 return lhs.participant.getMri() == rhs.participant.getMri()
 }

 private let owner: HomePageView

 @State var showPopUp: Bool = false
 @State var videoHeight = CGFloat(200)
 @ObservedObject private var participant:Participant

 var body: some View {
 ZStack {
 if (participant.rendererView != nil) {
 HStack {
 RenderInboundVideoView(view: $participant.rendererView)
 }
 .background(Color(.black))
 .frame(height: videoHeight)
 .animation(Animation.default)
 } else {
 HStack {
 Text("No incoming video")
 }
 .background(Color(.red))
 .frame(height: videoHeight)
 }
 }
 }

 func hash(into hasher: inout Hasher) {
 hasher.combine(participant.getMri())
 }

 init(_ owner: HomePageView, _ participant: Participant) {
 self.owner = owner
 self.participant = participant
 }

 func resizeVideo() {
 videoHeight = videoHeight == 200 ? 150 : 200
 }

 func showAlert(_ title: String, _ message: String) {
 DispatchQueue.main.asyncAfter(deadline: .now() + 0.1) {
 self.owner.alertMessage = message
 self.owner.showAlert = true
 }
 }
}

struct RenderInboundVideoView: UIViewRepresentable {
 @Binding var view:RendererView!

 func makeUIView(context: Context) -> UIView {
 return UIView()
 }

 func updateUIView(_ uiView: UIView, context: Context) {
 for view in uiView.subviews {
 view.removeFromSuperview()
 }
 if (view != nil) {
 uiView.addSubview(view)
 }
 }
}
Subscrever eventos
Podemos implementar uma CallObserver classe para se inscrever em uma coleção de eventos para ser notificado quando os valores, como remoteParticipants, mudam durante a chamada.
public class CallObserver : NSObject, CallDelegate
{
 private var owner: ContentView
 private var firstTimeCallConnected: Bool = true

 init(view: ContentView) {
 owner = view
 super.init()
 }

 public func call(_ call: Call, didChangeState args: PropertyChangedEventArgs) {
 let state = CallObserver.callStateToString(state:call.state)
 owner.callState = state
 if (call.state == CallState.disconnected) {
 owner.leaveRoomCall()
 }
 else if (call.state == CallState.connected) {
 if(self.firstTimeCallConnected) {
 self.handleInitialCallState(call: call);
 }
 self.firstTimeCallConnected = false;
 }
 }

 public func handleInitialCallState(call: Call) {
 // We want to build a matrix with max 2 columns

 owner.callState = CallObserver.callStateToString(state:call.state)
 var participants = [Participant]()

 // Add older/existing participants
 owner.participants.forEach { (existingParticipants: [Participant]) in
 participants.append(contentsOf: existingParticipants)
 }
 owner.participants.removeAll()

 // Add new participants to the collection
 for remoteParticipant in call.remoteParticipants {
 let mri = Utilities.toMri(remoteParticipant.identifier)
 let found = participants.contains { (participant) -> Bool in
 participant.getMri() == mri
 }

 if !found {
 let participant = Participant(call, remoteParticipant)
 participants.append(participant)
 }
 }

 // Convert 1-D array into a 2-D array with 2 columns
 var indexOfParticipant = 0
 while indexOfParticipant < participants.count {
 var newParticipants = [Participant]()
 newParticipants.append(participants[indexOfParticipant])
 indexOfParticipant += 1
 if (indexOfParticipant < participants.count) {
 newParticipants.append(participants[indexOfParticipant])
 indexOfParticipant += 1
 }
 owner.participants.append(newParticipants)
 }
 }

 public func call(_ call: Call, didUpdateRemoteParticipant args: ParticipantsUpdatedEventArgs) {
 var participants = [Participant]()
 // Add older/existing participants
 owner.participants.forEach { (existingParticipants: [Participant]) in
 participants.append(contentsOf: existingParticipants)
 }
 owner.participants.removeAll()

 // Remove deleted participants from the collection
 args.removedParticipants.forEach { p in
 let mri = Utilities.toMri(p.identifier)
 participants.removeAll { (participant) -> Bool in
 participant.getMri() == mri
 }
 }

 // Add new participants to the collection
 for remoteParticipant in args.addedParticipants {
 let mri = Utilities.toMri(remoteParticipant.identifier)
 let found = participants.contains { (view) -> Bool in
 view.getMri() == mri
 }

 if !found {
 let participant = Participant(call, remoteParticipant)
 participants.append(participant)
 }
 }

 // Convert 1-D array into a 2-D array with 2 columns
 var indexOfParticipant = 0
 while indexOfParticipant < participants.count {
 var array = [Participant]()
 array.append(participants[indexOfParticipant])
 indexOfParticipant += 1
 if (indexOfParticipant < participants.count) {
 array.append(participants[indexOfParticipant])
 indexOfParticipant += 1
 }
 owner.participants.append(array)
 }
 }

 private static func callStateToString(state:CallState) -> String {
 switch state {
 case .connected: return "Connected"
 case .connecting: return "Connecting"
 case .disconnected: return "Disconnected"
 case .disconnecting: return "Disconnecting"
 case .none: return "None"
 default: return "Unknown"
 }
 }
}
Executar o código
Você pode criar e executar seu aplicativo no simulador do iOS selecionando Executar produto> ou usando o atalho de teclado ⌘-R.
A capacidade de participar de uma chamada de sala e exibir as funções dos participantes da chamada está disponível no iOS Mobile Calling SDK versão 2.5.0 e superior.
Para obter mais informações sobre as funções dos participantes da chamada de sala, consulte API de salas para reuniões estruturadas.
Implementar o aplicativo de exemplo
Para implementar o código necessário para unir os participantes a uma chamada de salas, baixe do GitHub o aplicativo de exemplo Room Call.
Configurar o projeto
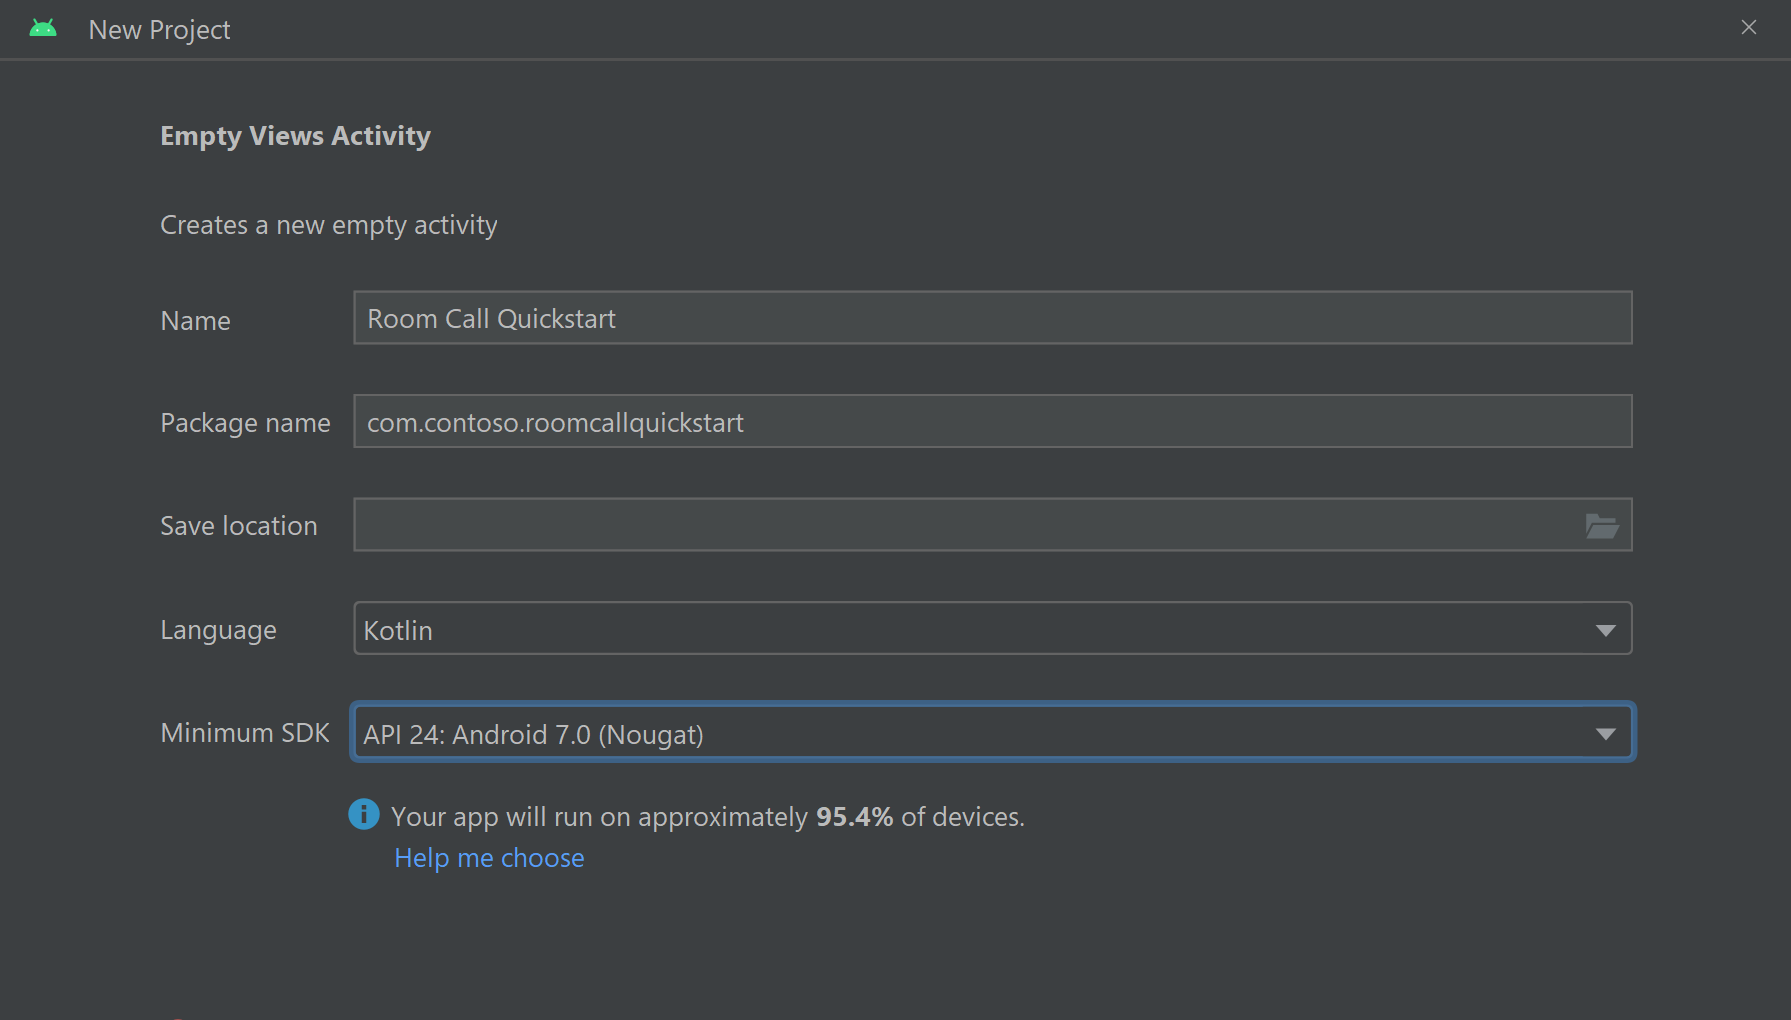
Criar um aplicativo Android com uma atividade vazia
A partir do Android Studio, crie um novo projeto:
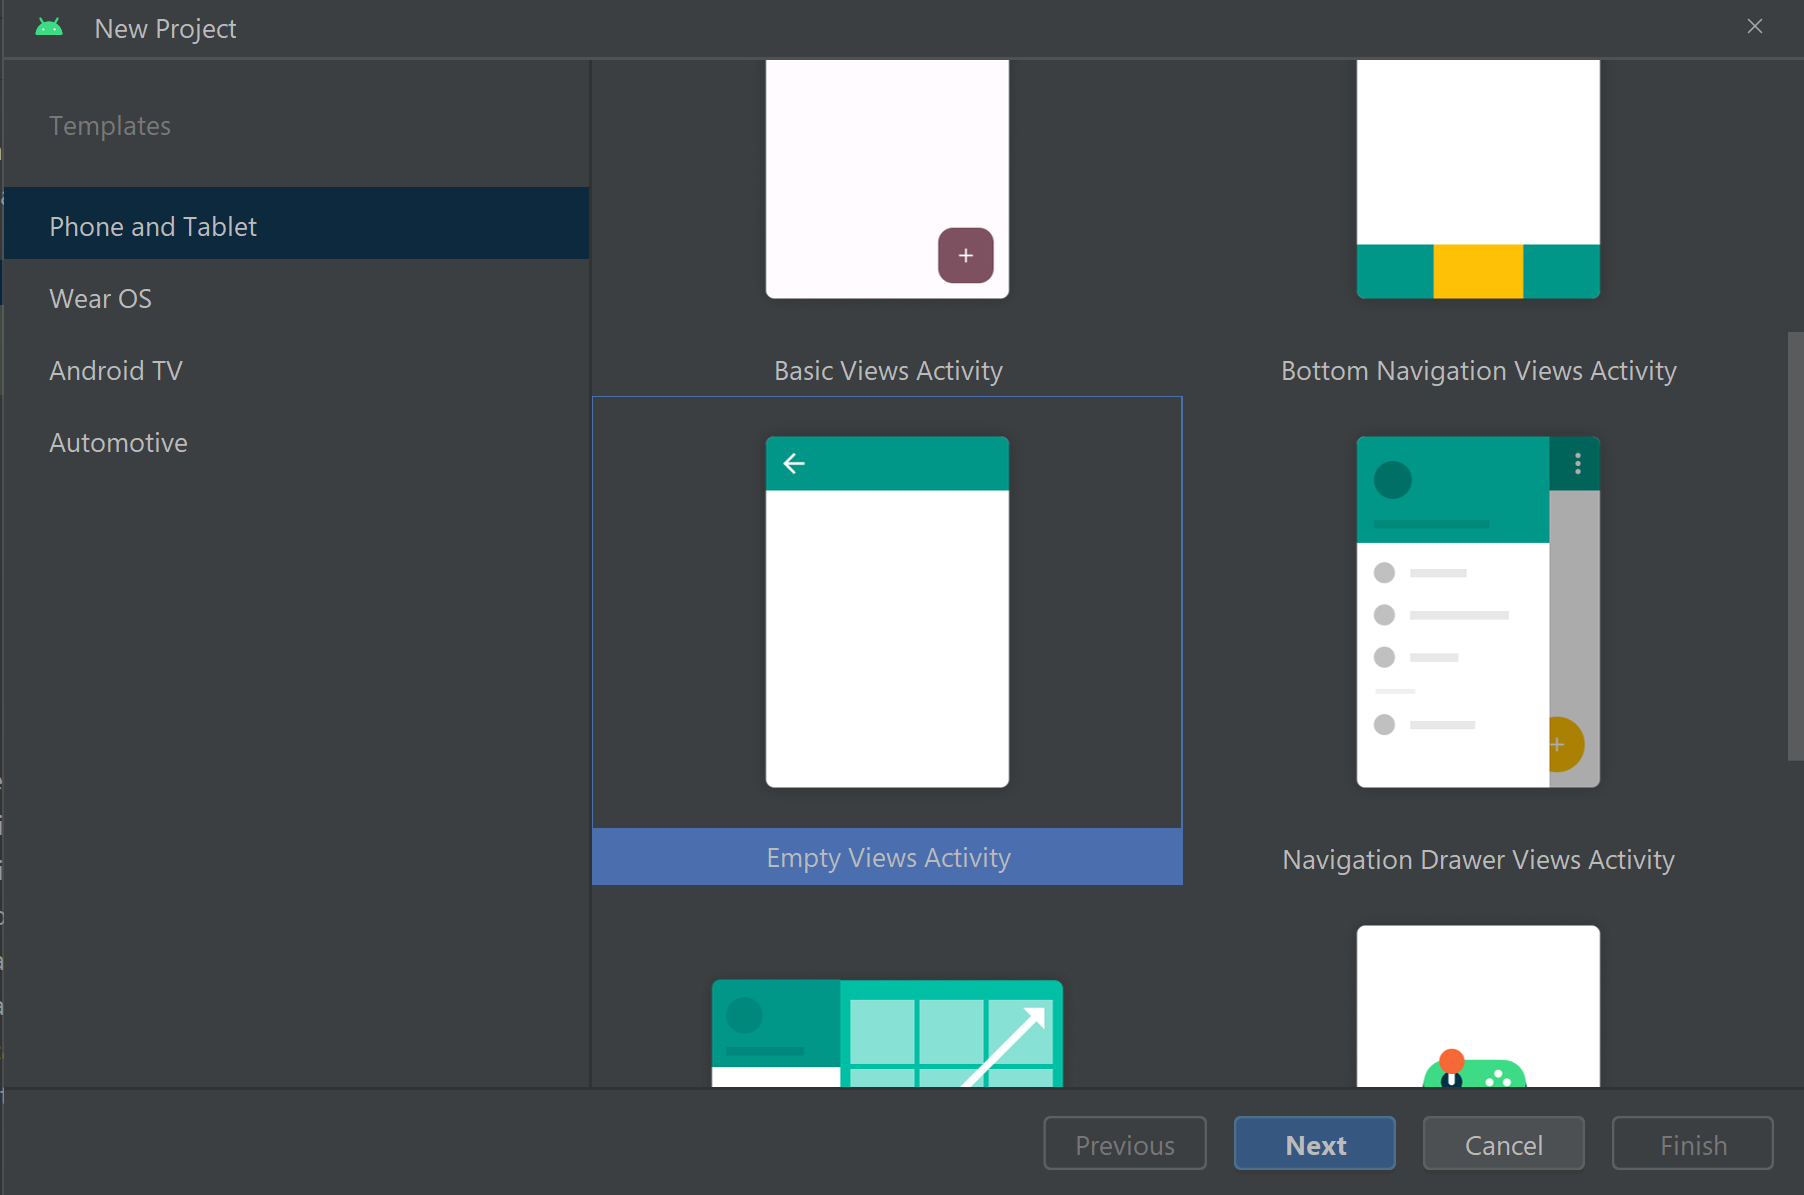
Nomeie seu projeto Room Call Quickstart e selecione Kotlin.
Instalar o pacote
No nível do módulo build.gradle, adicione a seguinte linha à secção dependencies.
dependencies {
    ...
    //Ability to join a Rooms calls is available in 2.4.0 or above.
    implementation 'com.azure.android:azure-communication-calling:2.4.0'
    ...
}
Adicionar permissões ao manifesto do aplicativo
Para solicitar as permissões necessárias para fazer uma chamada, primeiro declare as permissões no manifesto do aplicativo (app/src/main/AndroidManifest.xml). Copie o seguinte para o arquivo de manifesto:
<?xml version="1.0" encoding="utf-8"?>
<manifest xmlns:android="http://schemas.android.com/apk/res/android">

    <uses-feature
        android:name="android.hardware.camera"
        android:required="false" />

    <uses-permission android:name="android.permission.INTERNET" />
    <uses-permission android:name="android.permission.ACCESS_NETWORK_STATE" />
    <uses-permission android:name="android.permission.ACCESS_WIFI_STATE" />
    <uses-permission android:name="android.permission.RECORD_AUDIO" />
    <uses-permission android:name="android.permission.CAMERA" />

    <application
        android:allowBackup="true"
        android:icon="@mipmap/ic_launcher"
        android:label="@string/app_name"
        android:roundIcon="@mipmap/ic_launcher_round"
        android:supportsRtl="true"
        android:theme="@style/Theme.AppTheme">

        <!--Our Calling SDK depends on the Apache HTTP SDK.
    When targeting Android SDK 28+, this library needs to be explicitly referenced.
    See https://developer.android.com/about/versions/pie/android-9.0-changes-28#apache-p-->
        <uses-library android:name="org.apache.http.legacy" android:required="false"/>
        <activity
            android:name=".MainActivity"
            android:exported="true">
            <intent-filter>
                <action android:name="android.intent.action.MAIN" />

                <category android:name="android.intent.category.LAUNCHER" />
            </intent-filter>
        </activity>
    </application>

</manifest>
Configurar o layout do aplicativo
Você precisa de uma entrada de texto para o ID da sala, um botão para fazer a chamada e um botão extra para desligar a chamada.
Abra o app/src/main/res/layout/activity_main.xml arquivo e substitua o conteúdo do arquivo com o seguinte código:
<?xml version="1.0" encoding="utf-8"?>
<androidx.constraintlayout.widget.ConstraintLayout
    xmlns:android="http://schemas.android.com/apk/res/android"
    xmlns:app="http://schemas.android.com/apk/res-auto"
    xmlns:tools="http://schemas.android.com/tools"
    android:layout_width="match_parent"
    android:layout_height="match_parent"
    tools:context=".MainActivity">

    <TextView
        android:id="@+id/text_role"
        android:layout_width="wrap_content"
        android:layout_height="wrap_content"
        android:text="Role:"
        android:textSize="16sp"
        android:textStyle="bold"
        app:layout_constraintTop_toTopOf="parent"
        app:layout_constraintStart_toStartOf="parent"
        app:layout_constraintEnd_toEndOf="parent"
        android:layout_marginTop="16dp" />

    <TextView
        android:id="@+id/text_call_status"
        android:layout_width="wrap_content"
        android:layout_height="wrap_content"
        android:text="Call Status"
        android:textSize="16sp"
        android:textStyle="bold"
        app:layout_constraintTop_toTopOf="parent"
        app:layout_constraintStart_toStartOf="parent"
        app:layout_constraintEnd_toEndOf="parent"
        android:layout_marginTop="48dp" />

    <EditText
        android:id="@+id/room_id"
        android:layout_width="match_parent"
        android:layout_height="wrap_content"
        android:ems="10"
        android:hint="Room ID"
        android:inputType="textPersonName"
        android:layout_marginTop="100dp"
        android:layout_marginHorizontal="20dp"
        app:layout_constraintTop_toTopOf="parent"
        app:layout_constraintStart_toStartOf="parent"
        app:layout_constraintEnd_toEndOf="parent" />

    <LinearLayout
        android:layout_width="match_parent"
        android:layout_height="wrap_content"
        android:layout_marginBottom="260dp"
        android:gravity="center"
        app:layout_constraintBottom_toBottomOf="parent"
        app:layout_constraintEnd_toEndOf="parent"
        app:layout_constraintStart_toStartOf="parent">

        <Button
            android:id="@+id/call_button"
            android:layout_width="wrap_content"
            android:layout_marginEnd="32dp"
            android:layout_height="wrap_content"
            android:text="Start Call" />

        <Button
            android:id="@+id/hangup_button"
            android:layout_width="wrap_content"
            android:layout_height="wrap_content"
            android:text="Hangup" />

    </LinearLayout>

</androidx.constraintlayout.widget.ConstraintLayout>
Criar a atividade principal
Com o layout criado, pode adicionar a lógica para iniciar uma chamada no Room. A atividade lida com a solicitação de permissões de tempo de execução, a criação do agente de chamada e a realização da chamada quando um participante pressiona o botão.
O onCreate método invoca getAllPermissions e createAgent, e adiciona as ligações para o botão de chamada.
Esse evento ocorre apenas uma vez quando a atividade é criada. Para mais informações sobre onCreate, consulte Compreender o ciclo de vida da atividade.
Abra o MainActivity.kt arquivo e substitua o conteúdo pelo seguinte código:
package com.contoso.roomscallquickstart

import android.Manifest
import android.annotation.SuppressLint
import android.content.pm.PackageManager
import android.media.AudioManager
import android.os.Bundle
import android.widget.Button
import android.widget.EditText
import android.widget.TextView
import android.widget.Toast
import androidx.appcompat.app.AppCompatActivity
import androidx.core.app.ActivityCompat
import com.azure.android.communication.calling.Call
import com.azure.android.communication.calling.CallAgent
import com.azure.android.communication.calling.CallClient
import com.azure.android.communication.calling.HangUpOptions
import com.azure.android.communication.calling.JoinCallOptions
import com.azure.android.communication.calling.RoomCallLocator
import com.azure.android.communication.common.CommunicationTokenCredential
import java.util.concurrent.ExecutionException

class MainActivity : AppCompatActivity() {
    private val allPermissions = arrayOf(
        Manifest.permission.RECORD_AUDIO,
        Manifest.permission.CAMERA,
        Manifest.permission.READ_PHONE_STATE
    )

    private val userToken = "<ACS_USER_TOKEN>"
    private lateinit var callAgent: CallAgent
    private var call: Call? = null

    private lateinit var roleTextView: TextView
    private lateinit var statusView: TextView

    override fun onCreate(savedInstanceState: Bundle?) {
        super.onCreate(savedInstanceState)
        setContentView(R.layout.activity_main)

        getAllPermissions()
        createCallAgent()

        val callButton: Button = findViewById(R.id.call_button)
        callButton.setOnClickListener { startCall() }

        val hangupButton: Button = findViewById(R.id.hangup_button)
        hangupButton.setOnClickListener { endCall() }

        roleTextView = findViewById(R.id.text_role)
        statusView = findViewById(R.id.text_call_status)

        volumeControlStream = AudioManager.STREAM_VOICE_CALL
    }

    /**
     * Start a call
     */
    private fun startCall() {
        if (userToken.startsWith("<")) {
            Toast.makeText(this, "Please enter token in source code", Toast.LENGTH_SHORT).show()
            return
        }

        val roomIdView: EditText = findViewById(R.id.room_id)
        val roomId = roomIdView.text.toString()
        if (roomId.isEmpty()) {
            Toast.makeText(this, "Please enter room ID", Toast.LENGTH_SHORT).show()
            return
        }

        val joinCallOptions = JoinCallOptions()

        val roomCallLocator = RoomCallLocator(roomId)
        call = callAgent.join(applicationContext, roomCallLocator, joinCallOptions)

        call?.addOnStateChangedListener { setCallStatus(call?.state.toString()) }

        call?.addOnRoleChangedListener { setRoleText(call?.callParticipantRole.toString()) }
    }

    /**
     * Ends the call previously started
     */
    private fun endCall() {
        try {
            call?.hangUp(HangUpOptions())?.get()
        } catch (e: ExecutionException) {
            Toast.makeText(this, "Unable to hang up call", Toast.LENGTH_SHORT).show()
        }
    }

    /**
     * Create the call callAgent
     */
    private fun createCallAgent() {
            try {
                val credential = CommunicationTokenCredential(userToken)
                callAgent = CallClient().createCallAgent(applicationContext, credential).get()
            } catch (ex: Exception) {
                Toast.makeText(
                    applicationContext,
                    "Failed to create call callAgent.",
                    Toast.LENGTH_SHORT
                ).show()
            }
    }

    /**
     * Request each required permission if the app doesn't already have it.
     */
    private fun getAllPermissions() {
        val permissionsToAskFor = mutableListOf<String>()
        for (permission in allPermissions) {
            if (ActivityCompat.checkSelfPermission(this, permission) != PackageManager.PERMISSION_GRANTED) {
                permissionsToAskFor.add(permission)
            }
        }
        if (permissionsToAskFor.isNotEmpty()) {
            ActivityCompat.requestPermissions(this, permissionsToAskFor.toTypedArray(), 1)
        }
    }

    /**
     * Ensure all permissions were granted, otherwise inform the user permissions are missing.
     */
    override fun onRequestPermissionsResult(
        requestCode: Int,
        permissions: Array<out String>,
        grantResults: IntArray
    ) {
        super.onRequestPermissionsResult(requestCode, permissions, grantResults)
        var allPermissionsGranted = true
        for (result in grantResults) {
            allPermissionsGranted = allPermissionsGranted && (result == PackageManager.PERMISSION_GRANTED)
        }
        if (!allPermissionsGranted) {
            Toast.makeText(this, "All permissions are needed to make the call.", Toast.LENGTH_LONG).show()
            finish()
        }
    }

    @SuppressLint("SetTextI18n")
    private fun setCallStatus(status: String?) {
        runOnUiThread {
            statusView.text = "Call Status: $status"
        }
    }
    @SuppressLint("SetTextI18n")
    private fun setRoleText(role: String?) {
        runOnUiThread {
            roleTextView.text = "Role: $role"
        }
    }
}
Nota
Ao projetar seu aplicativo, considere quando você precisa solicitar essas permissões. Recomendamos solicitar permissões quando necessário, não com antecedência. Para obter mais informações, consulte o Guia de permissões do Android.
Executar o projeto
Antes de executar seu projeto, substitua <ACS_USER_TOKEN>MainActivity.kt por seu Token de Acesso de Usuário dos Serviços de Comunicação do Azure.
private val userToken = "<ACS_USER_TOKEN>"
Execute o projeto em um emulador ou dispositivo físico.
Procure o campo para inserir o ID do quarto e um botão para iniciar a Chamada de Sala. Introduza o ID da sua Sala e verifique se o estado da Chamada foi alterado juntamente com a sua Função.
Noções básicas sobre como participar de uma chamada de sala
Todo o código que você adicionou no aplicativo permite que você inicie e participe com sucesso de uma chamada de sala. Precisamos nos aprofundar em como tudo funciona e quais outros métodos e manipuladores você pode acessar para o Rooms.
As chamadas de sala são conectadas através de CallAgent criado com um token de utilizador válido.
private fun createCallAgent() {
    try {
        val credential = CommunicationTokenCredential(userToken)
        callAgent = CallClient().createCallAgent(applicationContext, credential).get()
    } catch (ex: Exception) {
        Toast.makeText(
            applicationContext,
            "Failed to create call callAgent.",
            Toast.LENGTH_SHORT
        ).show()
    }
}
Os participantes podem usar CallAgent e RoomCallLocator para participar numa chamada de sala usando o método CallAgent.join que retorna um objeto Call:
 val joinCallOptions = JoinCallOptions()
 val roomCallLocator = RoomCallLocator(roomId)
 call = callAgent.join(applicationContext, roomCallLocator, joinCallOptions)
Pode personalizar ainda mais o MainActivity.kt ficheiro subscrevendo Call eventos para obter atualizações:
call.addOnRemoteParticipantsUpdatedListener { args: ParticipantsUpdatedEvent? ->
    handleRemoteParticipantsUpdate(
        args!!
    )
}

call.addOnStateChangedListener { args: PropertyChangedEvent? ->
    this.handleCallOnStateChanged(
        args!!
    )
}
Você pode estender MainActivity.kt para exibir a função dos participantes da chamada local ou remota usando estes métodos e manipuladores:
// Get your role in the call
call.getCallParticipantRole();

// Subscribe to changes for your role in a call
private void isCallRoleChanged(PropertyChangedEvent propertyChangedEvent) {
    // handle self-role change
}

call.addOnRoleChangedListener(isCallRoleChanged);

// Subscribe to role changes for remote participants
private void isRoleChanged(PropertyChangedEvent propertyChangedEvent) {
    // handle remote participant role change
}

remoteParticipant.addOnRoleChangedListener(isRoleChanged);

// Get role of the remote participant
remoteParticipant.getCallParticipantRole();
A capacidade de participar de uma chamada de sala e exibir as funções dos participantes da chamada está disponível no Android Mobile Calling SDK versão 2.4.0 e superior.
Para obter mais informações sobre as funções dos participantes da chamada de sala, consulte API de salas para reuniões estruturadas.
Implementar o aplicativo de exemplo
Para participar numa chamada de sala, configure a sua aplicação do Windows usando o guia Adicionar chamada de vídeo à aplicação cliente.
Como alternativa, para implementar o código necessário para unir os participantes a uma chamada de salas, baixe do GitHub o aplicativo de exemplo de chamada de sala.
Crie um callAgent com um token de usuário válido:
var creds = new CallTokenCredential("<user-token>");

CallAgentOptions callAgentOptions = new CallAgentOptions();
callAgentOptions.DisplayName = "<display-name>";
callAgent = await callClient.CreateCallAgentAsync(creds, callAgentOptions);
Use o callAgent e o RoomCallLocator para ingressar numa chamada de sala, o método CallAgent.JoinAsync retorna um objeto CommunicationCall.
RoomCallLocator roomCallLocator = new RoomCallLocator('<RoomId>');

CommunicationCall communicationCall = await callAgent.JoinAsync(roomCallLocator, joinCallOptions);
Inscreva-se em CommunicationCall eventos para receber atualizações:
private async void CommunicationCall_OnStateChanged(object sender, PropertyChangedEventArgs args) {
	var call = sender as CommunicationCall;
	if (sender != null)
	{
		switch (call.State){
			// Handle changes in call state
		}
	}
}
Para exibir a função dos participantes da chamada, inscreva-se nas alterações de função:
private void RemoteParticipant_OnRoleChanged(object sender, Azure.Communication.Calling.WindowsClient.PropertyChangedEventArgs args)
{
    _ = Windows.ApplicationModel.Core.CoreApplication.MainView.CoreWindow.Dispatcher.RunAsync(CoreDispatcherPriority.Normal, () =>
    {
        System.Diagnostics.Trace.WriteLine("Raising Role change, new Role: " + remoteParticipant_.Role);
        PropertyChanged(this, new System.ComponentModel.PropertyChangedEventArgs("RemoteParticipantRole"));
    });
}
A capacidade de participar de uma chamada de sala e exibir as funções dos participantes da chamada está disponível no Windows NuGet Release versão 1.1.0 e superior.
Para obter mais informações sobre as funções dos participantes da chamada de sala, consulte API de salas para reuniões estruturadas.
Próximos passos
Nesta seção, você aprendeu como:
- Adicionar videochamadas à sua aplicação
- Passe o identificador de sala para o SDK de chamada
- Participe de uma chamada de sala a partir do seu aplicativo
Você também pode querer:
- Saiba mais sobre o conceito de quartos
- Saiba mais sobre os conceitos de chamadas de voz e vídeo
- Saiba mais sobre os conceitos de autenticação