Maintenance Mode for OMS Alerts
Azure Automation Runbook to enable and disable OMS Alerts
OMS is a hyper scale, hybrid and heterogenous monitoring system which can alert on thresholds from any system anywhere. The alerting can be either an email notification, a webhook or even a runbook.
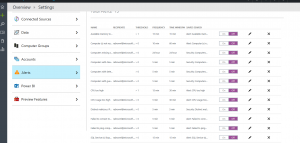
Now what happens when you want to suspend alert during a maintenance window? SCOM has the ability of pausing workflows and suspending alerts for a period. In OMS you would have to disable the alerts one by one:
Or you can trigger or schedule a runbook to do it for you!
This blog takes you step by step on setting your runbook to start or stop a maintenance window.
First things first. You’ll need:
- OMS workspace with alerts configured
- Azure Automation
That’s it!
Step 1 – Create your SPN for authentication:
I use a service principal get a token for authentication.
You can find more details here: /en-us/azure/resource-group-authenticate-service-principal
You can create it in the new portal, or via powershell:
$app = New-AzureRmADApplication -DisplayName "{app-name}" -HomePage "https://{your-domain}/{app-name}" -IdentifierUris "https://{your-domain}/{app-name}" -Password "{your-password}"New-AzureRmADServicePrincipal -ApplicationId $app.ApplicationIdNew-AzureRmRoleAssignment -RoleDefinitionName Contributor -ServicePrincipalName $app.ApplicationId.Guid
Or via the portal:
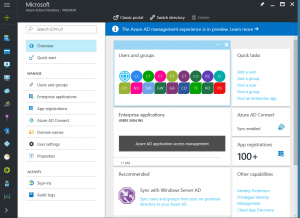
Click on Azure Active Directory, then choose “App Registrations”:
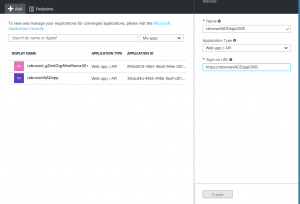
Click on Add, enter a name for the app, choose “Web App / API” and choose a Sign-on URL, then click on Create.
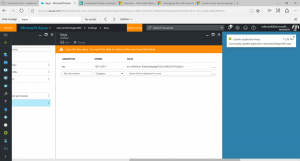
Click on the app, then settings and then “Keys”. Create a new key and click on save. Make sure you copy the key before you close the blade
Take note of the AppID and run this powershell line:
New-AzureRmRoleAssignment -RoleDefinitionName Contributer -ServicePrincipalName $app.ApplicationId.Guid
Step 2 – Add Assets to your Automation Account:
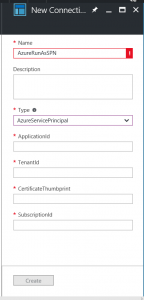
Add a connection asset for your SPN, with your Subscription ID, your Tenant ID, the SPN Application ID, the Application key (in the certificate thumbprint) called 'AzureRunAsSPN':
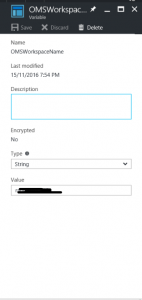
Add a variable for your OMS workspace details called "OMSWorkspaceName":
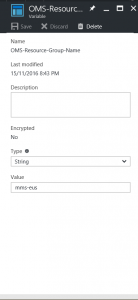
And another one for the name of the resource group for your OMS called "OMS-Resource-Group-Name":
Step 3 – Create your runbooks:
Create a Powershell runbook, called “Start-OMS-MaintenanceMode” with the following code:
$AlertsEnabled = "false" $OMSResourceGroupId = Get-AutomationVariable -Name 'OMS-Resource-Group-Name'$OMSWorkspaceName = Get-AutomationVariable -Name 'OMSWorkspaceName'$SPNConnection = Get-AutomationConnection -Name 'AzureRunAsSPN' $SubscriptionID = $SPNConnection.SubscriptionId $TenantID = $SPNConnection.TenantID $AzureUserNameForOMS = $SPNConnection.ApplicationId $AzureUserPasswordForOMS = $SPNConnection.CertificateThumbprint#region Get Access Token $TokenEndpoint = {https://login.windows.net/{0}/oauth2/token} -f $TenantID $ARMResource = "https://management.core.windows.net/";$Body = @{ 'resource'= $ARMResource 'client_id' = $AzureUserNameForOMS 'grant_type' = 'client_credentials' 'client_secret' = $AzureUserPasswordForOMS }$params = @{ ContentType = 'application/x-www-form-urlencoded' Headers = @{'accept'='application/json'} Body = $Body Method = 'Post' URI = $TokenEndpoint }$token = Invoke-RestMethod @params -UseBasicParsing $Headers = @{'authorization'="Bearer $($Token.access_token)"} #endregion#get all saved searches $savedSearches = (([string] (Invoke-WebRequest -Method Get -Uri "https://management.azure.com/subscriptions/$SubscriptionID/Resourcegroups/$OMSResourceGroupId/providers/Microsoft.OperationalInsights/workspaces/$OMSWorkspaceName/savedsearches?api-version=2015-03-20" -Headers $Headers -ContentType 'application/x-www-form-urlencoded' -UseBasicParsing).Content) | ConvertFrom-Json).Value.idforeach ($savedSearch in $savedSearches) { #call for schedules associated with the saved searches $schedules = (([string] (Invoke-WebRequest -Method Get -Uri "https://management.azure.com/$savedSearch/schedules?api-version=2015-03-20" -Headers $Headers -ContentType 'application/x-www-form-urlencoded' -UseBasicParsing).Content) | ConvertFrom-Json).value #check if the saved search has a schedule if ($schedules -ne $null) { $schedules.value.Properties.Enabled = $AlertsEnabled $scheduleurl = $schedules.value.id + "?api-version=2015-03-20" $body = $schedules | ConvertTo-Json #set new property to schedule Invoke-WebRequest -Method Put -Uri "https://management.azure.com/$scheduleurl" -Headers $Headers -ContentType 'application/json' -Body $Body -UseBasicParsing } }
You can now associate whatever schedule to suit you.
To stop maintenance mode, create another runbook called “Stop-OMS-MaintenanceMode”, changing the following line in the code:
From $AlertsEnabled = "false"
To $AlertsEnabled = "true"
Comments
- Anonymous
June 09, 2017
This probably needs to be updated to use AzureRM modules.- Anonymous
July 09, 2017
Hi Jason, there isn't a AzureRM cmdlet to update the scheduled yet.
- Anonymous
