Channel-based presence for customer service agents
Applies to: Dynamics 365 Customer Service
The recommended approach is to utilize a Channel-centric solution by setting up a separate Advanced Queue for each relevant Channel. This allows for the use of the native Assignment Method > Assignment Ruleset functionality and reduces latency between Agent Channel selection and assignments.
Use case definition
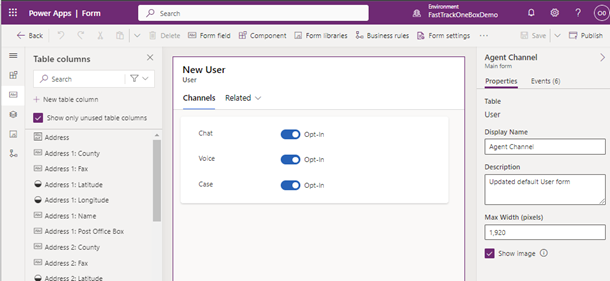
For this example, we'll set up three Channels; Chat, Voice, Case. Users are enabled to set their presence to accept a combination of Channels, at which point the appropriate items route to the agent based on their selections. If a User selects Chat and Case, that User will only receive live incoming Chats and Cases.
Update user record and security
The following items, in the User Record & Security section, are included in the Channel Based Presence solution.
Navigate to PowerApps and create a new solution for user customizations.
Add three new Boolean fields to the User entity (Chat, Voice, Case).
For all fields, set the Default Value = Opt-In

Create a custom User Form that only shows these three fields


Security options
There are multiple layers in security for Dynamics 365 to make sure users only have the required access.
Create a custom security role for 'Agent Channel Presence' that with no specific permissions contained within.
It's a best practice to copy from one of the out-of-box security roles.
Navigate to the User Entity, create a custom form with only the newly created fields listed above.
Choose 'Enable Security Roles' and enable the newly created 'Agent Channel Presence' security role (and System Admin, Supervisor, etc. roles as needed).
Note
We recommend that you make sure that the only user form available is the new user form that you created earlier.
We also recommend that you make sure your customer service agents cannot edit any other elements of the user record. for example, you can also switch on Enable Security Roles on all other user forms. You canl also make sure that the Agent Channel Presence security role as well as the other roles your customer service agents are assigned are un-checked so as to disable all other user forms for your customer service agents.
Finally, we recommend that you take an additional measure of security and switch on field-level security for all of the fields on the user entity except for the newly created Boolean fields.
Create chat channels
In the Customer Service admin center, you can add chat channels and customer support channels.
Create a channel
The following image illustrates the Channel details tab.

Note
At this point, you will be asked to name and create the associated Workstream.
The following image illustrates the Chat widget tab.

The following images illustrate the Behaviors tab.


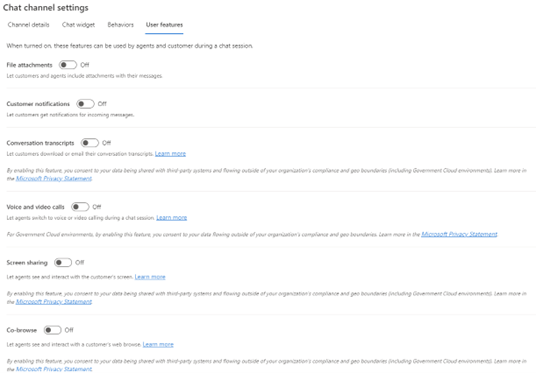
The following image illustrates the User features tab.
Note
If you have not set up your Workstreams yet, do so at this point so that you can associated your Channels with the appropriate Workstreams.
Repeat the Channel and Workstream setups for the other channels, in this example that would be Voice and Case.


Advanced queues and routing
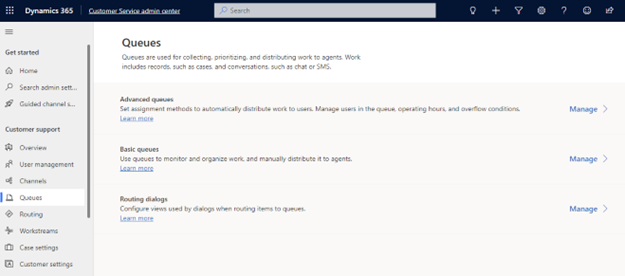
You manage advanced queues and routing in the Customer Service admin center.
Navigate to Customer support>Queues>Advanced Queues, and then choose the Manage action.
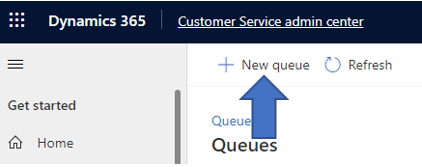
Choose the New queue action to create your new queue.
Follow the prompts to create your new queue and group number.


Once your queue is created, you must add users to the queue. Add all relevant Customer Service agent users to this queue.
Choose the See more option in the Assignment method section.

Choose the Create new action. This step brings you to the Assignment method area. In the Assignment ruleset section, choose the See more action. And here in the Assignment ruleset area, choose Create new again.

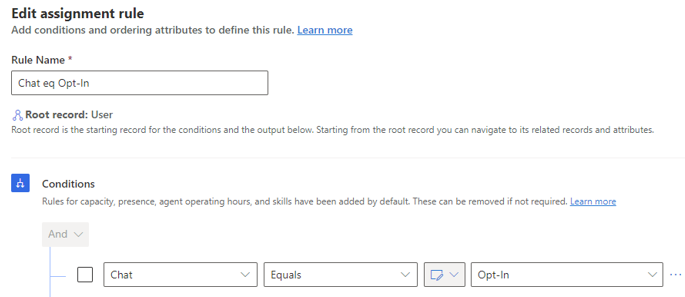
Name your new Assignment ruleset, such as Chat Opt-In.
While editing this new Assignment rule, under the Conditions section, select your newly created Chat Boolean field (on the User record) and make it Equals – Opt-In.
Save and close this newly created assignment ruleset and repeat this activity for each of your newly created channels so that there's a unique assignment rule for each of your channels, in our example, voice and case.

Model driven app custom button
In order to allow individual Users to access the custom User form with the newly created custom channel selection fields (Chat, Voice, Case, etc) we have created a custom button. This button will be deployed within the model-driven app 'Customer Service workspace'.
Note
A Prerequisite for adding the custom button is XrmToolBox, which you can download from GitHub at XrmToolBox. Once you have installed XrmToolBox, search for the Ribbon Workbench Tool and make sure that it has been installed in your instance of XrmToolBox.
When modifying a ribbon, we recommend that you back up the out-of-the-box ribbon. For example, create a new solution, Custom Ribbon, and then choose the Add existing menu, and then choose Application Ribbons to add your native Application Ribbon.
Note
Best practice is to Export this solution with the out-of-the-box ribbon as a backup. In addition, this should be deployed in a DEV environment first to be able to properly test the desired functionality.

In your solution, create a new Web Resource component of Type = Script. This web resource file is included in the Channel Based Presence Capability solution.

Choose the Text Editor button to add the following JavaScript code.
function setAgentChannelAvailability()

{

  var userSettings = Xrm.Utility.getGlobalContext().userSettings;

  var pageInput = {

  pageType: "entityrecord",

  entityName: "systemuser",

  entityId: userSettings.userId,

  formId: "4a3294ca-3132-ec11-b6e5-00224808de9e"

  };

  var navigationOptions = {

  target: 2,

  height: {value: 80, unit:"%"},

  width: {value: 25, unit:"%"},

  position: 2

  };

  Xrm.Navigation.navigateTo(pageInput, navigationOptions).then(

    function success() {

    // Run code on success

    },

    function error() {

    // Handle errors

    }

    );

}
In XrmToolBox, connect to your environment, choose the Open Solution action on the Ribbon Workbench tool, and then choose the new Custom Ribbon solution.
Note
The following Application Ribbon file is contained in the Channel Based Presence Capability Solution. If you have already modified your Ribbon, utilize the alternate Solution available Channel Based Presence Capability – No Application Ribbon.
Here, add a custom button to the main ribbon. The button setup should look like the following:

The commands for the button should reference our newly created Web Resource file as follows:

In the Ribbon Workbench tool, choose the Publish action at the top to deploy your newly created button.
The modified ribbon should look like the following, with your newly created button


When you choose this button, you'll see the newly created User form with your newly created buttons.

The user can then select which items to opt-in or opt-out of. The previously configured assignment rulesets reference these selected items when deciding to whom to route the Chat, Voice, or Case records.
Solution components
Channel-based presence capability solution components
Note
There is a managed and an unmanaged version available.
- User Entity
- Agent Channel – custom form
- Case (new_casechannel) – custom Boolean field
- Chat (new_chatchannel) – custom Boolean field
- Voice (new_phonecallchannel) – custom Boolean field
- Display Agent Channels (new_displayagentchannels) – custom Web Resource file containing the aforementioned JavaScript.
- Agent Channel Presence – custom Security Role assigned to the Agent Channel custom form.
- Application Ribbons – out of the box Ribbon containing the custom button.
- User Entity
Channel-based presence capability - no application ribbon solution components
Note
There is a managed and an unmanaged version available. If you have already made modifications to your Application Ribbon, you'll want to utilize this solution and manually modify your ribbon per the instructions above.
- User Entity
- Agent Channel – custom form
- Case (new_casechannel) – custom Boolean field
- Chat (new_chatchannel) – custom Boolean field
- Voice (new_phonecallchannel) – custom Boolean field
- Display Agent Channels (new_displayagentchannels) – custom Web Resource file containing the JavaScript code from the Model driven app custom button.
- Agent Channel Presence – custom Security Role assigned to the Agent Channel custom form.
- User Entity
Comentários
Brevemente: Ao longo de 2024, vamos descontinuar progressivamente o GitHub Issues como mecanismo de feedback para conteúdos e substituí-lo por um novo sistema de feedback. Para obter mais informações, veja: https://aka.ms/ContentUserFeedback.
Submeter e ver comentários