Scheduled tasks quickstart
This quickstart shows you how to create a task that runs on a schedule. There are many game operation routines that can be automated using a scheduled task, such as:
- Modifying prices in a store according to the time of the day.
- Updating title data to reflect changes for a current event.
- Injecting virtual currencies into the game economy daily, etc.
In the example used in this quickstart, we'll show you how to modify a game variable called rareDropRate in the title data at 12:00 UTC, and only on weekend days.
Step 1 - Prepare the CloudScript
In the Game Manager:
- Select Automation in the menu to the left.
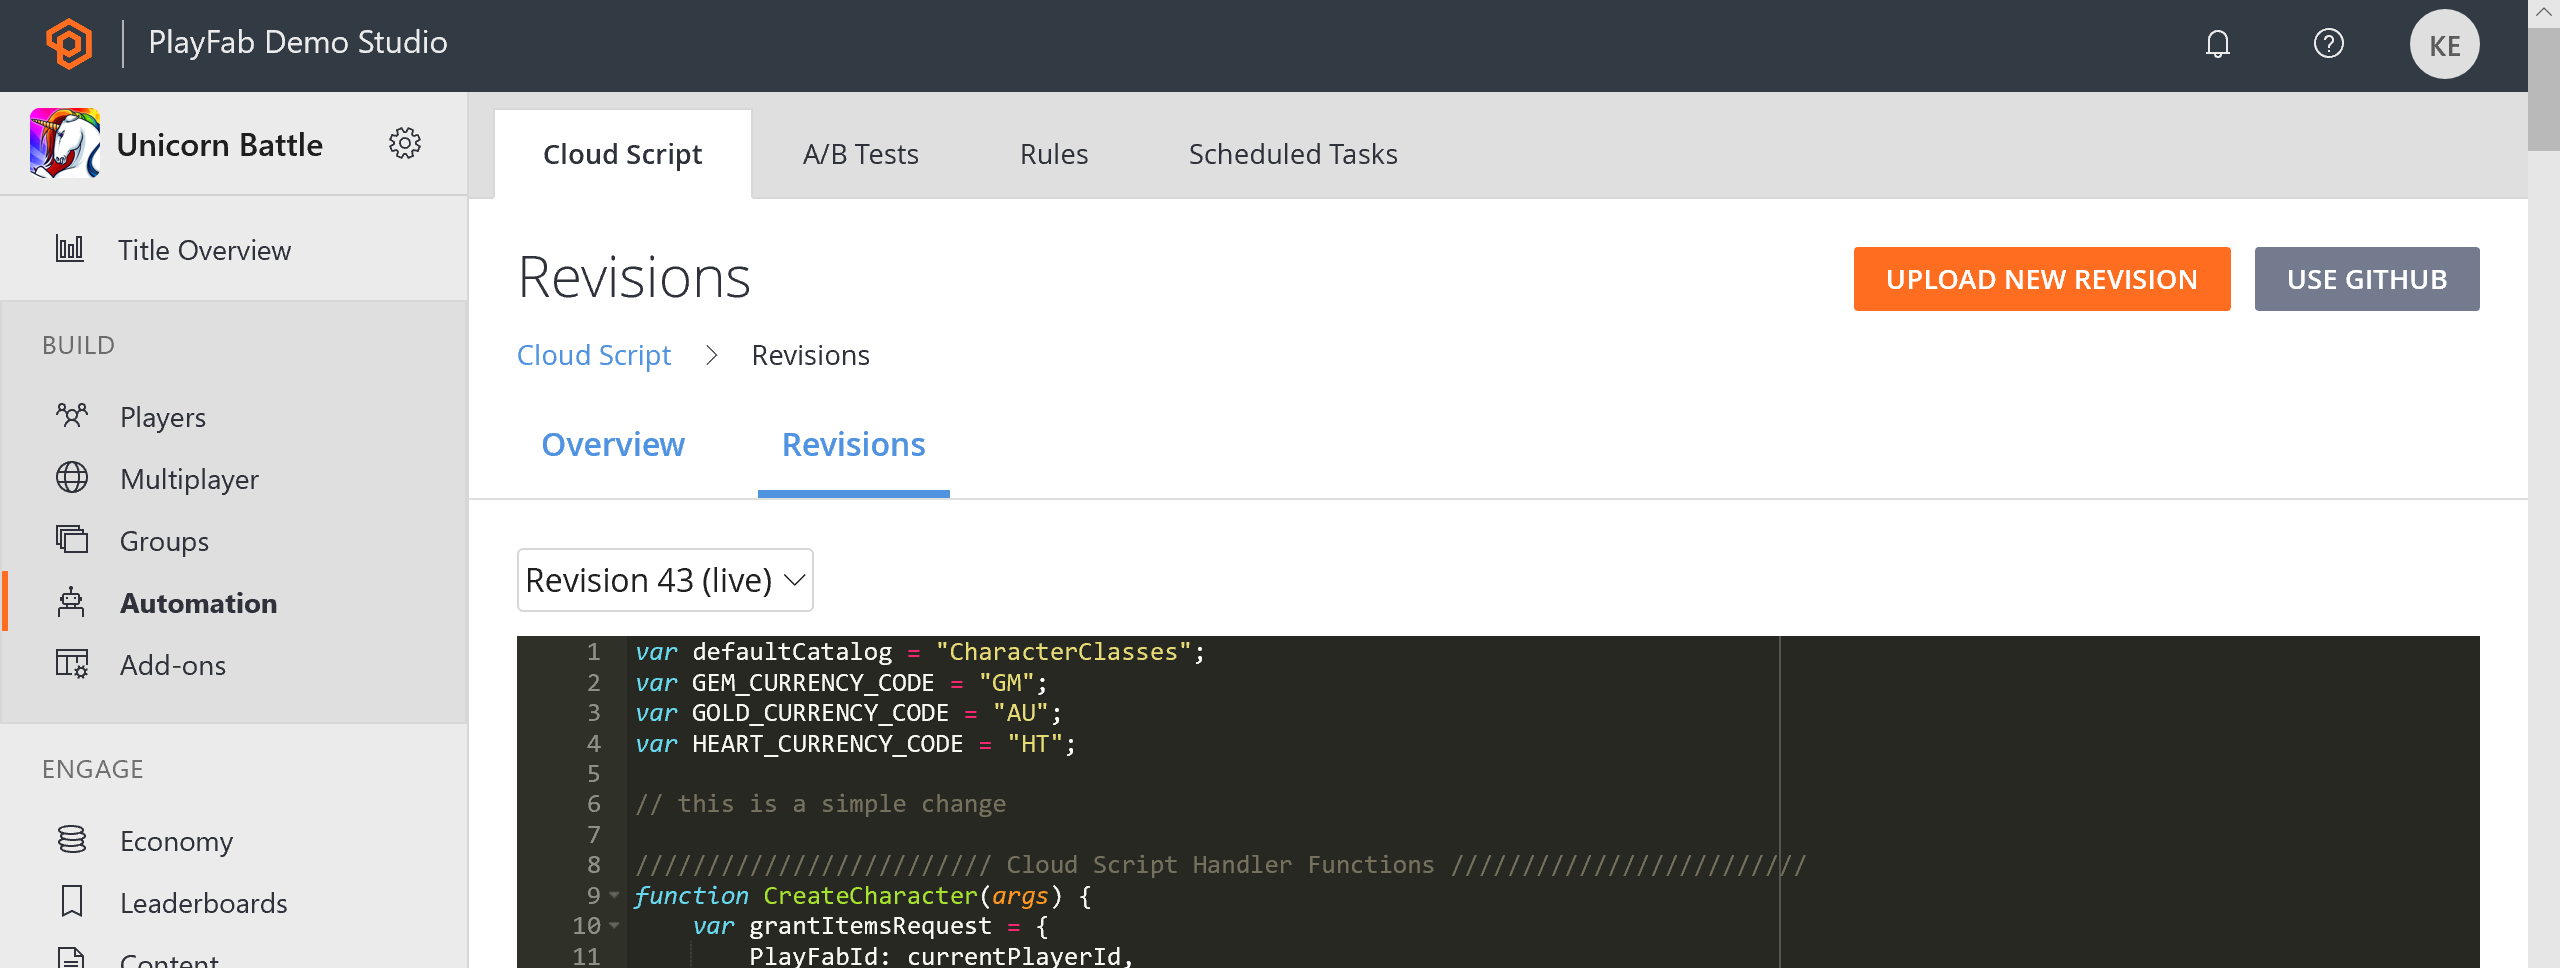
- On the CloudScript Revisions tab add a new CloudScript function called
adjustRareDropRatewith a simple call to theSetTitleDataAPI as shown in the code snippet and image below.
Note
For the sharp-eyed, don’t worry - there’s a bug in there on purpose. Make sure you deploy the new revision, so that it is live in your game.
You can learn more about using CloudScript in our CloudScript quickstart, and in documentation for the method ExecuteCloudScript.
handlers.adjustRareDropRate = function(args) {
    // Tutorial demo CloudScript
    serverAPI.SetTitleData({
        "Key": "rareDropRate",
        "Value": args.dropRate
    });
}

Step 2 - Create a scheduled task
Now select Servers from the menu to the left.
- Go to the Scheduled Tasks tab.
- Select New Scheduled Task on the upper-right corner of your screen.
- This will bring up the Create Task view.
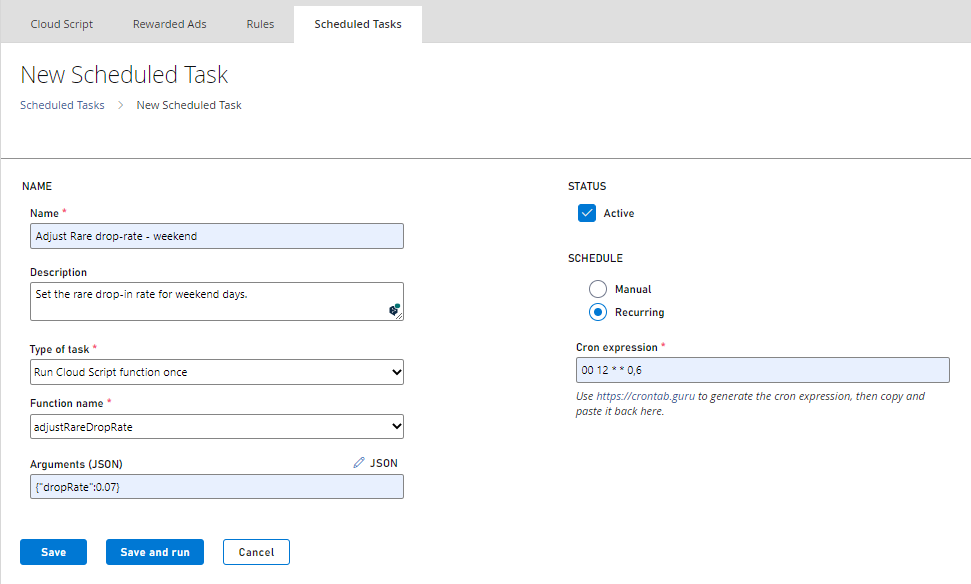
- In the Type of task field, choose Run a CloudScript function.
- Below that, you’ll be able to pick a function from the currently deployed revision of CloudScript, and specify arguments to pass in.
- Choose the adjustRareDropRate Handler that you wrote in the previous step.
To set the schedule for this task:
- Select On a schedule (UTC) under the SCHEDULE header.
- A simple schedule builder lets you choose when the Task should run (every hour, day, week, etc).
- For this example, we would like an advanced schedule, where we can specify which days of the week to run the task.
- So select CRON EXPRESSION.
The highly customizable Cron Expression allows you to build a very complex schedule, though it’s important to note that we currently only allow schedules whose occurrences happen on 5-minute marks of the hour.
For example, you may specify a task to run on the 5th, 10th, 25th, or 50th minute of the hour, but you may not specify a task to run on the 3rd, 11th, or 46th minute of the hour.
If you'd like to learn more about Cron Expression, crontab.guru provides rich information and an interactive expression builder.
In this case, we want the task to run at 12:00 UTC on Saturdays and Sundays, which would be 00 12 * * 0,6 (zero minutes past twelve o’clock, every Sunday and Saturday).
Finally, make sure you save the new task before moving on to the next step.

Step 3 - Test the task
On the Tasks view (Servers -> Tasks), we can see that the next run of the newly created task is on the following Saturday - as expected.
So, if it’s currently Tuesday, then the next scheduled runtime would be 4 days away. To test the task now, select the Adjust rare drop rate task and choose RUN TASKS.

Step 4 - Check the results of the test run
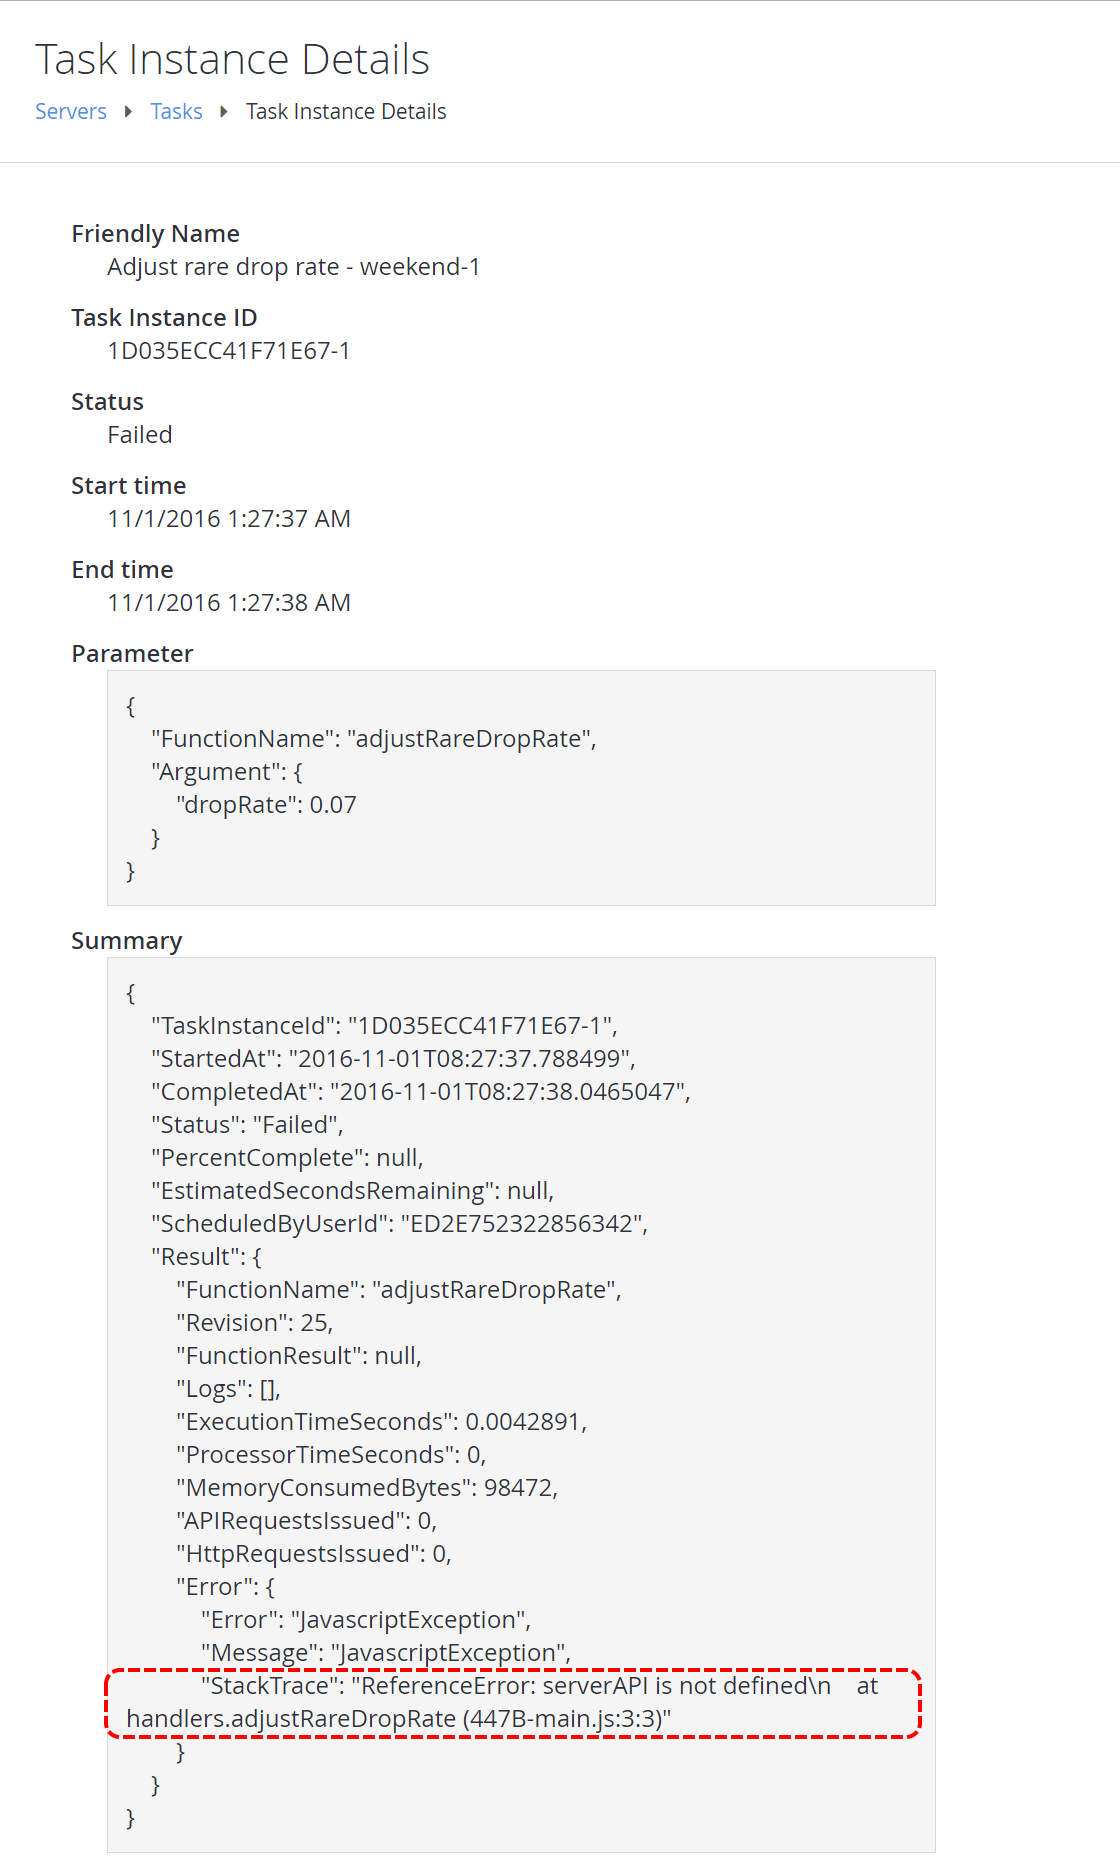
Unfortunately, the task run has failed. Select the task instance to see what went wrong.

The Task Instance Details view provides diagnostic information on why the task failed.
In this case, it’s pointing out that the call to serverAPI.SetTitleData is incorrect. It should really be server.SetTitleData (for an explanation, see the Intermediate: Calling the Server APIs section of the Writing Custom CloudScript tutorial).
There is other important information on the Task Instance Details view as well - such as the start and end times, the function that was called, any arguments passed in, the full CloudScript execution result, and more.

Step 5 - Test again (successfully)
Go ahead and fix the error we found in Step 4. The correct code snippet is shown below.
handlers.adjustRareDropRate = function(args) {
    // Tutorial demo CloudScript
    server.SetTitleData({
        "Key": "rareDropRate",
        "Value": args.dropRate
    });
}
And now, repeating Step 3, your final test run is successful.

To confirm success:
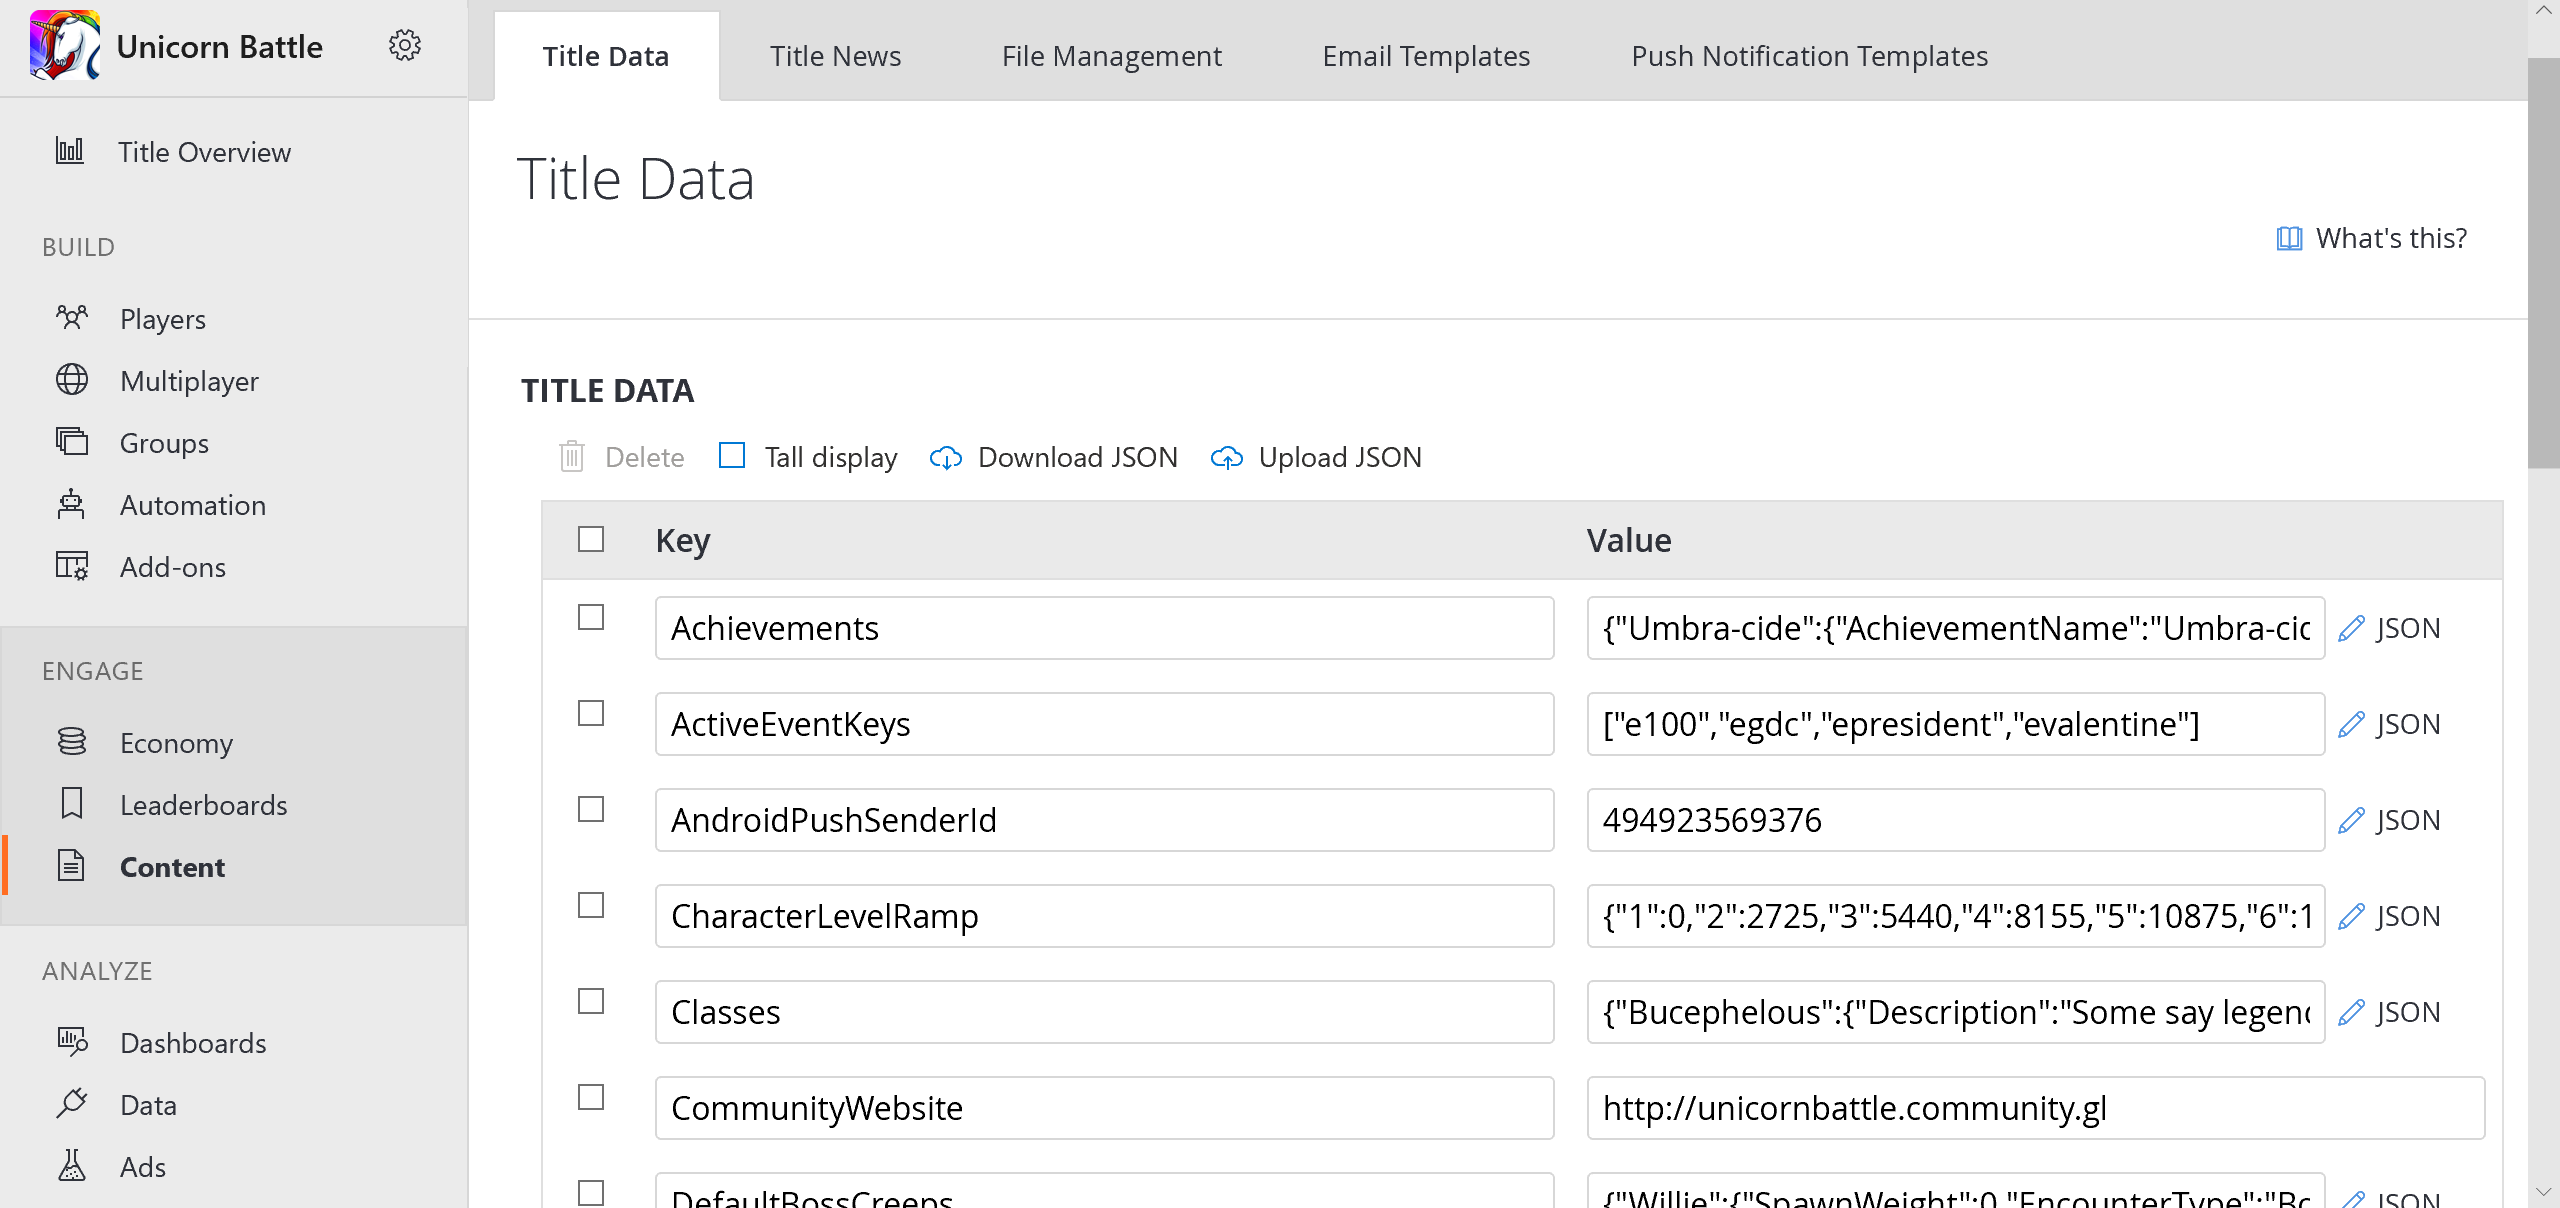
- Select Content in the menu to the left.
- Go to the Title Data tab.
- Verify that the Title Data entry was actually set.
