Exercise - Build an Azure Data Factory pipeline to copy data
A data factory is a service for processing structured and unstructured data from any source. A pipeline is a logical grouping of activities that together perform a task. The activities in a pipeline define actions to perform on your data.
In this exercise, you’ll create an Azure Data Factory pipeline that will connect to your Dataverse environment and will copy three columns of the Emission table into a JSON file in blob storage.
Step 1 – Create a Microsoft Entra ID app registration
The Data Factory pipeline will use the Microsoft Entra ID app registration to gain access to your Dataverse environment.
Go to the Azure portal.
Go to Microsoft Entra ID.
Go to App registrations.
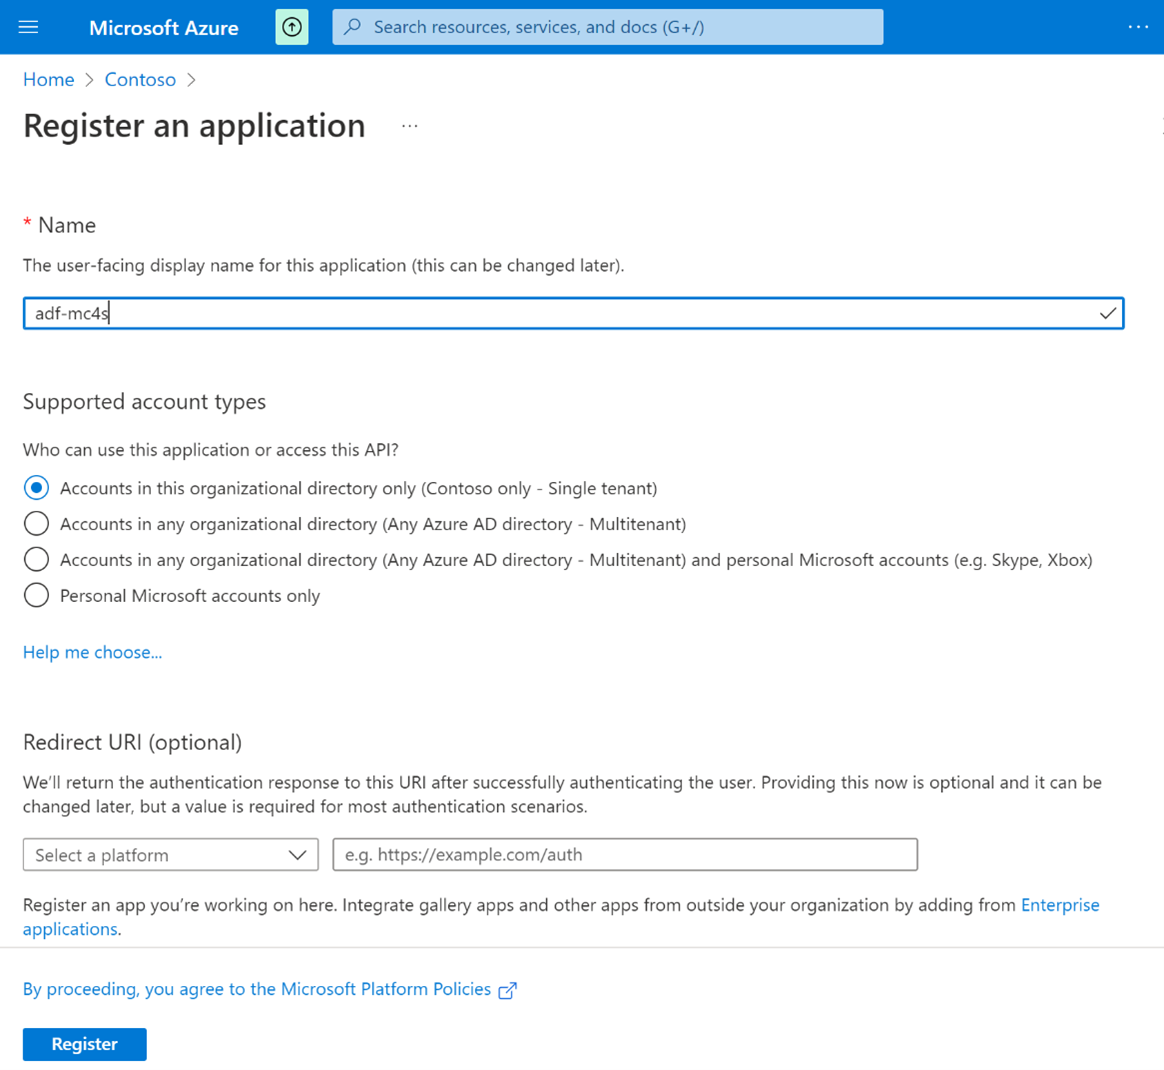
Select New registration.
- Enter any name, such as adf-mc4s.
- Select Single tenant for the Supported account types section.
- Leave the Redirect URI section blank.
- Select Register.
The app registration will be created, and the Overview tab will open.
Note the Application (client) ID because you’ll need it later in this exercise.
Select Certificate & secrets > Client secrets > New client secret.
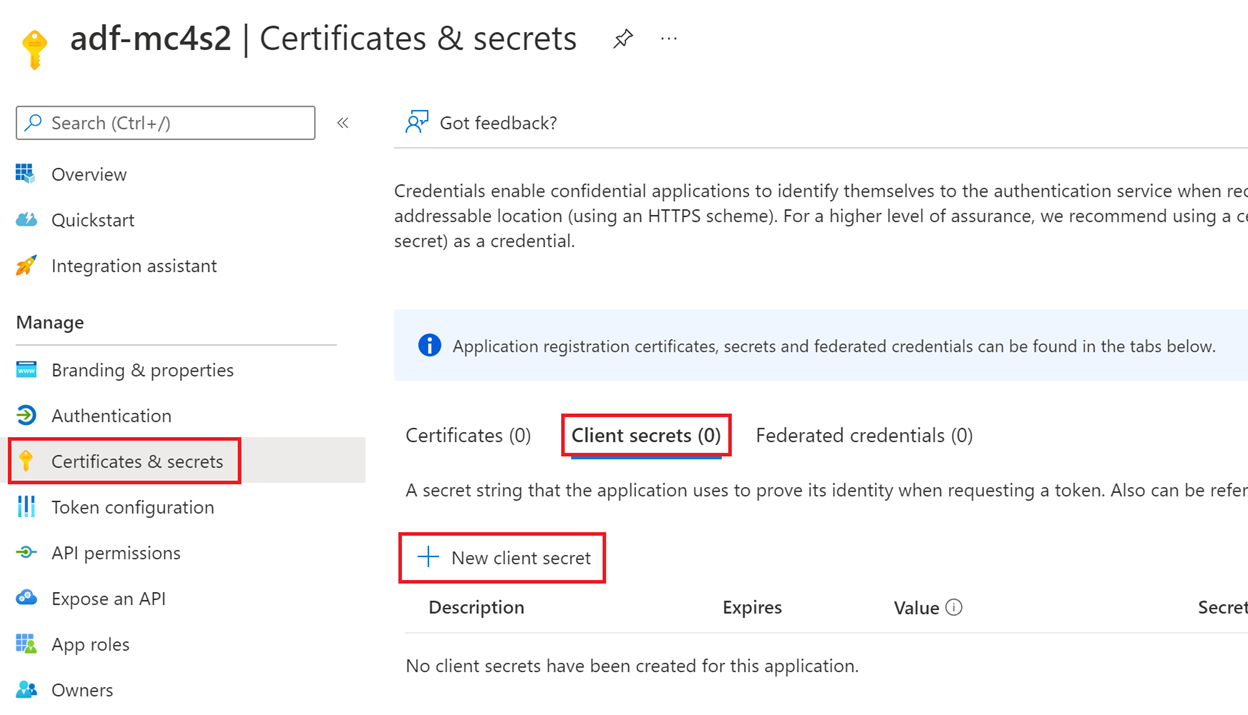
Enter any description, retain the default expiration, and then select Add.
Copy the new client secret because you’ll need it later in this exercise.
Warning
You won’t be able to retrieve the secret later, so make sure that you copy it without fail.


Step 2 - Grant access to Dataverse
In this step, you’ll create an application user that’s linked to the app registration and then you’ll grant access to Dataverse.
Go to Environments and select the environment where your Microsoft Cloud for Sustainability is installed.
Note your Environment URL because you’ll need this information later in this exercise. The URL will resemble
org12345.crm2.dynamics.comSelect Settings in the toolbar at the top.
Expand Users + permissions and then select Application users.

Select New app user.
Select Add an app.
From the list, select the app registration that you created in the previous step (for example, adf-mc4s), and then select Add.
In the Business units section, select the organization that matches the environment URL that you took note of previously.
Select the edit icon to the right of Security roles.
Select System administrator from the list, select Save, and then select Create.
Note
For simplicity, Data Factory has the System Administrator role in this exercise. However, in a production environment, you would create a specific role with only the needed permissions.

Step 3 - Create a storage account
In this step, you’ll create the storage account to which the data factory pipeline will write the output files.
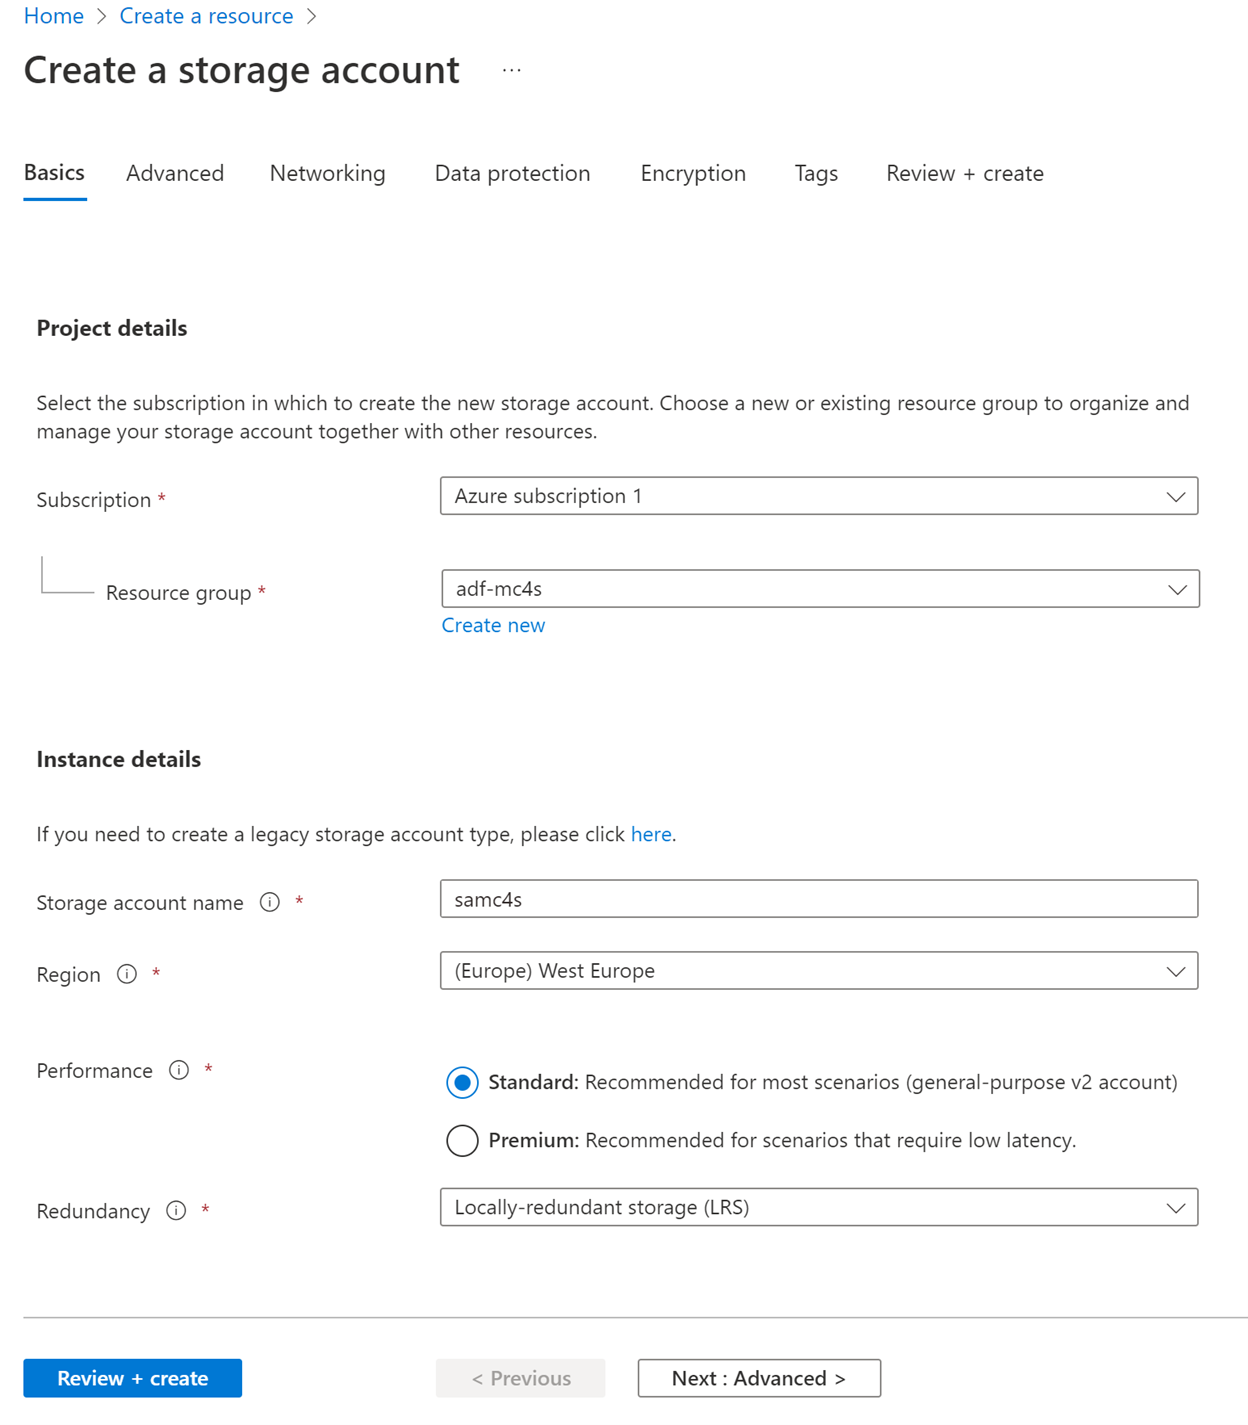
Go to the Azure portal.
Create a new storage account resource:
- Give any name, such as samc4s.
- Select a region (preferably the same region where your Microsoft Cloud for Sustainability environment is deployed).
- In the Redundancy dropdown menu, select Locally-redundant storage (LRS) .
- Retain everything else as default and then create the resource.
Go to Containers and select + Container in the toolbar to create a new container. Enter the details as follows:
- Name - adf-output
- Public access level - Private
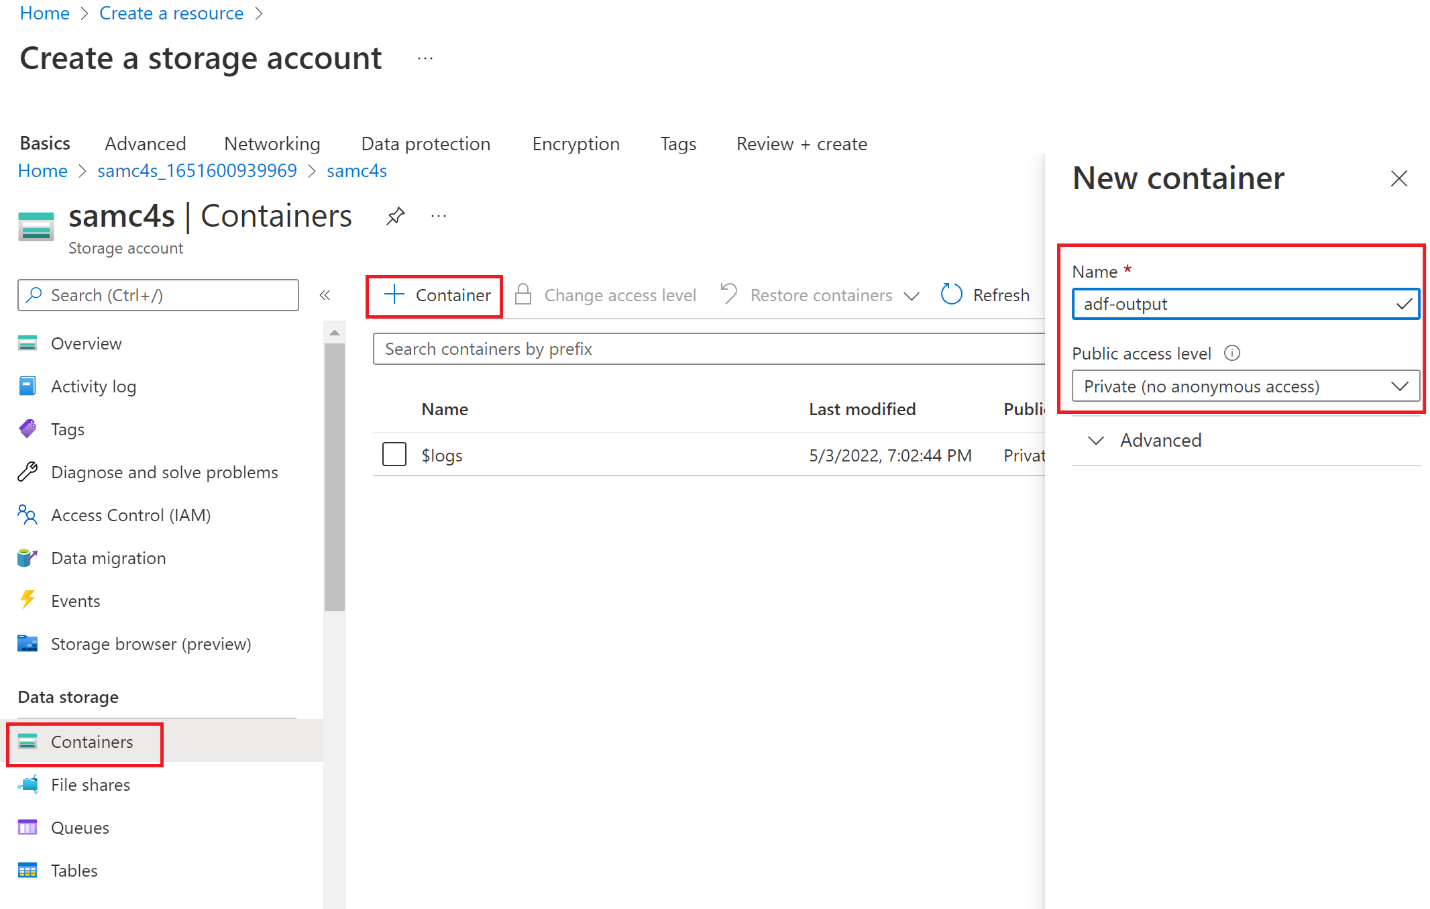
Select Create.


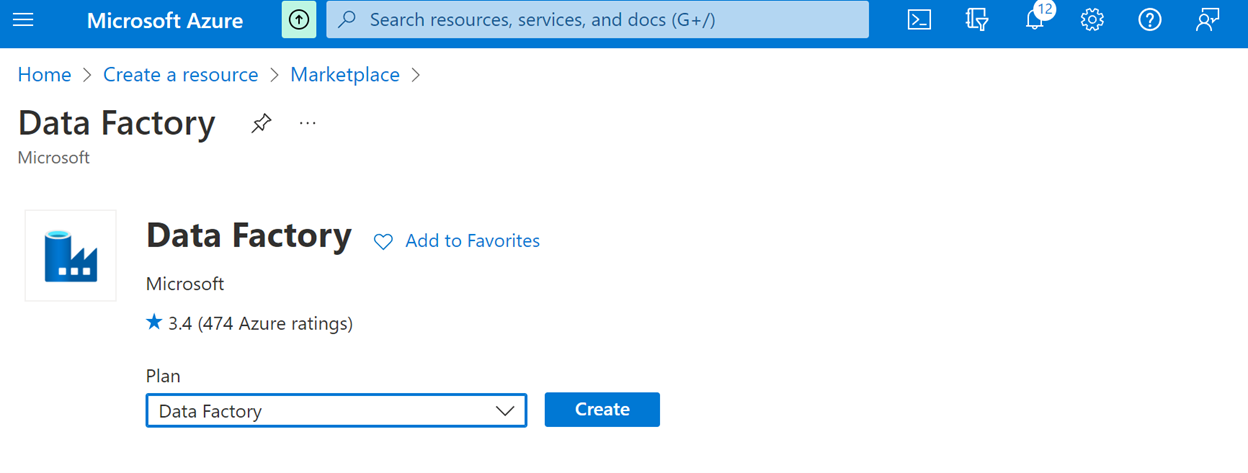
Step 4 - Create a Data Factory resource
To create a Data Factory resource, consider the following steps:
From the Azure portal, create a new Data Factory resource.
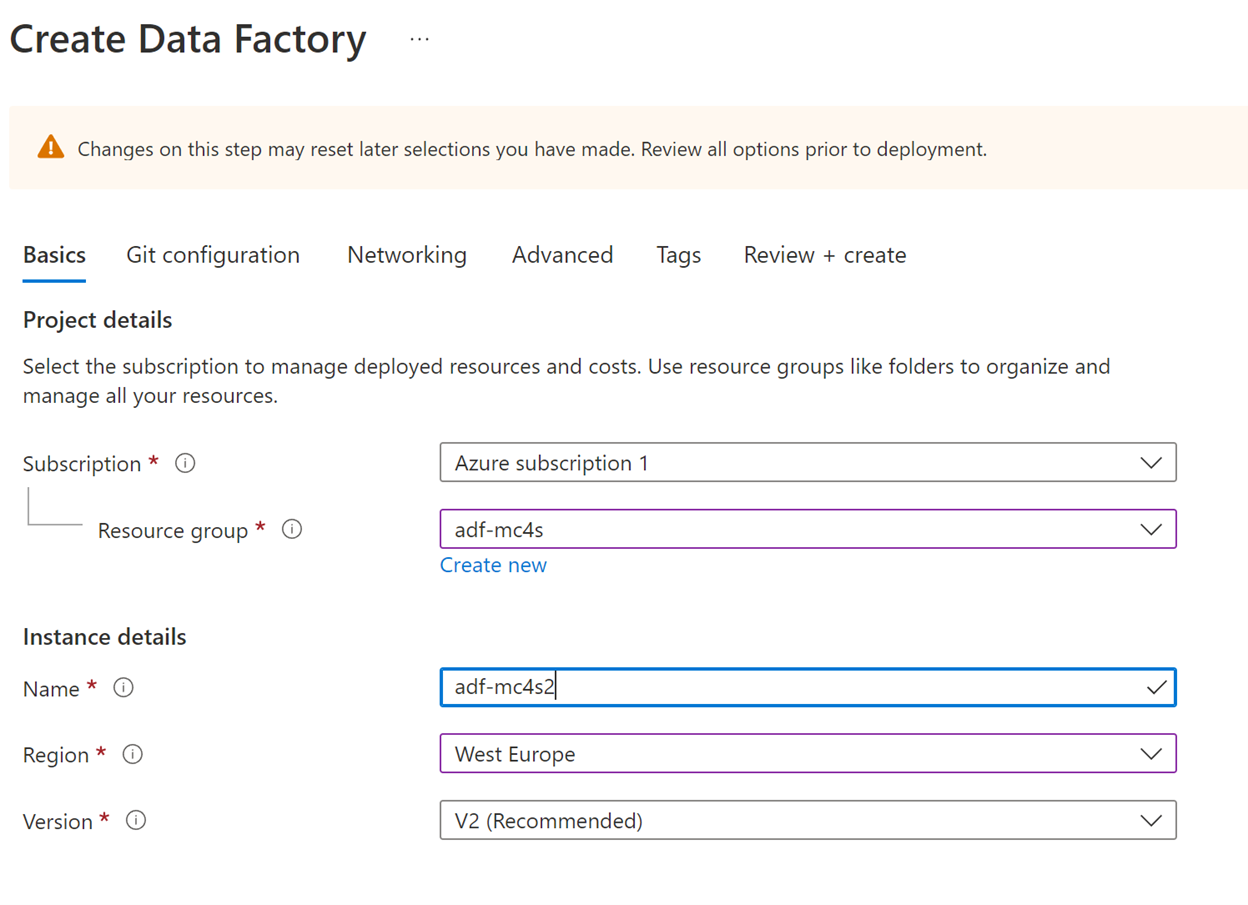
On the Basics tab, enter a name, such as adf-mc4s, and then select the same region that you previously selected for the storage account.
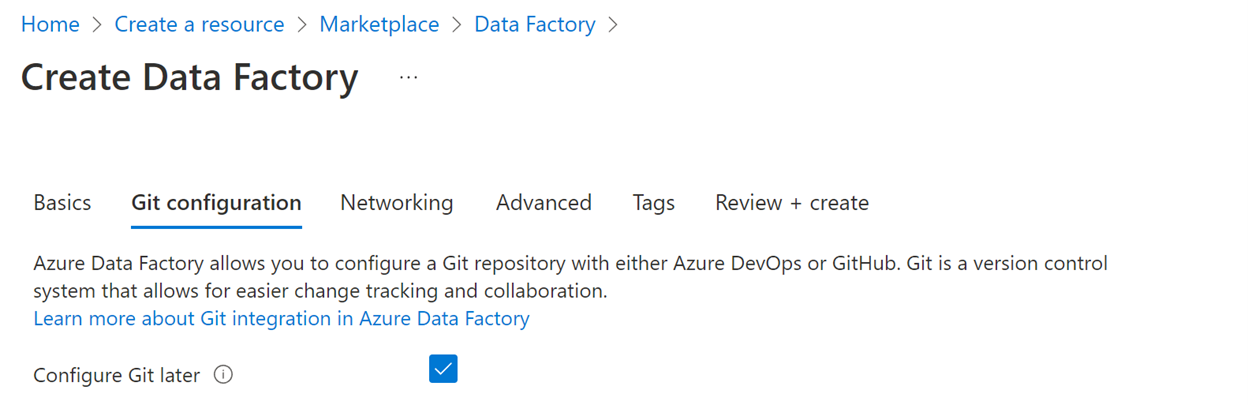
On the Git configuration tab, select Configure Git later.
Retain all other options as default and then create the Data Factory resource.
When the resource has been created, from the Overview tab, select Open Azure Data Factory Studio.


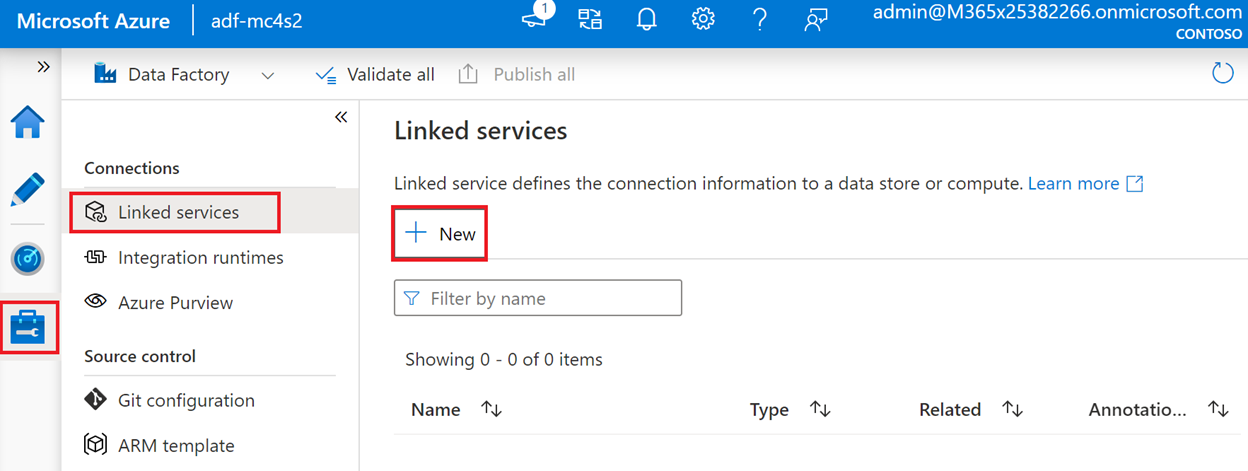
Step 5 - Create the Data Factory Linked services
To create the linked services to Dataverse (for the pipeline input) and to the storage account (for the pipeline output), follow these steps:
From the Azure Data Factory Studio, select the Manage icon (the last icon in the toolbar on the left) and then select Linked services > New.
Search for Dataverse, select Dataverse (Common Data Service for Apps), and then select Continue.
Fill in the New linked service page as follows:
Name - MC4S Dataverse Link
Service Uri - Enter the environment URL that you previously took note of in the exercise
Service principal ID - Enter the Application (client) ID that you previously took note of in the exercise
Service principal key - Enter the secret key that you previously created in the exercise
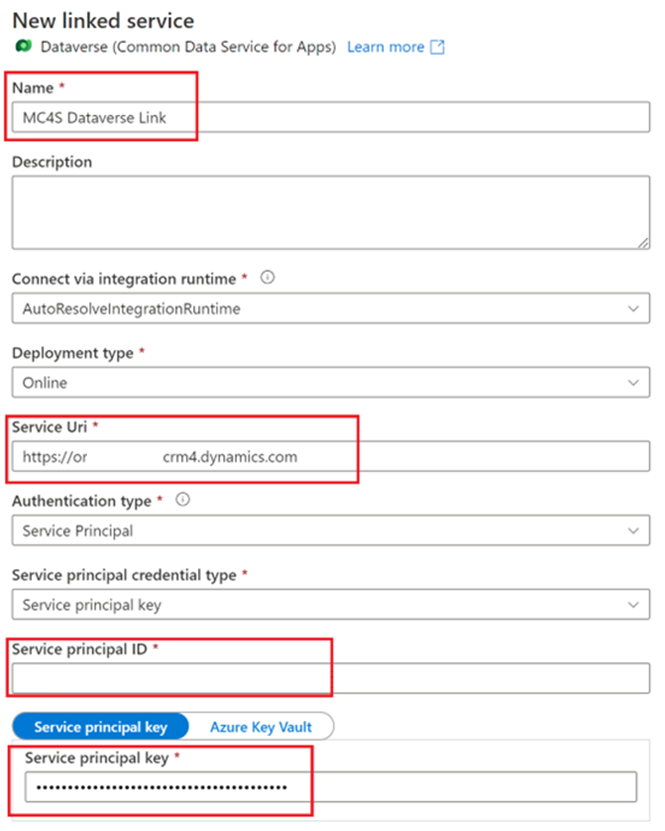
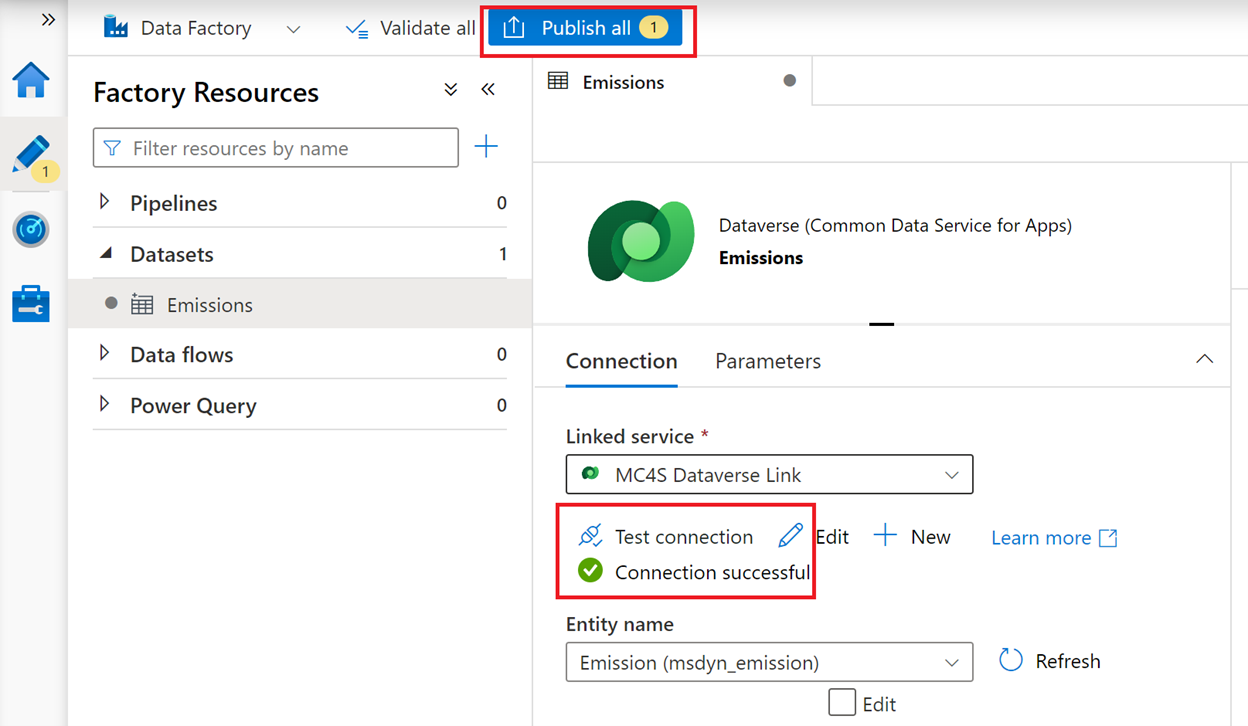
Select Test connection to validate the connection.
Select Create.
On the Linked services page, select New. You’ll now create the output connection to the storage account.
Search for storage and then select Azure Blob Storage.
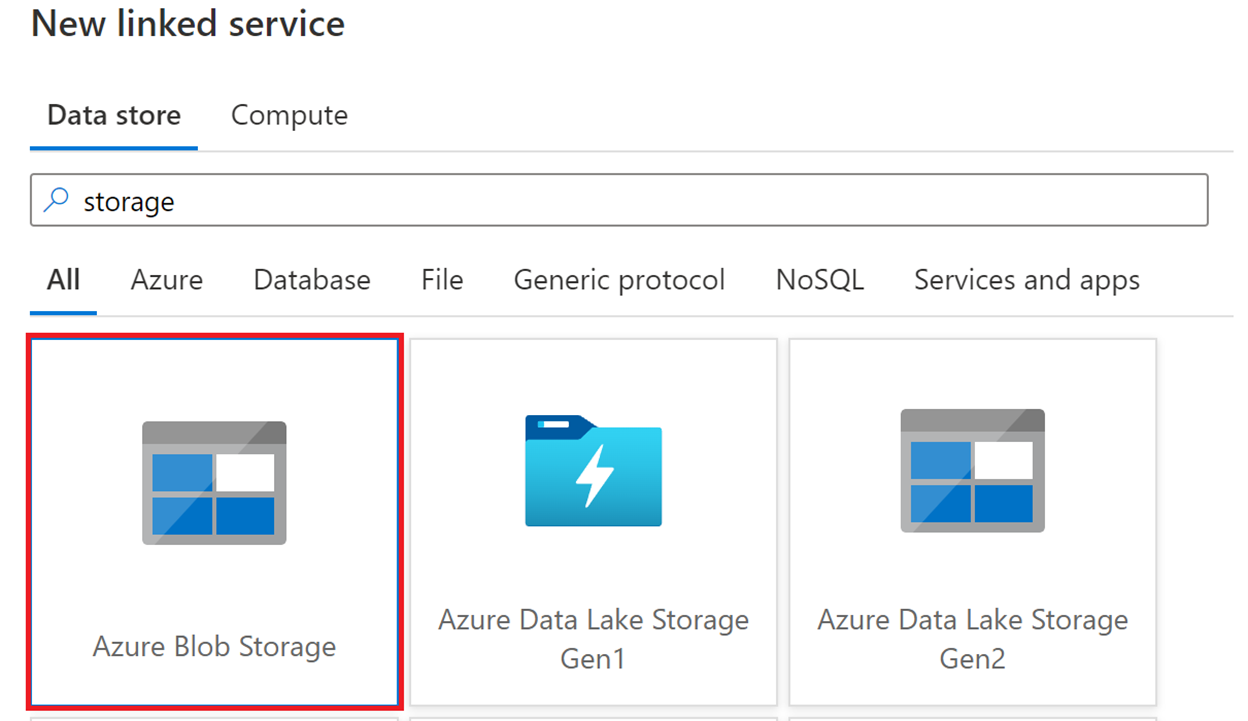
Select Continue.
Fill in the New linked service page as follows:
- Name - Blob storage link
- Storage account name - Select from the list the storage account that you previously created in this exercise
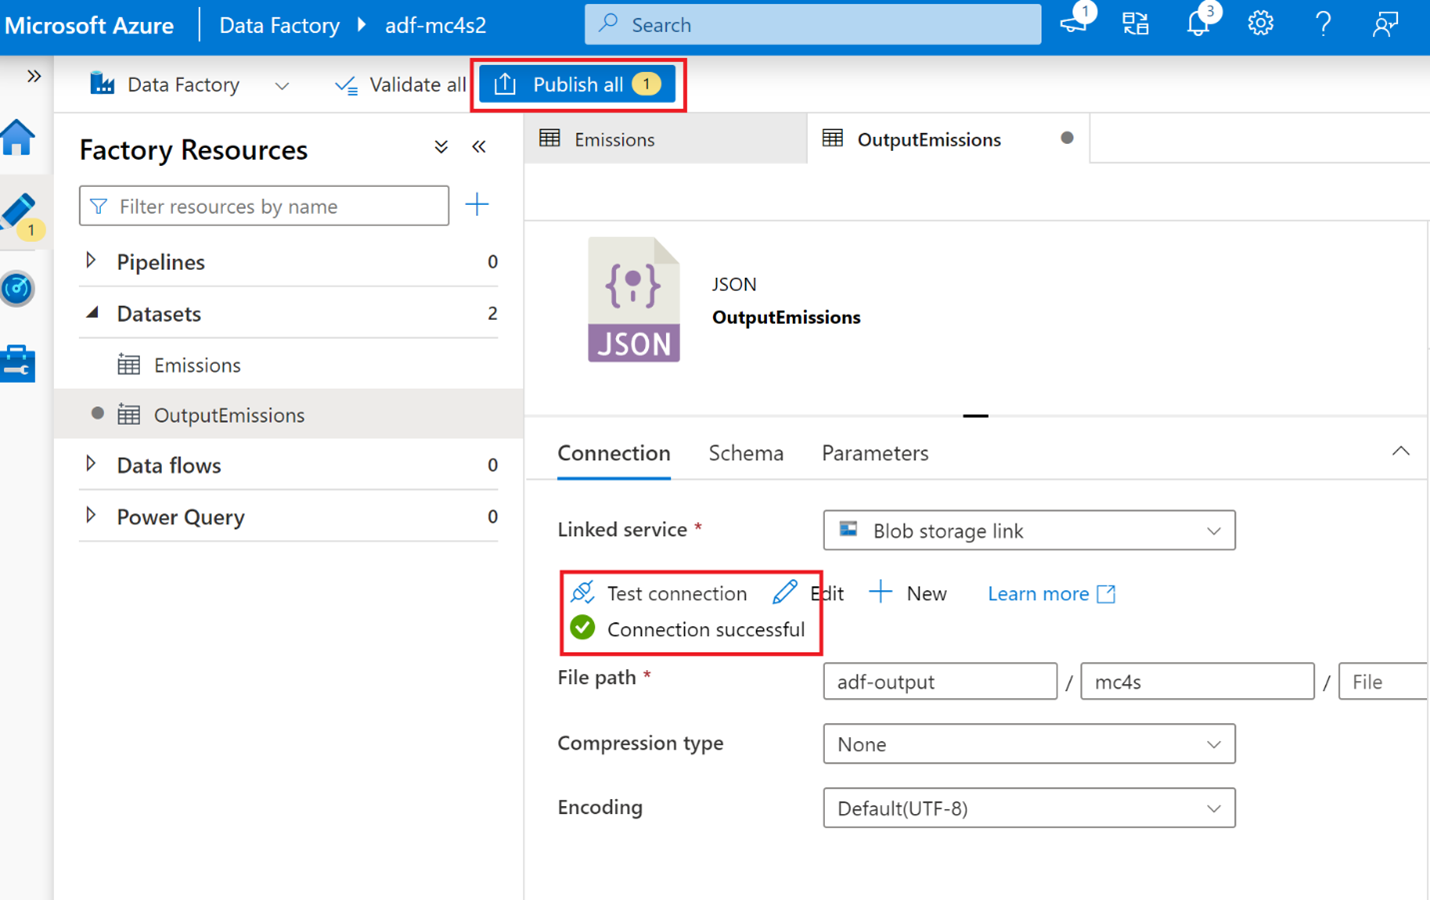
Select Test connection to validate the connection.
Select Create.

Two linked services will be displayed on the Linked services page.


Step 6 - Create the input dataset
A dataset is a named view of data that points to or references the data that you want to use in your activities as inputs and outputs.
To create the input dataset, complete the following steps:
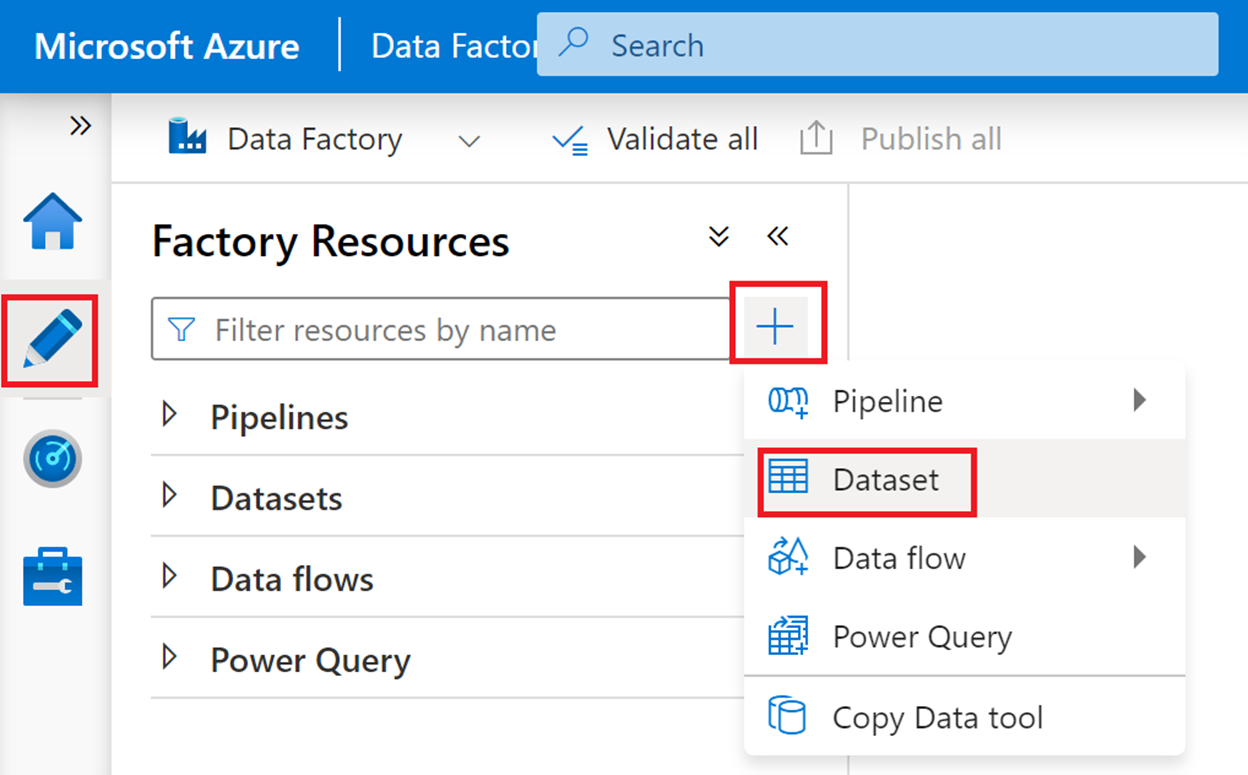
On the left toolbar of the Azure portal, select the Author icon (the second icon from the top). Select the plus (+) symbol, and then select Dataset to add a dataset.
On the New dataset page, search for Dataverse, select Dataverse (Common Data Service for Apps), and then select Continue.
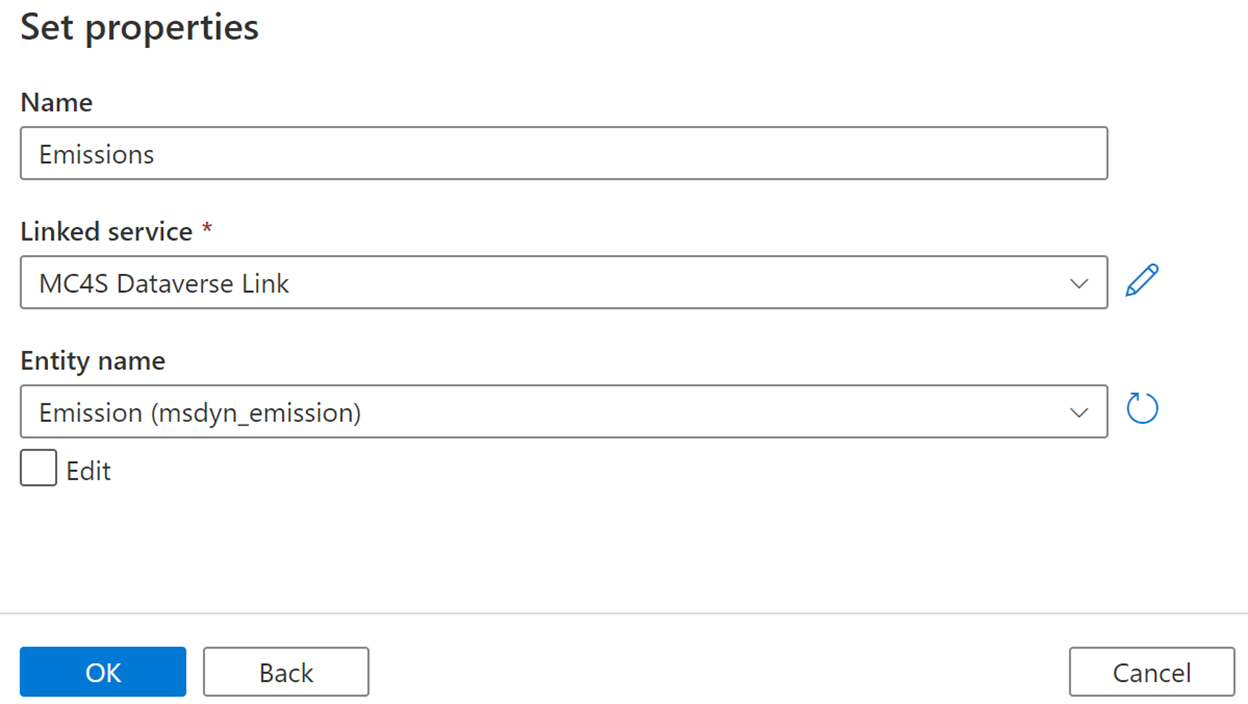
In the Set properties page, fill in the form as follows:
Enter any name, such as Emission.
Select MC4S Dataverse Link from the Linked service list.
Select Emission (msdyn_emission) from the Entity name list.
Select OK.
Review the connection and then select Publish all > Publish.


Step 7 - Create the output dataset
To create the output dataset, follow these steps:
On the left toolbar of the Azure portal, select the Author icon, select the plus (+) symbol, and then select Dataset to add a dataset.
On the New dataset page, search for storage, select Azure Blob Storage, and then select Continue.
On the Select format page, select JSON, and then select Continue.
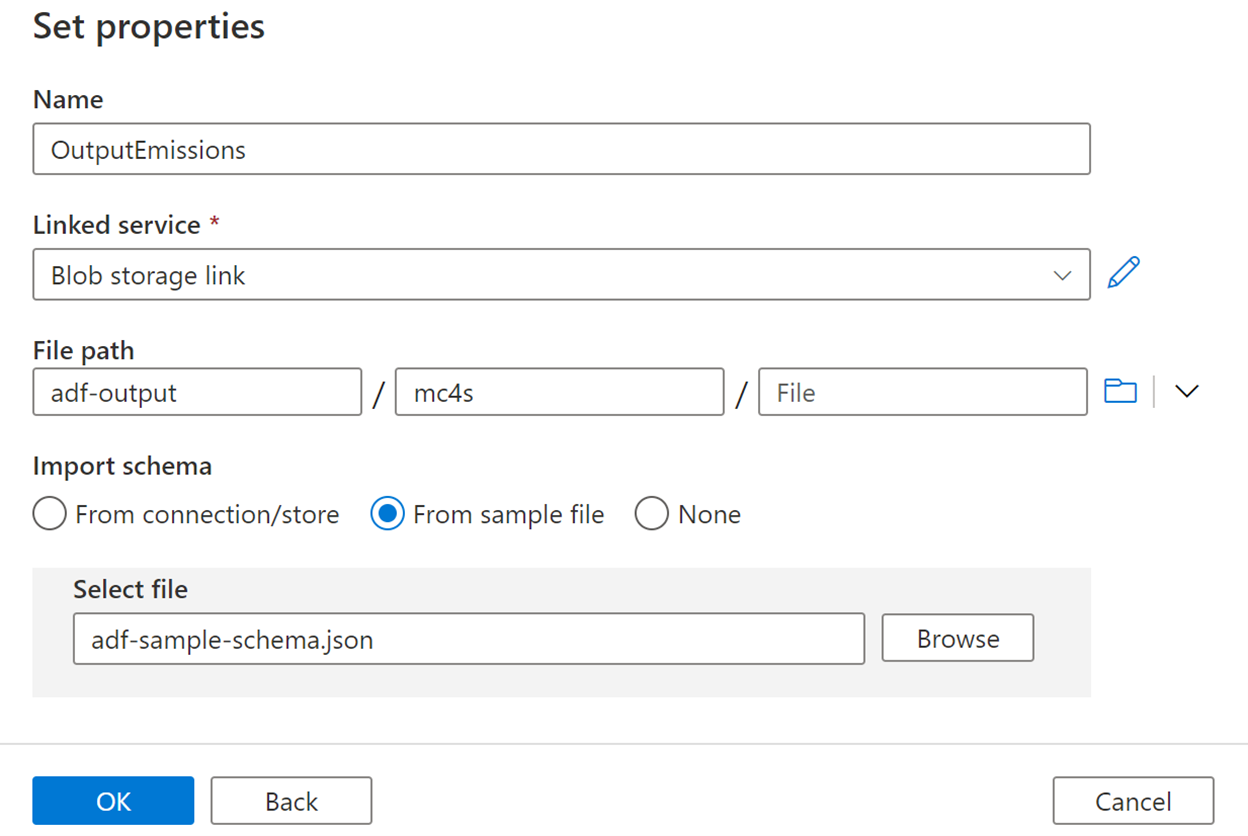
On the Set properties page, fill in the form as follows:
Enter any name, such as OutputEmissions.
Select Blob storage link from the Linked service dropdown list.
Enter adf-output / mc4s for the file path, and then leave the last box blank.
Select From sample file for Import schema.
Download this file locally and then select it with the Browse button.
Select OK.
Review the connection and then select Publish all > Publish.


Step 8 - Create a Data Factory pipeline
To create a Data Factory pipeline, follow these steps:
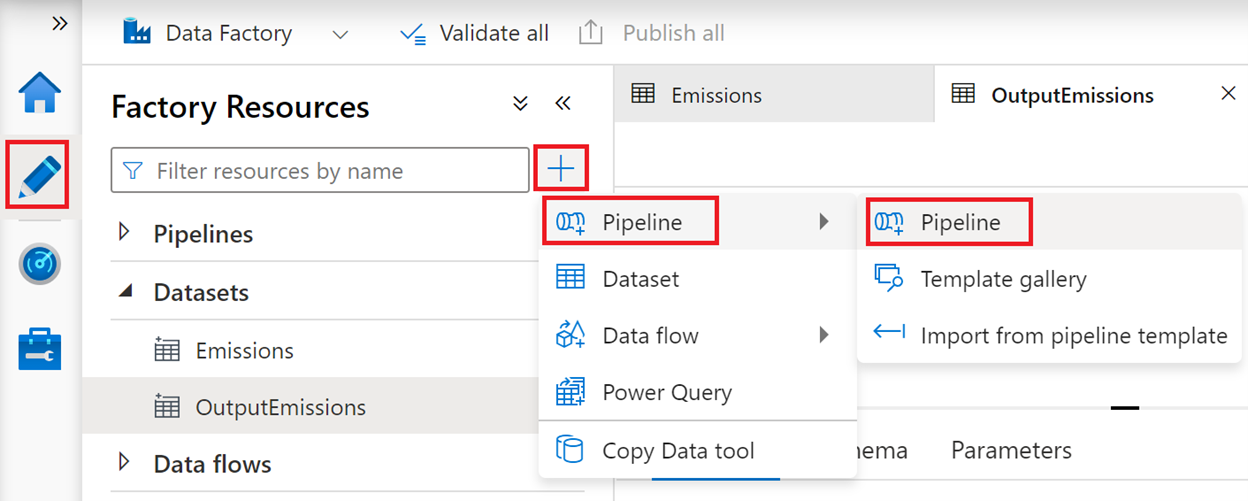
On the left toolbar of the Azure portal, select the Author icon, select the plus (+) symbol, and then select Pipeline > Pipeline.
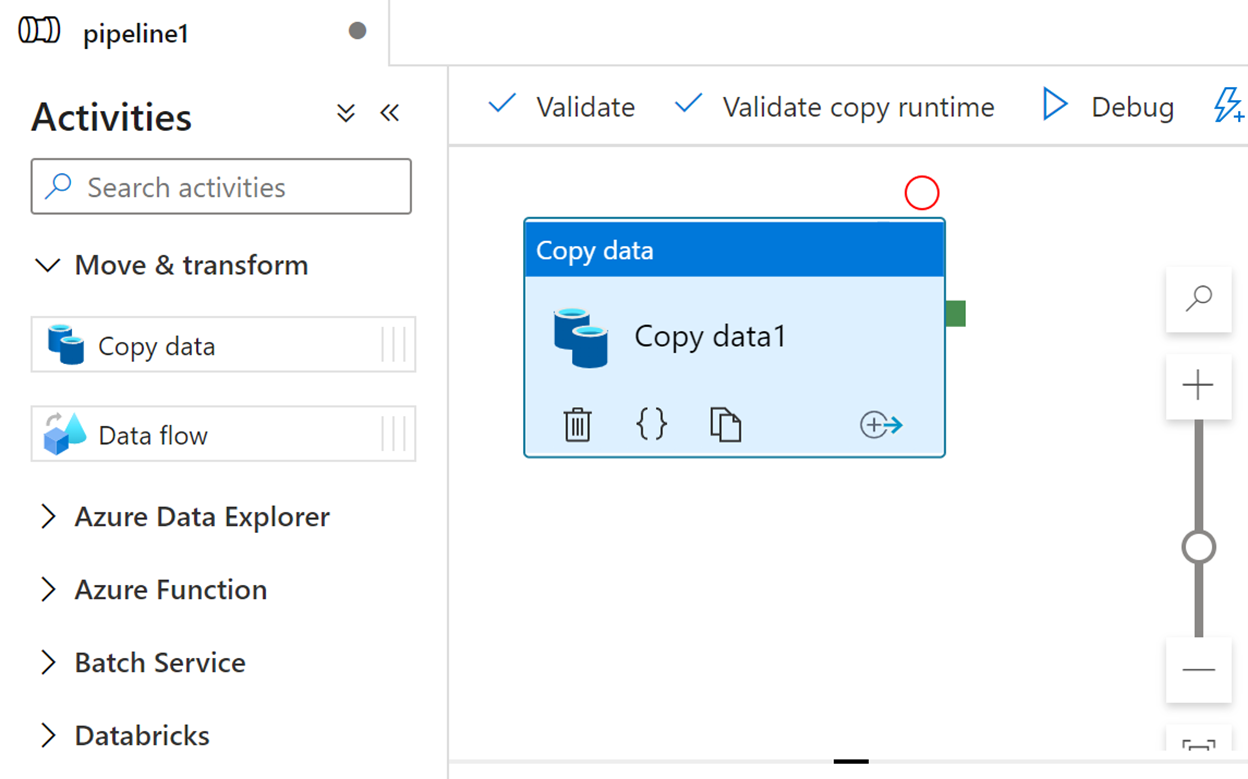
Expand Move & transform and then drag the Copy data activity into the design surface.
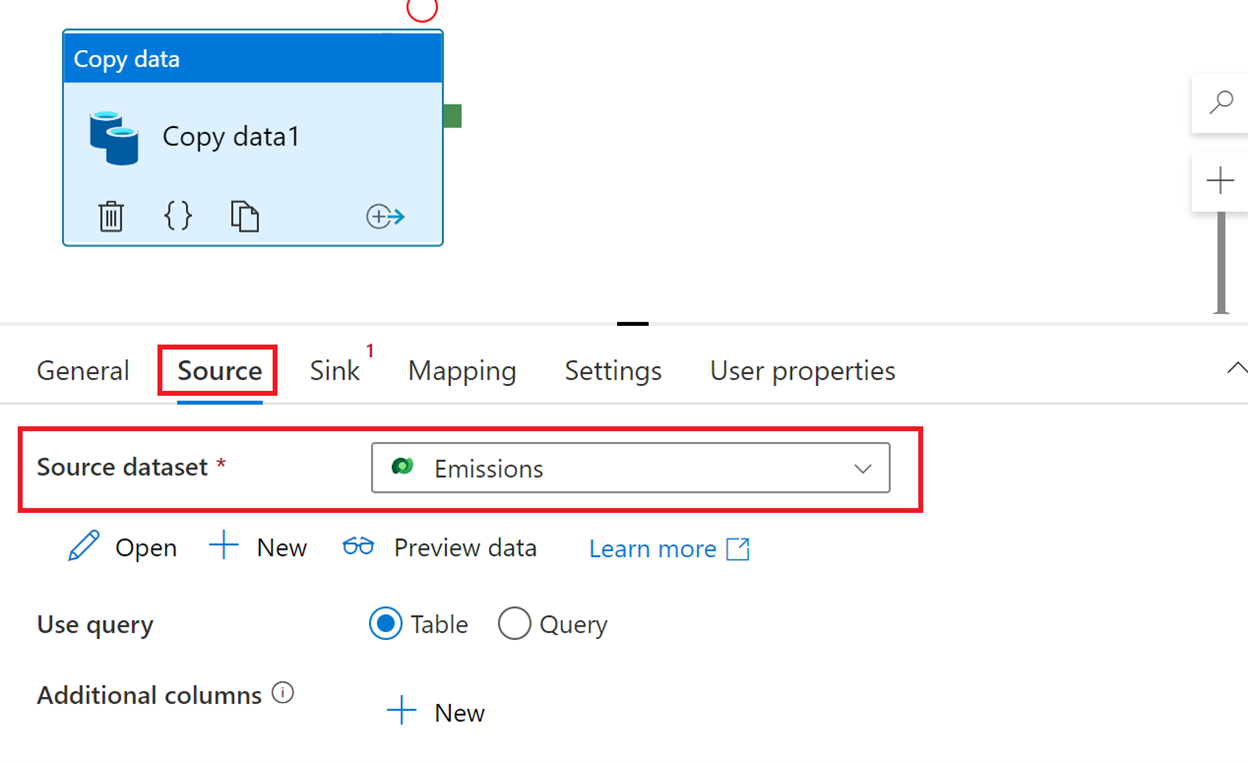
On the Source tab, select Emissions from the Source dataset dropdown menu.
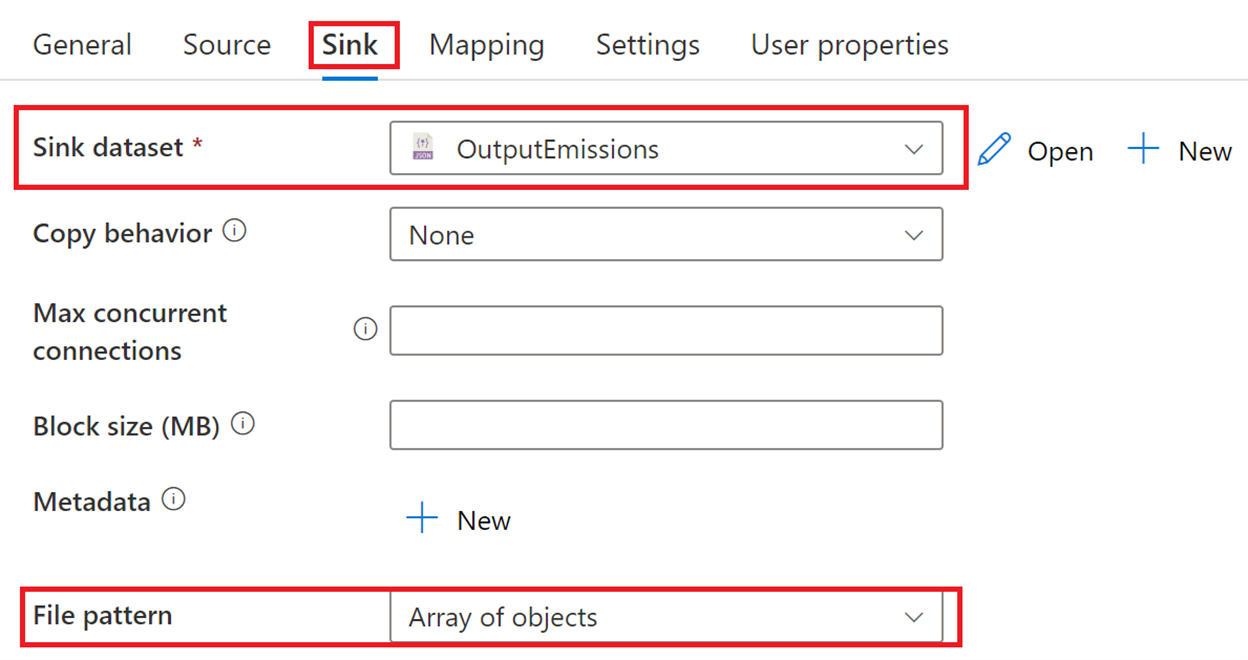
On the Sink tab, select OutputEmissions from the Sink dataset dropdown menu, and then select Array of objects from the File pattern dropdown menu.
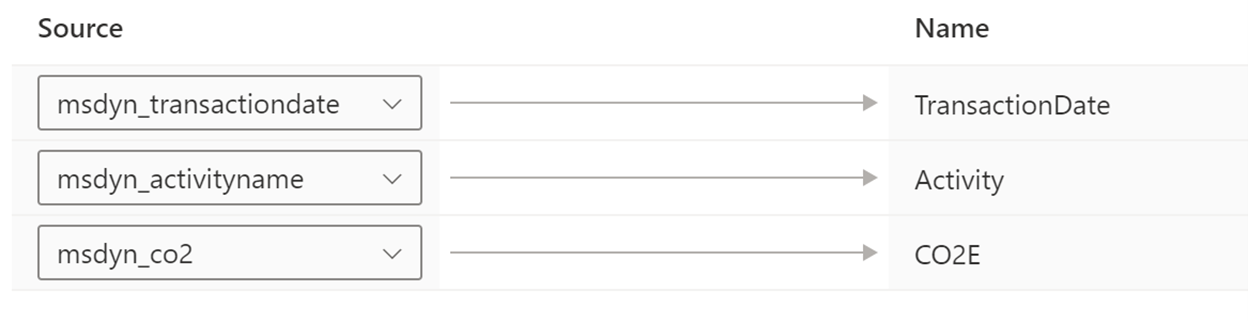
On the Mapping tab, select Import schemas.

Define the mapping as follows:
msdyn_transactiondate > TransactionDate
msdyn_activityname > Activity
msdyn_co2 > CO2E
Select Debug and then wait for the pipeline to run.
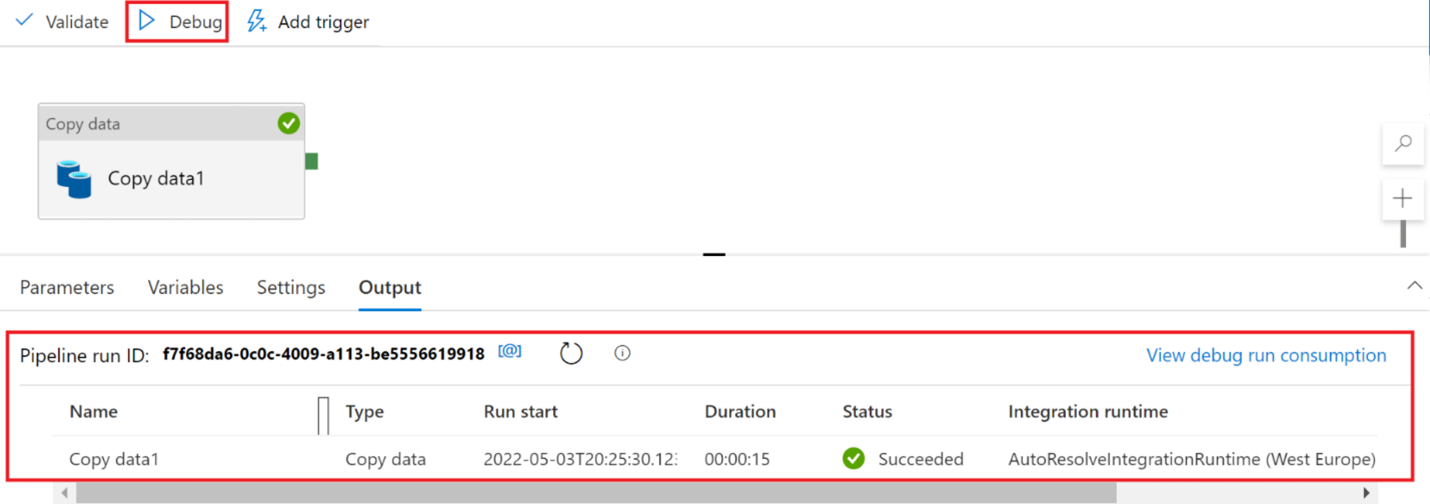
Select Publish all > Publish to save the pipeline. If you want to run the pipeline again without debugging, select Add trigger > Trigger now.
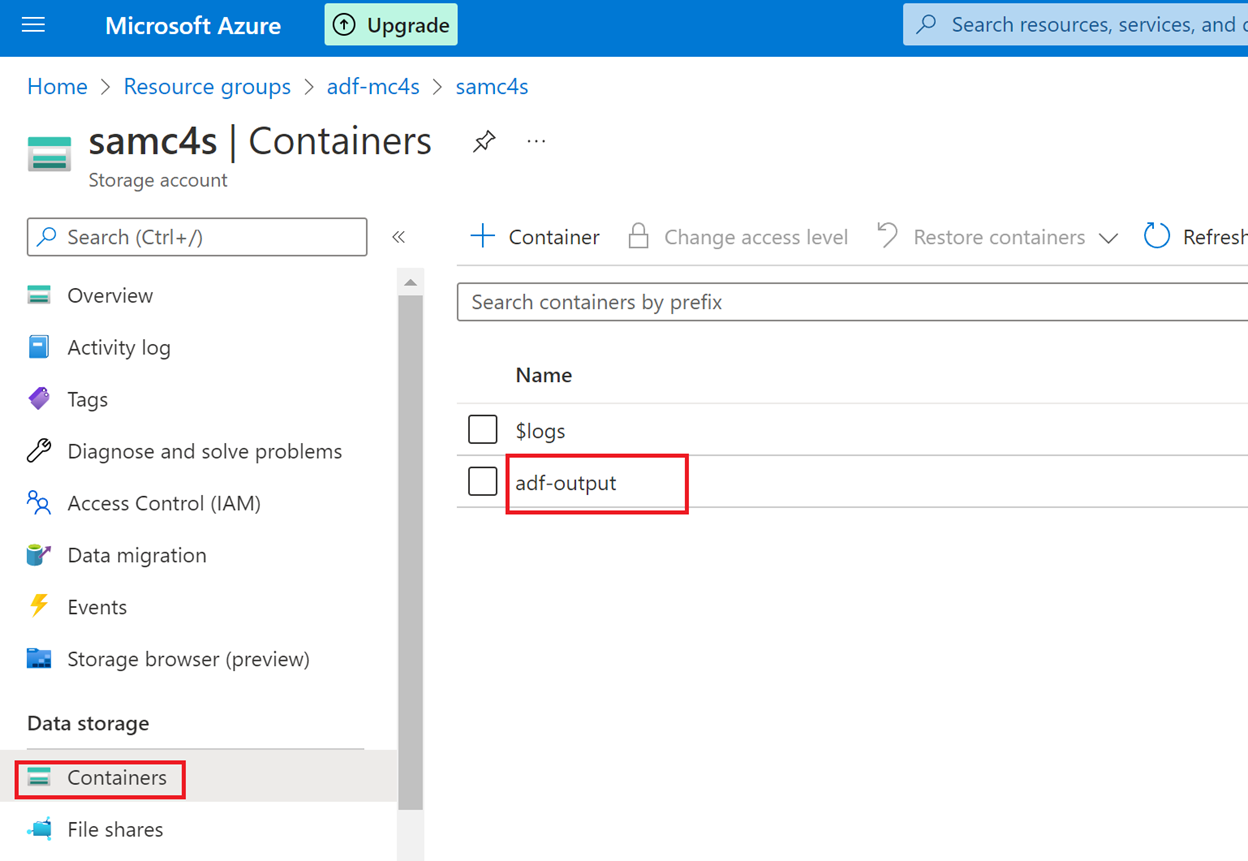
Return to the Azure portal and go to the storage account that you previously created.
Select Containers and then select the adf-output container.
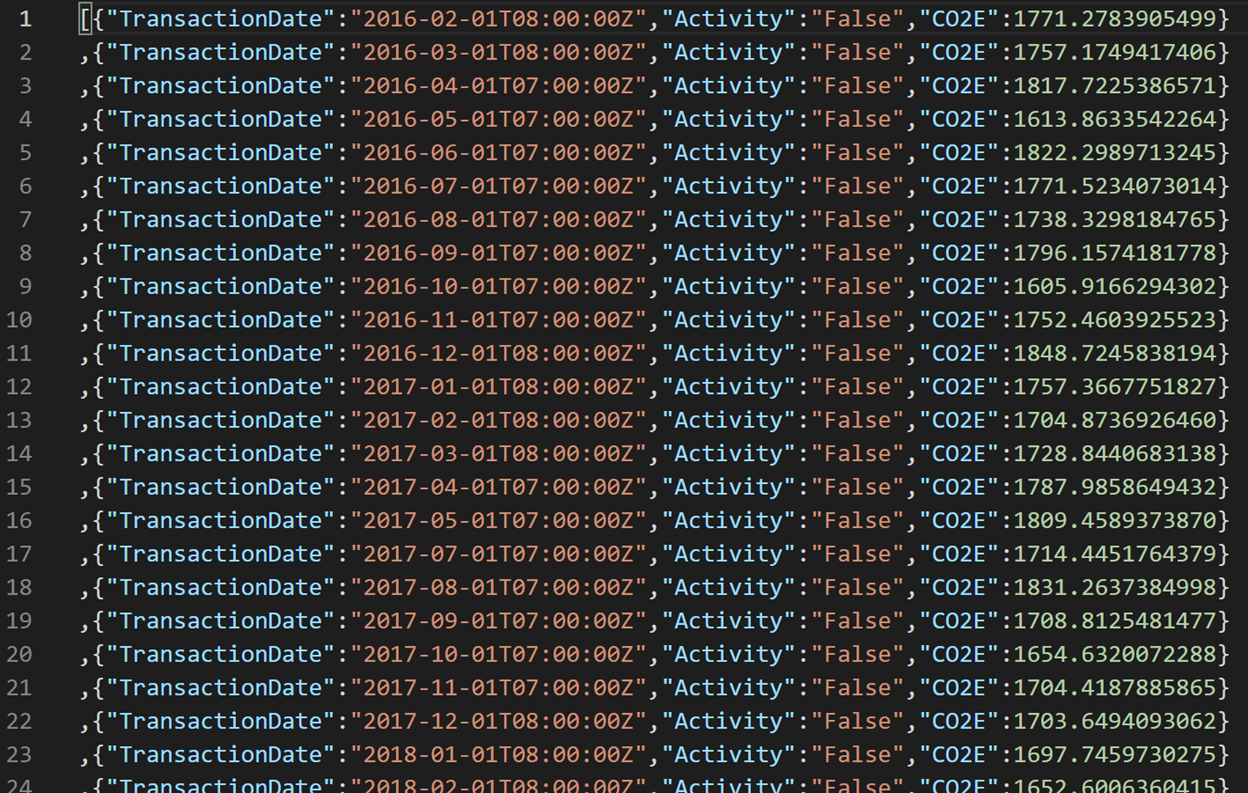
Open the mc4s folder, select msdyn_emission.json, and then select Download.
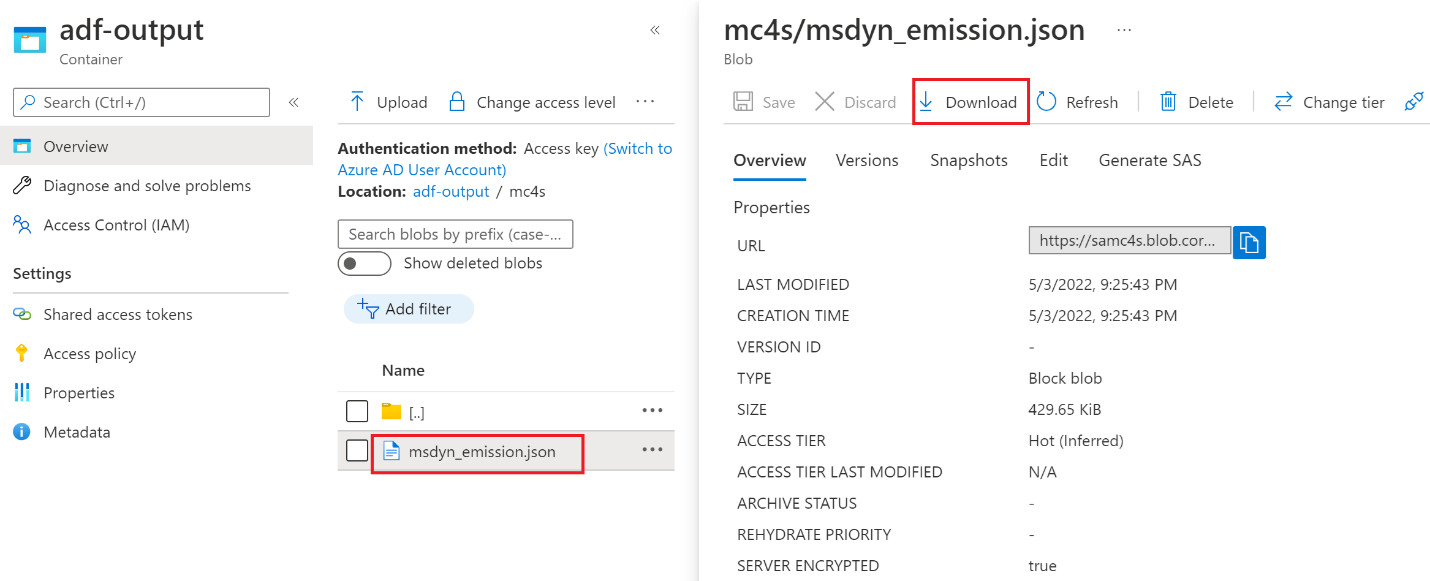
Open the JSON file and confirm that the three mapped columns from the Emission table display in JSON format.