Exercise - Access data through Dataverse API by using .NET 6 with MSAL
Follow the steps in this exercise to access sustainability data through Dataverse API by using .NET 6 with MSAL.
Step 1 – Locate the endpoint of your Dataverse environment
Your first task is to locate the endpoint of your Dataverse environment by following these steps:
Go to Power Apps.
Review the Environment badge in the upper right to ensure that you’re in the correct environment.
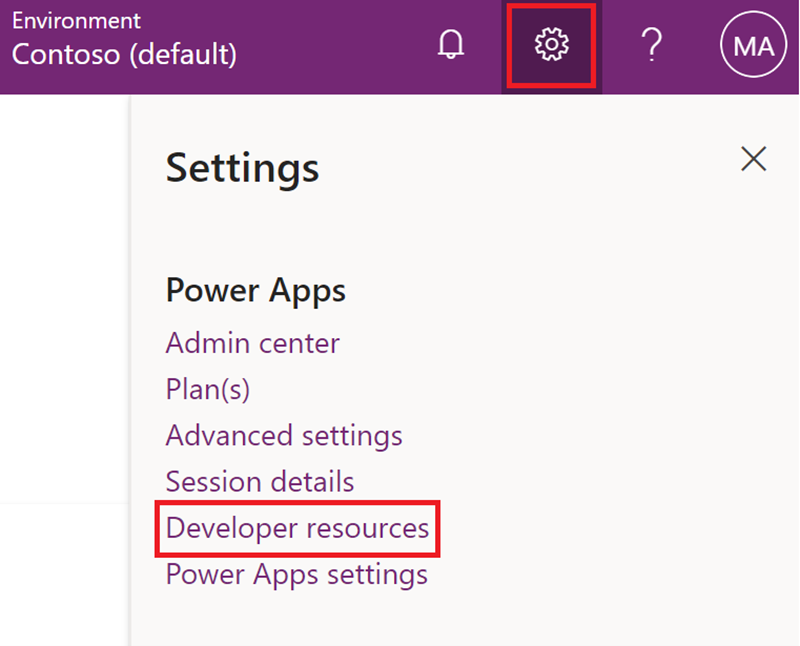
Select the Settings (gear) icon in the upper right and then select Developer resources.
Copy and save the Web API endpoint (you’ll need this information later in this exercise). Make sure that you only copy the URL from the scheme (https) to the host
www.globaldisco.crm4.dynamics.comwithout the path or query string (/api/data/v9.x).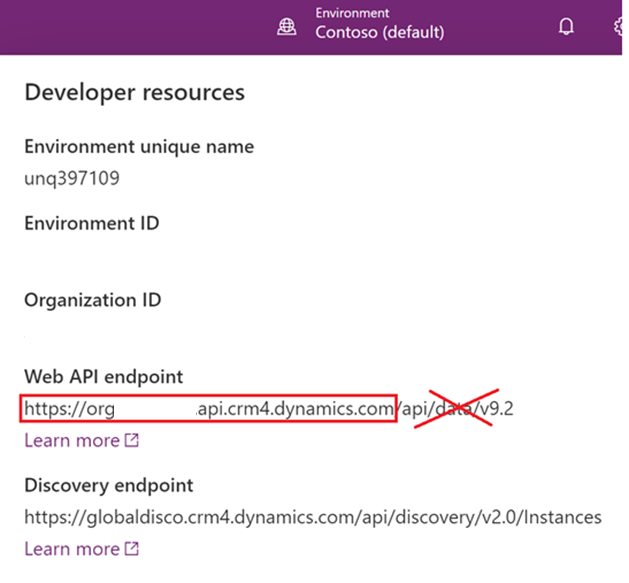


Step 2 – Register an application with Microsoft Entra ID and create a service principal
When you have applications, hosted services, or automated tools that need to access or modify resources, you can create an identity for the app. This identity is known as a service principal. Access to resources is restricted by the roles that are assigned to the service principal, giving you control over which resources that people can access and at which level. For security reasons, we always recommend that you use service principals with automated tools rather than allowing users to sign in with a user identity.
In this step, you’ll create the app registration and the underlying service principal that your app will use to run the Microsoft Entra ID delegate authentication.
Important
You’ll need to complete this step to get the users to authenticate with their credentials and use the resulting authentication token to access Dataverse.
- Go to the Azure portal.
- Go to Microsoft Entra ID.
- Go to App registrations.
- Select New registration to register the application.
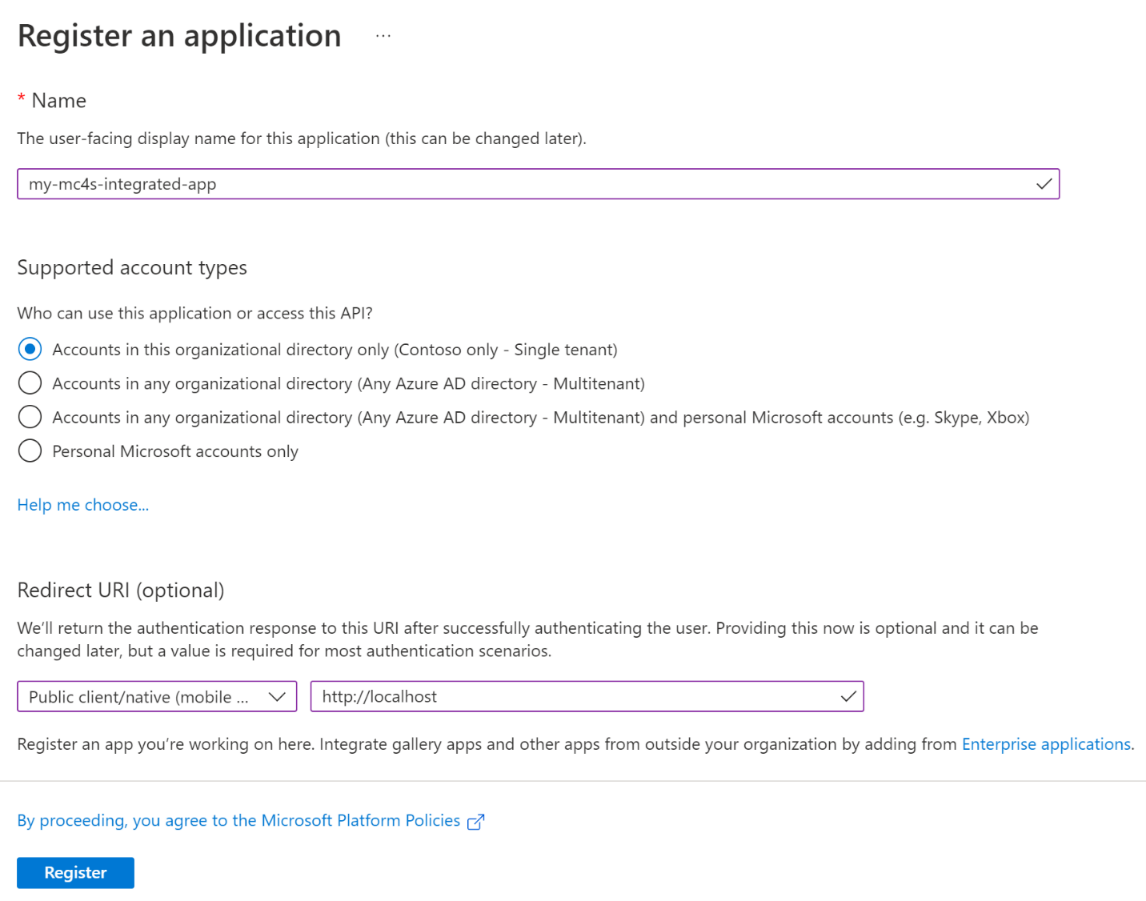
Enter any name, such as my-mc4s-integrated-app.
Select Single tenant in the Supported account types section.
Select Public client/native (mobile & desktop) and then enter http://localhost in the Redirect URI (optional) section.
Select Register.

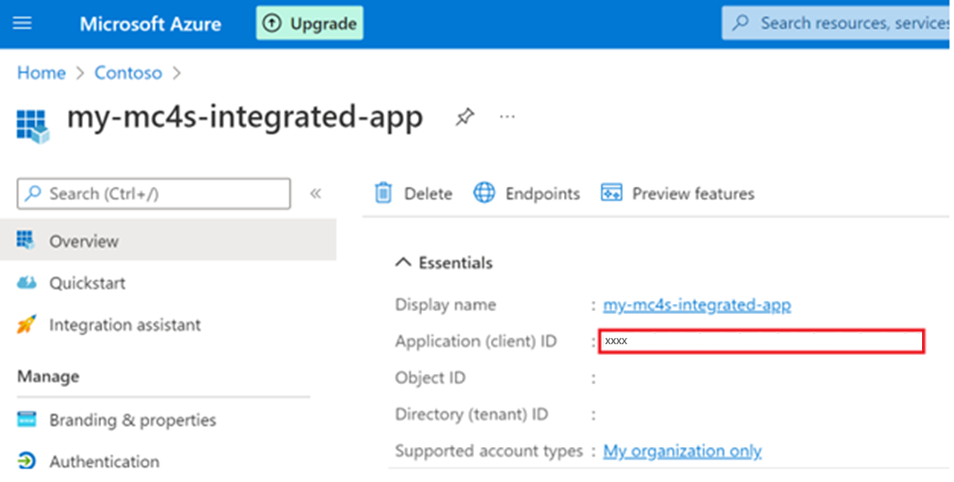
Now, you've created your Microsoft Entra ID application and service principal. The app registration will be created, and the Overview tab will open.
Note the Application (client) ID because you’ll need it later in this exercise.
Note
You can register multiple applications with the same name in Microsoft Entra ID, but the applications must have different application (client) IDs.
To access resources in your subscription, assign a role to the application.
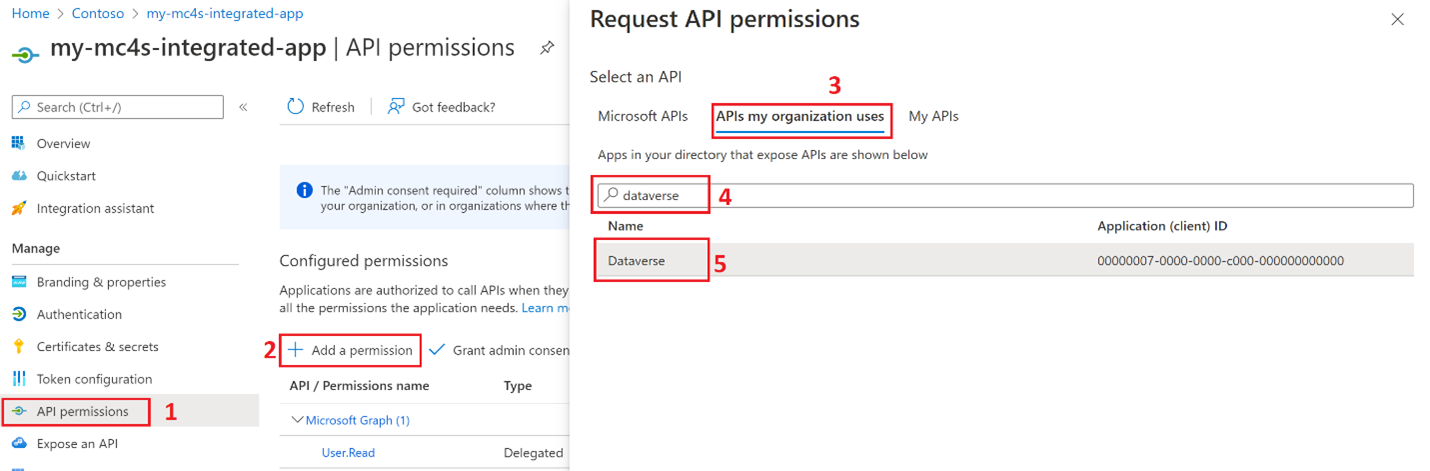
- Go to API permissions.
- Select Add a permission.
- Select APIs my organization uses.
- Enter Dataverse in the search box.
- Select the Dataverse item from the result list.
Note
By default, Microsoft Entra ID applications aren't displayed in the available options. To find your application, search for it and then select the name.
Ensure that the user_impersonation permission is selected and then select Add permissions.
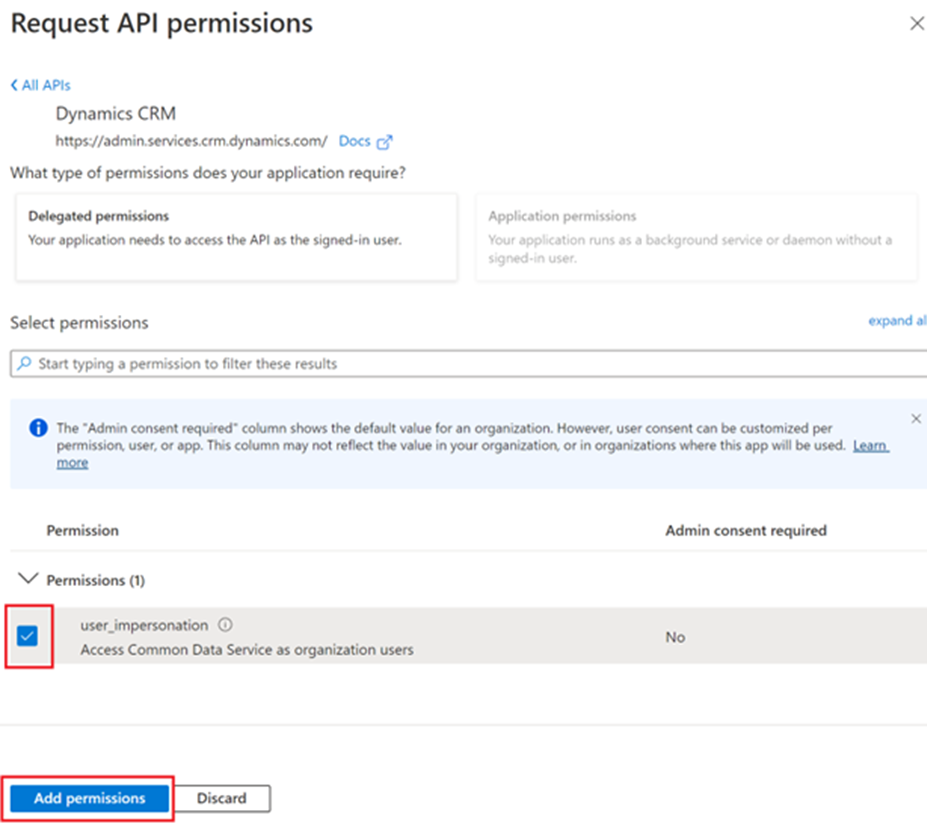
The user_impersonation permission will show in the permissions list.


Your service principal is now set up. You can start using it to run your scripts or apps. These steps will allow your app to impersonate the signed-in user to access the Microsoft Cloud for Sustainability data in Dataverse.
Step 3 - Create a .NET 6 console app to query the Emission table
To create a .NET 6 console app, follow these steps:
Open Microsoft Visual Studio or Visual Studio Code.
Open the Program.cs file and replace the existing content with the following code:
using MyMC4SApp;
using Microsoft.Identity.Client;  // Microsoft Authentication Library (MSAL)
using System.Net.Http.Headers;
using System.Text.Json;

namespace MyMC4SApp
{
class Program
{
static async Task Main()
{
// TODO Specify the Dataverse environment name to connect with.
string resource = "Enter Dataverse environment endpoint here";
// TODO Specify the Microsoft Entra ID app registration id.
var clientId = "Enter App ID here";
var redirectUri = "http://localhost"; // Loopback for the interactive login.

#region Authentication

var authBuilder = PublicClientApplicationBuilder.Create(clientId)
                            .WithAuthority(AadAuthorityAudience.AzureAdMultipleOrgs)
                            .WithRedirectUri(redirectUri)
                            .Build();
            var scope = resource + "/.default";
            string[] scopes = { scope };

            AuthenticationResult token =
                authBuilder.AcquireTokenInteractive(scopes).ExecuteAsync().Result;
            #endregion Authentication

            #region Client configuration

            var client = new HttpClient
            {
                // See https://learn.microsoft.com/powerapps/developer/data-platform/webapi/compose-http-requests-handle-errors#web-api-url-and-versions
                BaseAddress = new Uri(resource + "/api/data/v9.2/"),
                Timeout = new TimeSpan(0, 2, 0)    // Standard two minute timeout on web service calls.
            };

            // Default headers for each Web API call.
            // See https://learn.microsoft.com/powerapps/developer/data-platform/webapi/compose-http-requests-handle-errors#http-headers
            HttpRequestHeaders headers = client.DefaultRequestHeaders;
            headers.Authorization = new AuthenticationHeaderValue("Bearer", token.AccessToken);
            headers.Add("OData-MaxVersion", "4.0");
            headers.Add("OData-Version", "4.0");
            headers.Accept.Add(new MediaTypeWithQualityHeaderValue("application/json"));
            #endregion Client configuration

            #region Web API call

            var response = await client.GetAsync("msdyn_emissions?$top=10");

            if (response.IsSuccessStatusCode)
            {
                using (var stream = response.Content.ReadAsStreamAsync())
                {
                    var result = await JsonSerializer.DeserializeAsync<DataverseQueryResult<Emission>>(await stream)!;
                    await foreach (var emission in result!.value!)
                        Console.WriteLine($"{emission.msdyn_activityname} activity on {emission.msdyn_transactiondate} emitted {emission.msdyn_co2e} CO2 Equivalent");
                }
            }
            else
                Console.WriteLine($"Web API call failed with reason {response.ReasonPhrase}");
            #endregion Web API call

            Console.ReadKey();
        }
    }
    public class DataverseQueryResult<T>
    {
        public IAsyncEnumerable<T> value { get; set; }
    }
    public class Emission
    {
        public string? msdyn_activityname { get; set; }
        public DateTime msdyn_transactiondate { get; set; }
        public decimal msdyn_co2e { get; set; }
    }
}
Replace the placeholder text in the Enter Dataverse environment endpoint field with the URL that you previously retrieved in this exercise.
Replace the placeholder text in the Enter App ID here field with the app registration ID that you previously copied in this exercise.
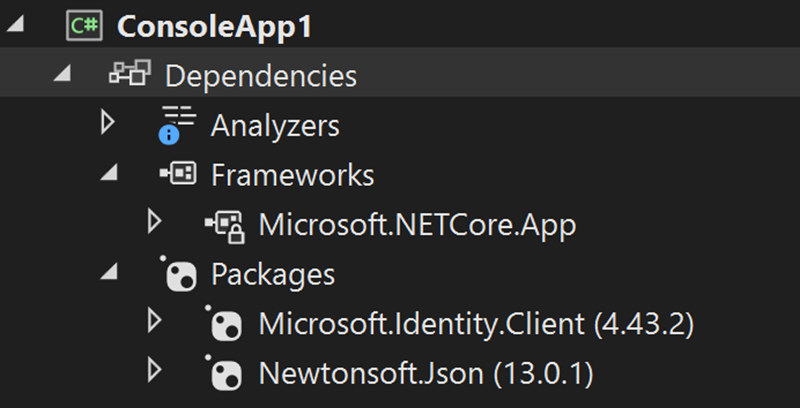
Add the following NuGet packages:
- Microsoft.Identity.Client
- Newtonsoft.Json
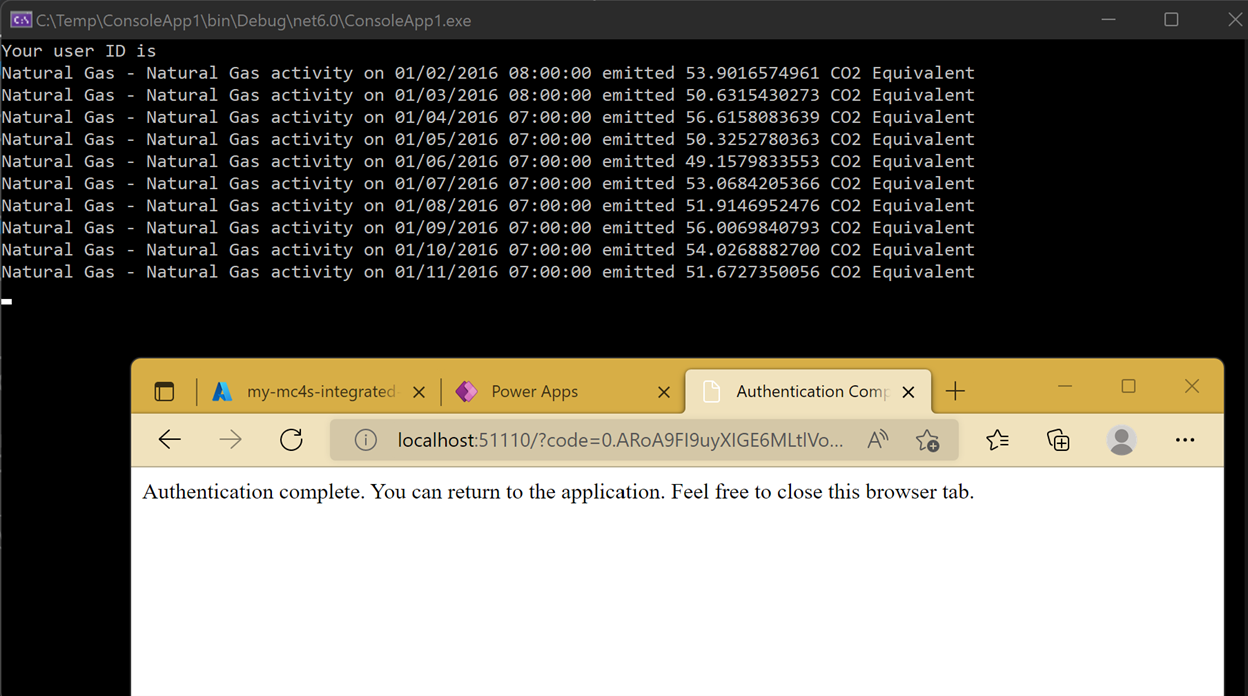
Run the console app and authenticate in the browser window. The console app will list the first 10 records of the Emission table.