Azure Cosmos DB for MongoDB migration extension for Azure Data Studio (preview)
The Azure Cosmos DB for MongoDB migration extension helps you in migrating your MongoDB workloads to Azure Cosmos DB. You can use this extension to:
- Run an end-to-end assessment on your workload and find out the necessary actions you need to take to migrate your workloads to vCore-based Azure Cosmos DB for MongoDB.
- Perform the migration operation with selected databases and collections to vCore-based Azure Cosmos DB for MongoDB.
Important
Currently this extension doesn't support the following scenarios:
- Migration where source or target account are Private Endpoint enabled.
- Online/Offline Migrations for RU-based Azure Cosmos DB for MongoDB.
For more information on alternate solutions for the API for MongoDB vCore, see migration options.
Prerequisites
- An existing vCore-based Azure Cosmos DB for MongoDB account.
- If you don't have an Azure subscription, create an account for free.
- Latest version of Azure Data Studio.
- MongoDB running version 3.2 or higher.
- Add firewall exceptions to the source MongoDB and vCore-based Azure Cosmos DB for MongoDB target account to accept connections from global Azure datacenters.
- If you're using Database Migration Service for the first time, make sure that the Microsoft.DataMigration resource provider is registered in your subscription.
Prepare
Before starting the migration, carry out up-front planning and decision-making about your migration before you actually move any data.
- For more information about premigration planning for the API for MongoDB vCore, see premigration steps for vCore-based Azure Cosmos DB for MongoDB,
- For more information about premigration planning for the API for MongoDB RU, see premigration steps for RU-based Azure Cosmos DB for MongoDB
Install the extension
Install the Azure Cosmos DB for MongoDB migration extension in Azure Data Studio before you begin your migration.
Open the extensions manager in Azure Data Studio. Either select the extensions icon or select Extensions in the View menu.
Enter
Cosmosin the search bar.Select the Azure Cosmos DB Migration for MongoDB extension and view its details.

Select Install.

Configure extension settings
You can configure some extension settings after installing the extension. This step is optional. If no settings are explicitly configured, the extension uses default settings.
Go to extensions and select Azure Cosmos DB Migration for MongoDB, select the manage settings icon, and then select extension settings.

Under extension settings for this extension, provide the
Assessment pathto change the location where the assessment metadata is stored. If left blank, the default location is used.

Connect to the MongoDB source
Use the extension for the first time to connect to the existing MongoDB source instance. Ensure that you have the connection credentials for the source ready before starting this section.
Locate the connections icon in the menu bar, and select New Connection.
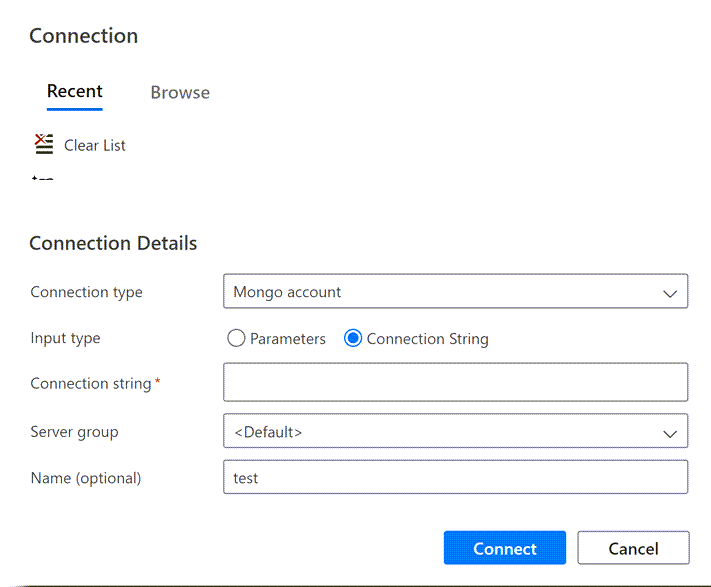
In the Connection pane, fill out the following fields:
Value Connection type Azure Cosmos DB for MongoDBConnection string/Parameters Use the connection string or parameters for your existing source MongoDB instance. Server group DefaultName (optional) Provide a unique name for this connection. Select Connect.
Open the context menu for the new connection in the Connections pane. Then, select Manage.
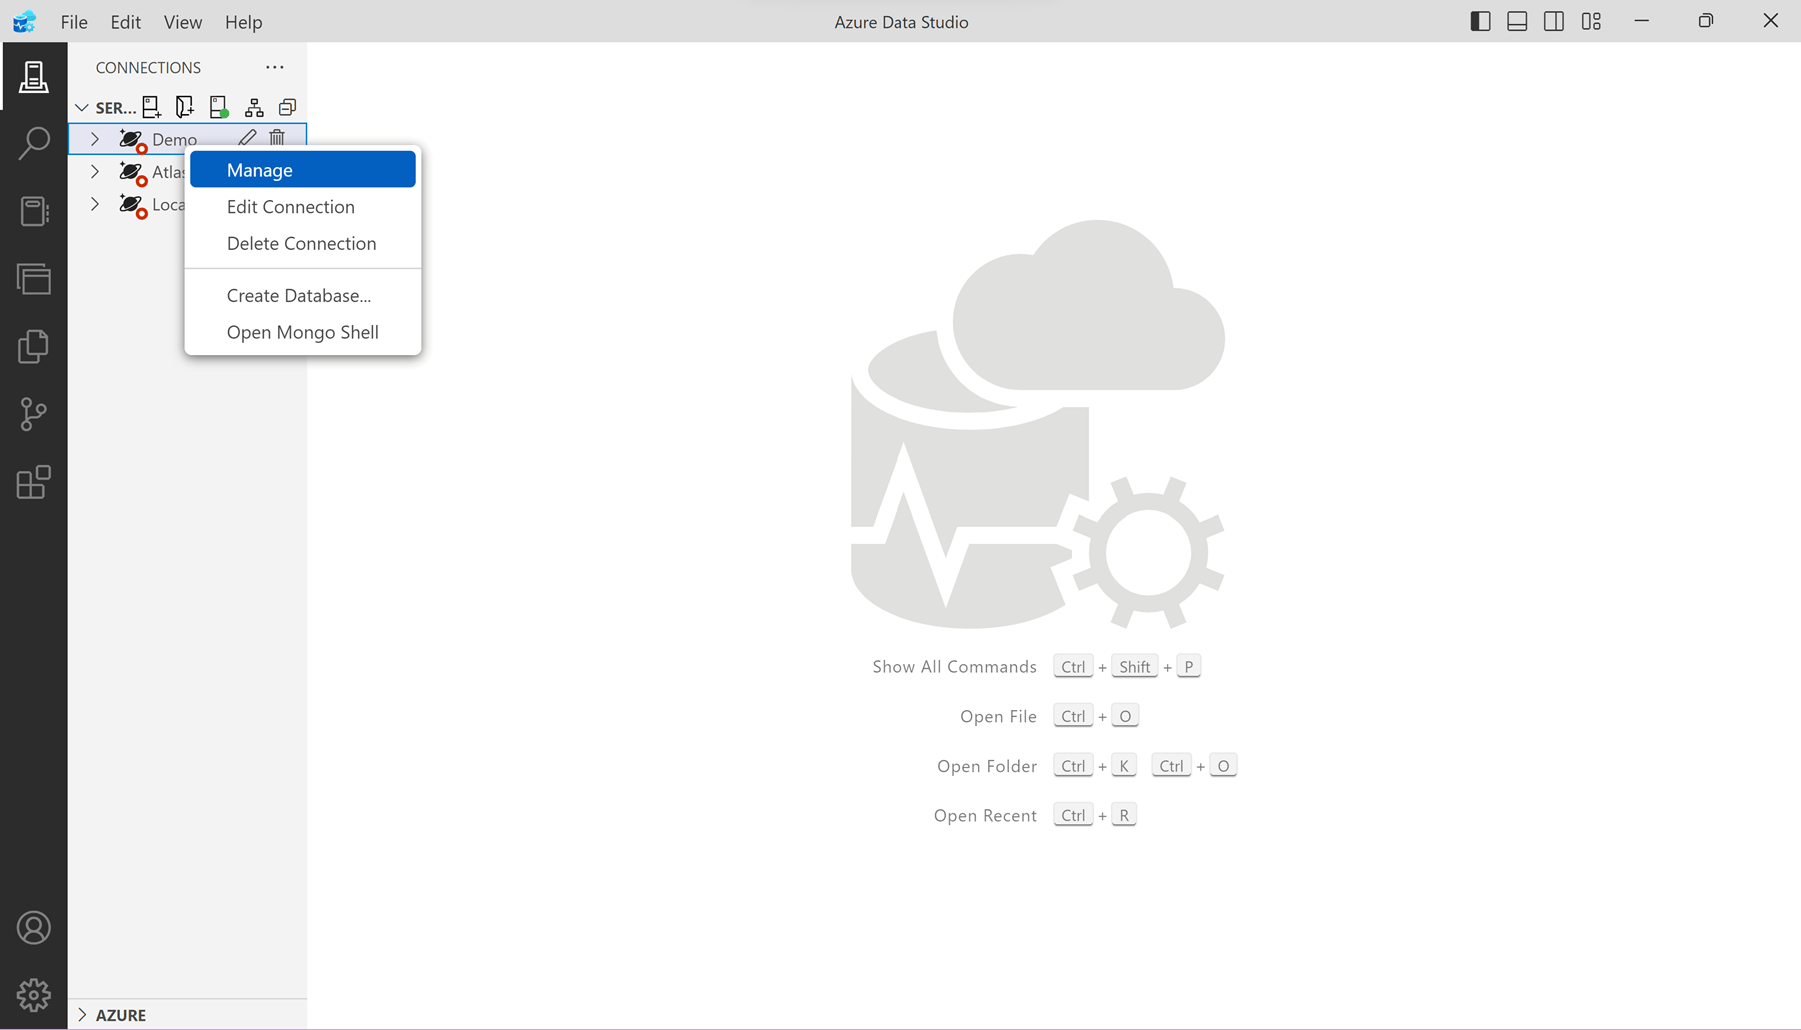
Select Azure Cosmos DB Migration.


Run an assessment
The assessment examines your current MongoDB data estate and utilization. The assessment feature then generates a comprehensive report that helps you identify the necessary actions to take before migrating your workloads to Azure Cosmos DB for MongoDB.
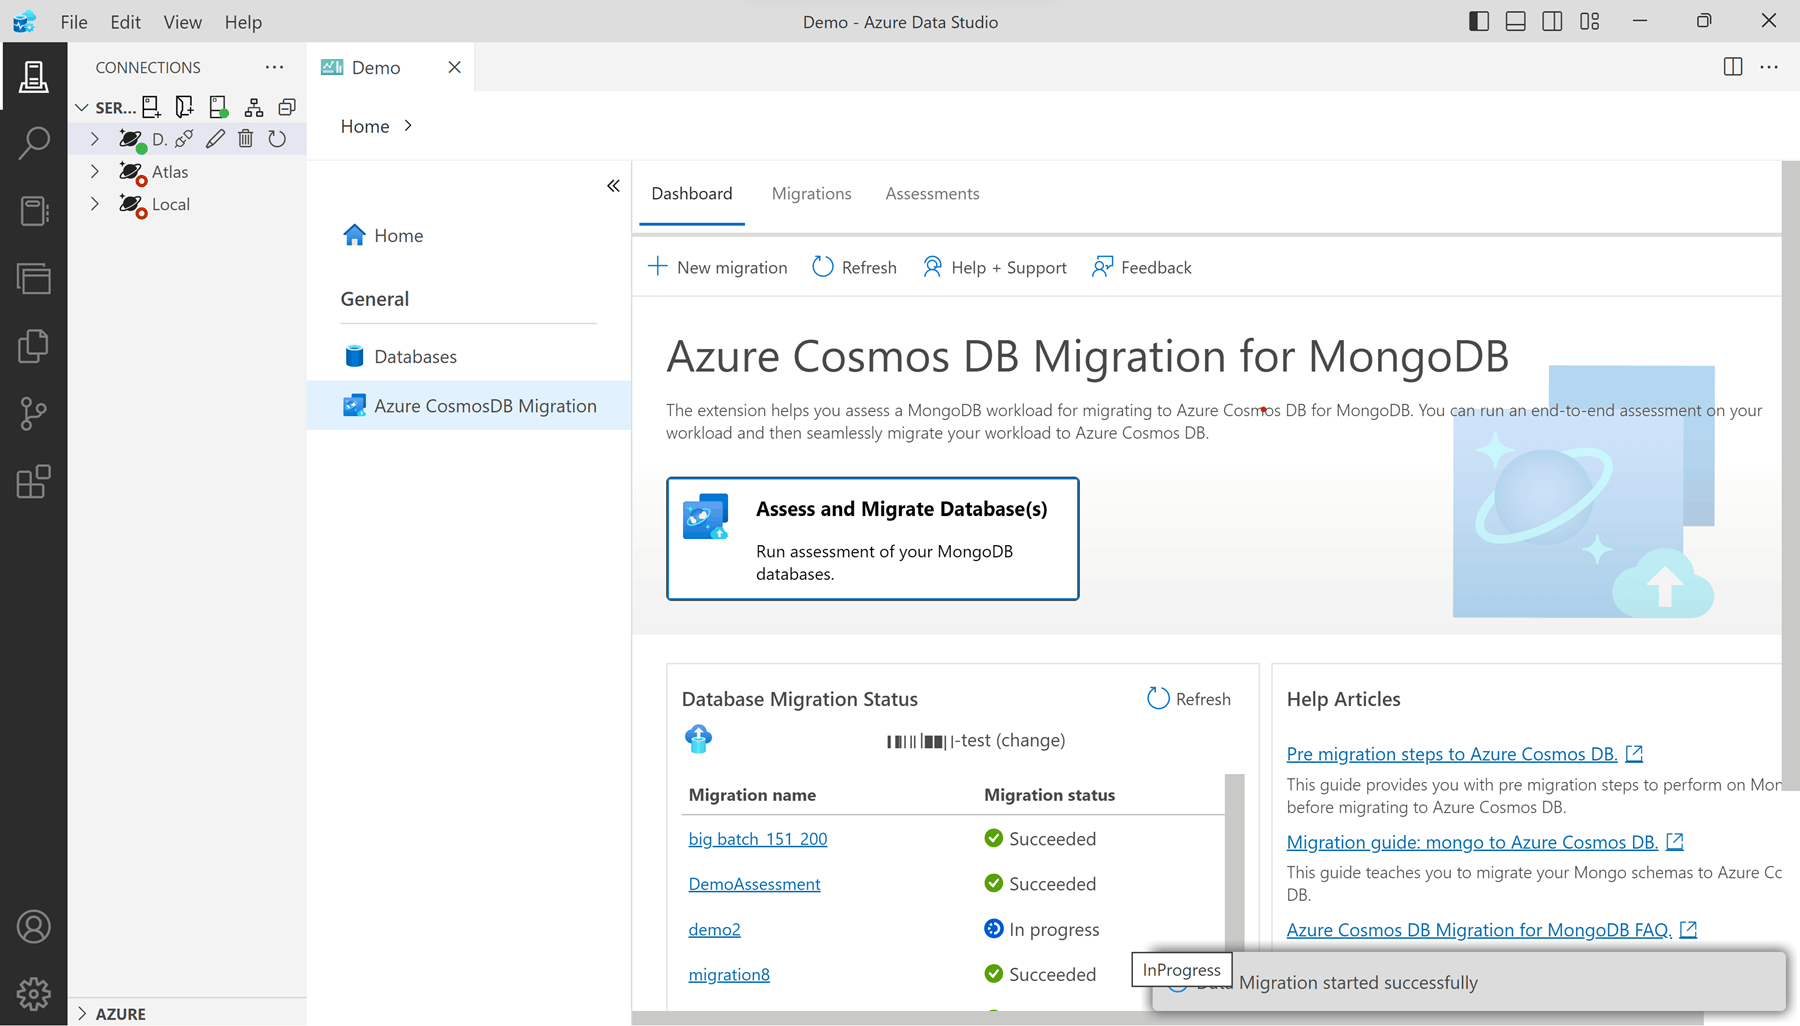
Locate and navigate to the Dashboard tab. Then, select Assess and Migrate Databases(s).

Complete the wizard to provide details to the extension so that it can perform an assessment.
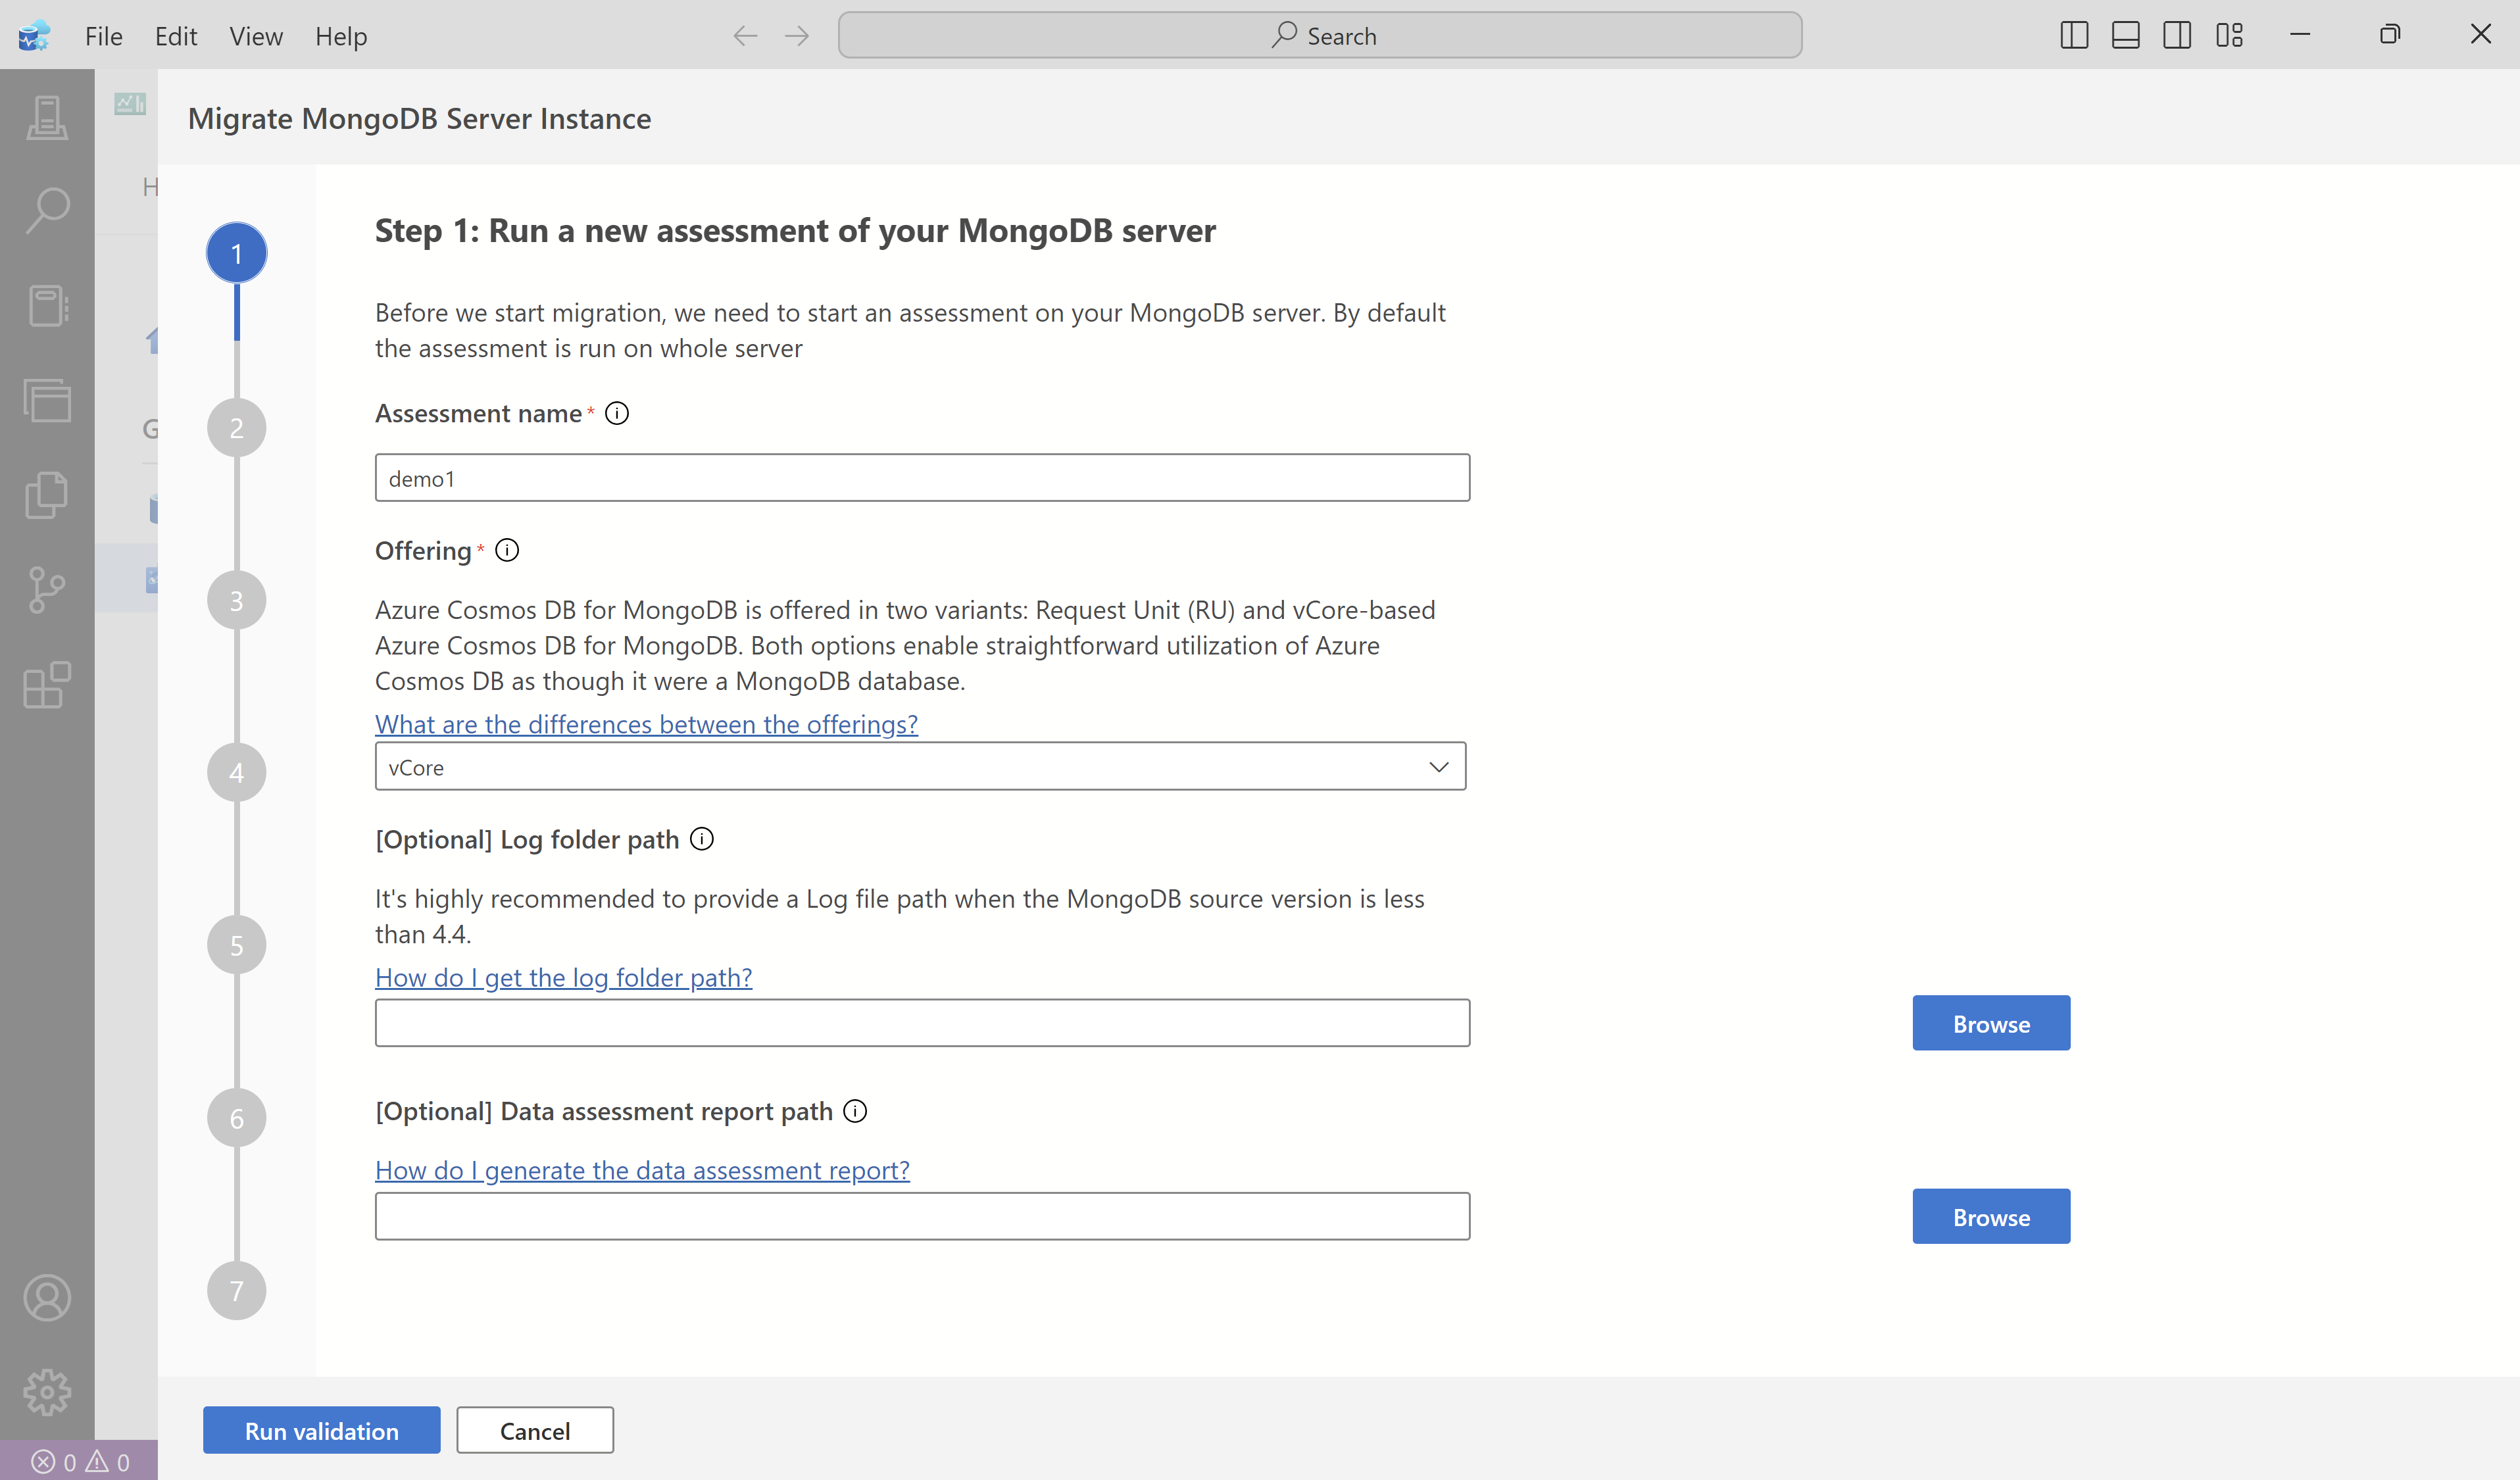
In the Assessment name field, enter a title.
Select the target Azure Cosmos DB for MongoDB account from the Offering dropdown list.
Provide the path to MongoDB Logs.
Tip
This is an optional field, however specifying the logs path results in more granular findings at the collection level. When the log folder isn't specified, the tool uses details from the
serverStatuscommand to perform the assessment.The
serverStatuscommand returns feature usage only since the last restart, so you would need to ensure that sufficient time has passed since the last server restart to get an assessment that accurately reflects your actual workload.Provide the path to Data assessment logs.
Tip
Although this field is optional, providing data assessment logs can yield more detailed insights about the workload. These logs are obtained by scanning data and reading verbose logs. The data assessment runs independently as a CLI before initiating the migration assessment, and the resulting JSON is then supplied here. Download the data assessment CLI here.
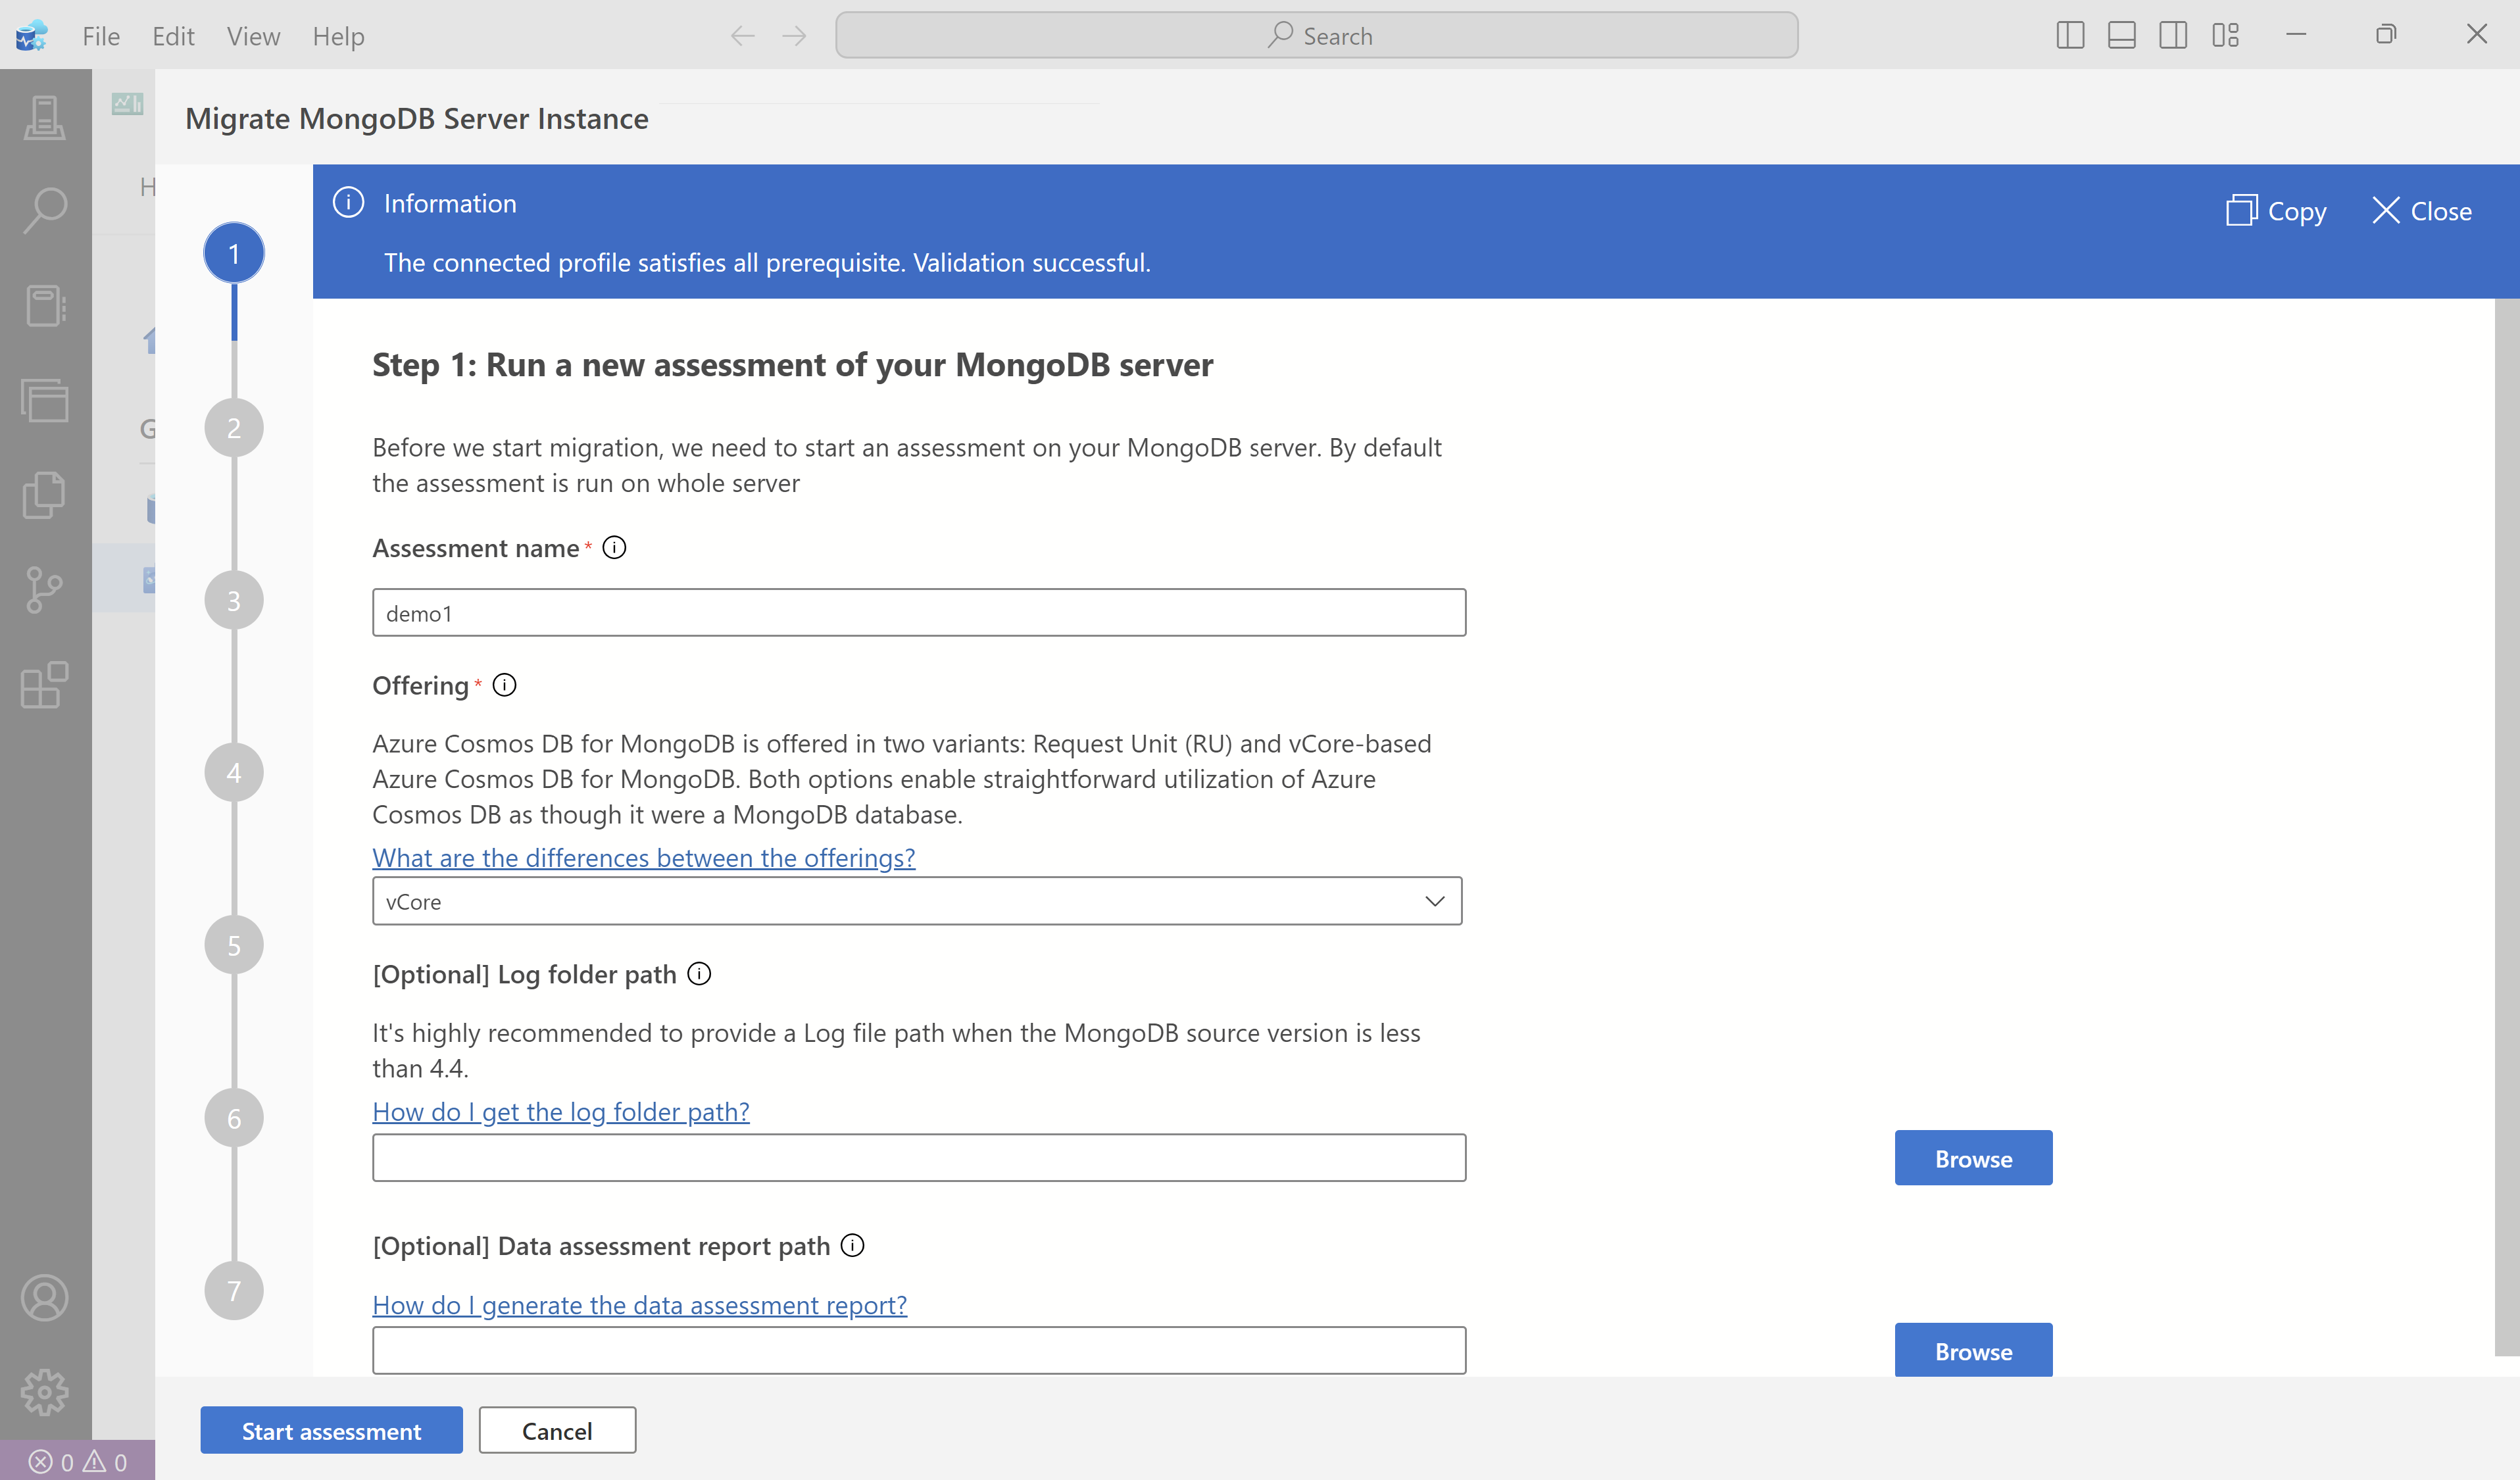
Select Run validation to validate the assessment inputs.
Once the validation is successful, select Start assessment to run the assessment.
Depending on the size of your source server, the assessment takes a few minutes. Wait for the assessment to complete before continuing.
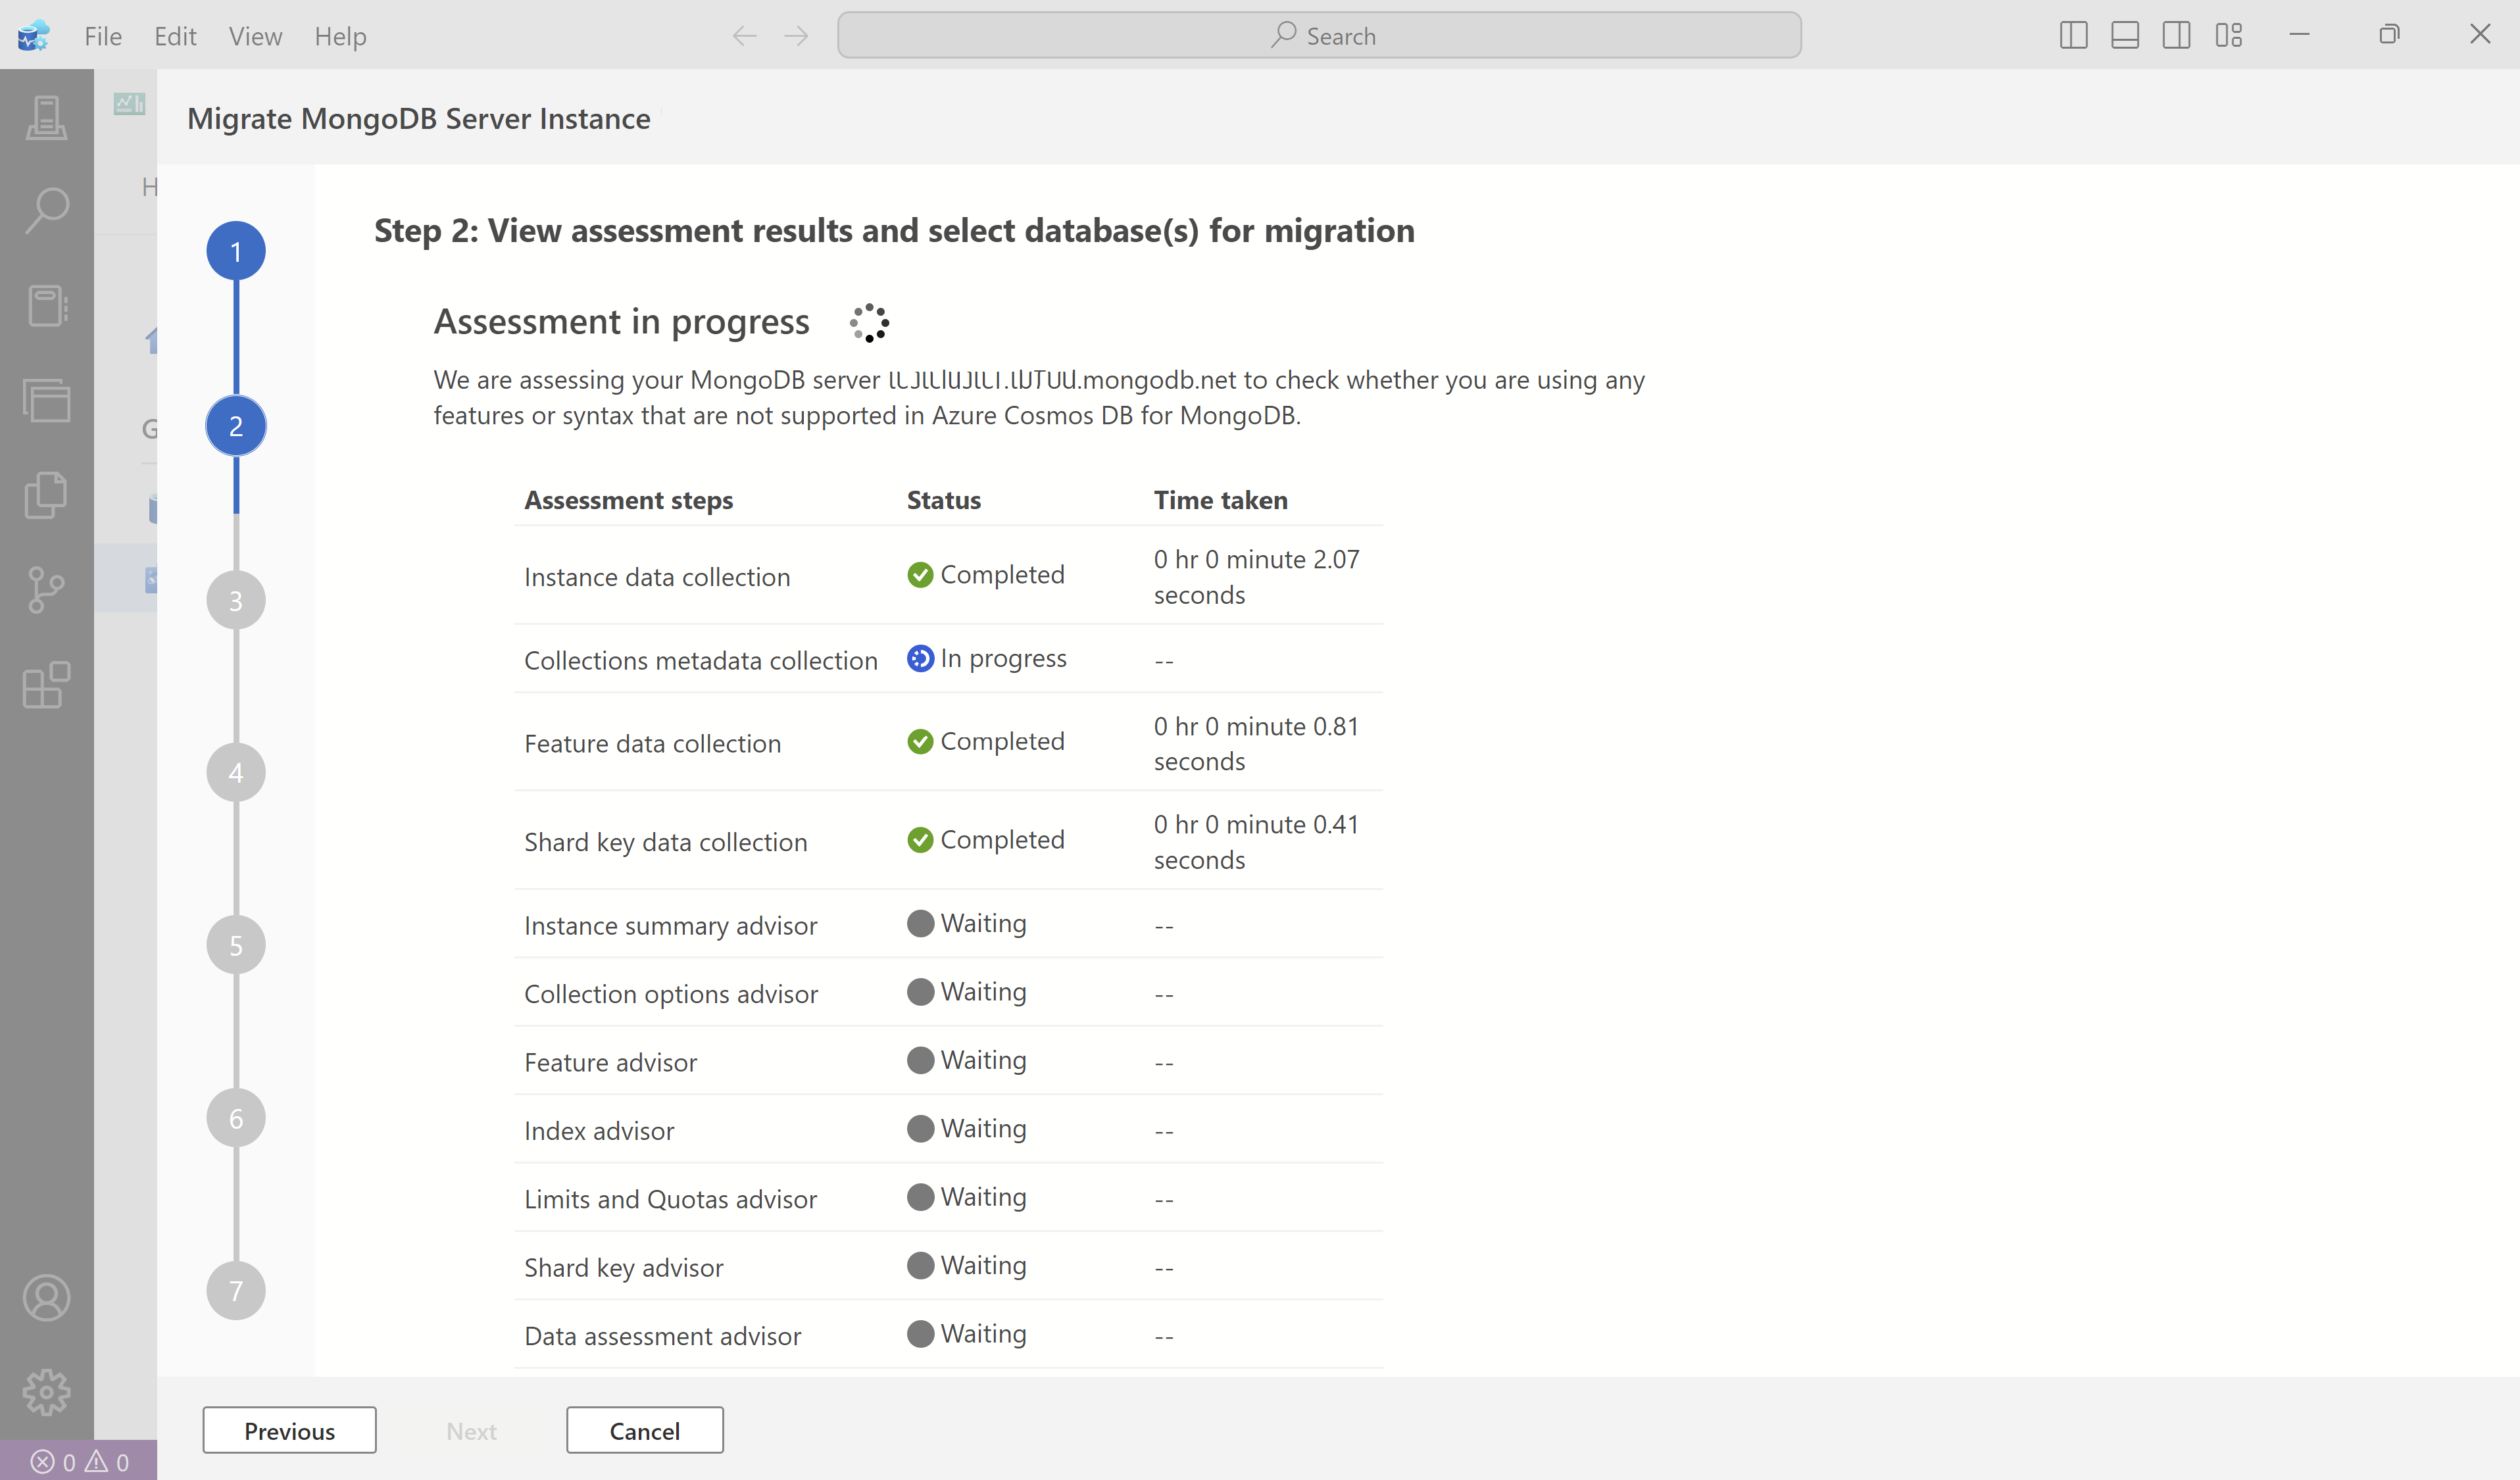
After the assessment is complete, you should now have an assessment report.

In the assessment report, select the instance name to review a list of server-wide issues. Select a specific database to view issues that are only applicable to the selected database.
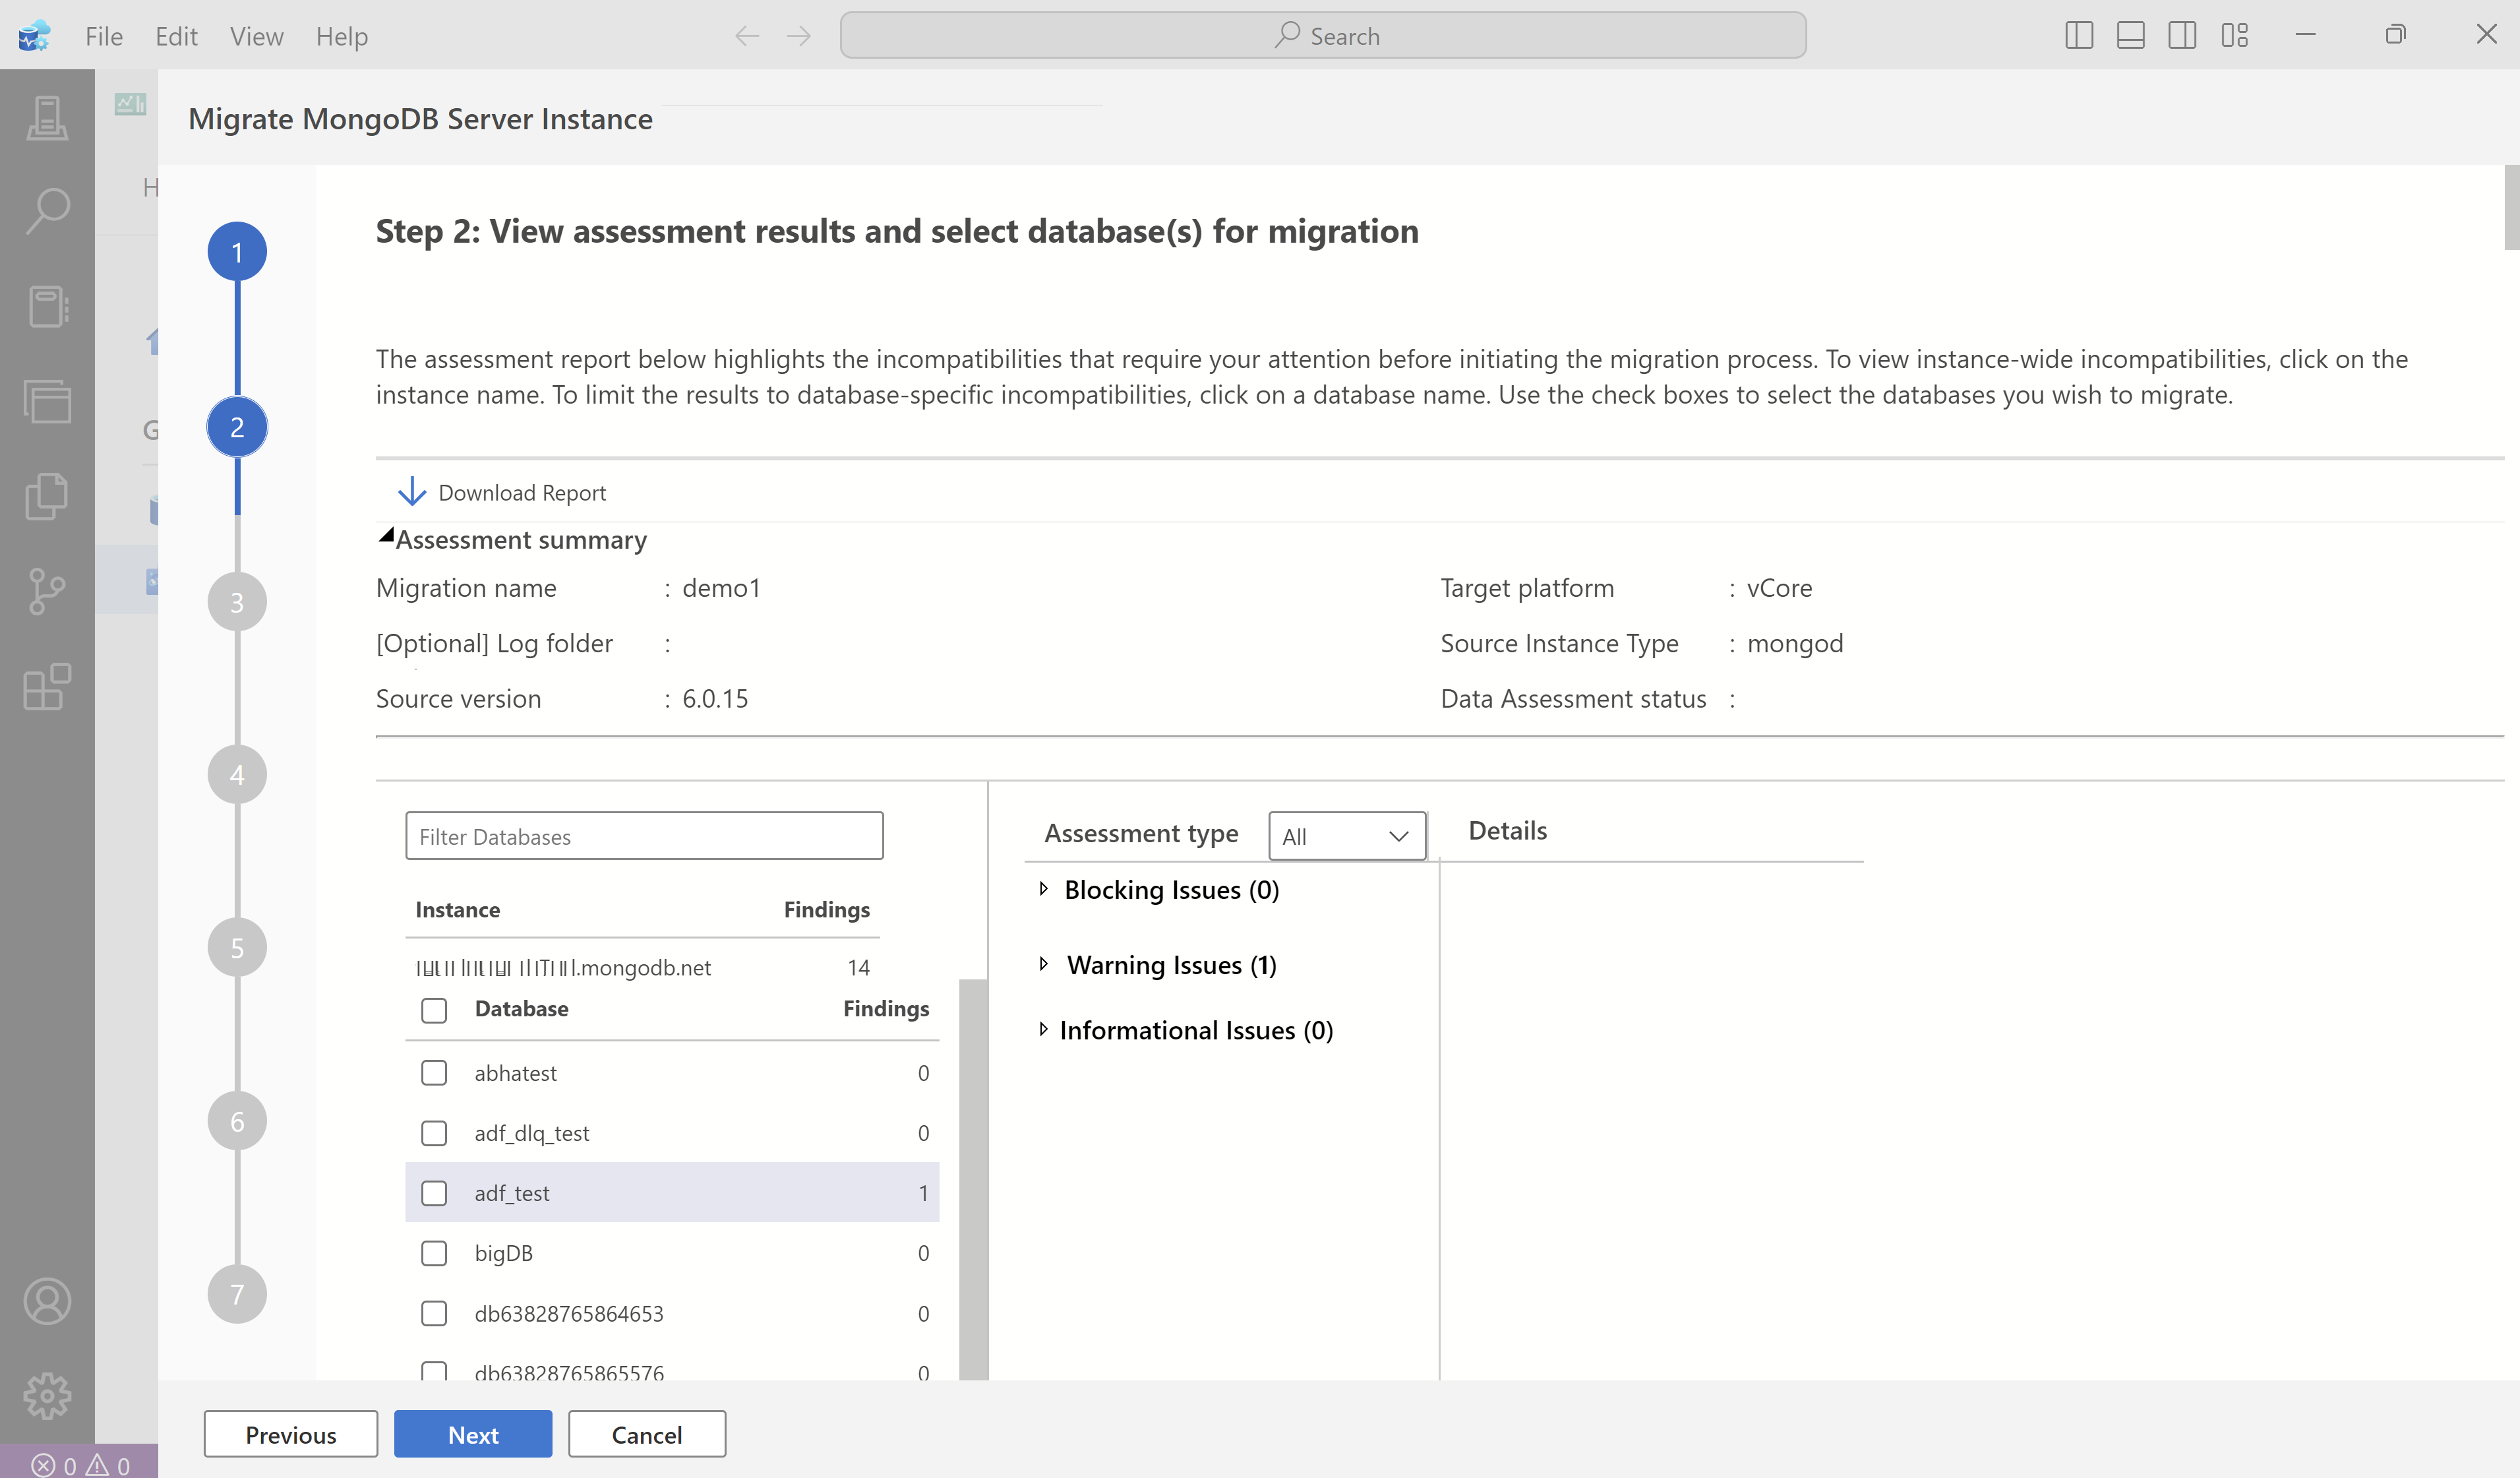
Select Download Report to get a consolidated downloadable report.
Study the assessment report to identify any actions you need to take for a seamless migration of your workloads on Azure Cosmos DB for MongoDB. Before moving to the next step, ensure that all blocking issues reported in the assessment are handled. If there are any unresolved issues, you can exit the process and handle them later. Once the issues are resolved, you can come back and restart the assessment and migration process.


Perform a migration
Now, use the assessment report to perform a migration of your data from your source MongoDB instance to your target vCore-based Azure Cosmos DB for MongoDB account.
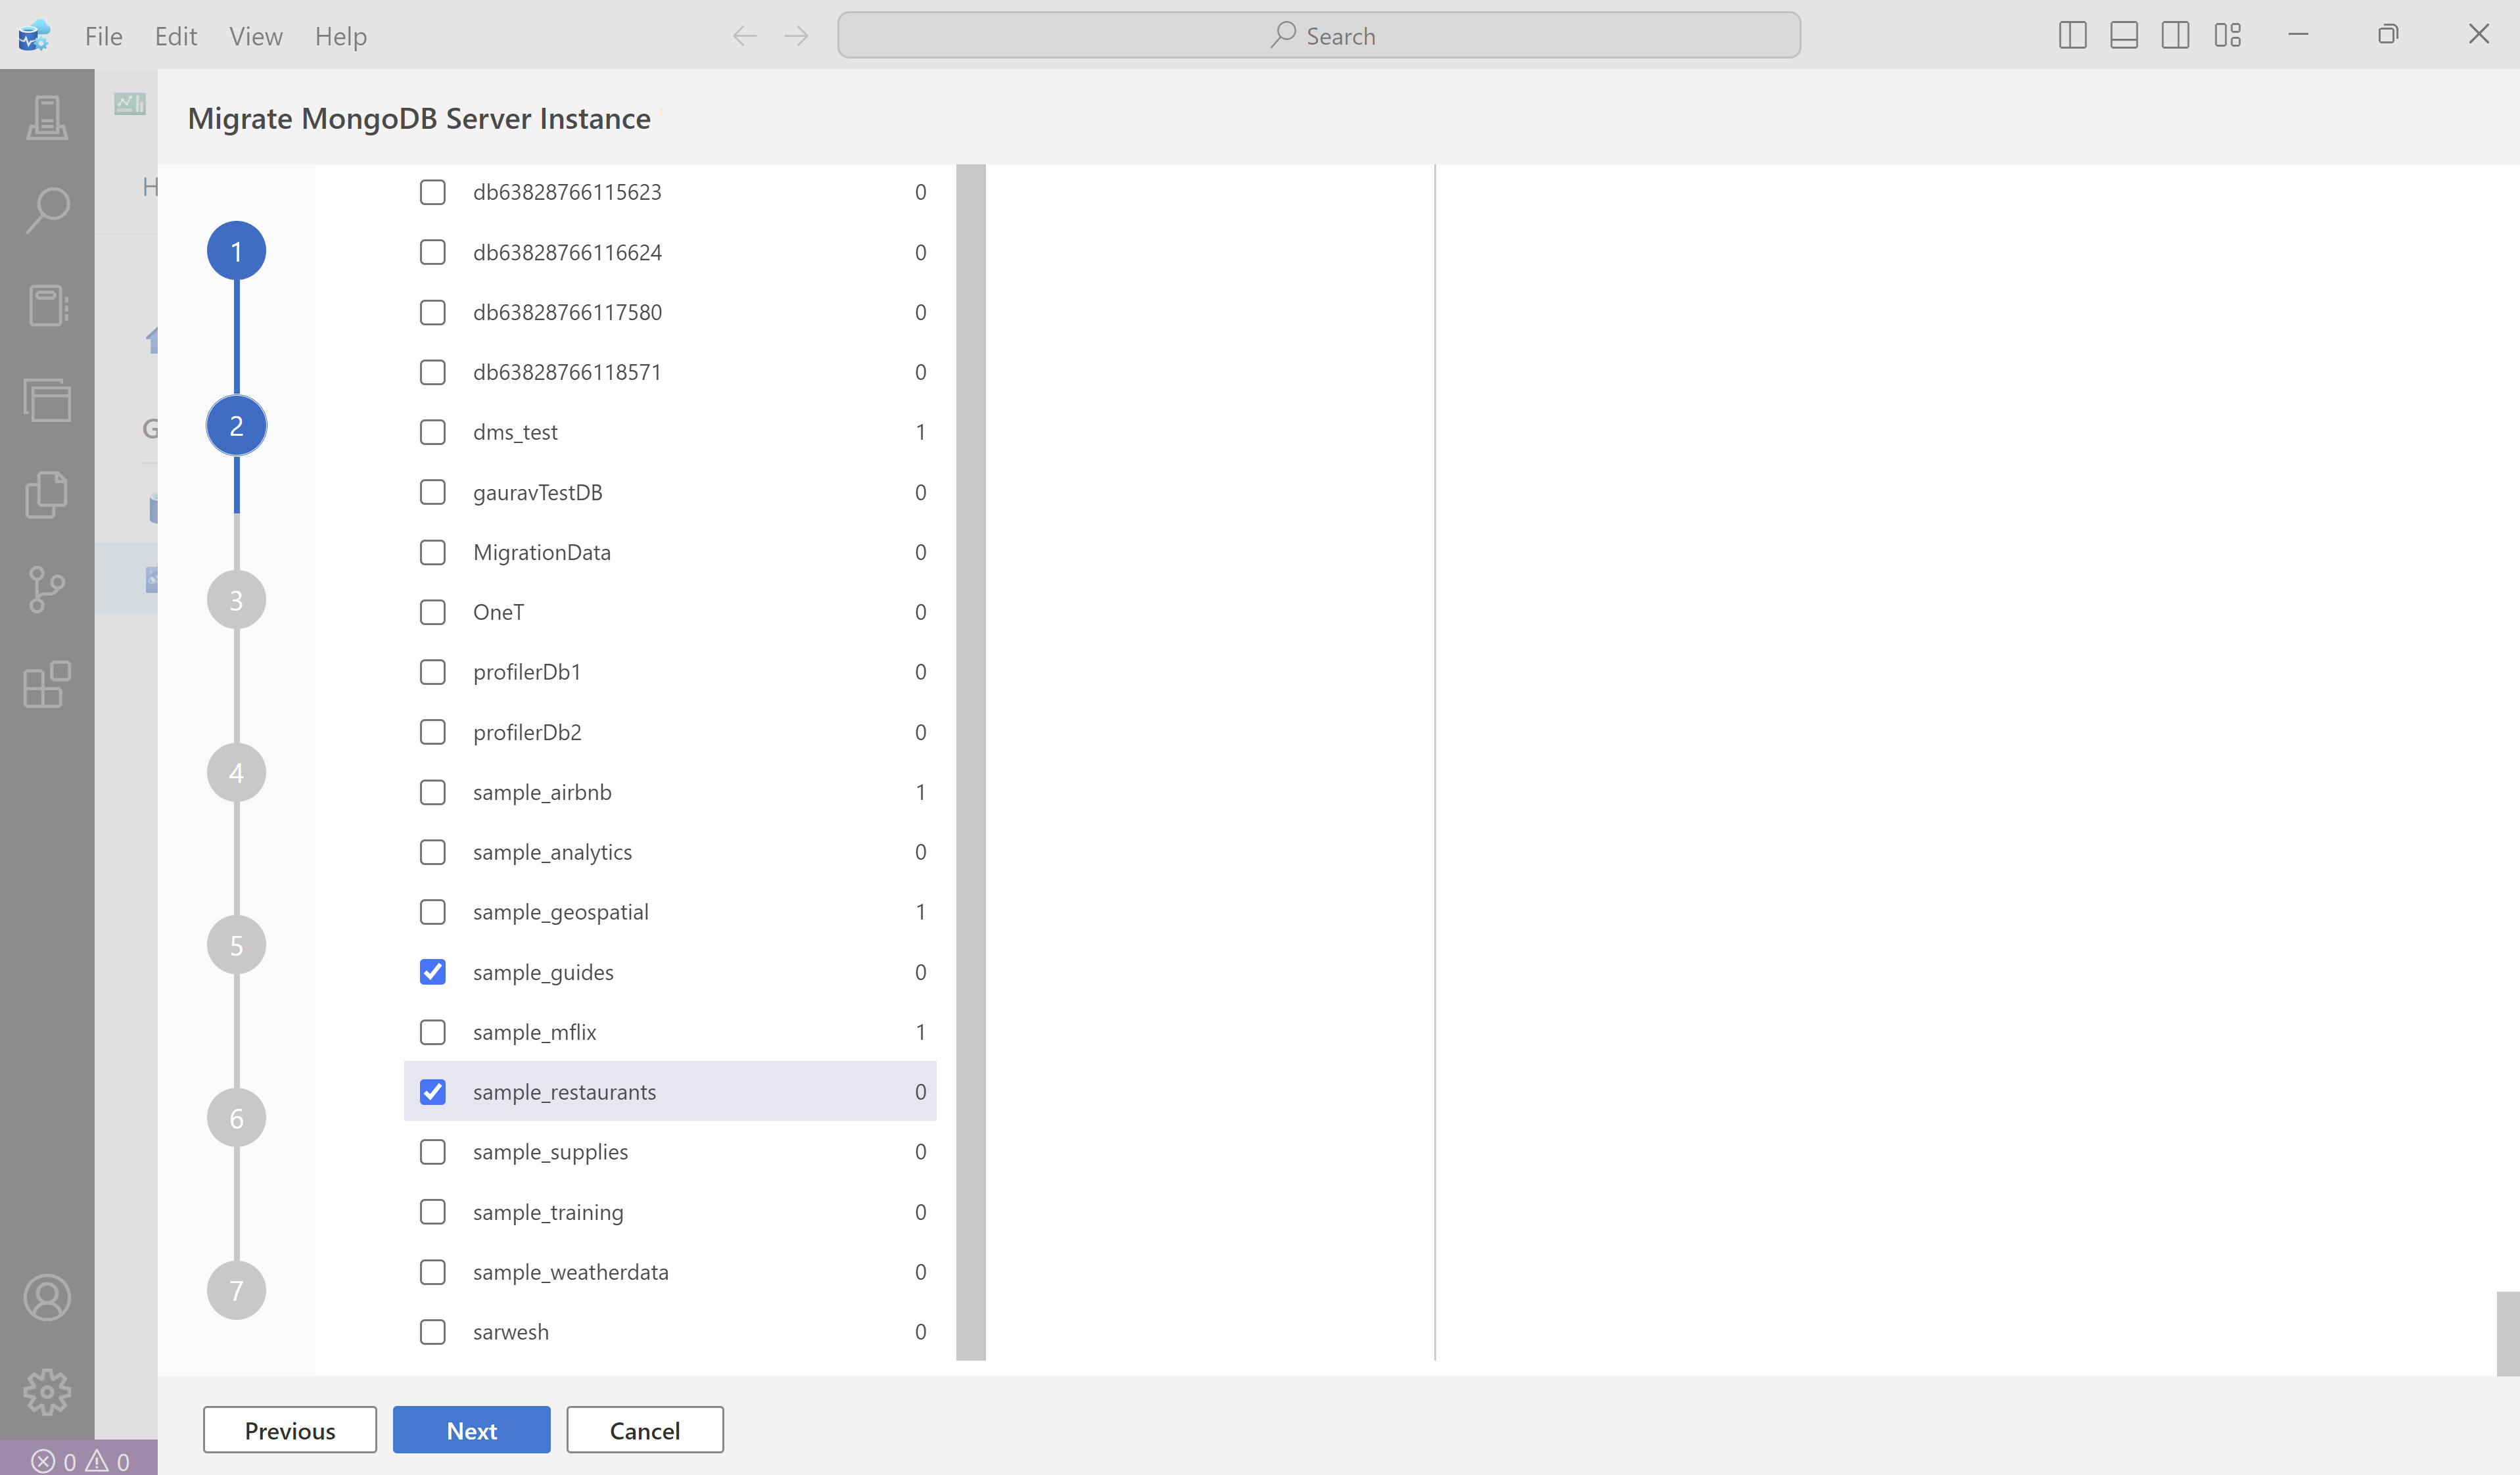
In the assessment report screen, select any databases you plan to migrate. Then, select Next.
Narrow down the lists to Select the target Azure Cosmos DB for MongoDB account by filtering by subscription and then resource group. Then provide connection credentials necessary to connect to the account.
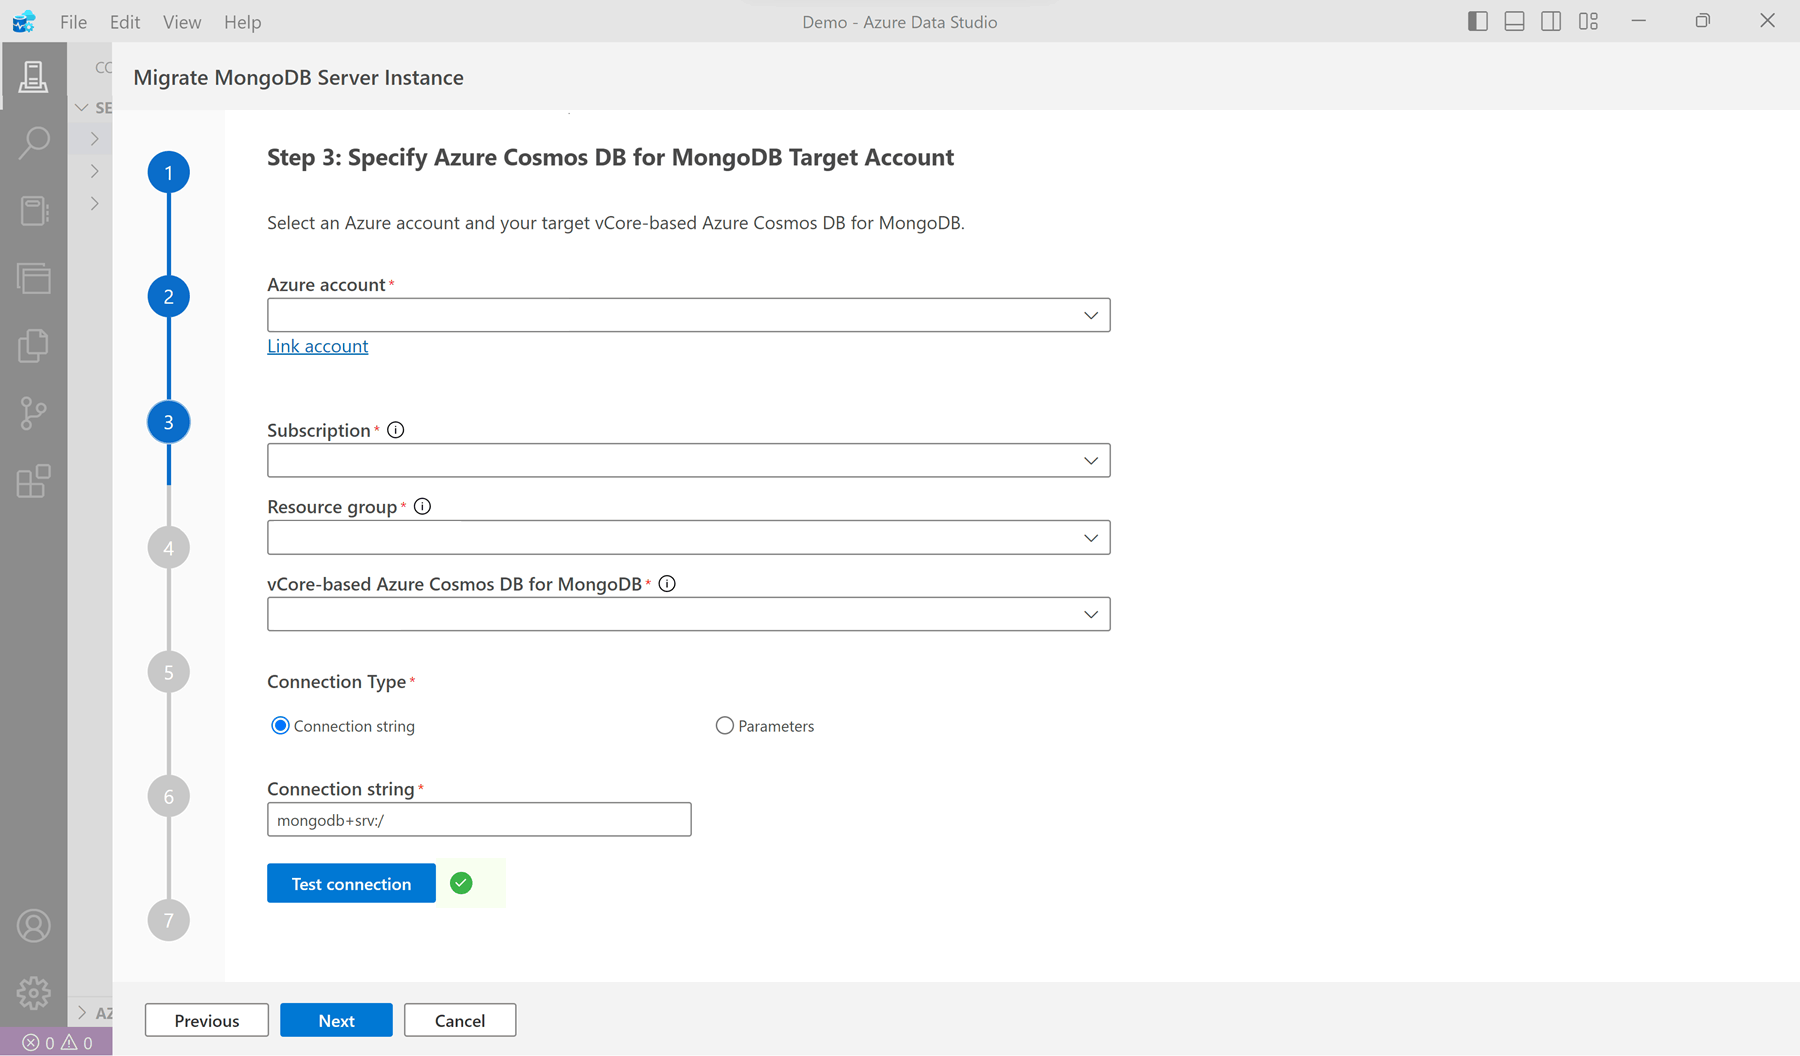
Select Test connection to validate the credentials for the Azure Cosmos DB for MongoDB account. Select Next to navigate to the mapping of collections from the source to the target.
Choose either Skip or Migrate for each collection in the list of mappings. Collections that already exist in the target are automatically marked with an icon and set to Skip by default. Select Next to configure the Azure Database Migration Service (DMS).

Warning
Opting to Migrate an existing collection will overwrite the entire collection, resulting in irrecoverable data loss. Please exercise caution when choosing this option.
Choose an existing Azure Database Migration Service instance from the dropdown list or select Create New to create a new migration service. Azure Database Migration Service is a service that migrates data to and from Azure data platforms by using cloud infrastructure for data transfer, instead of relying on local resources.

Select the migration mode that's most appropriate for your use case.
- Online migration copies collection data, ensuring updates are also replicated during the process. This method is advantageous with minimal downtime, allowing continuous operations for business continuity. Use this option when ongoing operations are crucial, and reducing downtime is a priority.
- Offline migration captures a snapshot of the database at the beginning, offering a simpler and predictable approach. It works well when using a static copy of the database is acceptable, and real-time updates aren't essential.
Select Next to view the migration summary. Once you reviewed and confirmed the details, select Create Schema to create resources on the target account.

Select Start Migration to initiate the data transfer using the selected migration service.

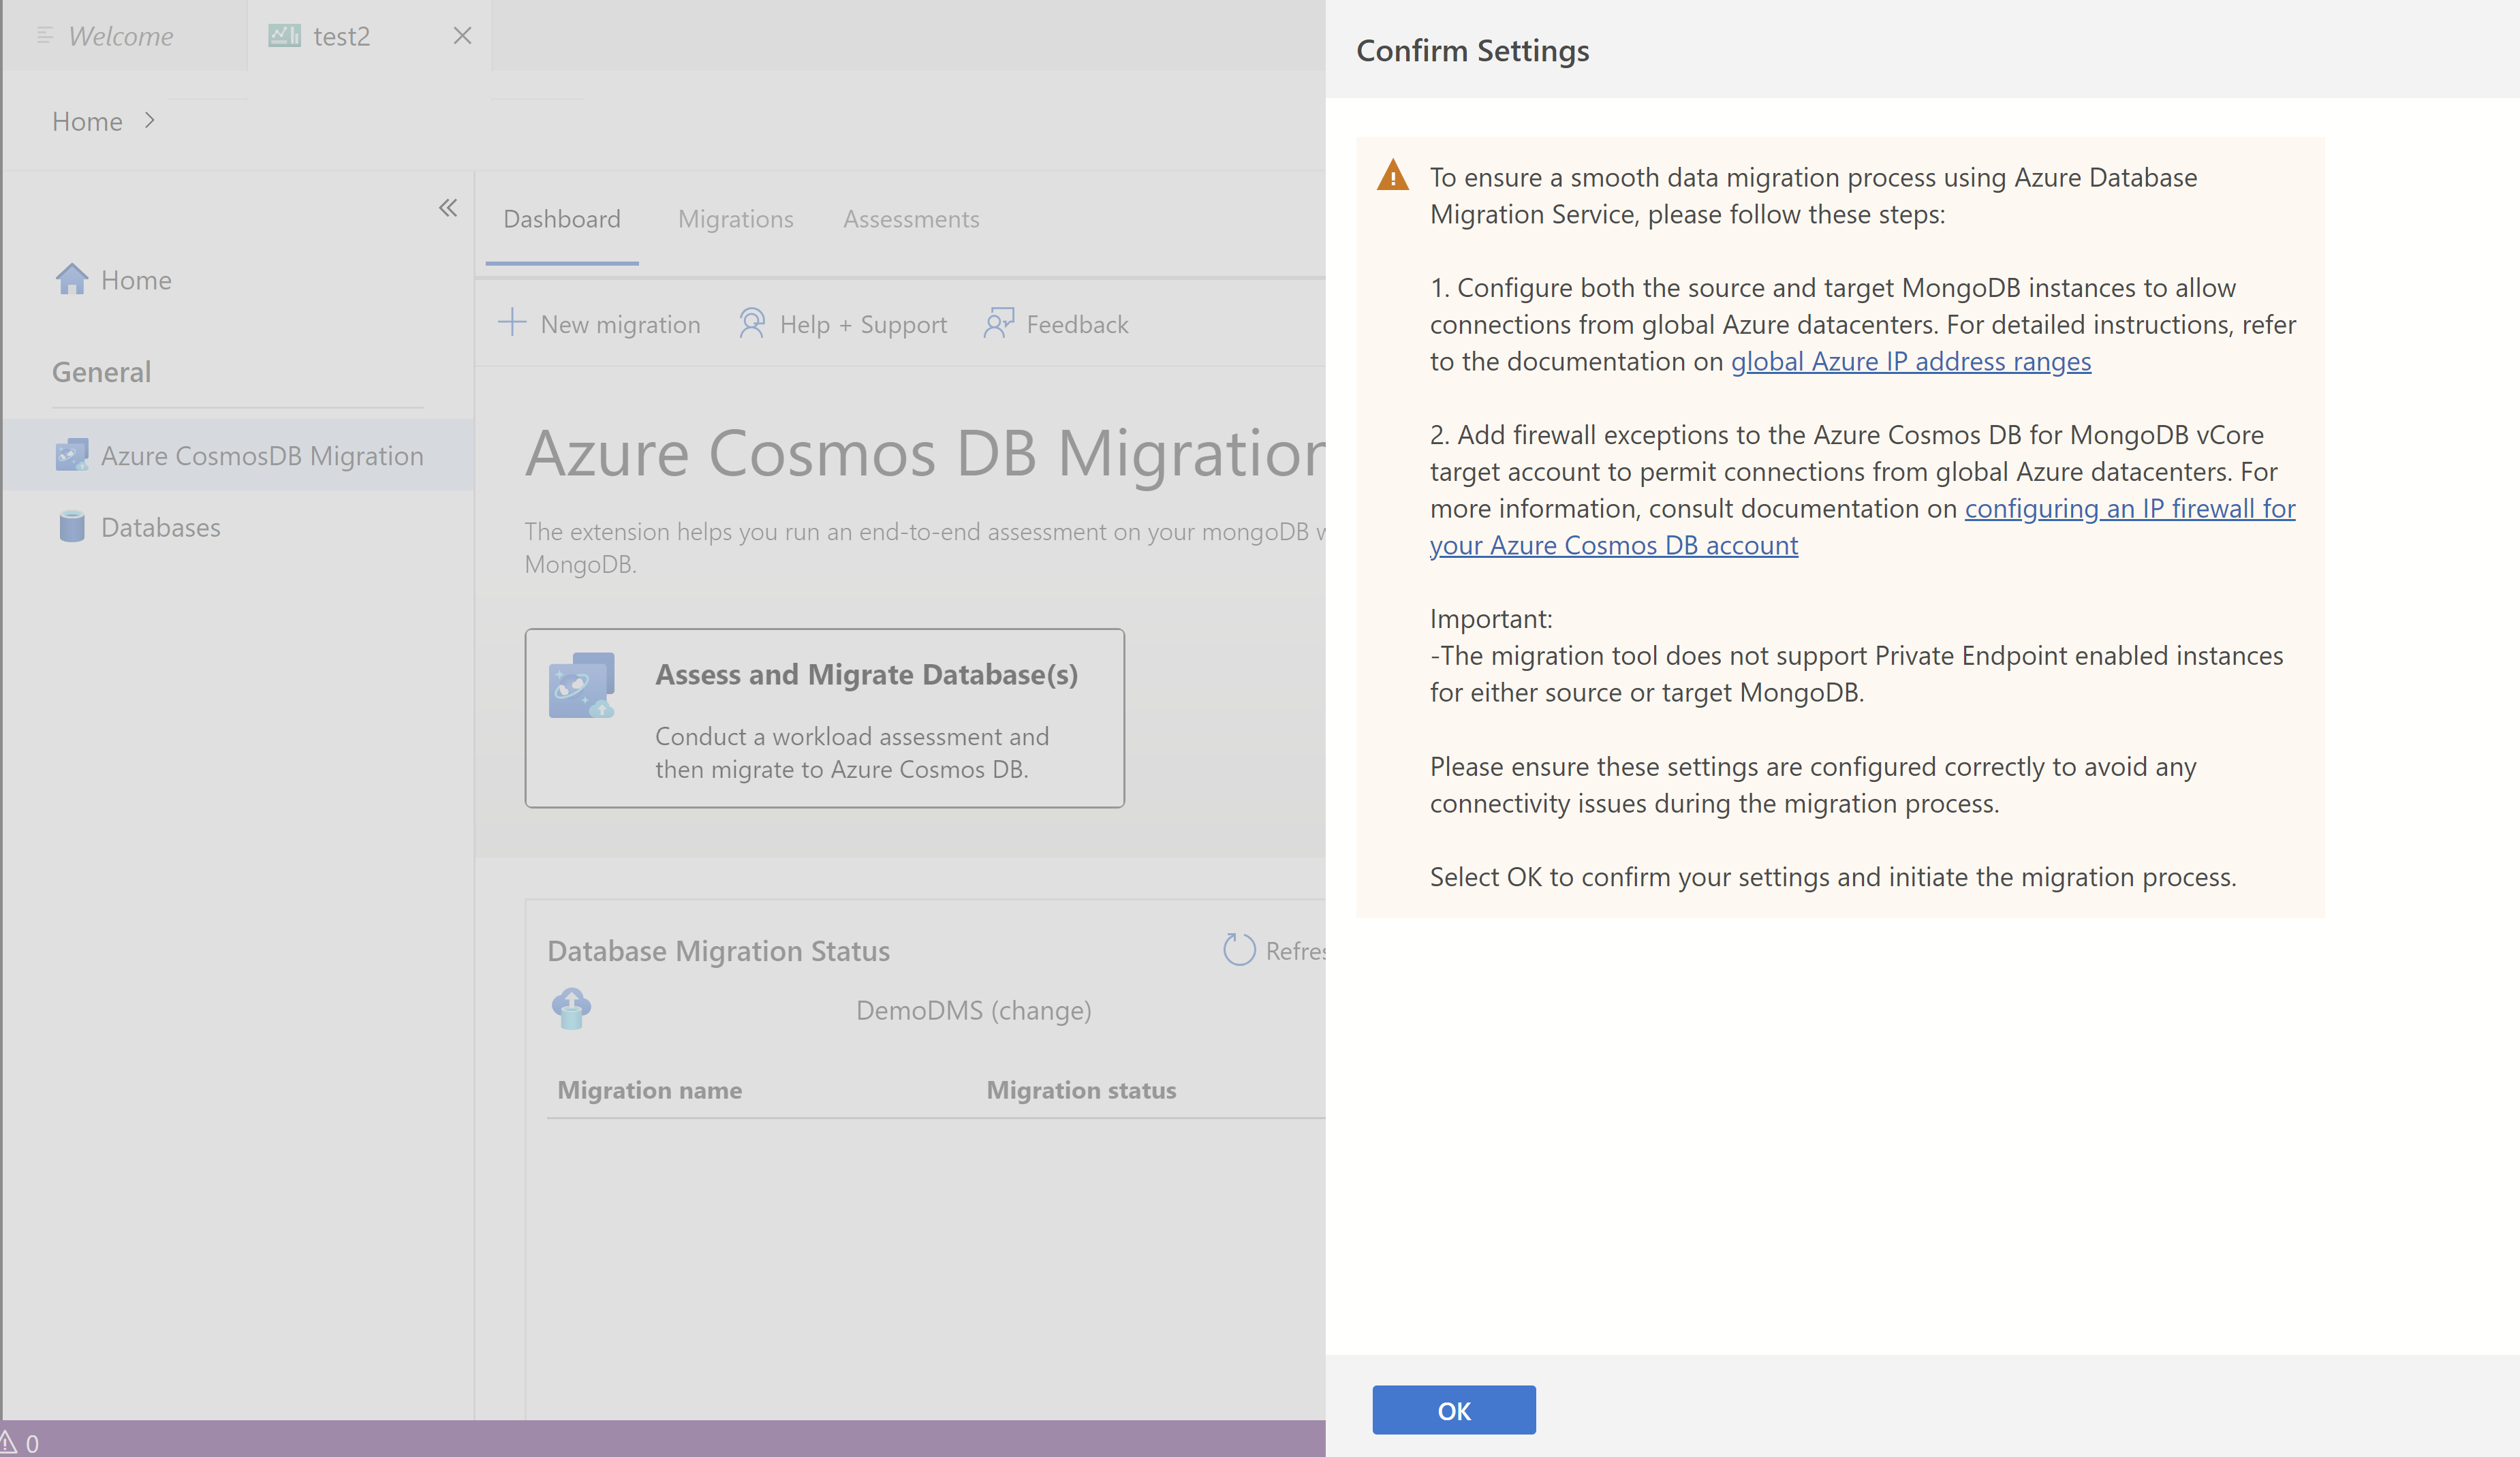
In the Confirm Settings pop-up, verify that your firewall settings meet the requirements. Select OK to confirm.


The data migration tasks are run on Azure Database Migration Service hence you aren't required to be connected to the source and target environments during the data migration. The status is updated on the dashboard at frequent intervals
Note
If you selected more than 50 collections to migrate, the migration job will be batched into multiple jobs on the migration service, each containing max of 50 collections.
Monitor the migration status on the dashboard page once the jobs are initialized.
To view more details, select a specific migration from the list of migrations.

Monitoring Offline migrations
The status is automatically updated once all data migration tasks are finished.

Once the data is successfully copied from the source to the target, offline migrations status indicates success.

- Change the connection string in your applications to point to the target account.
Monitoring Online migrations
Online migrations, unlike offline migrations, don't automatically complete. Instead, they run continuously until they're manually finalized by selecting Cutover.

To complete the online migration, follow these steps in the given order:
The Cutover button is enabled once the Initial Data Load is completed for all collections. The migration is currently in the replication phase, continuously copying updates from the source instance to the target instance to keep it up-to-date with the latest changes.
When ready to perform the migration cutover, stop all incoming transactions to the source collections being migrated.
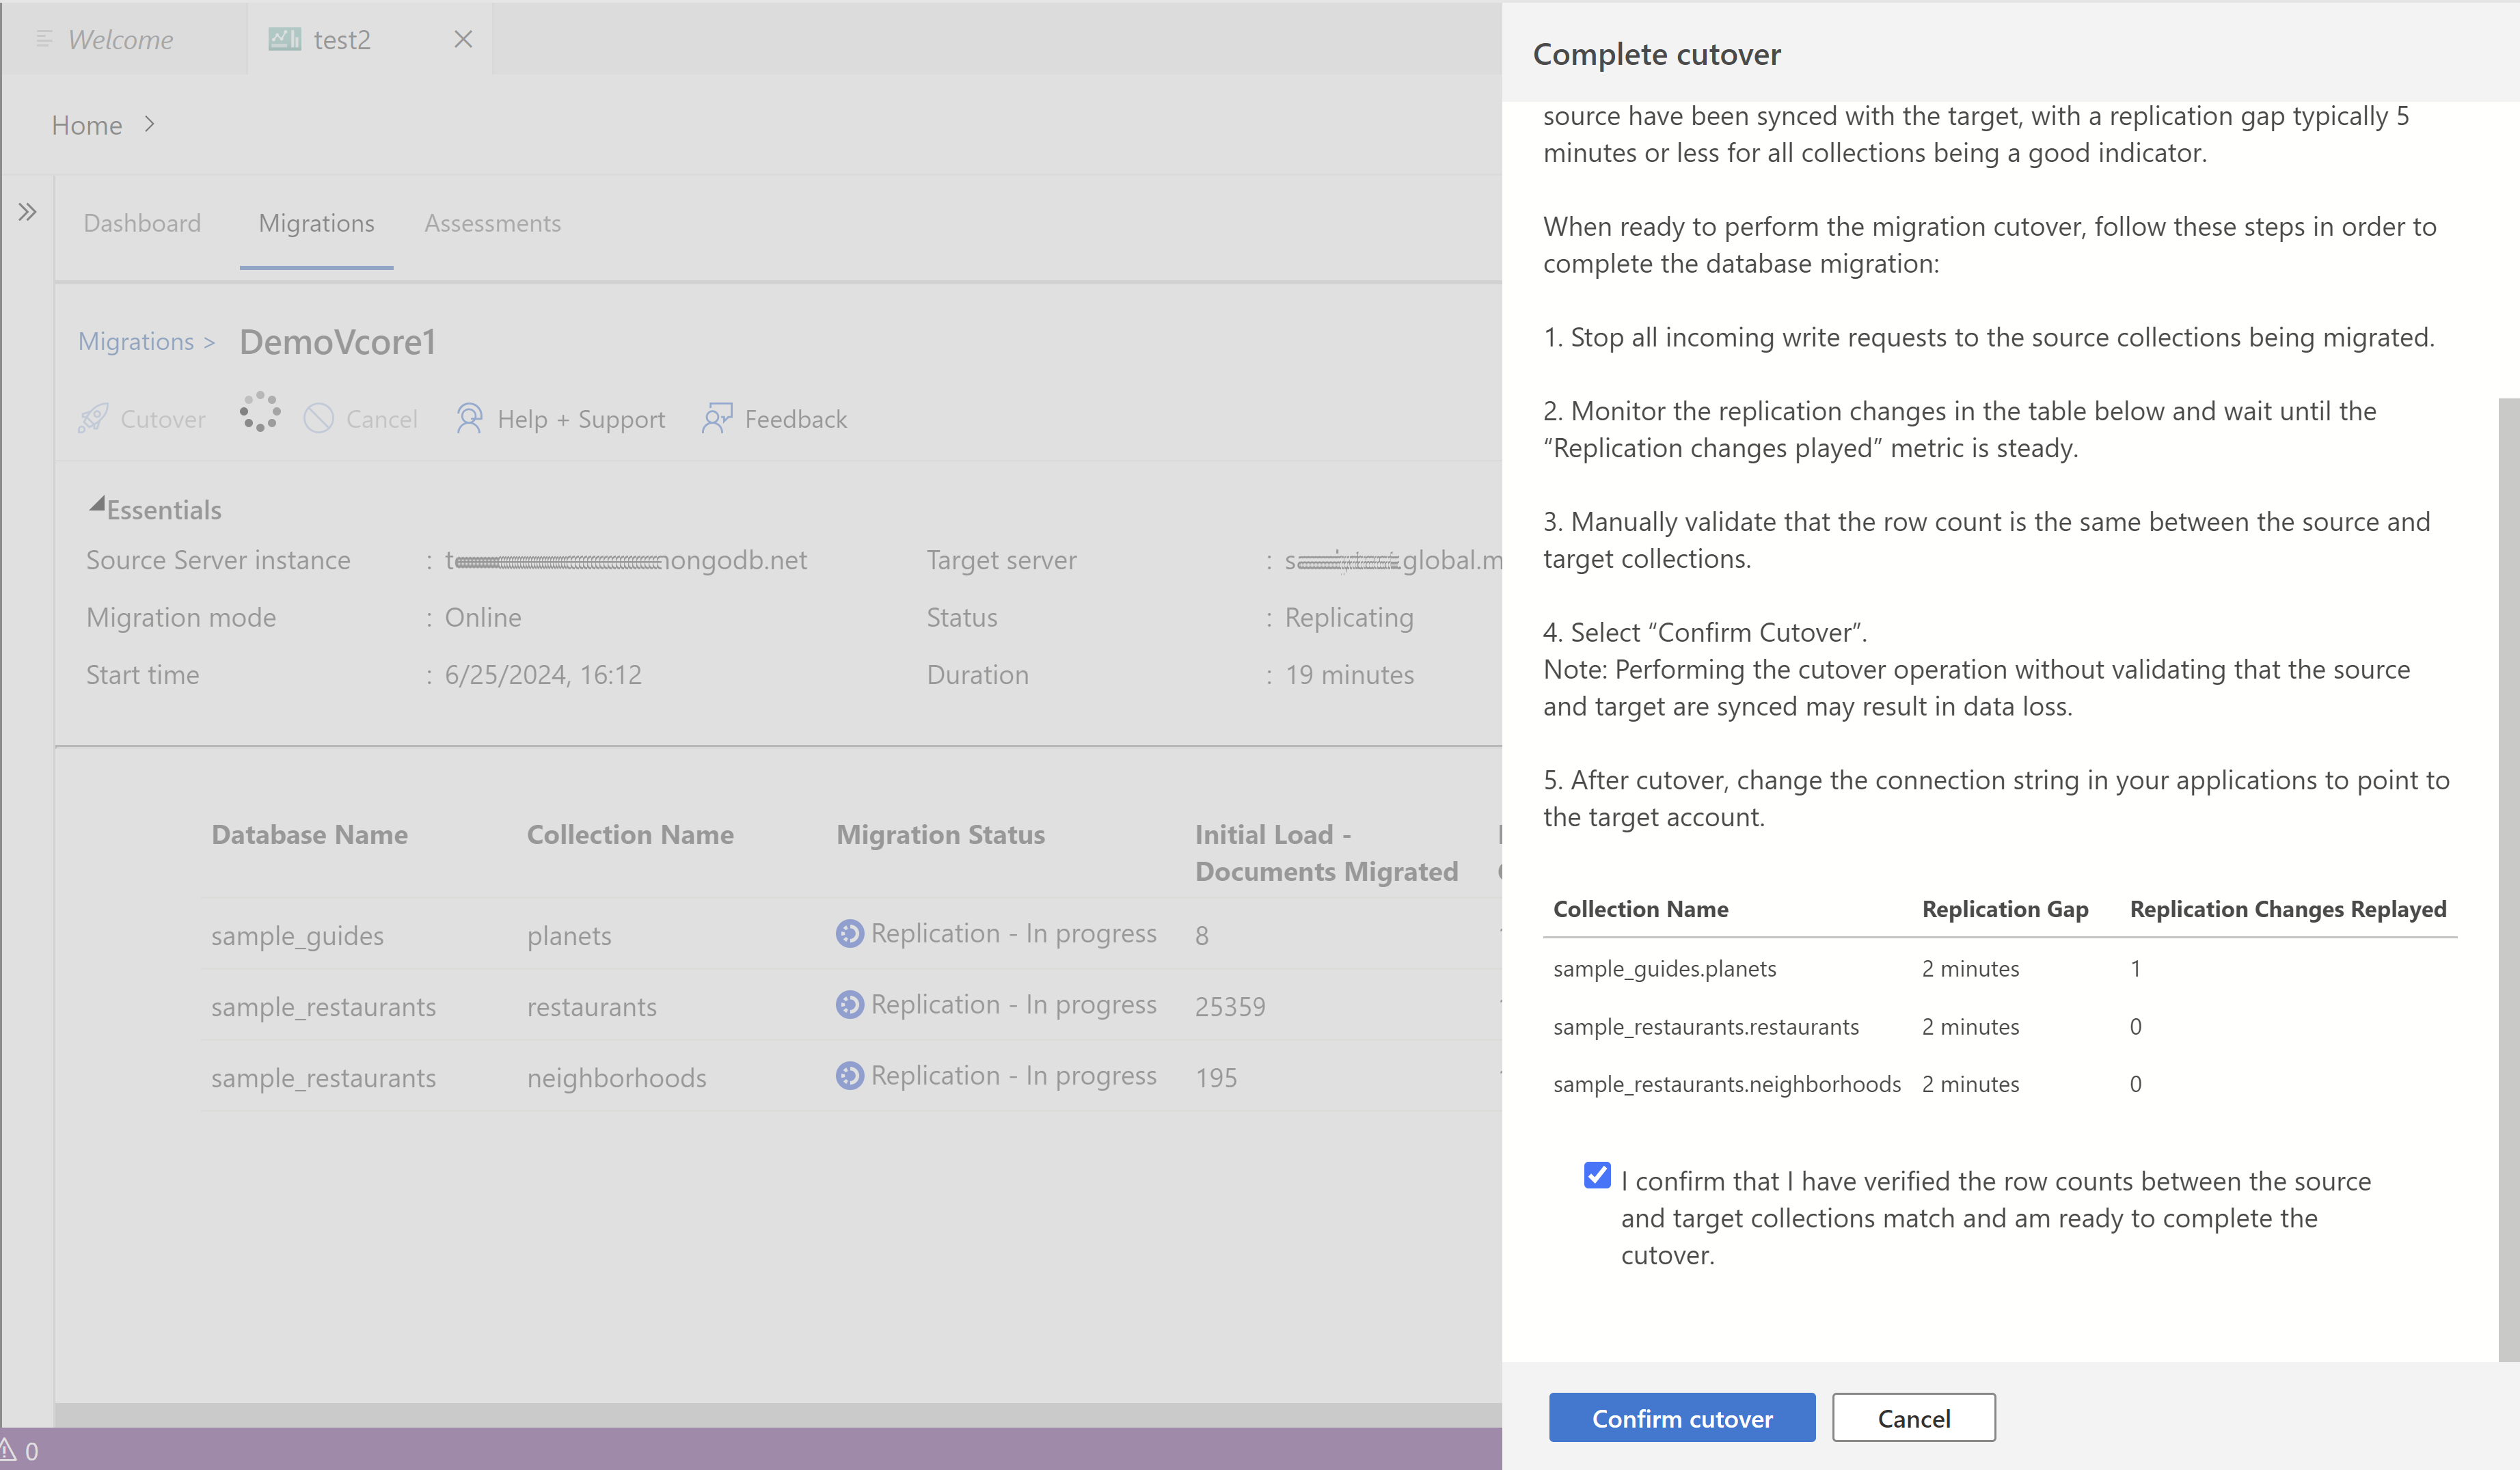
Monitor the replication changes in the table and wait until the 'Replication Changes Played' metric stabilizes. A stable 'Replication Changes Played' metric indicates that all updates from the source are successfully copied to the target.
Select Cutover when the replication gap is minimal for all collections and the 'Replication Changes Played' metric is stable.
Manually validate that the row count is the same between the source and target collections.
In the pop-up dialog. Select Complete Cutover.
Note
Performing the cutover operation without validating that the source and target are synced might result in data loss.
Wait for the status to change to Succeeded.
Update the connection string in your applications to point to the target account.

View past migrations and assessments
It's often useful to review past assessments and migrations. The extension provides an interface to review summaries of past assessment and migrations. The extension also provides the capability to review detailed historical assessment reports.
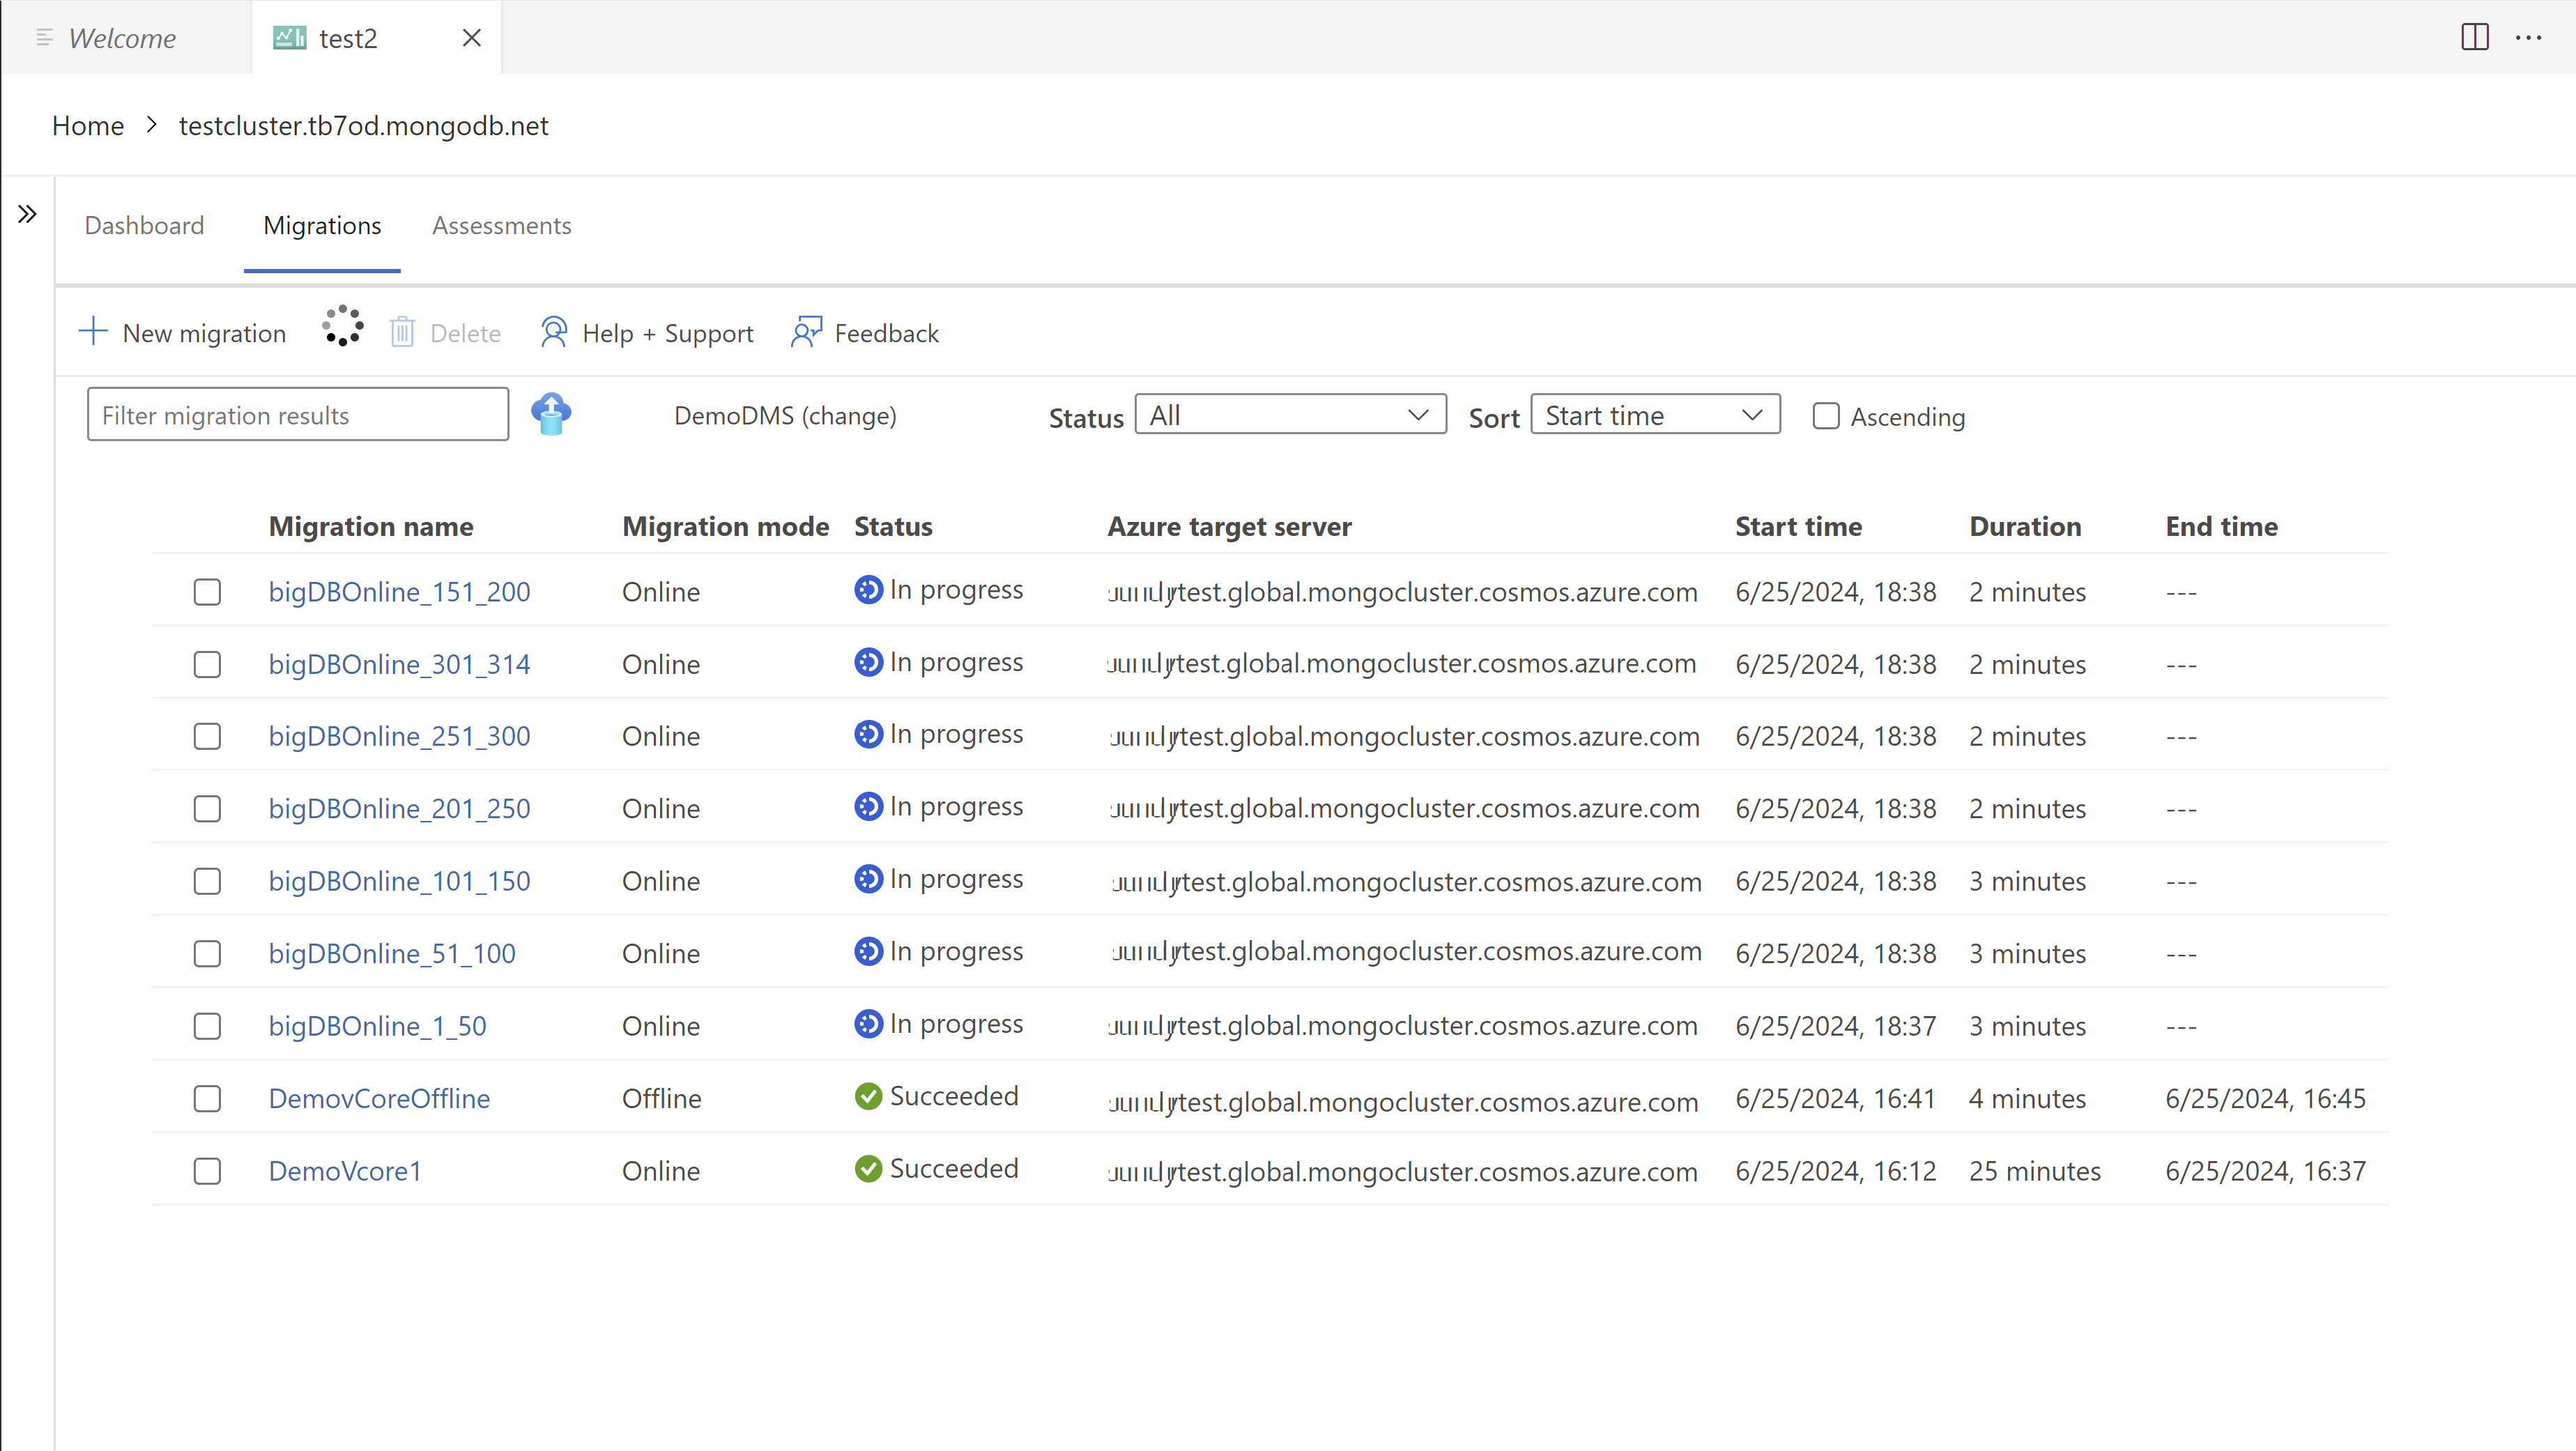
To view past migrations, select the Migrations tab in the toolbar. The migrations list contains all migrations that were initiated on the current machine. You can select a specific migration in the list to get more details.
To view past assessments, select the Assessments tab in the toolbar. The assessments list contains all assessments that were initiated on the current machine.


