Quickstart: Create Intel SGX VM in the Azure portal
This tutorial guides you through the process of deploying Intel SGX VMs using Azure portal. Otherwise, we recommend following Azure Marketplace templates.
Prerequisites
If you don't have an Azure subscription, create an account before you begin.
Note
Free trial accounts do not have access to the VMs in this tutorial. Please upgrade to a Pay-As-You-Go subscription.
Sign in to Azure
Sign in to the Azure Portal.
At the top, select Create a resource.
On the left hand side pane, select, select Compute.
Select Create Virtual Machine.

Configure an Intel SGX Virtual Machine
In the Basics tab, select your Subscription and Resource Group.
For Virtual machine name, enter a name for your new VM.
Type or select the following values:
Region: Select the Azure region that's right for you.
Note
Intel SGX VMs run on specialized hardware in specific regions. For the latest regional availability, look for DCsv2-series or DCsv3/DCdsv3-series in available regions.
Configure the operating system image that you would like to use for your virtual machine.
Choose Image: For this tutorial, select Ubuntu 20.04 LTS - Gen2. You may also select Ubuntu 18.04 LTS - Gen2, or Windows Server 2019.
Update to Generation 2: Underneath Image, select Configure VM generation, in the fly out, then select Generation 2.

Choose a virtual machine with Intel SGX capabilities by clicking on + Add filter to create a filter, select Type for Filter type, and check only Confidential compute from the list in the next dropdown.

Tip
You should see sizes DC(number)s_v2, DC(number)s_v3 and DC(number)ds_v3. Learn more.
Fill in the following information:
Authentication type: Select SSH public key if you're creating a Linux VM.
Note
You have the choice of using an SSH public key or a Password for authentication. SSH is more secure. For instructions on how to generate an SSH key, see Create SSH keys on Linux and Mac for Linux VMs in Azure.
Username: Enter the Administrator name for the VM.
SSH public key: If applicable, enter your RSA public key.
Password: If applicable, enter your password for authentication.
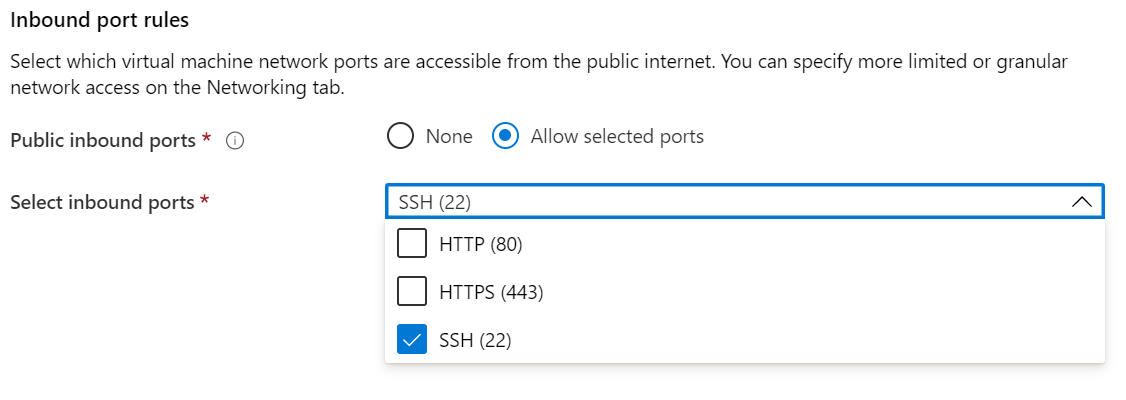
Public inbound ports: Choose Allow selected ports and select SSH (22) and HTTP (80) in the Select public inbound ports list. If you're deploying a Windows VM, select HTTP (80) and RDP (3389).
Note
Allowing RDP/SSH ports is not recommended for production deployments.

Make changes in the Disks tab.
- DCsv2-series supports Standard SSD, Premium SSD is supported across DC1, DC2 and DC4.
- DCsv3 and DCdsv3-series supports Standard SSD, Premium SSD and Ultra Disk
Make any changes you want to the settings in the following tabs or keep the default settings.
- Networking
- Management
- Guest config
- Tags
Select Review + create.
In the Review + create pane, select Create.
Note
Proceed to the next section and continue with this tutorial if you deployed a Linux VM. If you deployed a Windows VM, follow these steps to connect to your Windows VM and then install the OE SDK on Windows.
Connect to the Linux VM
Open your SSH client of choice, like Bash on Linux or PowerShell on Windows. The ssh command is typically included in Linux, macOS, and Windows. If you are using Windows 7 or older, where Win32 OpenSSH is not included by default, consider installing WSL or using Azure Cloud Shell from the browser. In the following command, replace the VM user name and IP address to connect to your Linux VM.
ssh azureadmin@40.55.55.555
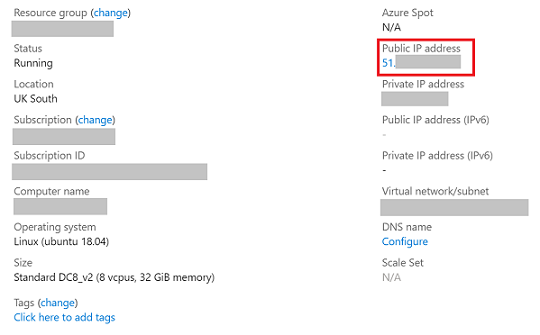
You can find the Public IP address of your VM in the Azure portal, under the Overview section of your virtual machine.

For more information about connecting to Linux VMs, see Create a Linux VM on Azure using the Portal.
Install Azure DCAP Client
Azure Data Center Attestation Primitives (DCAP), a replacement for Intel Quote Provider Library (QPL), fetches quote generation collateral and quote validation collateral directly from the THIM Service.
The Trusted Hardware Identity Management (THIM) service handles cache management of certificates for all trusted execution environments (TEE) residing in Azure and provides trusted computing base (TCB) information to enforce a minimum baseline for attestation solutions.
DCsv3 and DCdsv3 only support ECDSA-based Attestation and the users are required to install Azure DCAP client to interact with THIM and fetch TEE collateral for quote generation during attestation process. DCsv2 continues to support EPID-based Attestation.
Clean up resources
When no longer needed, you can delete the resource group, virtual machine, and all its related resources.
Select the resource group for the virtual machine, then select Delete. Confirm the name of the resource group to finish deleting the resources.
Next steps
In this quickstart, you deployed and connected to your Intel SGX VM. For more information, see Solutions on Virtual Machines.
Discover how you can build confidential computing applications, by continuing to the Open Enclave SDK samples on GitHub.
Microsoft Azure Attestation is free and ECDSA-based attestation framework, for remotely verifying the trustworthiness of multiple TEEs and integrity of the binaries running inside it. Learn more