Set up upstream sources
Azure DevOps Services | Azure DevOps Server 2022 - Azure DevOps Server 2019
With Azure Artifacts upstream sources, you can streamline your package management by using a single feed to store both the packages you publish and those you consume from external feeds and public registries such as npmjs.com, NuGet.org. When an upstream source is enabled on your feed, Azure Artifacts will automatically save a copy of any package installed by a collaborator or higher from upstream.
Note
Maven snapshots are not supported in upstream sources.
Enable upstream sources in a new feed
Sign in to your Azure DevOps organization, and then navigate to your project.
Select Artifacts, and then select Create Feed.
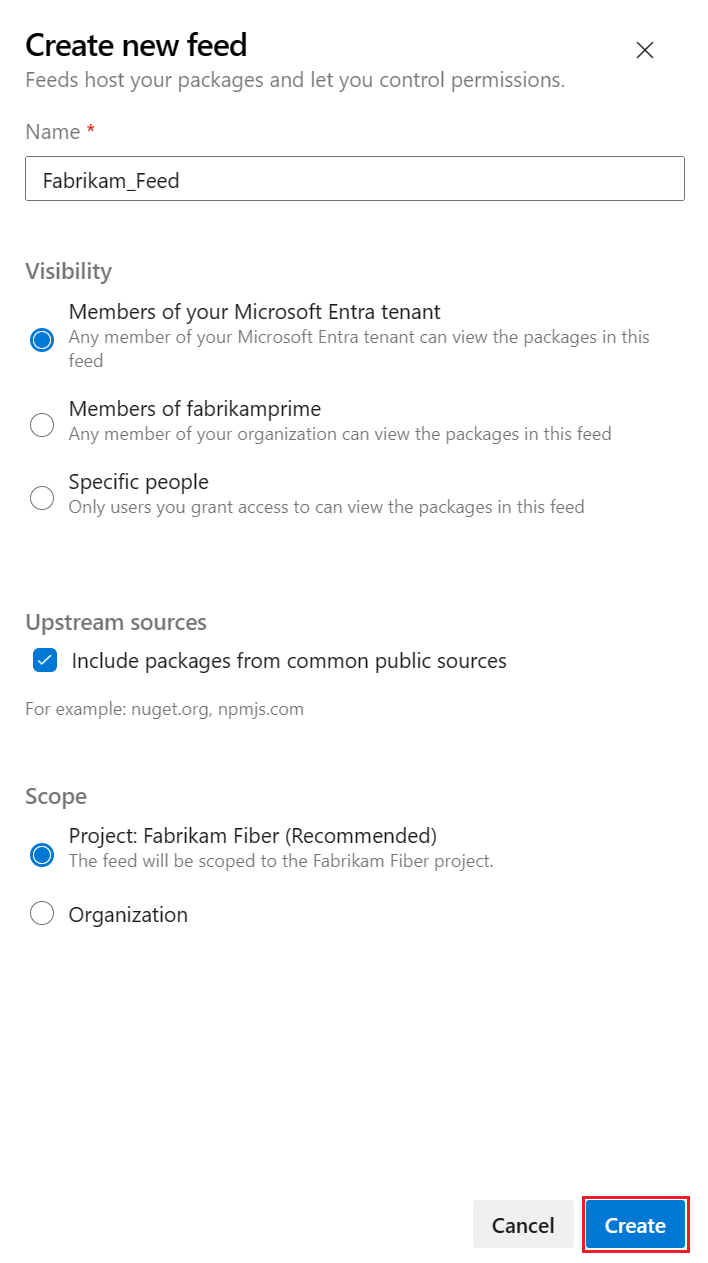
Provide a Name for your feed and select its Visibility and Scope settings. Make sure to check the Include packages from common public sources checkbox to enable upstream sources.
Select Create when you're done.

Note
You must be a feed owner or a feed administrator to add or remove upstream sources.
Enable upstream sources in an existing feed
Sign in to your Azure DevOps organization, and then navigate to your project.
Select the gear icon button
 to navigate to your feed settings.
Select Upstream sources, and then select Add upstream source.
Select Public source, and then select a Public source from the dropdown menu.
Select Add when you're done, and then select Save once more in the top right corner to preserve your changes.
Note
Custom public upstream sources are only supported with npm registries.
Add a feed in the same organization as an upstream source
Sign in to your Azure DevOps organization, and then navigate to your project.
Select the gear icon button
 to access your feed's settings.
Select Upstream sources, and then select Add Upstream.
Select Azure Artifacts feed in this organization.
Select the desired Feed from the dropdown menu to add it as an upstream source. Then, select the View and choose the Package type(s) you wish to use. Optionally, you can also modify the name of your upstream source.
Select Add when you're done.

Add a feed in a different organization as an upstream source
Sign in to your Azure DevOps organization, and then navigate to your project.
Select the gear icon button
 to access your feed's settings.
Select Upstream sources, and then select Add Upstream.
Select Azure Artifacts feed in another organization.
Enter your Azure Artifacts feed locator in the following format:
Organization scoped feed:
azure-feed://ORGANIZATION_NAME/FEED_NAME@VIEWProject scoped feed:
azure-feed://ORGANIZATION_NAME/PROJECT_NAME/FEED_NAME@VIEW
Select the Package type(s) you wish to use and provide a name for your upstream source.
Select Add when you're done.

Note
To add a feed from a different organization as an upstream source, the target feed owner must share the target view with All feeds and people in organizations associated with my Microsoft Entra tenant by navigating to Feed Settings > Views > Select the ellipsis button on the right for the specified view > Edit .
Examples
Note
You must be a Feed and Upstream Reader (Collaborator), a Feed Publisher (Contributor), or a Feed Owner to install new packages from upstream. A copy of each upstream package is saved to the feed on first use. Packages already saved from upstream sources can be used by Feed Readers.