Quickstart: Create an Azure private DNS zone using the Azure portal
This quickstart walks you through the steps to create your first private DNS zone and record using the Azure portal.
A DNS zone is used to host the DNS records for a particular domain. Public DNS zones have unique names and are visible on the Internet. However, a private DNS zone name must only be unique within its resource group and the DNS records are not visible on the Internet. To start hosting your private domain in Azure Private DNS, you first need to create a DNS zone for that domain name. Next, the DNS records for your private domain are created inside this DNS zone.
Important
When you create a private DNS zone, Azure stores the zone data as a global resource. This means that the private zone isn't dependent on a single virtual network or region. You can link the same private zone to multiple virtual networks in different regions. If service is interrupted in one virtual network, your private zone is still available. For more information, see Azure Private DNS zone resiliency.
Virtual private links
To resolve DNS records in a private DNS zone, resources must typically be linked to the private zone. Linking is accomplished by creating a virtual network link that associates the virtual network to the private zone.
When you create a virtual network link, you can (optionally) enable autoregistration of DNS records for devices in the virtual network. If autoregistration is enabled, Azure private DNS updates DNS records whenever a virtual machine inside the linked virtual network is created, changes its IP address, or is deleted. For more information, see What is the autoregistration feature in Azure DNS private zones.
Note
Other methods are available for resolving DNS records in private DNS zones that don't always require a virtual network link. These methods are beyond the scope of this quickstart article. For more information, see What is Azure DNS Private Resolver.
In this article, a virtual machines is used in a single virtual network. The virtual network is linked to your private DNS zone with autoregistration enabled. The setup is summarized in the following figure.

Prerequisites
If you don’t have an Azure subscription, create a free account before you begin.
If you prefer, you can complete this quickstart using Azure PowerShell or Azure CLI.
Create a private DNS zone
The following example creates a DNS zone called private.contoso.com in a resource group called MyResourceGroup.
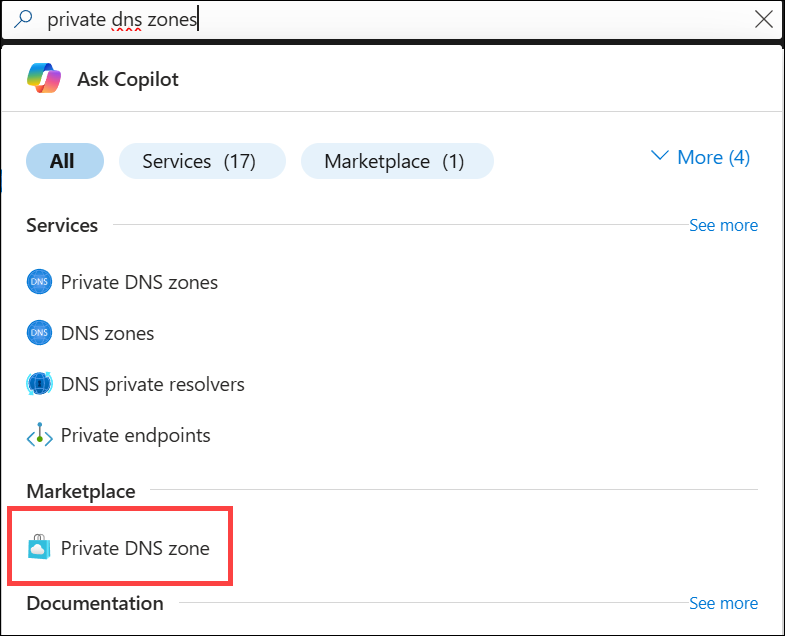
On the portal search bar, type private dns zones in the search text box and press Enter.
Under Marketplace, select Private DNS zone. The Create Private DNS Zone page opens.
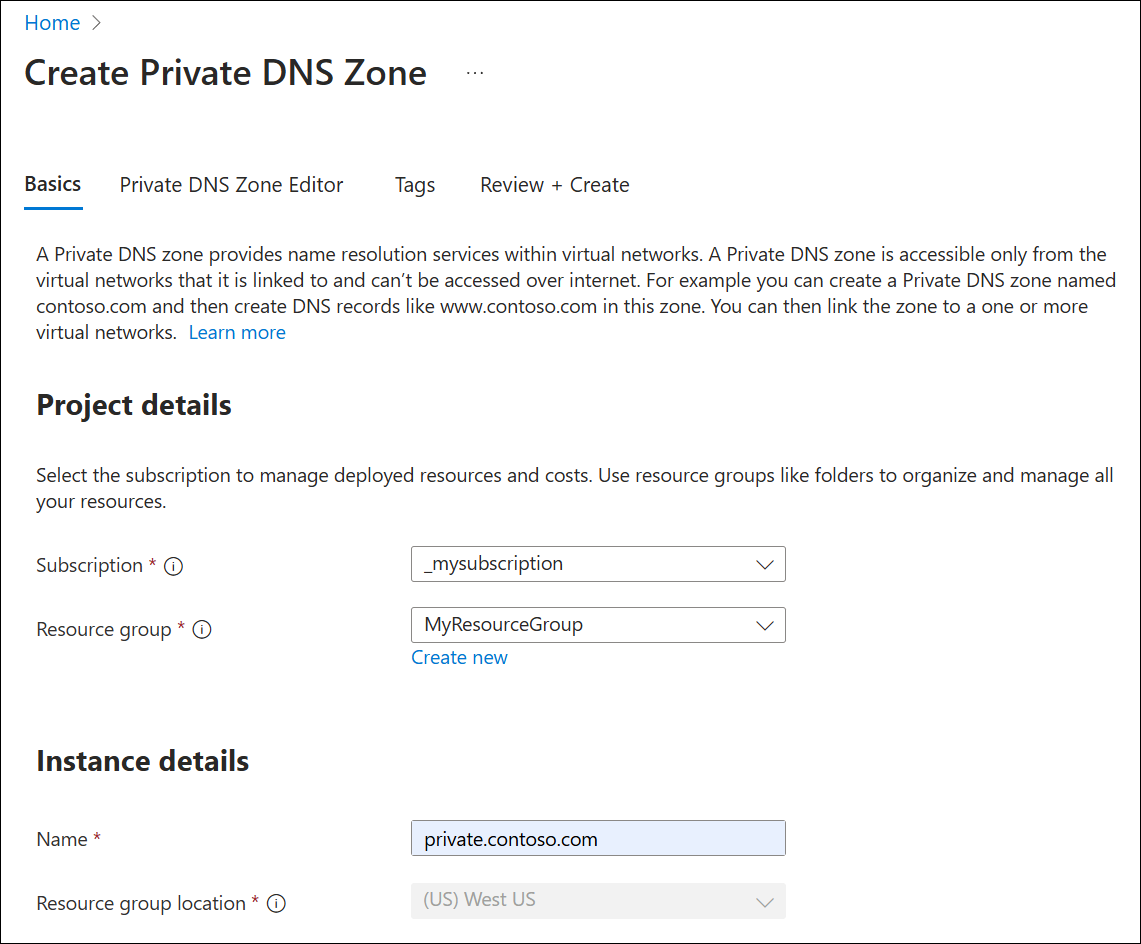
On the Create Private DNS Zone page, type or select the following values:
- Resource group: Select an existing resource group, or choose Create new. Enter a resource group name, and then select OK. For example: MyResourceGroup. The resource group name must be unique within the Azure subscription.
- Name: Type private.contoso.com for this example.
The Resource group location is selected already if you use an existing resource group. If you created a new resource group, choose a location, for example: (US) West US.
Select Review + Create and then select Create. It might take a few minutes to create the zone.
Create the virtual network and subnet
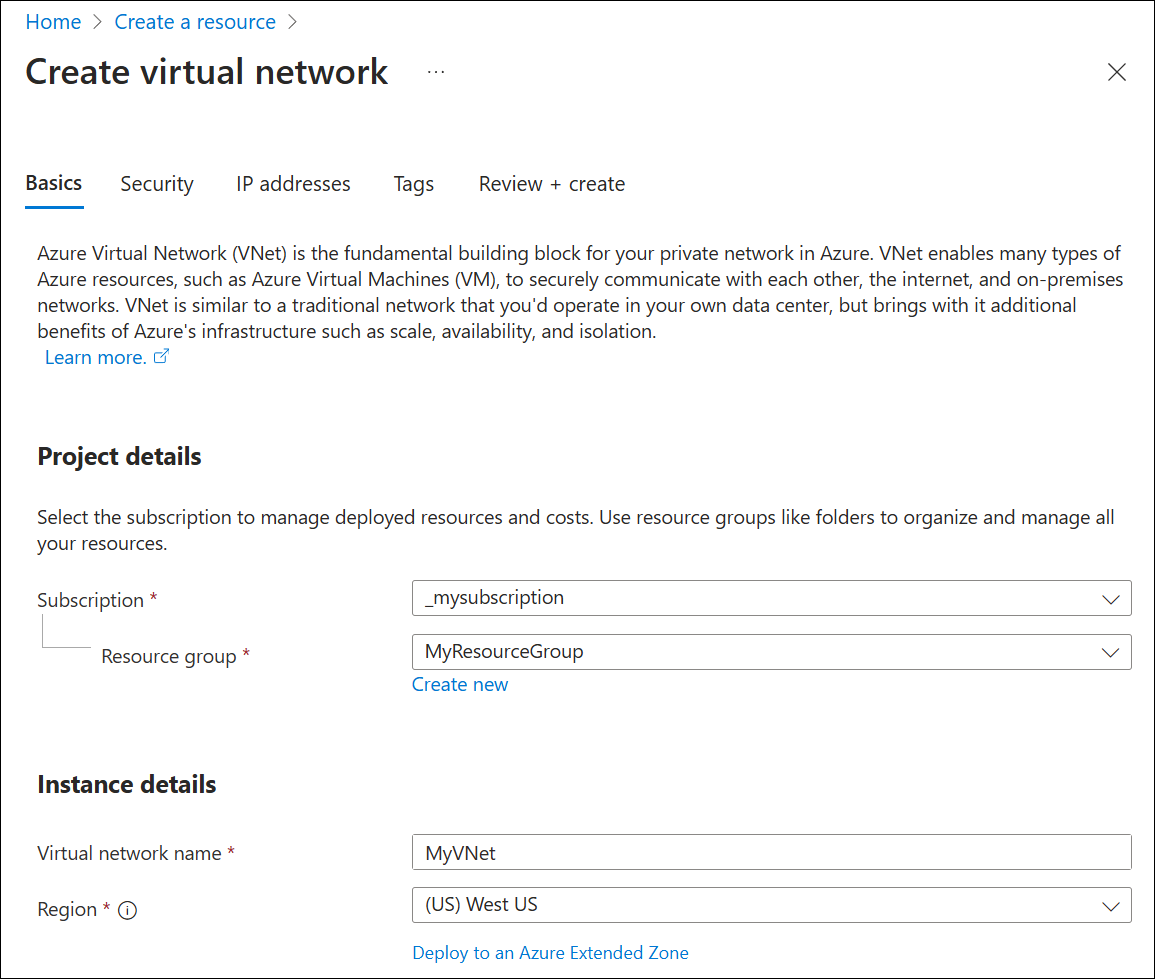
- From the Azure portal home page, select Create a resource > Networking > Virtual network, or search for Virtual network in the search box and then select + Create.
- On the Create virtual network page, enter the following:
Subscription: Select your Azure subscription.
Resource group: Select an existing resource group or create a new one. The resource group doesn't need to be the same as the one used for the private DNS zone. In this example the same resource group is used (MyResourceGroup).
Virtual network name: Enter a name for the new virtual network. MyVNet is used in this example.
Region: If you created a new resource group, choose a location. (US) West US is used in this example.
Select the IP addresses tab, and under Add IPv4 address space edit the default address space by entering 10.2.0.0/16.
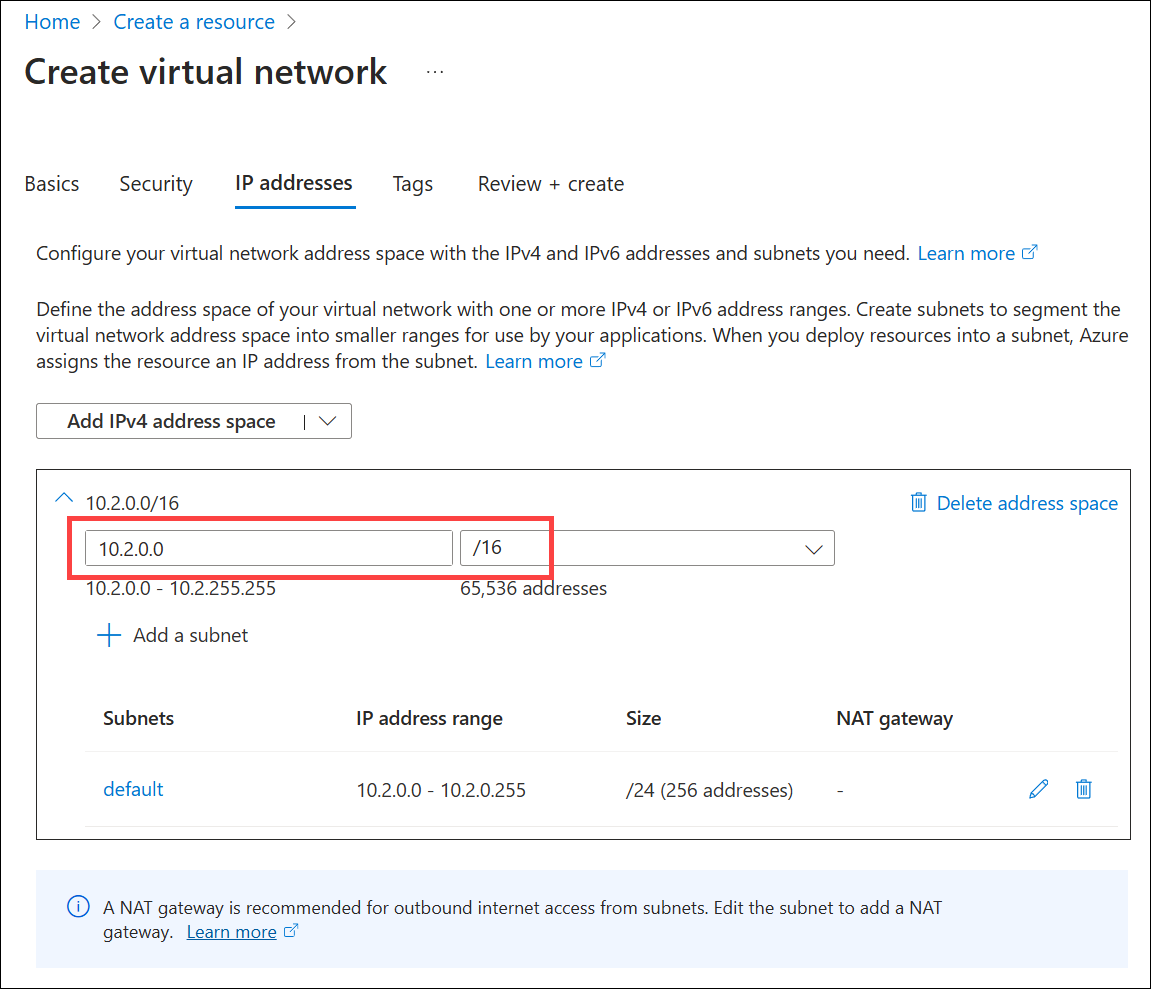
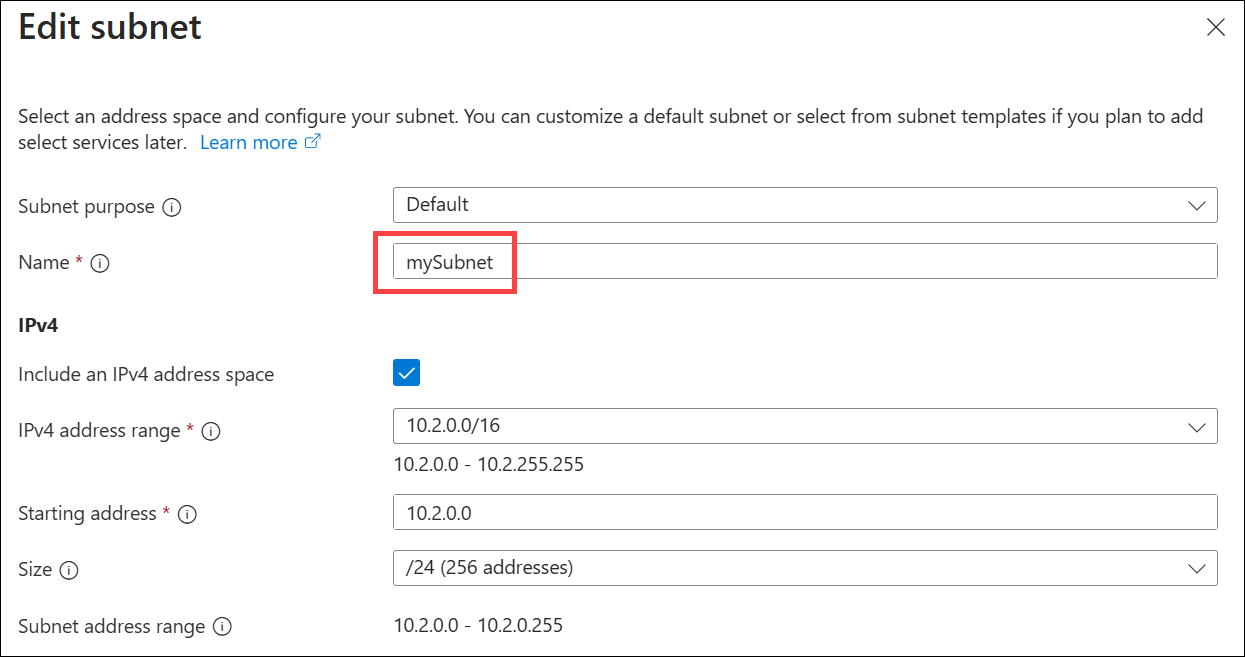
In the subnets area, select the pen icon to edit the name of the default subnet, or delete the default subnet and select + Add a subnet. The Edit subnet or Add a subnet pane opens, respectively. The Edit subnet pane is shown in this example.
Next to Name, enter mySubnet and verify that the Subnet address range is 10.2.0.0 - 10.2.0.255. The Size should be /24 (256 addresses). These values are set by default based on the parent VNet address range.
Select Save, select Review + create, and then select Create.
Link the virtual network
Next, link the private DNS zone to the virtual network by adding a virtual network link.
- Search for and select Private DNS zones and then select your private zone. For example: private.contoso.com.
- Under DNS Management, select Virtual Network Links and then select + Add.
- Enter the following parameters:
- Link name: Provide a name for the link, for example: MyVNetLink.
- Subscription: Select our subscription.
- Virtual Network: Select the virtual network that you created, for example: MyVNet.
Under Configuration, select the checkbox next to Enable auto registration.
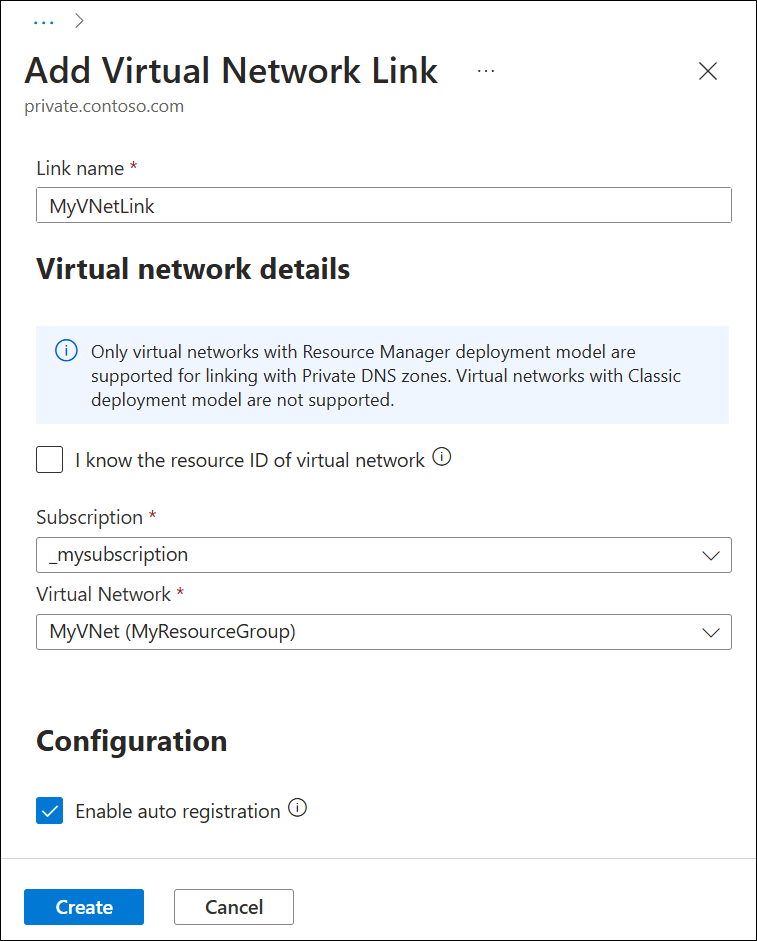
Select Create, wait until the virtual link is created, and then verify that it is listed on the Virtual Network Links page.
Create the test virtual machine
Now, create a virtual machine to test autoregistgration in your private DNS zone:
- On the portal page upper left, select Create a resource, and then select Windows Server 2019 Datacenter.
- Select MyResourceGroup for the resource group.
- Type myVM01 - for the name of the virtual machine.
- Select *(US) West US for the Region.
- Enter a name for the administrator user name.
- Enter a password and confirm the password.
- For Public inbound ports, select Allow selected ports, and then select RDP (3389) for Select inbound ports.
- Accept the other defaults for the page and then click Next: Disks >.
- Accept the defaults on the Disks page, then click Next: Networking >.
- Make sure that myAzureVNet is selected for the virtual network.
- Accept the other defaults for the page, and then click Next: Management >.
- For Boot diagnostics, select Disable, accept the other defaults, and then select Review + create.
- Review the settings and then click Create. It will take a few minutes for the virtual machine allocation to complete.
- Search for and select Virtual machines and then verify that the VM status is Running. If it isn't running, start the virtual machine.
Review autoregistion
Search for or select Private DNS zones and then select the private.contoso.com zone.
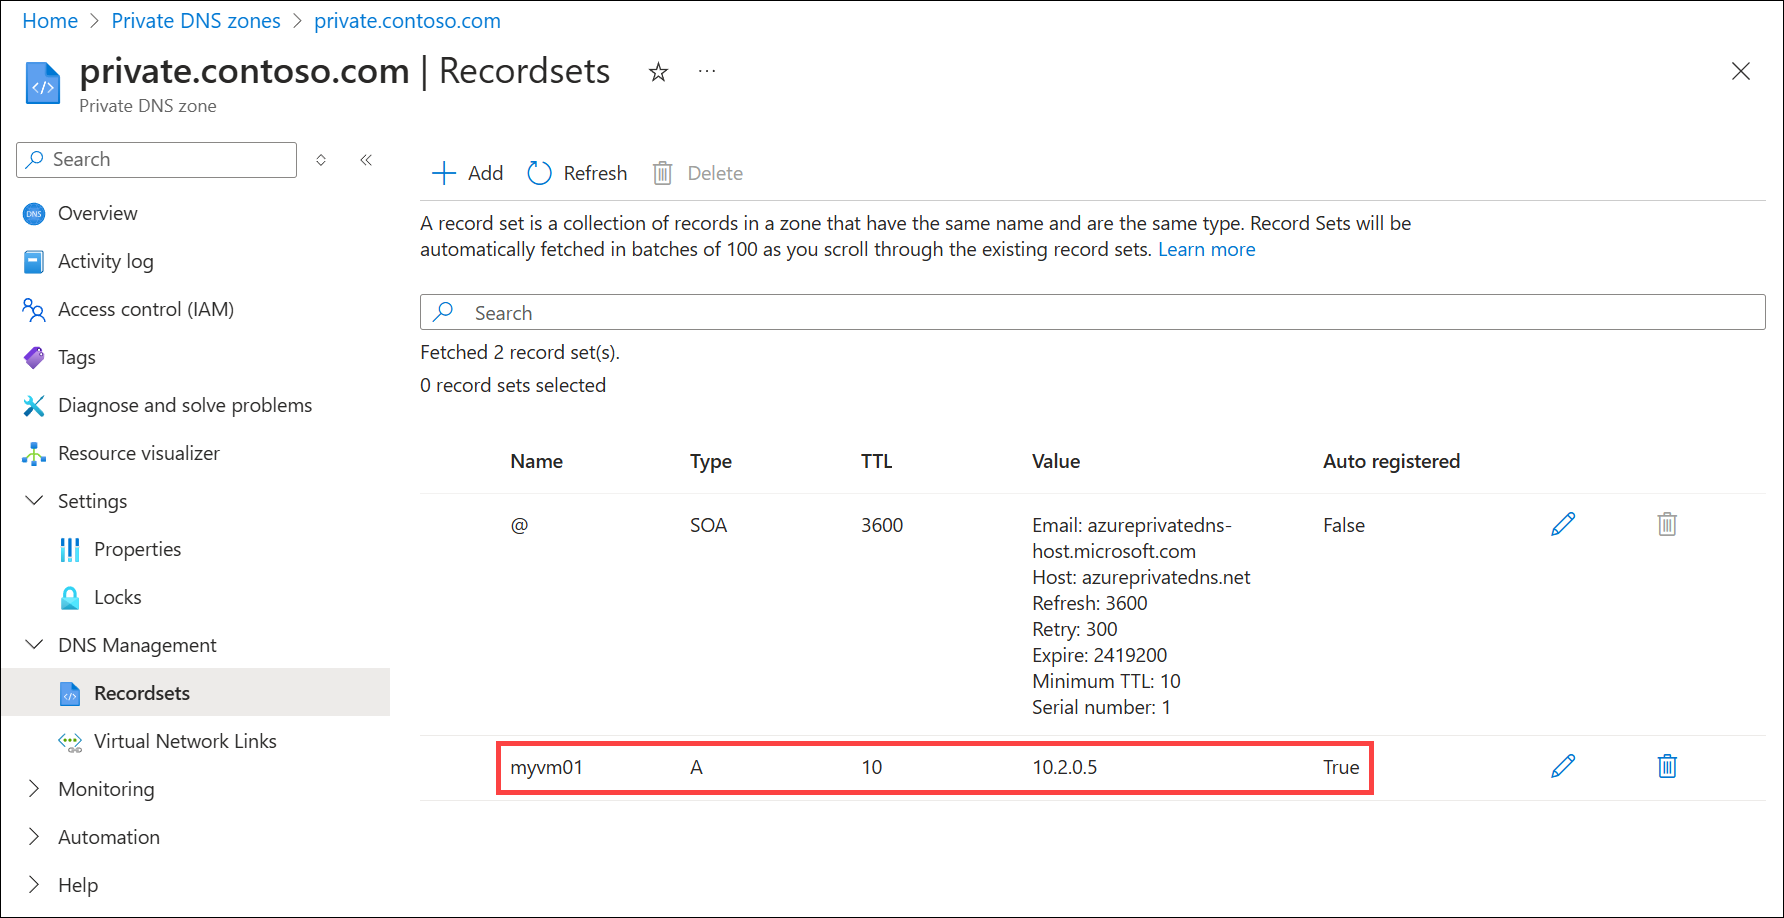
Under DNS Management, select Recordsets.
Verify that a DNS record exists of Type A with an Auto registered value of True. See the following example:
Create another DNS record
You can also add records to the private DNS zone manually. The following example creates a record with the hostname db in the DNS Zone private.contoso.com. The fully qualified name of the record set is db.private.contoso.com. The record type is A, with an IP address corresponding to the autoregistered IP address of myVM01.private.contoso.com.
- Search for or select Private DNS zones and then select the private.contoso.com zone.
- Under DNS Management, select Recordsets.
- Select + Add.
- Under Name, enter db.
- Next to IP Address, type the IP address you see for myVM01.
- Select OK.
Search and display records
By default, the Recordsets node displays all record sets in the zone. A record set is a collection of records that have the same name and are the same type. Record sets are automatically fetched in batches of 100 as you scroll through the list.
You can also search and display specific DNS record sets in the zone by entering a value in the search box. In the following example, one record with the name db is displayed:
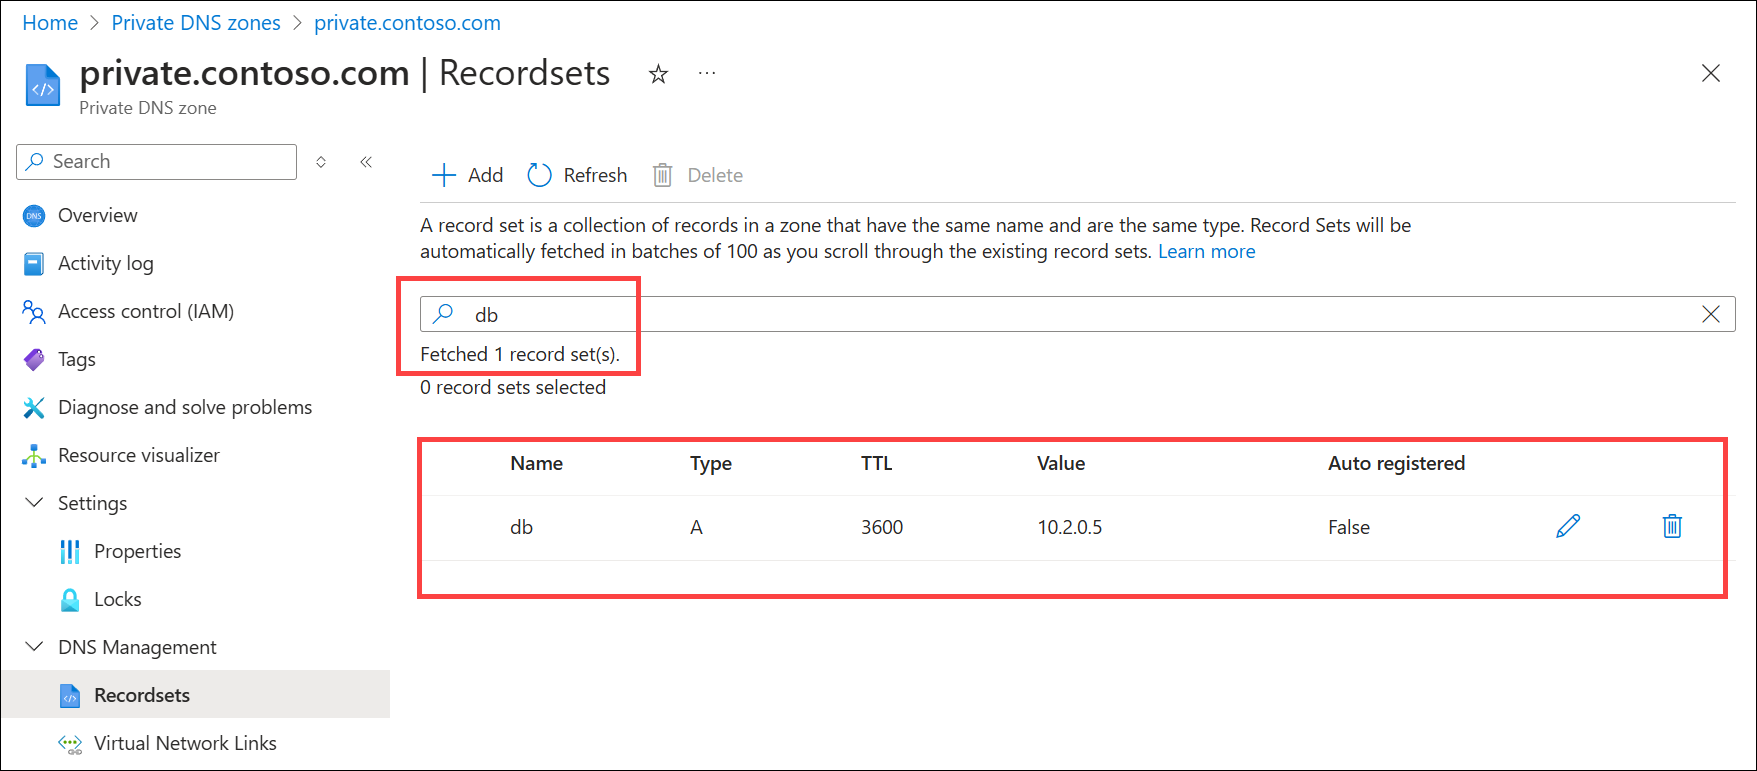
You can search by name, type, TTL, value, or autoregistration status. For example, the record db in this example is also displayed by searching for A (display all records of type A), 3600 (the record's TTL value), 10.2.0.5 (the IP address of the A record), or False (non-autoregistered records). All records in the zone that match the search criteria are displayed in batches of 100.
Test the private zone
Now you can test the name resolution for your private.contoso.com private zone.
You can use the ping command to test name resolution. You can do this by connecting to the virtual machine and opening a command prompt, or by using the Run command on this virtual machine.
To use the Run command:
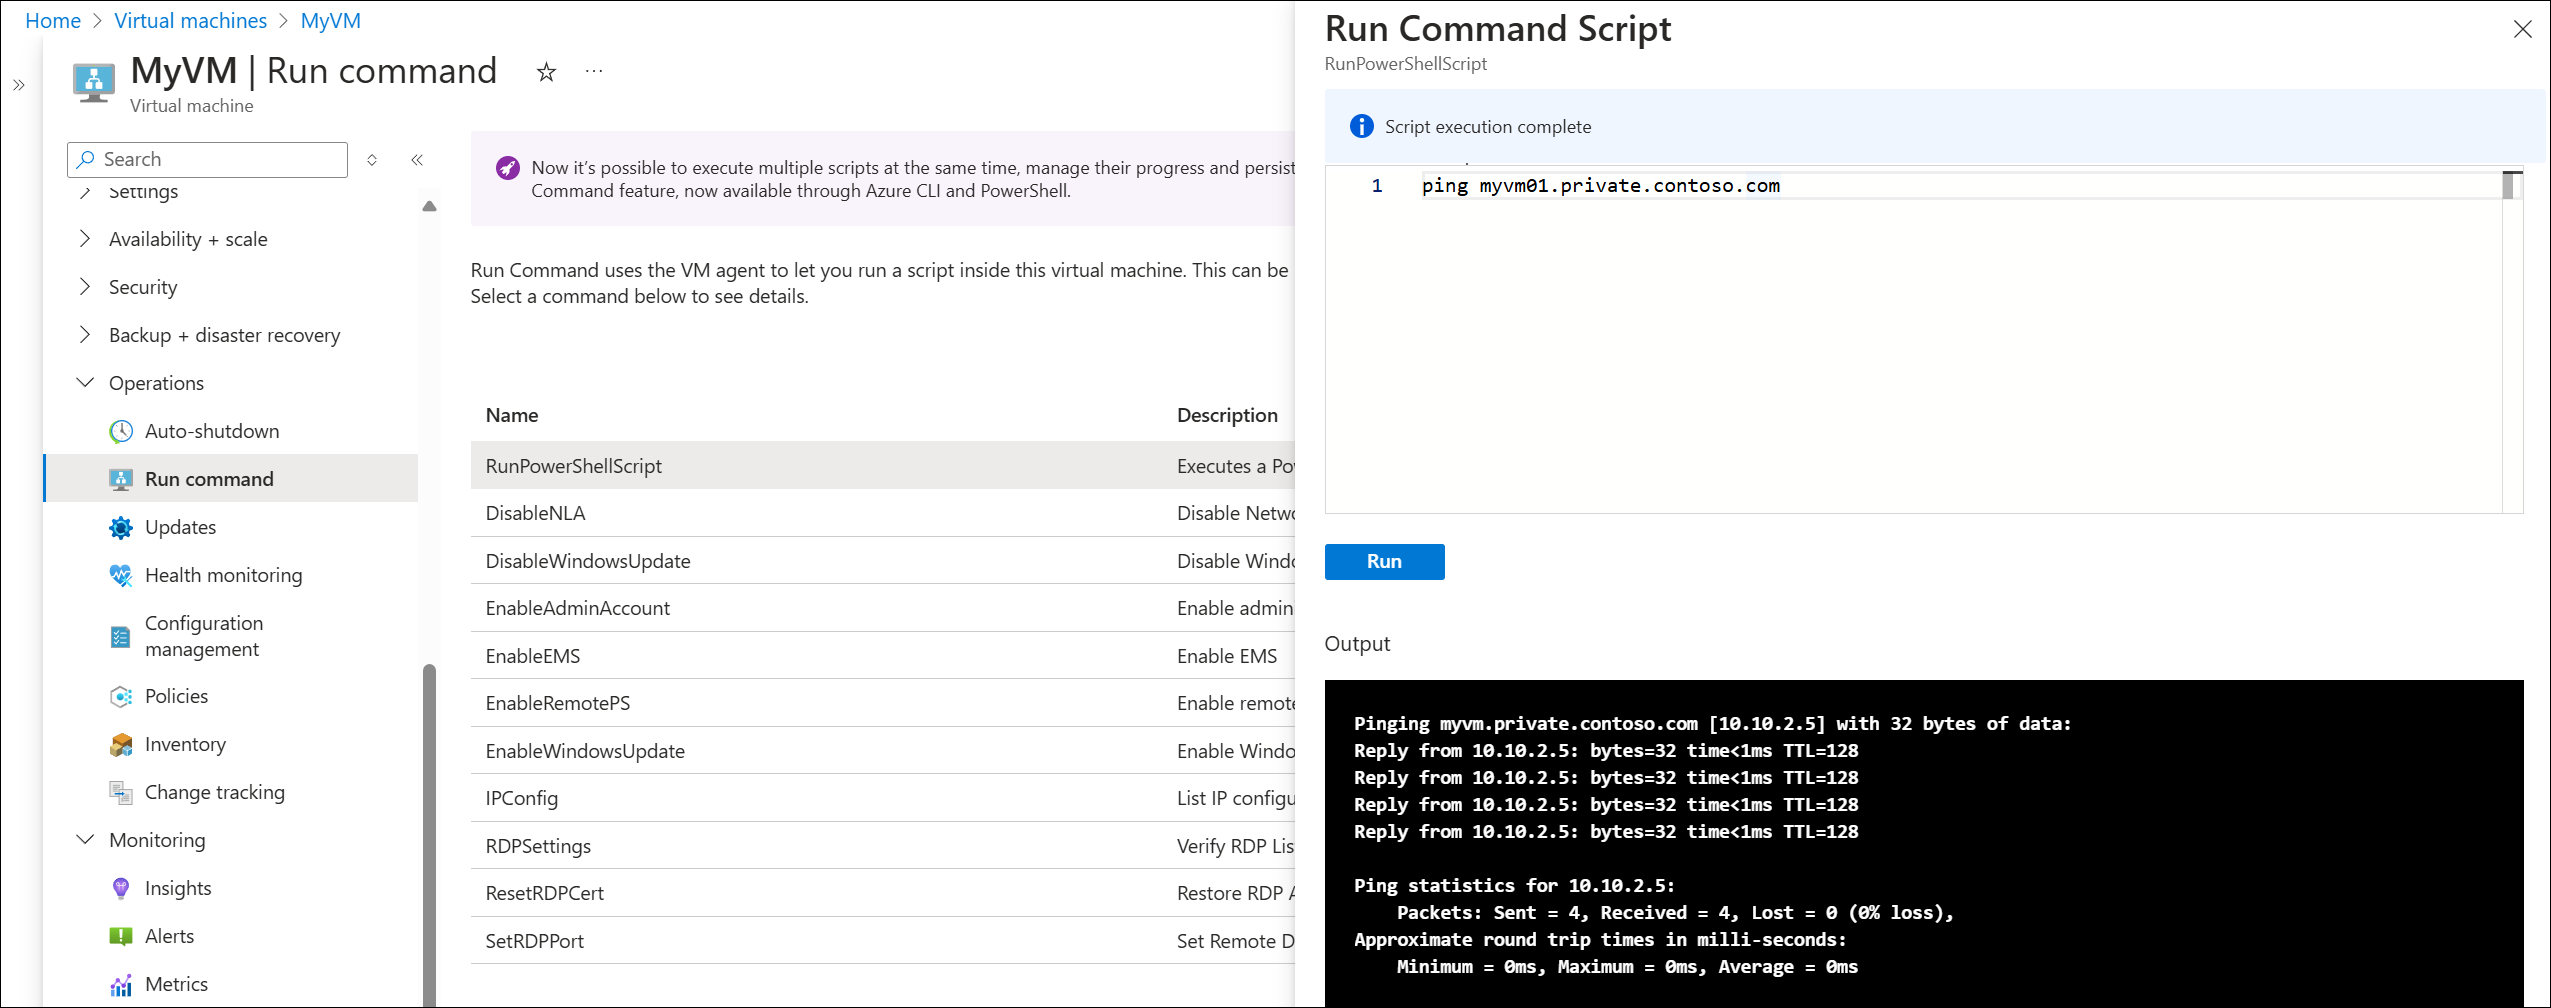
Select Virtual machines, select your virtual machine, and then under Operations select Run command.
Select RunPowerShellScript, under Run Command Script enter ping myvm01.private.contoso.com and then select Run. See the following example:
Now ping the db name you created previously:
Pinging db.private.contoso.com [10.10.2.5] with 32 bytes of data:
Reply from 10.10.2.5: bytes=32 time<1ms TTL=128
Reply from 10.10.2.5: bytes=32 time<1ms TTL=128
Reply from 10.10.2.5: bytes=32 time<1ms TTL=128
Reply from 10.10.2.5: bytes=32 time<1ms TTL=128

Ping statistics for 10.10.2.5:
    Packets: Sent = 4, Received = 4, Lost = 0 (0% loss),
Approximate round trip times in milli-seconds:
    Minimum = 0ms, Maximum = 0ms, Average = 0ms

Clean up resources
When no longer needed, delete the MyResourceGroup resource group to delete the resources created in this quickstart.