Create, change, or delete a virtual network peering
Learn how to create, change, or delete a virtual network peering. Virtual network peering enables you to connect virtual networks in the same region and across regions (also known as Global Virtual Network Peering) through the Azure backbone network. Once peered, the virtual networks are still managed as separate resources. If you're new to virtual network peering, you can learn more about it in the virtual network peering overview or by completing the virtual network peering tutorial.
Prerequisites
If you don't have an Azure account with an active subscription, create one for free. Complete one of these tasks before starting the remainder of this article:
Sign in to the Azure portal with an Azure account that has the necessary permissions to work with peerings.
Create a peering
Before creating a peering, familiarize yourself with the requirements and constraints and necessary permissions.
In the search box at the top of the Azure portal, enter Virtual network. Select Virtual networks in the search results.
In Virtual networks, select the network you want to create a peering for.
Select Peerings in Settings.
Select + Add.
Enter or select values for the following settings, and then select Add.
Settings Description Remote virtual network summary Peering link name The name of the peering from the local virtual network. The name must be unique within the virtual network. Virtual network deployment model Select which deployment model the virtual network you want to peer with was deployed through. I know my resource ID If you have read access to the virtual network you want to peer with, leave this checkbox unchecked. If you don't have read access to the virtual network or subscription you want to peer with, select this checkbox. Resource ID This field appears when you check I know my resource ID checkbox. The resource ID you enter must be for a virtual network that exists in the same, or supported different Azure region as this virtual network.
The full resource ID looks similar to/subscriptions/<Id>/resourceGroups/<resource-group-name>/providers/Microsoft.Network/virtualNetworks/<virtual-network-name>.
You can get the resource ID for a virtual network by viewing the properties for a virtual network. To learn how to view the properties for a virtual network, see Manage virtual networks. User permissions must be assigned if the subscription is associated to a different Microsoft Entra tenant than the subscription with the virtual network you're peering. Add a user from each tenant as a guest user in the opposite tenant.Subscription Select the subscription of the virtual network you want to peer with. One or more subscriptions are listed, depending on how many subscriptions your account has read access to. Virtual network Select the remote virtual network. Remote virtual network peering settings Allow the peered virtual network to access 'vnet-1' By default, this option is selected.
- Select this option to allow traffic from the peered virtual network to 'vnet-1'. This setting enables communication between hub and spoke in hub-spoke network topology and allows a VM in the peered virtual network to communicate with a VM in 'vnet-1'. The VirtualNetwork service tag for network security groups includes the virtual network and peered virtual network when this setting is selected. To learn more about service tags, see Azure service tags.Allow the peered virtual network to receive forwarded traffic from 'vnet-1` This option isn't selected by default.
- Enabling this option will allow the peered virtual network to receive traffic from virtual networks peered to 'vnet-1'. For example, if vnet-2 has an NVA that receives traffic from outside of vnet-2 that forwards to vnet-1, you can select this setting to allow that traffic to reach vnet-1 from vnet-2. While enabling this capability allows the forwarded traffic through the peering, it doesn't create any user-defined routes or network virtual appliances. User-defined routes and network virtual appliances are created separately.Allow gateway or route server in the peered virtual network to forward traffic to 'vnet-1' This option isn't selected by default.
- Enabling this setting will allow 'vnet-1' to receive traffic from the peered virtual networks' gateway or route server. In order for this option to be enabled, the peered virtual network must contain a gateway or route server.Enable the peered virtual network to use 'vnet-1's' remote gateway or route server This option isn't selected by default.
- This option can be enabled only if 'vnet-1' has a remote gateway or route server and 'vnet-1' enables "Allow gateway in 'vnet-1' to forward traffic to the peered virtual network". This option can be enabled in only one of the peered virtual networks' peerings.
You can also select this option, if you want this virtual network to use the remote Route Server to exchange routes, see Azure Route Server.
NOTE: You can't use remote gateways if you already have a gateway configured in your virtual network. To learn more about using a gateway for transit, see Configure a VPN gateway for transit in a virtual network peering.Local virtual network summary Peering link name The name of the peering from the remote virtual network. The name must be unique within the virtual network. Local virtual network peering settings Allow 'vnet-1' to access the peered virtual network By default, this option is selected.
- Select this option to allow traffic from 'vnet-1' to the peered virtual network. This setting enables communication between hub and spoke in hub-spoke network topology and allows a VM in 'vnet-1' to communicate with a VM in the peered virtual network.Allow 'vnet-1' to receive forwarded traffic from the peered virtual network This option isn't selected by default.
- Enabling this option will allow 'vnet-1' to receive traffic from virtual networks peered to the peered virtual network. For example, if vnet-2 has an NVA that receives traffic from outside of vnet-2 that gets forwards to vnet-1, you can select this setting to allow that traffic to reach vnet-1 from vnet-2. While enabling this capability allows the forwarded traffic through the peering, it doesn't create any user-defined routes or network virtual appliances. User-defined routes and network virtual appliances are created separately.Allow gateway or route server in 'vnet-1' to forward traffic to the peered virtual network This option isn't selected by default.
- Enabling this setting will allow the peered virtual network to receive traffic from 'vnet-1's' gateway or route server. In order for this option to be enabled, 'vnet-1' must contain a gateway or route server.Enable 'vnet-1' to use the peered virtual networks' remote gateway or route server This option isn't selected by default.
- This option can be enabled only if the peered virtual network has a remote gateway or route server and the peered virtual network enables "Allow gateway in the peered virtual network to forward traffic to 'vnet-1'". This option can be enabled in only one of 'vnet-1's' peerings.
Note
If you use a Virtual Network Gateway to send on-premises traffic transitively to a peered virtual network, the peered virtual network IP range for the on-premises VPN device must be set to 'interesting' traffic. You may need to add all Azure virtual network's CIDR addresses to the Site-2-Site IPSec VPN Tunnel configuration on the on-premises VPN device. CIDR addresses include resources like such as Hub, Spokes, and Point-2-Site IP address pools. Otherwise, your on-premises resources won't be able to communicate with resources in the peered VNet. Interesting traffic is communicated through Phase 2 security associations. The security association creates a dedicated VPN tunnel for each specified subnet. The on-premises and Azure VPN Gateway tier have to support the same number of Site-2-Site VPN tunnels and Azure VNet subnets. Otherwise, your on-premises resources won't be able to communicate with resources in the peered VNet. Consult your on-premises VPN documentation for instructions to create Phase 2 security associations for each specified Azure VNet subnet.
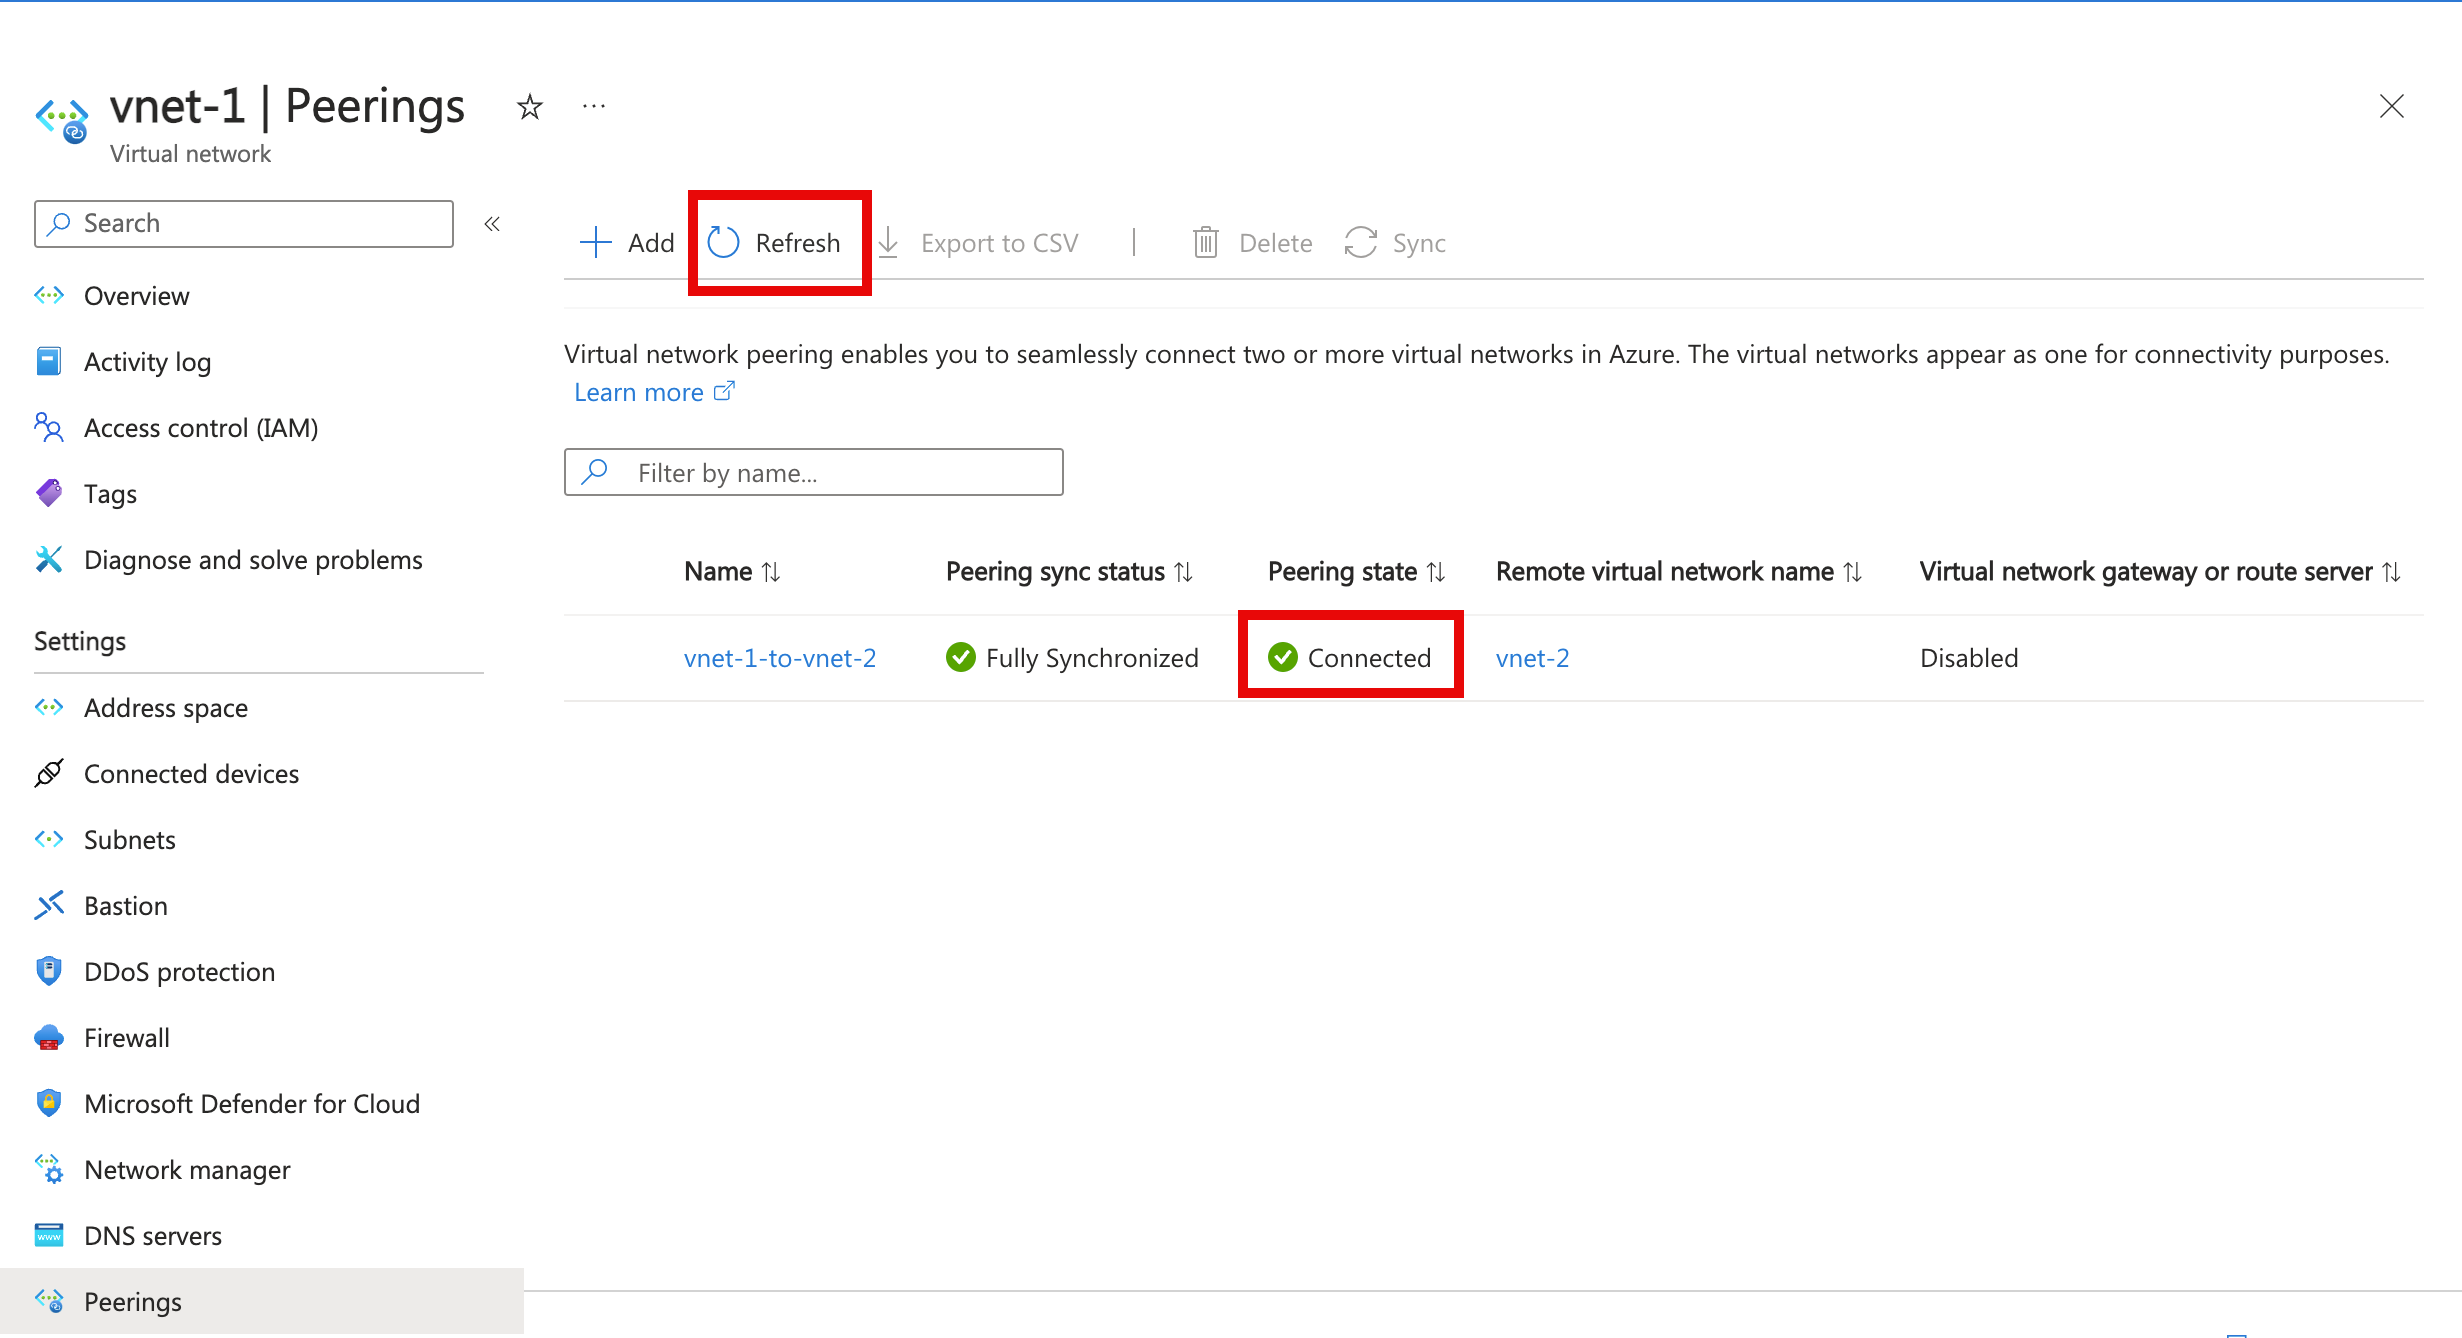
Select the Refresh button after a few seconds, and the peering status will change from Updating to Connected.
For step-by-step instructions for implementing peering between virtual networks in different subscriptions and deployment models, see next steps.
View or change peering settings
Before changing a peering, familiarize yourself with the requirements and constraints and necessary permissions.
In the search box at the top of the Azure portal, enter Virtual network. Select Virtual networks in the search results.
Select the virtual network that you would like to view or change its peering settings in Virtual networks.
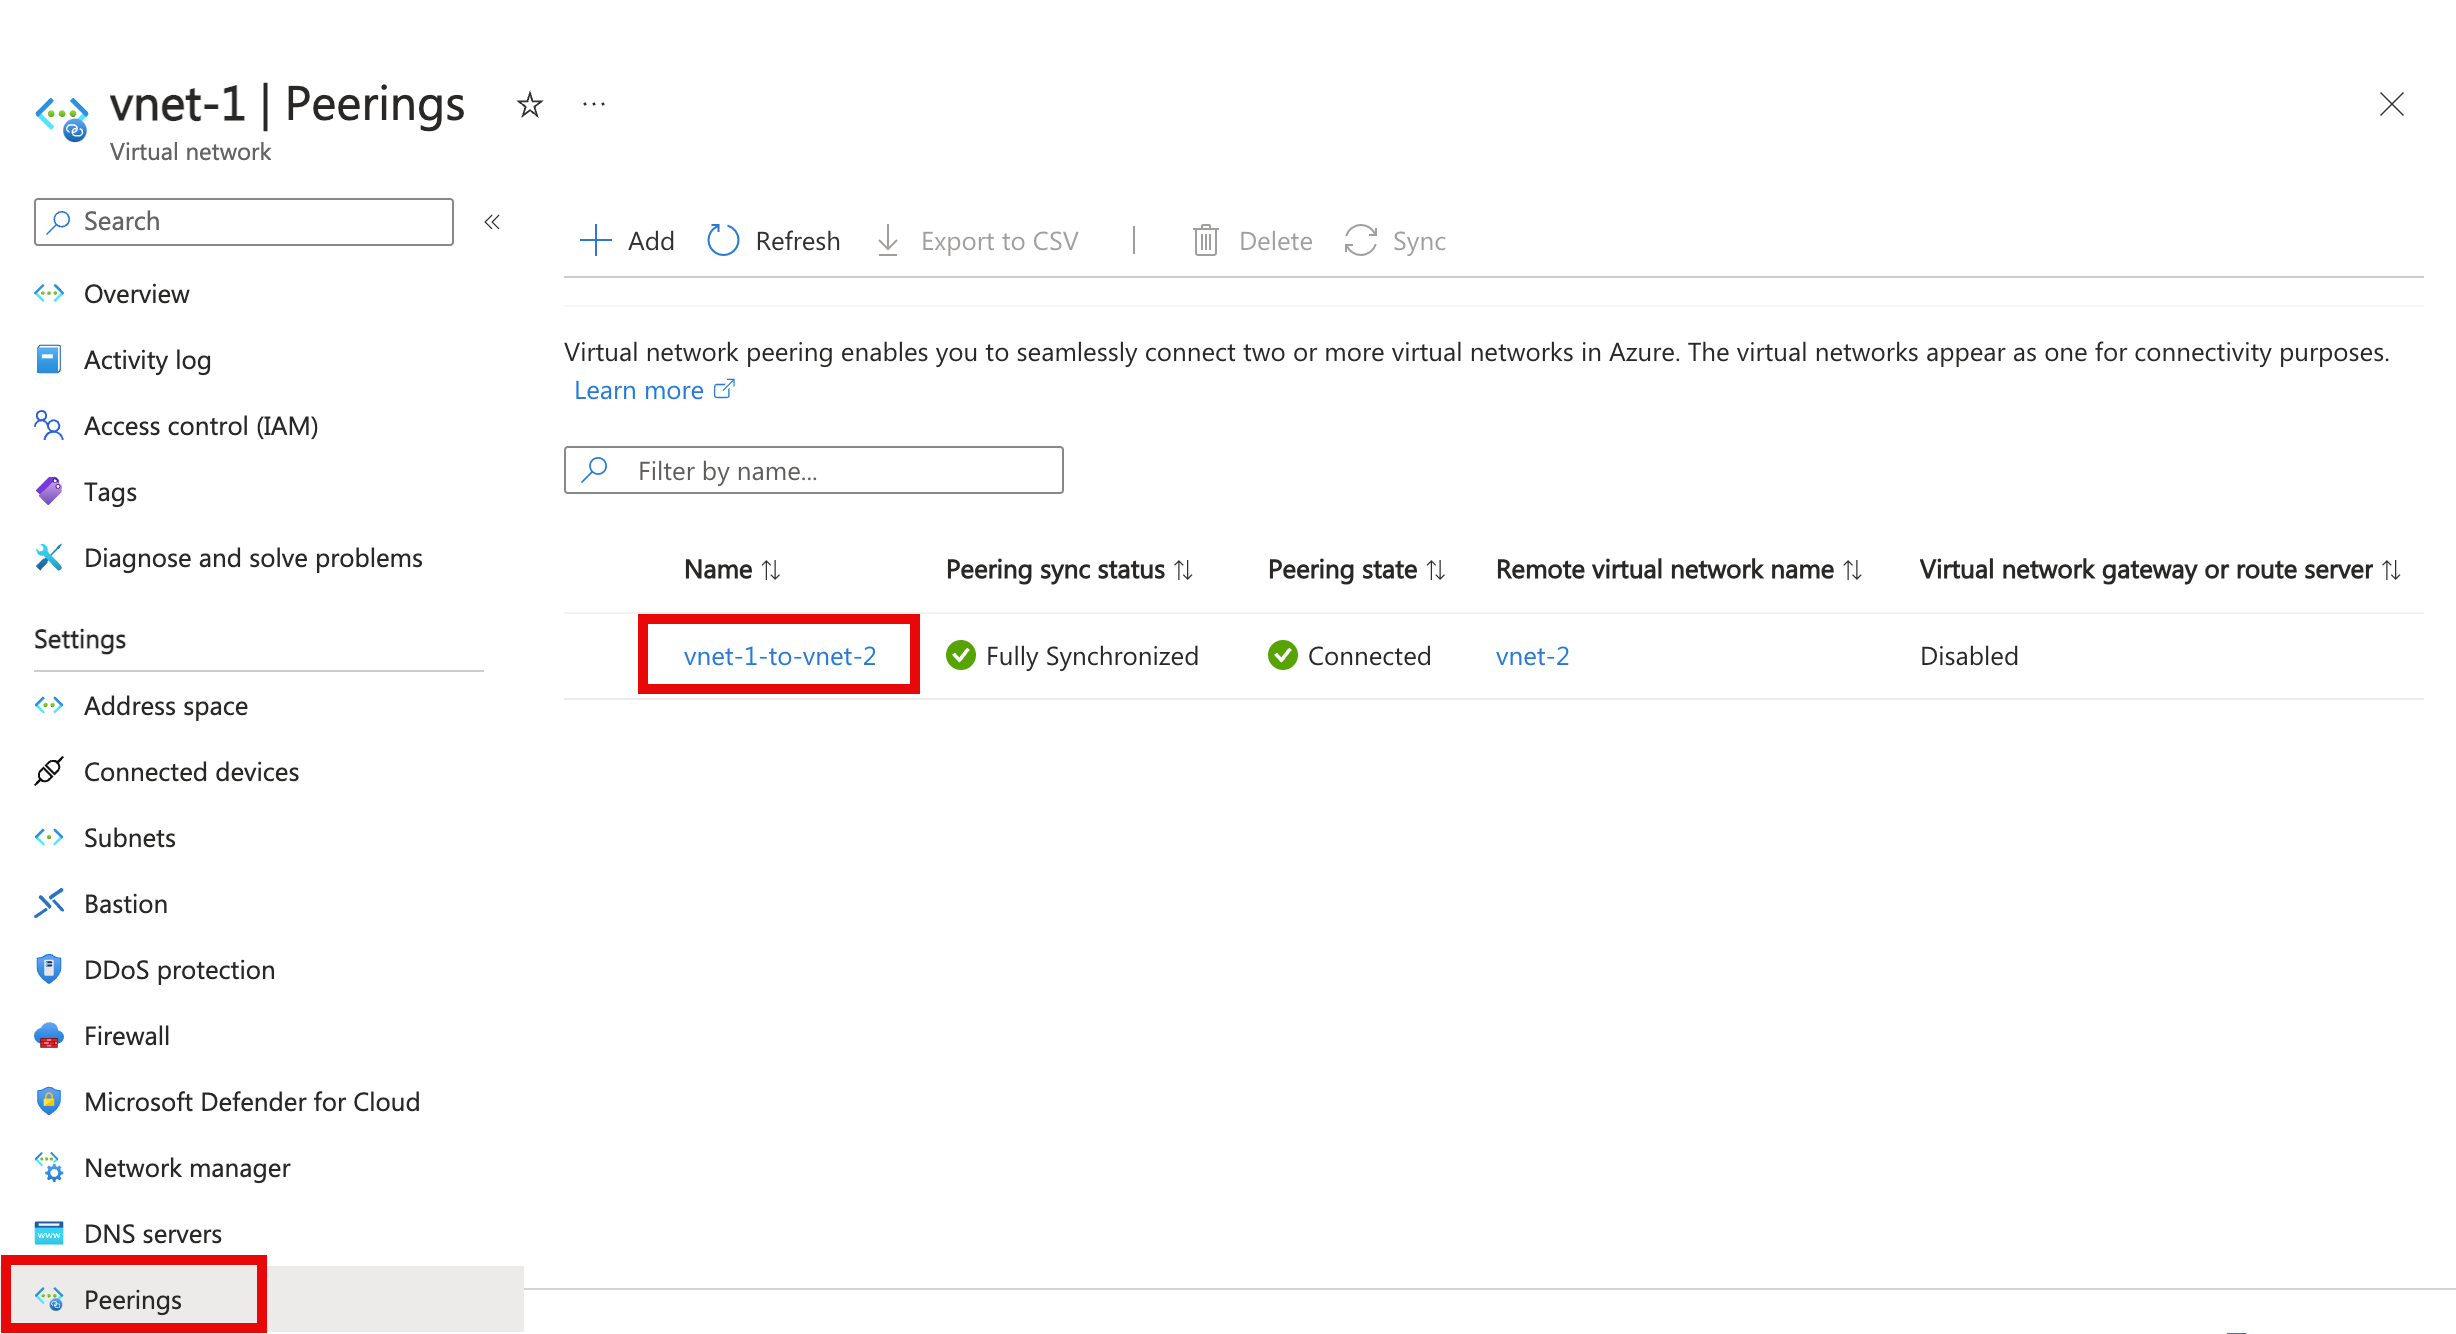
Select Peerings in Settings and then select the peering you want to view or change settings for.
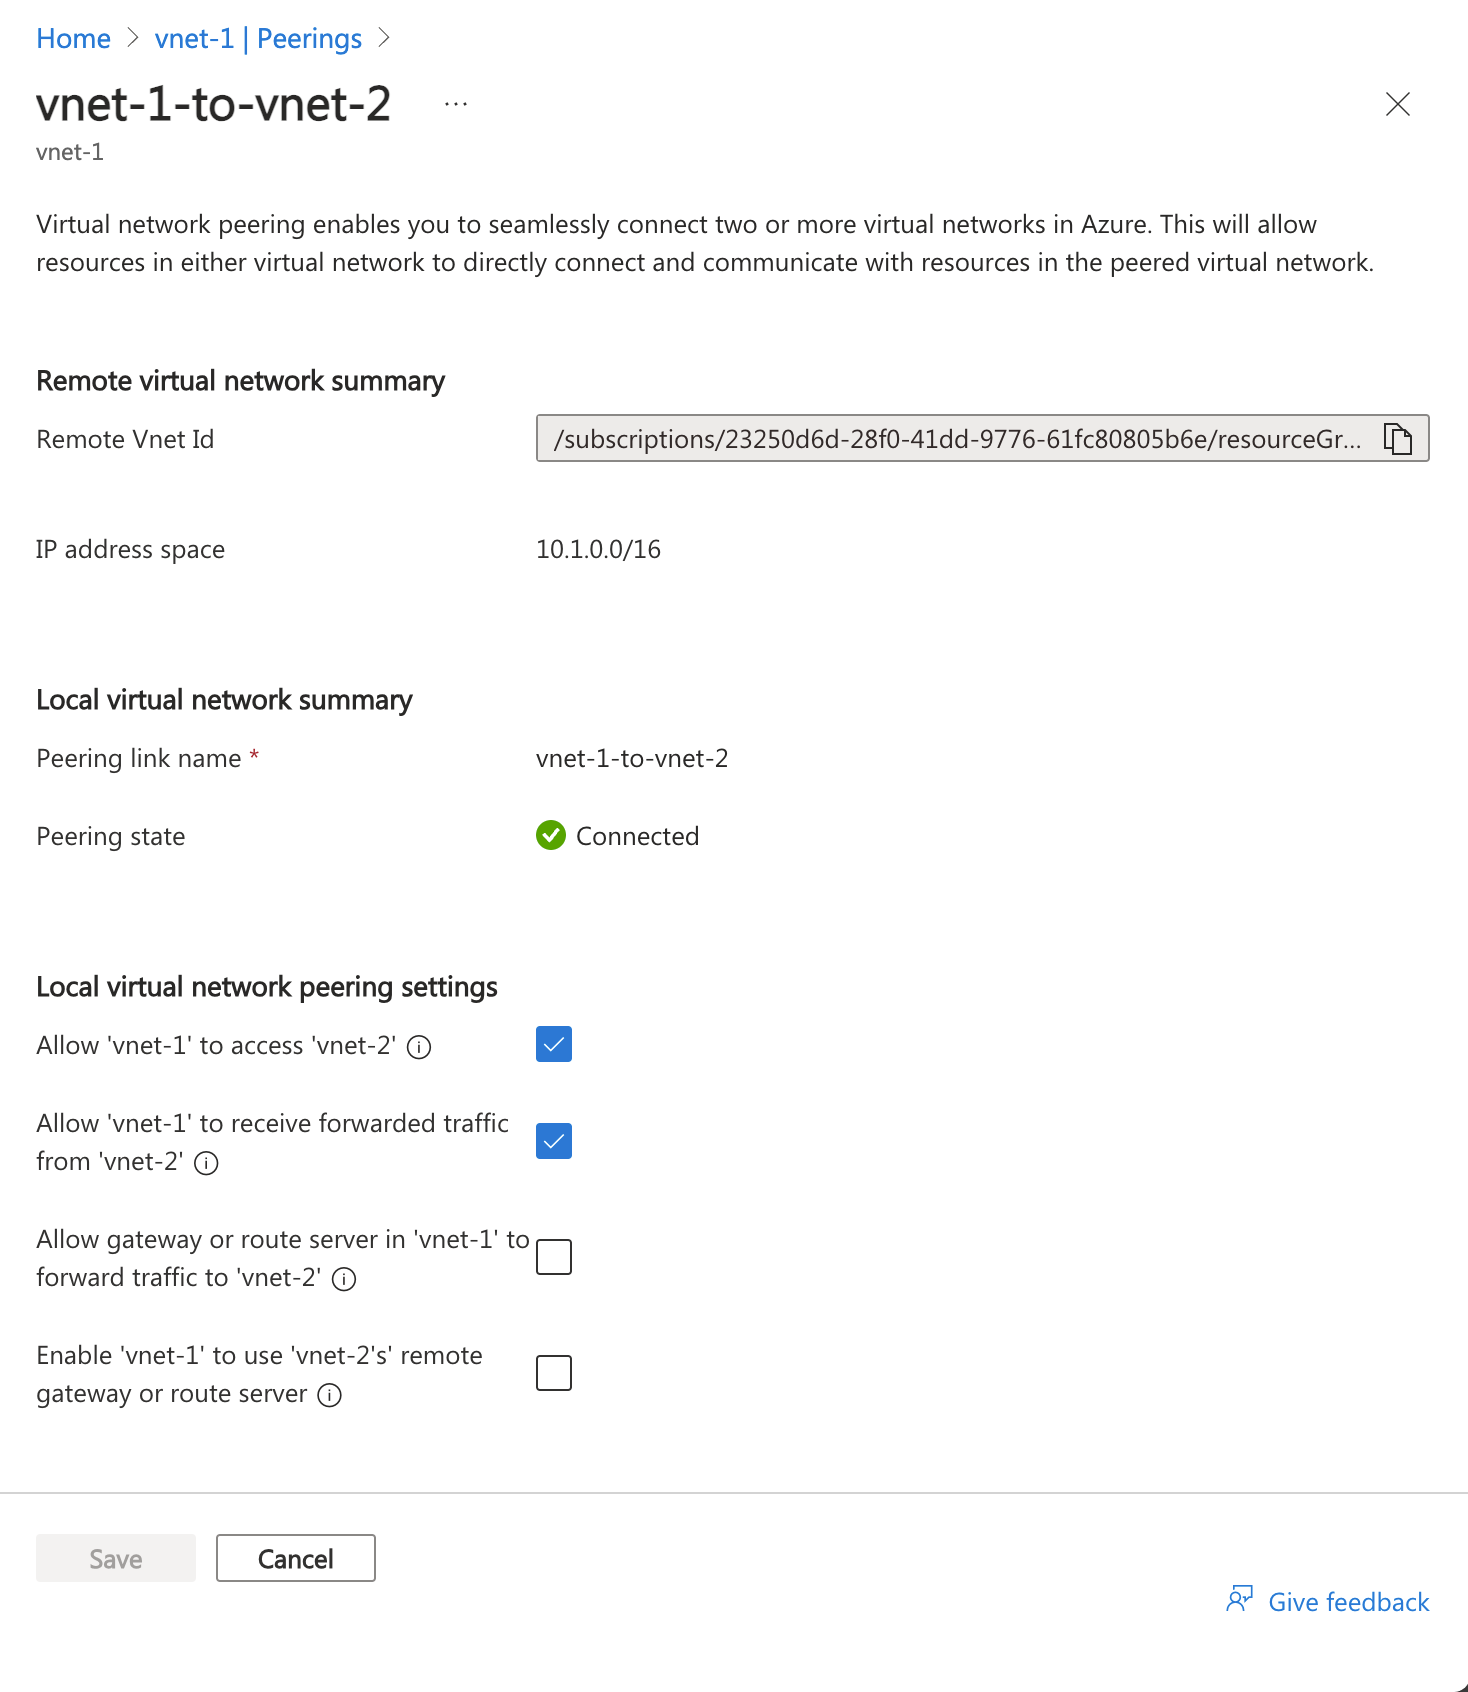
Change the appropriate setting. Read about the options for each setting in step 4 of create a peering. Then select Save to complete the configuration changes.
Delete a peering
Before deleting a peering, familiarize yourself with the requirements and constraints and necessary permissions.
When a peering between two virtual networks is deleted, traffic can no longer flow between the virtual networks. If you want virtual networks to communicate sometimes, but not always, rather than deleting a peering, deselect the Allow traffic to remote virtual network setting if you want to block traffic to the remote virtual network. You may find disabling and enabling network access easier than deleting and recreating peerings.
In the search box at the top of the Azure portal, enter Virtual network. Select Virtual networks in the search results.
Select the virtual network that you would like to view or change its peering settings in Virtual networks.
Select Peerings in Settings.
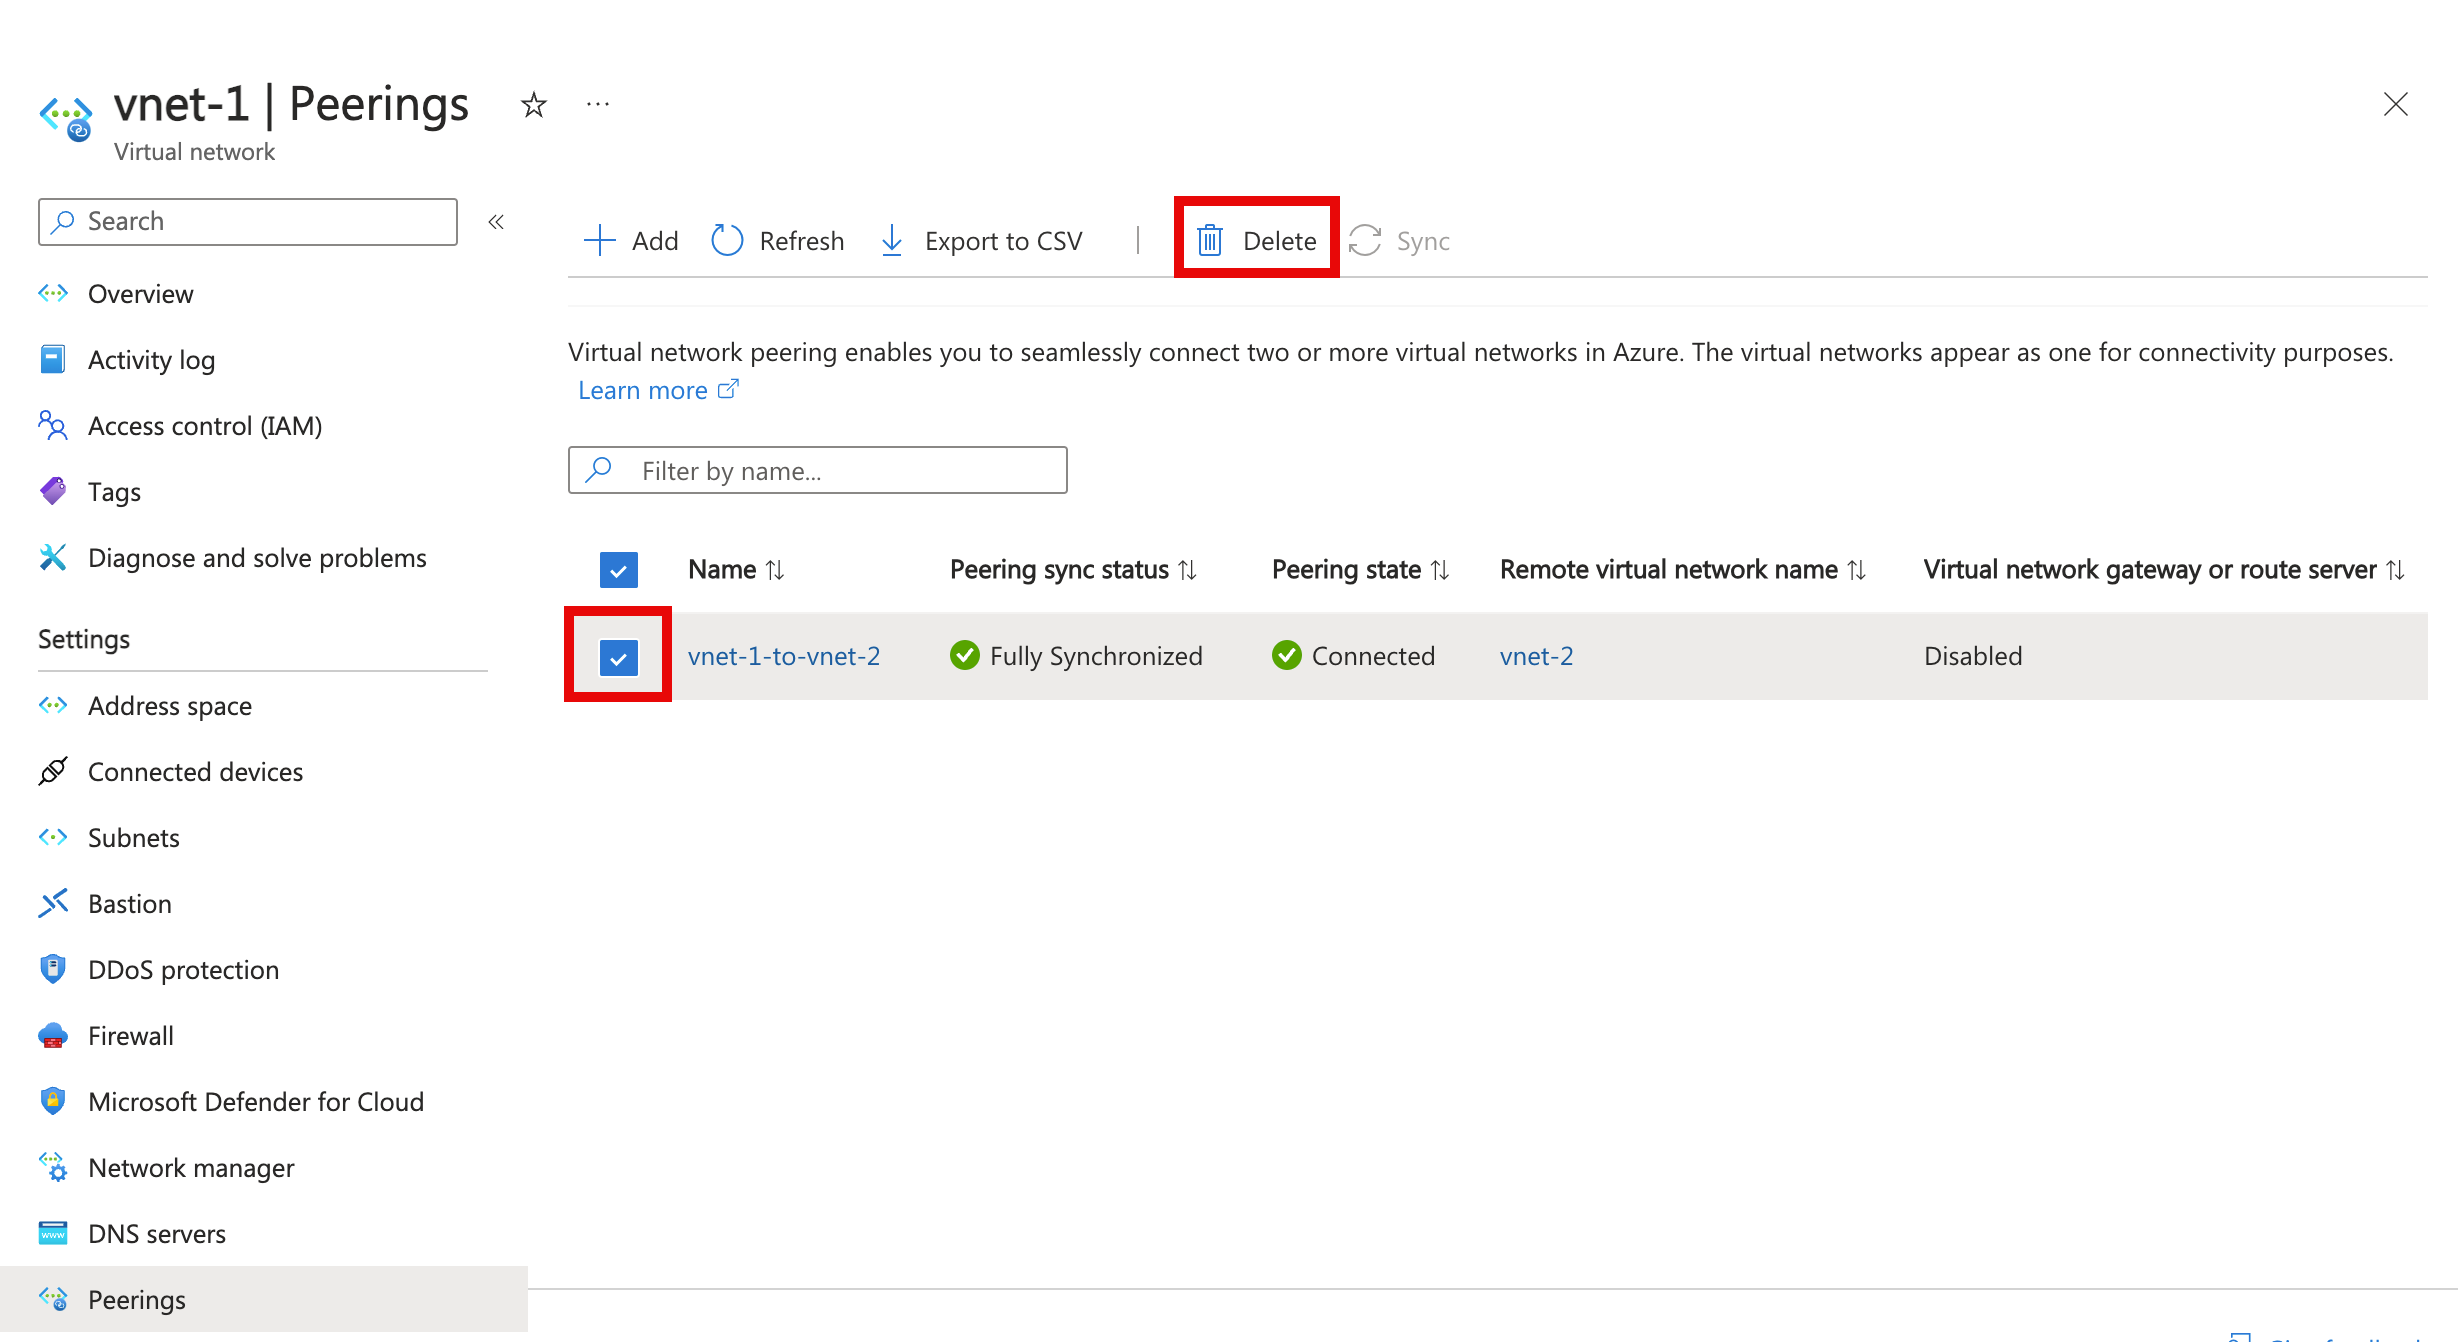
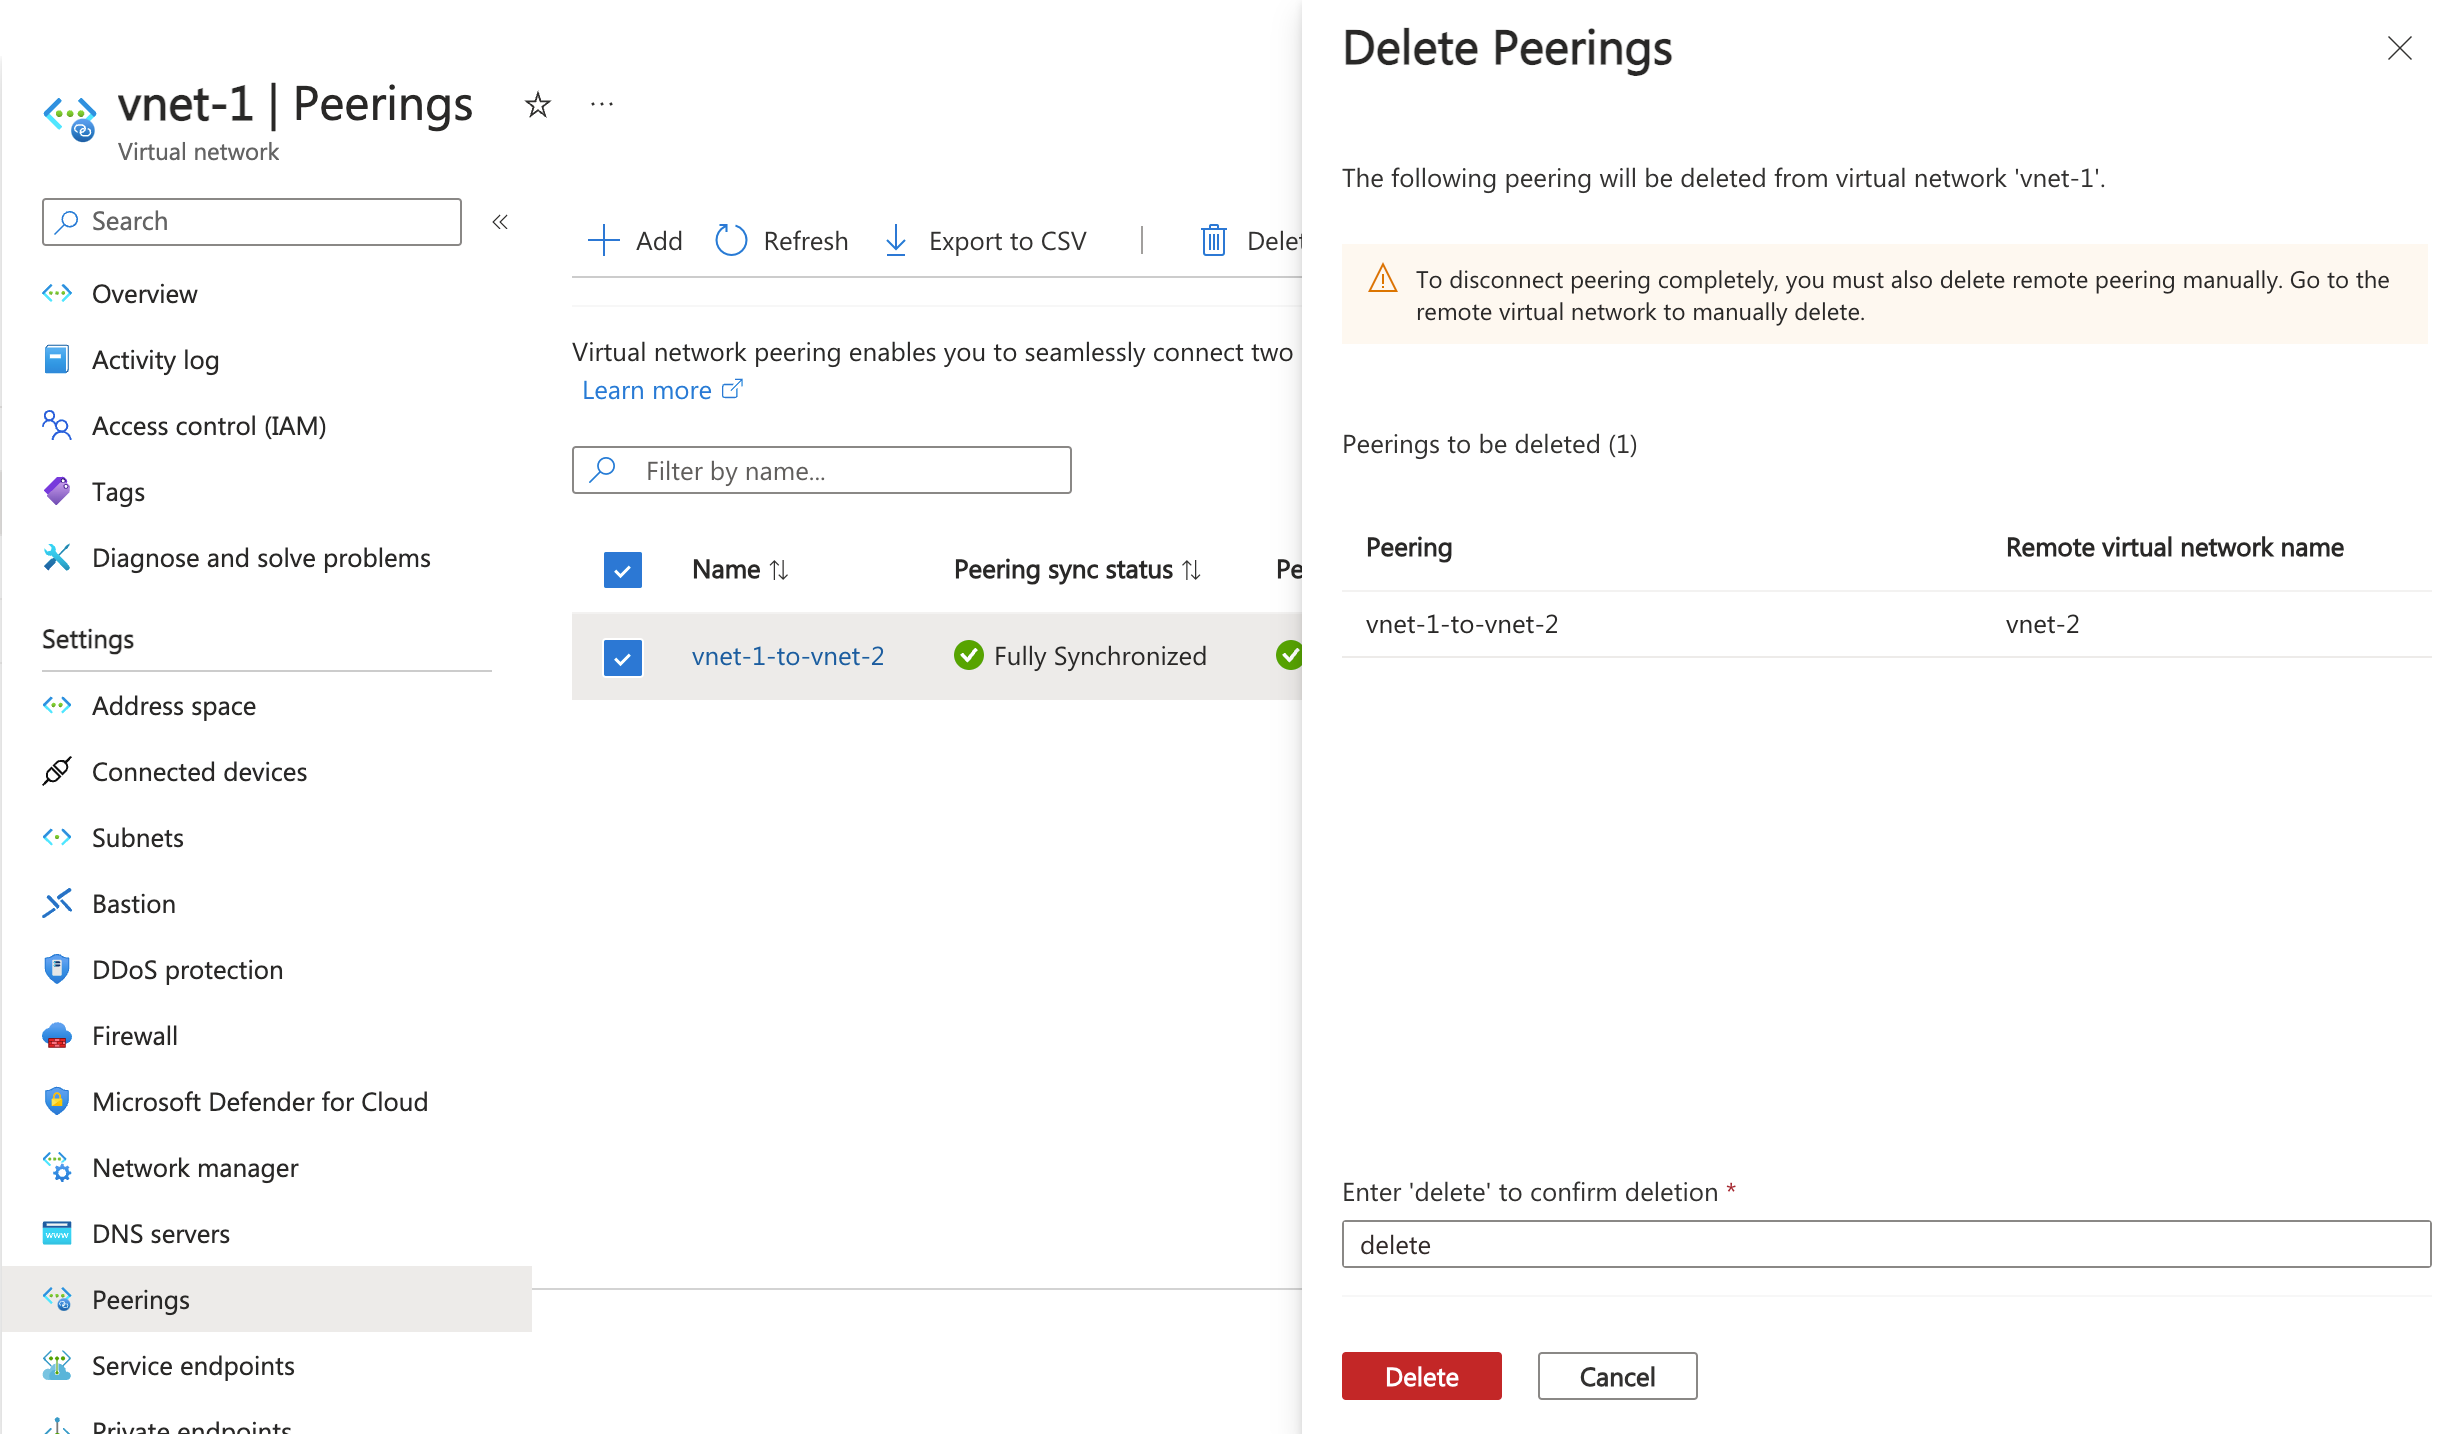
Select the box next to the peering you want to delete, and then select Delete.
In Delete Peerings, enter delete in the confirmation box, and then select Delete.
Note
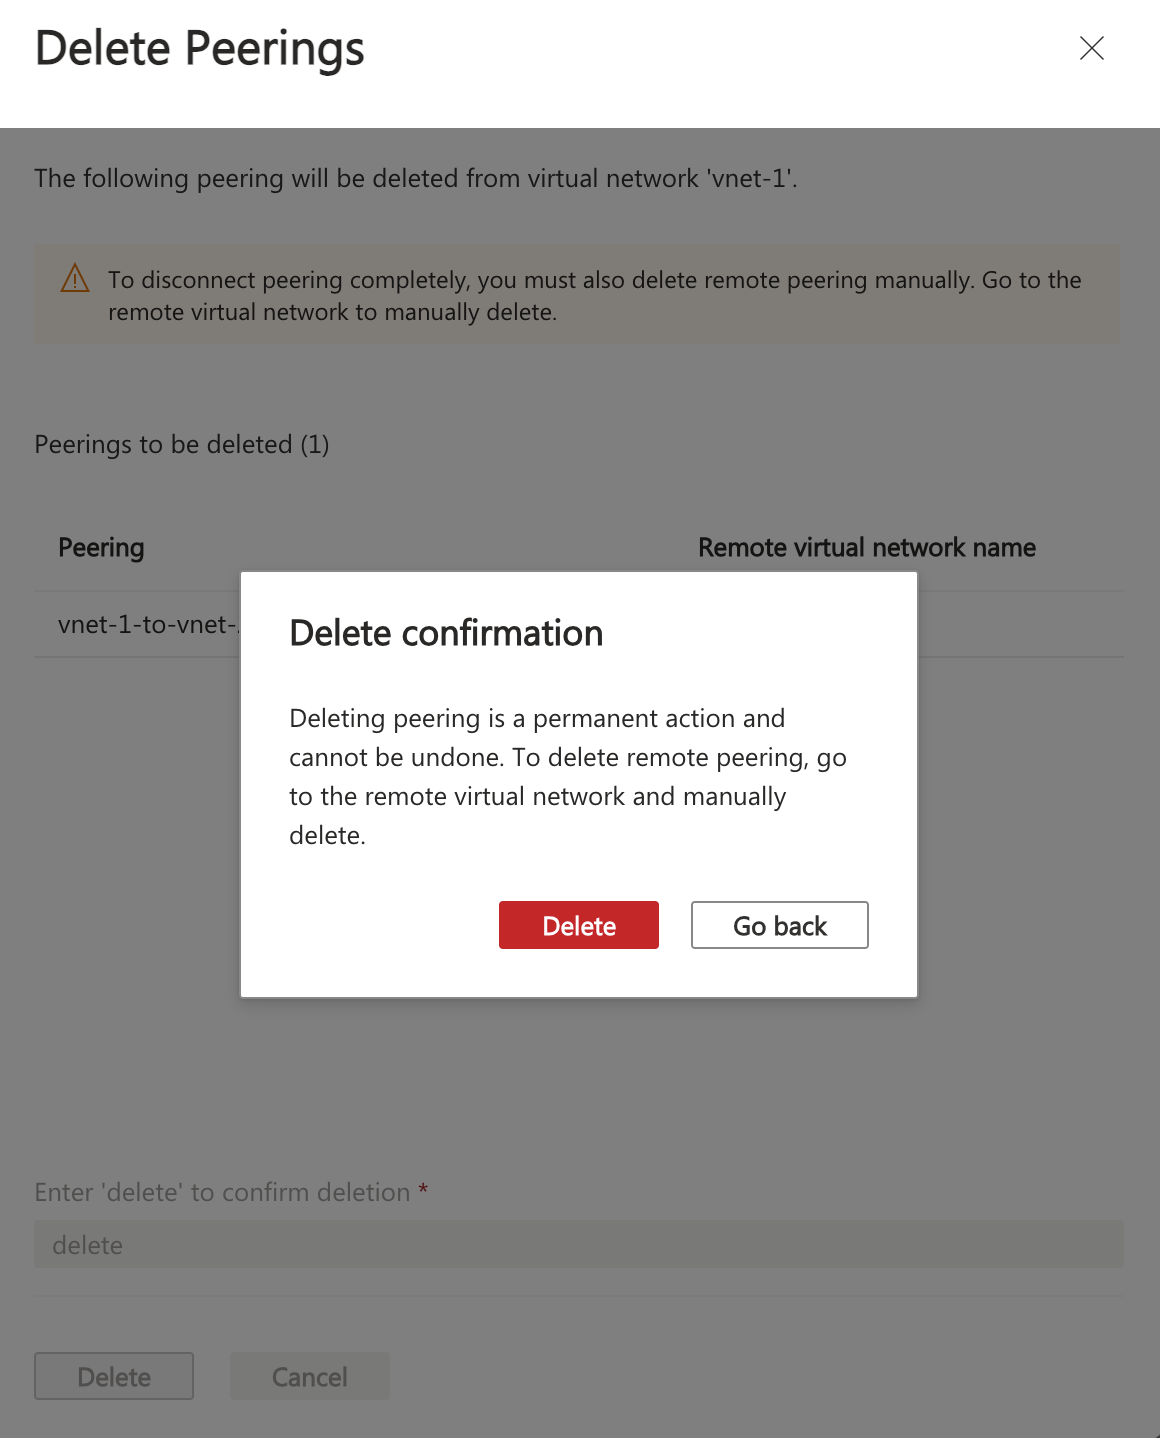
When you delete a virtual network peering from a virtual network, the peering from the remote virtual network will also be deleted.
Select Delete to confirm the deletion in Delete confirmation.
Requirements and constraints
You can peer virtual networks in the same region, or different regions. Peering virtual networks in different regions is also referred to as Global Virtual Network Peering.
When creating a global peering, the peered virtual networks can exist in any Azure public cloud region or China cloud regions or Government cloud regions. You can't peer across clouds. For example, a virtual network in Azure public cloud can't be peered to a virtual network in Microsoft Azure operated by 21Vianet cloud.
When part of a peering, a virtual network cannot be moved. If you need to move a virtual network to a different resource group or subscription, you must delete the peering, move the virtual network, and then recreate the peering.
Resources in one virtual network can't communicate with the front-end IP address of a basic load balancer (internal or public) in a globally peered virtual network. Support for basic load balancer only exists within the same region. Support for standard load balancer exists for both, Virtual Network Peering and Global Virtual Network Peering. Some services that use a basic load balancer don't work over global virtual network peering. For more information, see Constraints related to Global Virtual Network Peering and Load Balancers.
You can use remote gateways or allow gateway transit in globally peered virtual networks and locally peered virtual networks.
The virtual networks can be in the same, or different subscriptions. When you peer virtual networks in different subscriptions, both subscriptions can be associated to the same or different Microsoft Entra tenant. If you don't already have an AD tenant, you can create one.
The virtual networks you peer must have nonoverlapping IP address spaces.
You can peer two virtual networks deployed through Resource Manager or a virtual network deployed through Resource Manager with a virtual network deployed through the classic deployment model. You can't peer two virtual networks created through the classic deployment model. If you're not familiar with Azure deployment models, read the Understand Azure deployment models article. You can use a VPN Gateway to connect two virtual networks created through the classic deployment model.
When you peer two virtual networks created through Resource Manager, a peering must be configured for each virtual network in the peering. You see one of the following types for peering status:
Initiated: When you create the first peering, its status is Initiated.
Connected: When you create the second peering, peering status becomes Connected for both peerings. The peering isn't successfully established until the peering status for both virtual network peerings is Connected.
When peering a virtual network created through Resource Manager with a virtual network created through the classic deployment model, you only configure a peering for the virtual network deployed through Resource Manager. You can't configure peering for a virtual network (classic), or between two virtual networks deployed through the classic deployment model. When you create the peering from the virtual network (Resource Manager) to the virtual network (Classic), the peering status is Updating, then shortly changes to Connected.
A peering is established between two virtual networks. Peerings by themselves aren't transitive. If you create peerings between:
VirtualNetwork1 and VirtualNetwork2
VirtualNetwork2 and VirtualNetwork3
There's no connectivity between VirtualNetwork1 and VirtualNetwork3 through VirtualNetwork2. If you want VirtualNetwork1 and VirtualNetwork3 to directly communicate, you have to create an explicit peering between VirtualNetwork1 and VirtualNetwork3, or go through an NVA in the Hub network. To learn more, see Hub-spoke network topology in Azure.
You can't resolve names in peered virtual networks using default Azure name resolution. To resolve names in other virtual networks, you must use Azure Private DNS or a custom DNS server. To learn how to set up your own DNS server, see Name resolution using your own DNS server.
Resources in peered virtual networks in the same region can communicate with each other with the same latency as if they were within the same virtual network. The network throughput is based on the bandwidth that's allowed for the virtual machine, proportionate to its size. There isn't any extra restriction on bandwidth within the peering. Each virtual machine size has its own maximum network bandwidth. To learn more about maximum network bandwidth for different virtual machine sizes, see Sizes for virtual machines in Azure.
A virtual network can be peered to another virtual network, and also be connected to another virtual network with an Azure virtual network gateway. When virtual networks are connected through both peering and a gateway, traffic between the virtual networks flows through the peering configuration, rather than the gateway.
Point-to-Site VPN clients must be downloaded again after virtual network peering has been successfully configured to ensure the new routes are downloaded to the client.
There's a nominal charge for ingress and egress traffic that utilizes a virtual network peering. For more information, see the pricing page.
Application Gateways that do not have Network Isolation enabled don't allow traffic to be sent between peered VNETs when Allow traffic to remote virtual network is disabled.
Permissions
The accounts you use to work with virtual network peering must be assigned to the following roles:
Network Contributor: For a virtual network deployed through Resource Manager.
Classic Network Contributor: For a virtual network deployed through, the classic deployment model.
If your account isn't assigned to one of the previous roles, it must be assigned to a custom role that is assigned the necessary actions from the following table:
| Action | Name |
|---|---|
| Microsoft.Network/virtualNetworks/virtualNetworkPeerings/write | Required to create a peering from virtual network A to virtual network B. Virtual network A must be a virtual network (Resource Manager) |
| Microsoft.Network/virtualNetworks/peer/action | Required to create a peering from virtual network B (Resource Manager) to virtual network A |
| Microsoft.ClassicNetwork/virtualNetworks/peer/action | Required to create a peering from virtual network B (classic) to virtual network A |
| Microsoft.Network/virtualNetworks/virtualNetworkPeerings/read | Read a virtual network peering |
| Microsoft.Network/virtualNetworks/virtualNetworkPeerings/delete | Delete a virtual network peering |
Next steps
A virtual network peering can be created between virtual networks created through the same, or different deployment models that exist in the same, or different subscriptions. Complete a tutorial for one of the following scenarios:
Azure deployment model Subscription Both Resource Manager Same Different One Resource Manager, one classic Same Different Learn how to create a hub and spoke network topology
Create a virtual network peering using PowerShell or Azure CLI sample scripts, or using Azure Resource Manager templates
Create and assign Azure Policy definitions for virtual networks
Pripomienky
Pripravujeme: V priebehu roka 2024 postupne zrušíme službu Problémy v službe GitHub ako mechanizmus pripomienok týkajúcich sa obsahu a nahradíme ju novým systémom pripomienok. Ďalšie informácie nájdete na stránke: https://aka.ms/ContentUserFeedback.
Odoslať a zobraziť pripomienky pre