Configure Azure VPN Client – Microsoft Entra ID authentication – Windows
This article helps you configure the Azure VPN Client on a Windows computer to connect to a virtual network using a VPN Gateway point-to-site (P2S) VPN and Microsoft Entra ID authentication. For more information about point-to-site connections, see About point-to-site connections. The Azure VPN Client is supported with Windows FIPS mode by using the KB4577063 hotfix.
Prerequisites
Configure your VPN gateway for point-to-site VPN connections that specify Microsoft Entra ID authentication. See Configure a P2S VPN gateway for Microsoft Entra ID authentication.
Workflow
This article continues on from the Configure a P2S VPN gateway for Microsoft Entra ID authentication steps. This article helps you:
- Download and install the Azure VPN Client for Windows.
- Extract the VPN client profile configuration files.
- Import the client profile settings to the VPN client.
- Create a connection and connect to Azure.
Download the Azure VPN Client
Download the latest version of the Azure VPN Client install files using one of the following links:
- Install using Client Install files: https://aka.ms/azvpnclientdownload.
- Install directly, when signed in on a client computer: Microsoft Store.
Install the Azure VPN Client to each computer.
Verify that the Azure VPN Client has permission to run in the background. For steps, see Windows background apps.
To verify the installed client version, open the Azure VPN Client. Go to the bottom of the client and click ... -> ? Help. In the right pane, you can see the client version number.
Extract client profile configuration files
To configure your Azure VPN Client profile, you must first download the VPN client profile configuration package from the Azure P2S gateway. This package is specific to the configured VPN gateway and contains the necessary settings to configure the VPN client.
If you used the P2S server configuration steps as mentioned in the Prerequisites section, you've already generated and downloaded the VPN client profile configuration package that contains the VPN profile configuration files. If you need to generate configuration files, see Download the VPN client profile configuration package.
After you obtain the VPN client profile configuration package, extract the zip file. The file contains the following folders:
- AzureVPN: The AzureVPN folder contains the Azurevpnconfig.xml file that is used to configure the Azure VPN Client.
- Generic: The generic folder contains the public server certificate and the VpnSettings.xml file. The VpnSettings.xml file contains information needed to configure a generic client.
Import client profile configuration settings
Note
We're in the process of changing the Azure VPN Client fields for Azure Active Directory to Microsoft Entra ID. If you see Microsoft Entra ID fields referenced in this article, but don't yet see those values reflected in the client, select the comparable Azure Active Directory values.
When your P2S configuration specifies Microsoft Entra ID authentication, the VPN client profile configuration settings are contained in the azurevpnconfig.xml file. This file is located in the AzureVPN folder of the VPN client profile configuration package.
On the page, select Import.

Browse to the Azure VPN Client profile configuration folder that you extracted. In the AzureVPN folder, select azurevpnconfig.xml. With the file selected, select Open.
Change the name of the Connection name (optional). In this example, you'll notice that the Audience value shown is the new Azure Public value associated to the Microsoft-registered Azure VPN Client App ID. The value in this field must match the value that your P2S VPN gateway is configured to use.

Click Save to save the connection profile.
In the left pane, select the connection profile that you want to use. Then click Connect to initiate the connection.
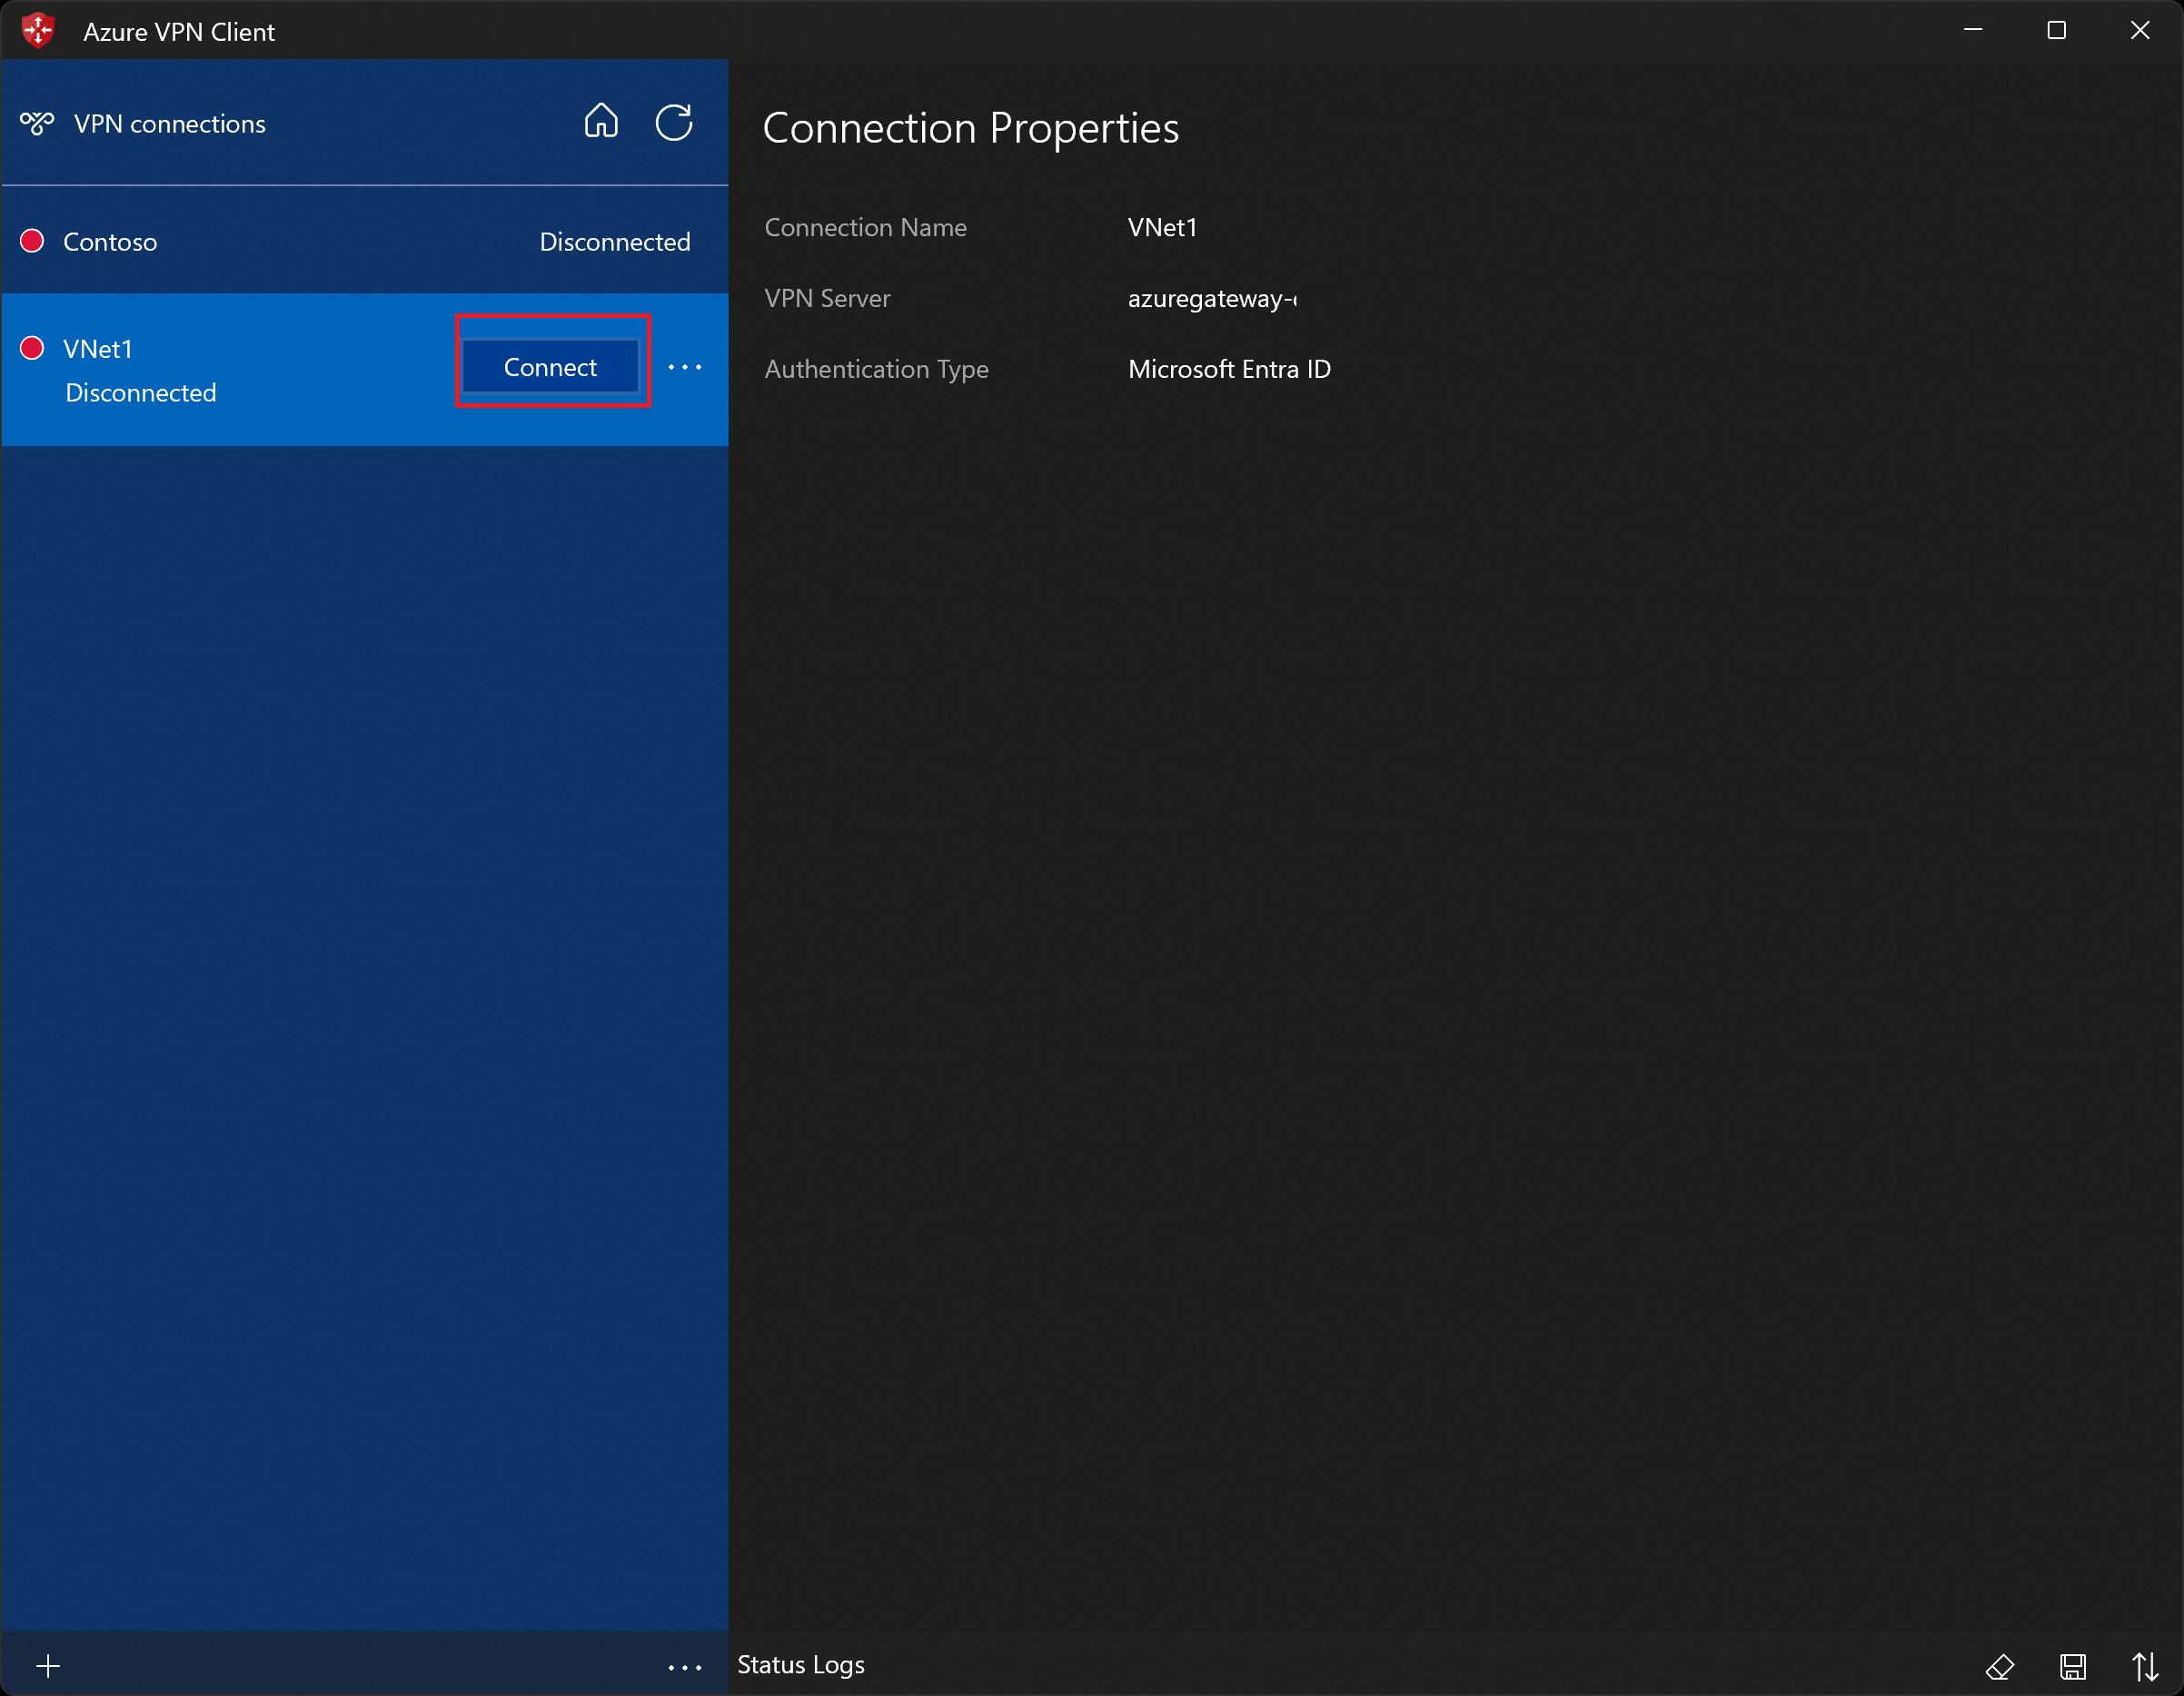
Authenticate using your credentials, if prompted.
Once connected, the icon turns green and shows Connected.


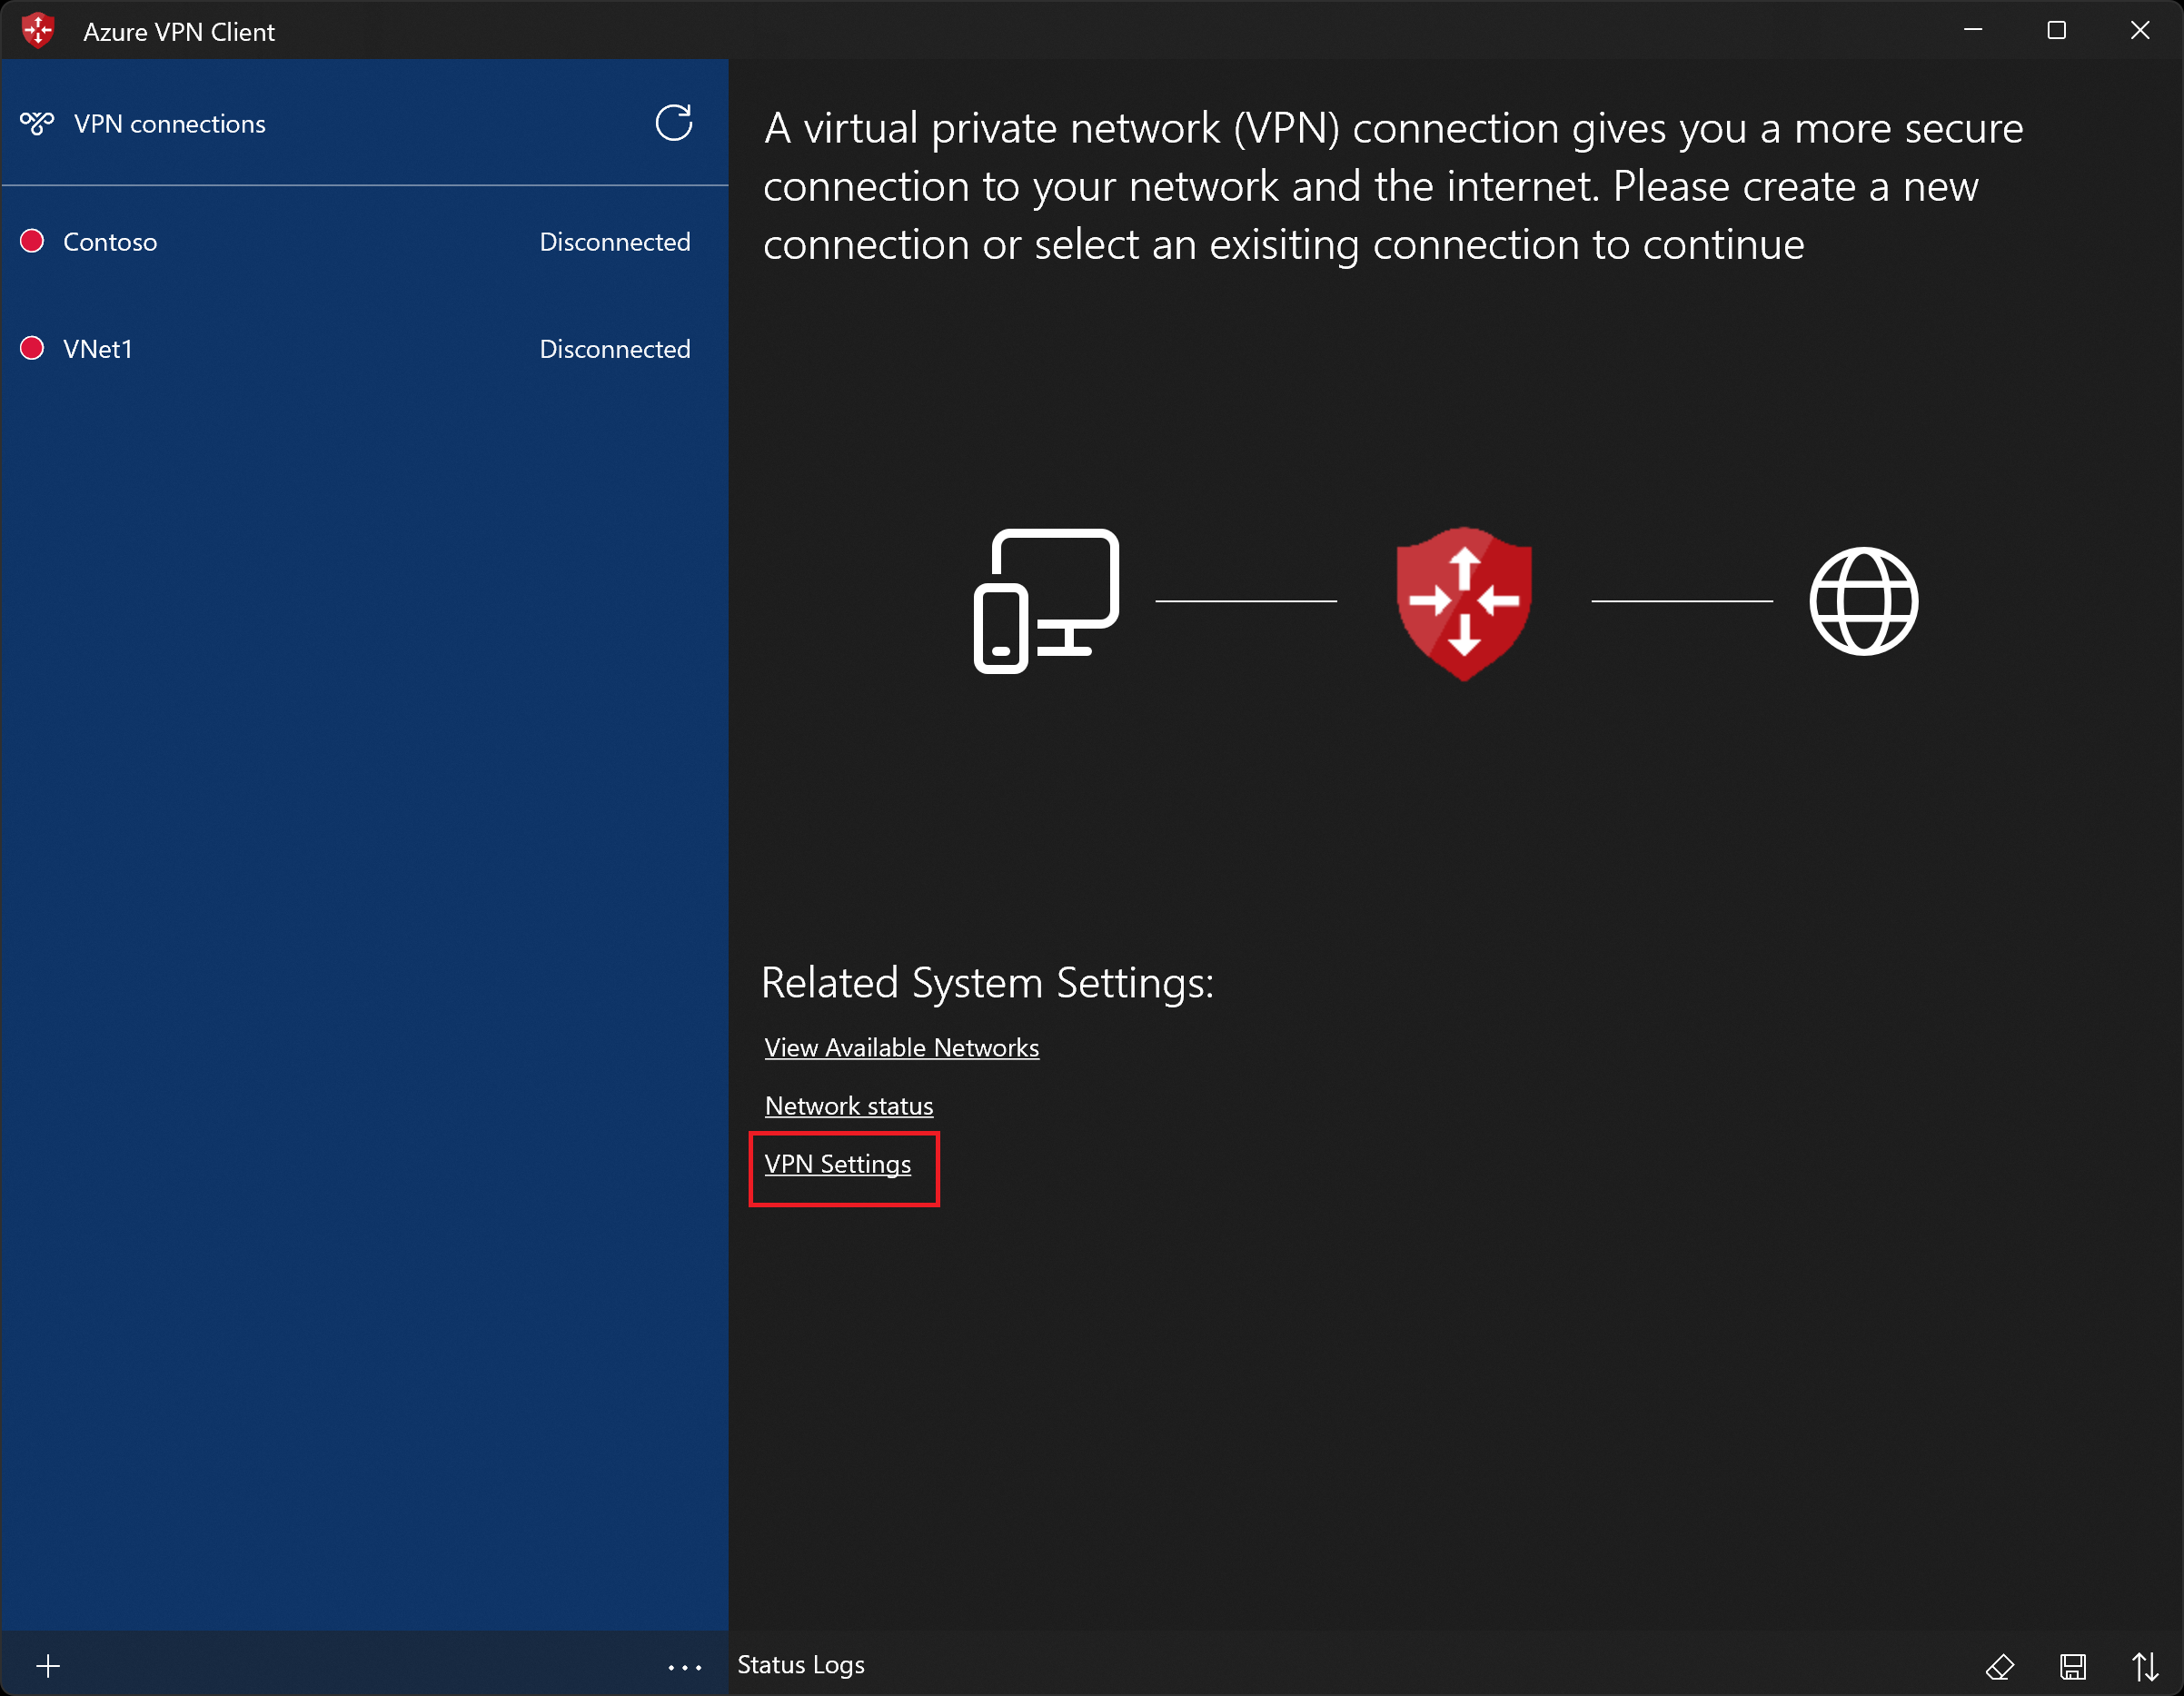
To connect automatically
These steps help you configure your connection to connect automatically with Always-on.
On the home page for your VPN client, select VPN Settings. If you see the switch apps dialogue box, select Yes.
If the connection you want to configure is connected, disconnect the connection, then highlight the profile and select the Connect automatically check box.
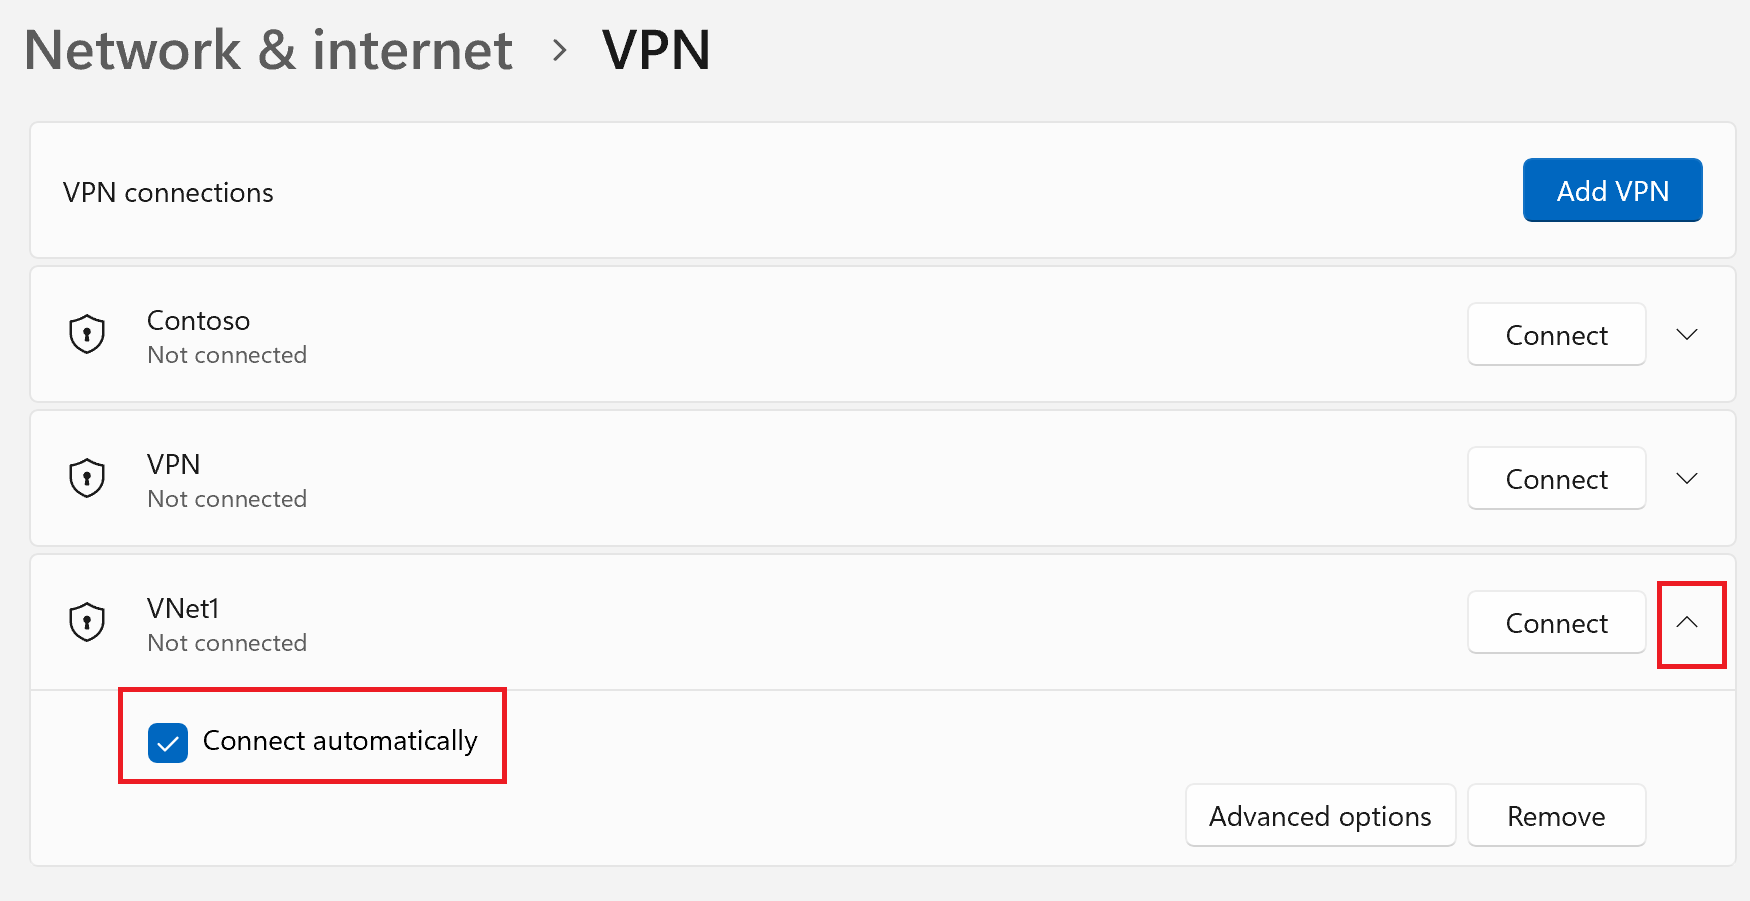
Select Connect to initiate the VPN connection.


Export and distribute a client profile
Once you have a working profile and need to distribute it to other users, you can export it using the following steps:
Highlight the VPN client profile that you want to export, select the ..., then select Export.
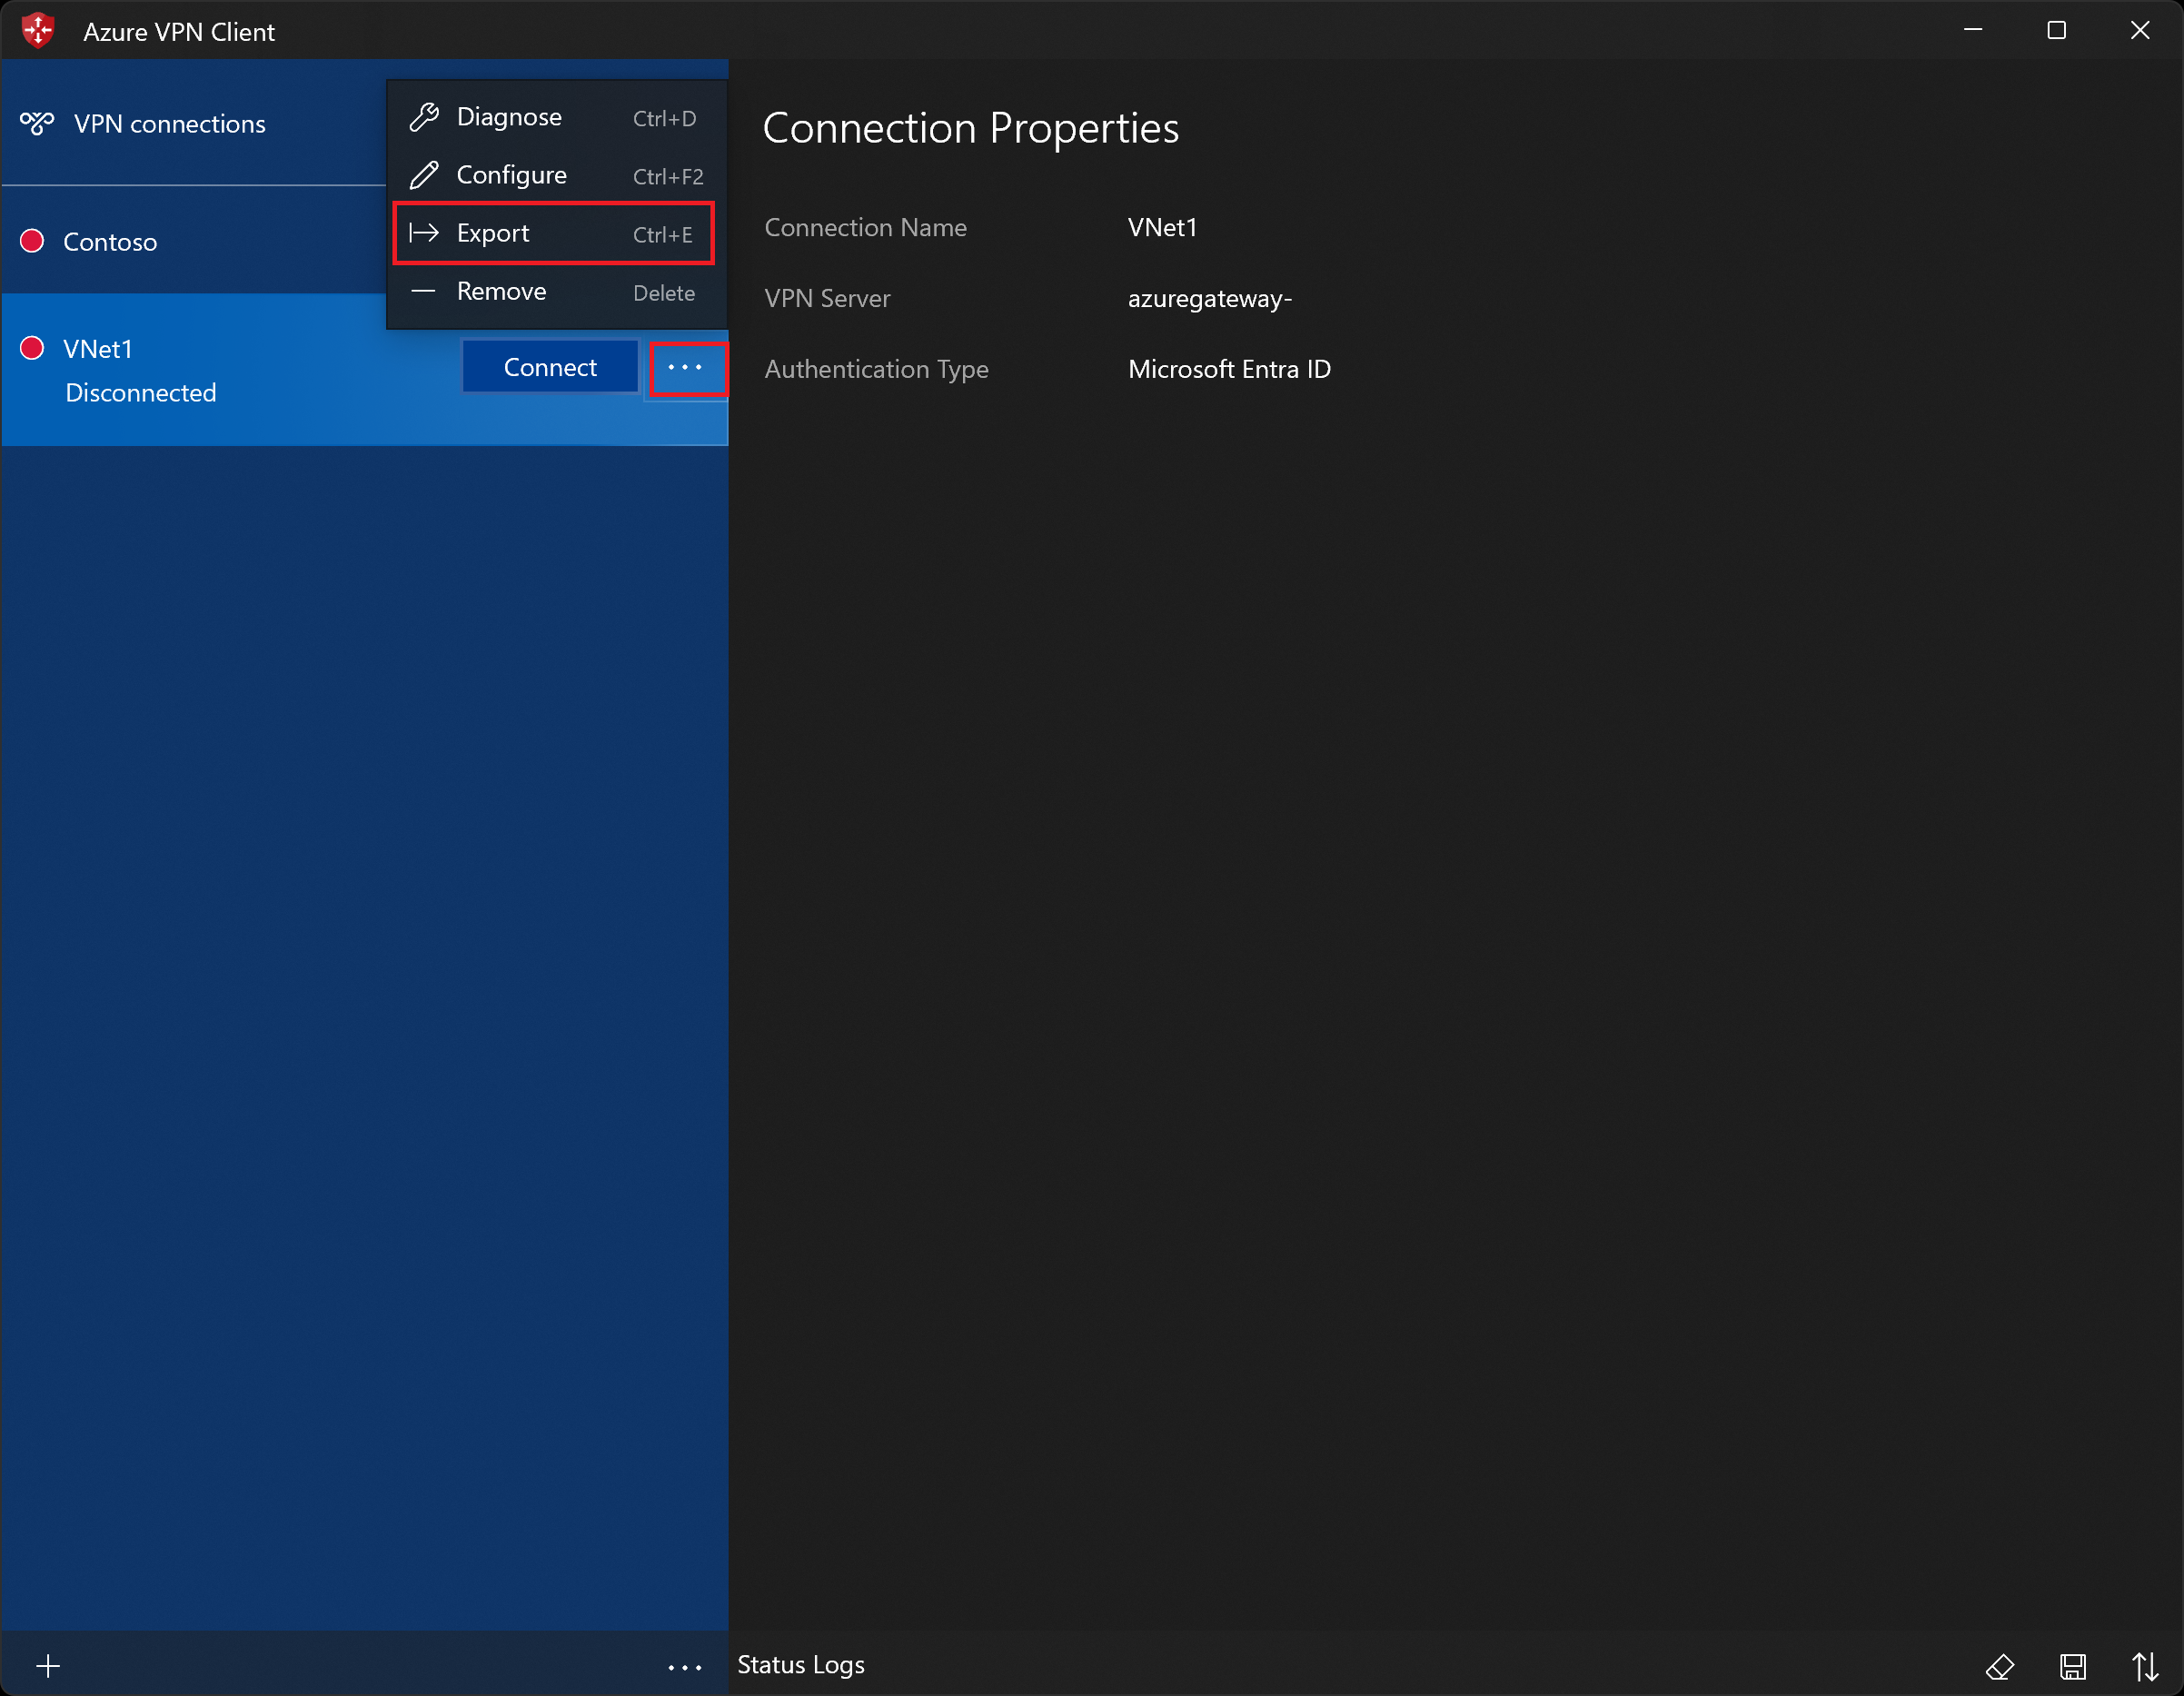
Select the location that you want to save this profile to, leave the file name as is, then select Save to save the xml file.

Delete a client profile
Select the ellipses next to the client profile that you want to delete. Then, select Remove.
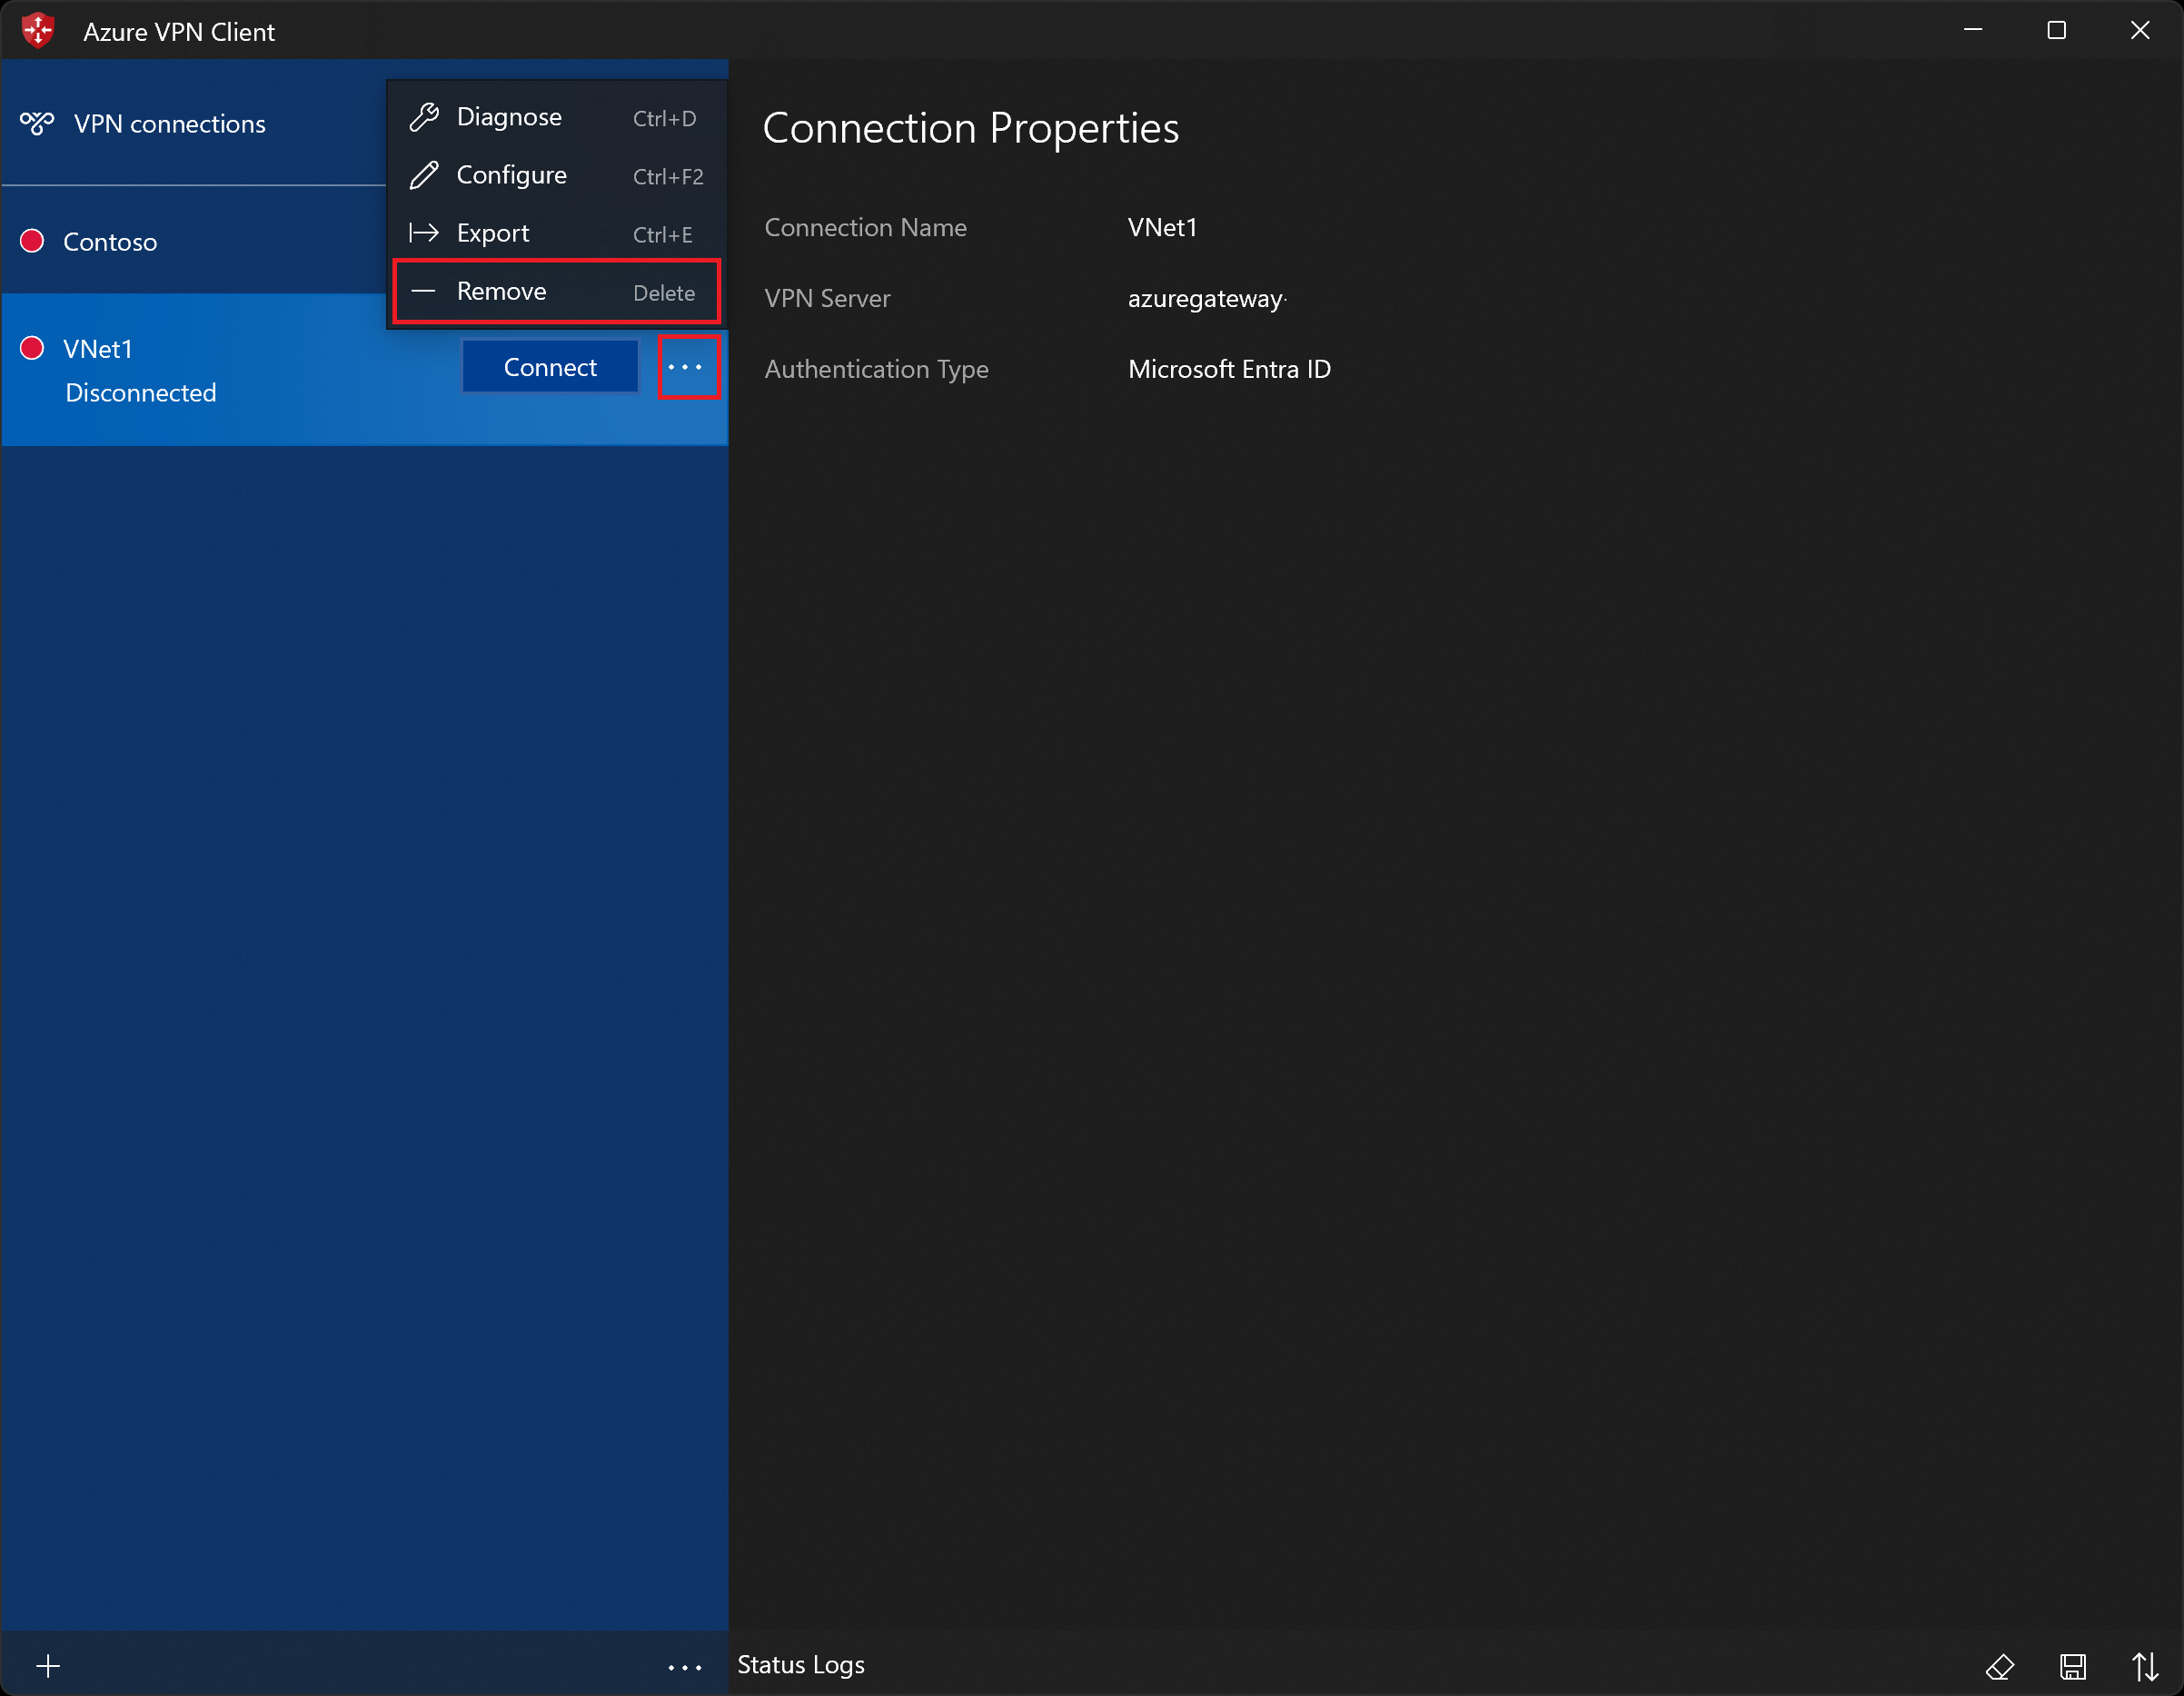
On the confirmation popup, select Remove to delete.

Diagnose connection issues
To diagnose connection issues, you can use the Diagnose tool. Select the ... next to the VPN connection that you want to diagnose to reveal the menu. Then select Diagnose. On the Connection Properties page, select Run Diagnostics.
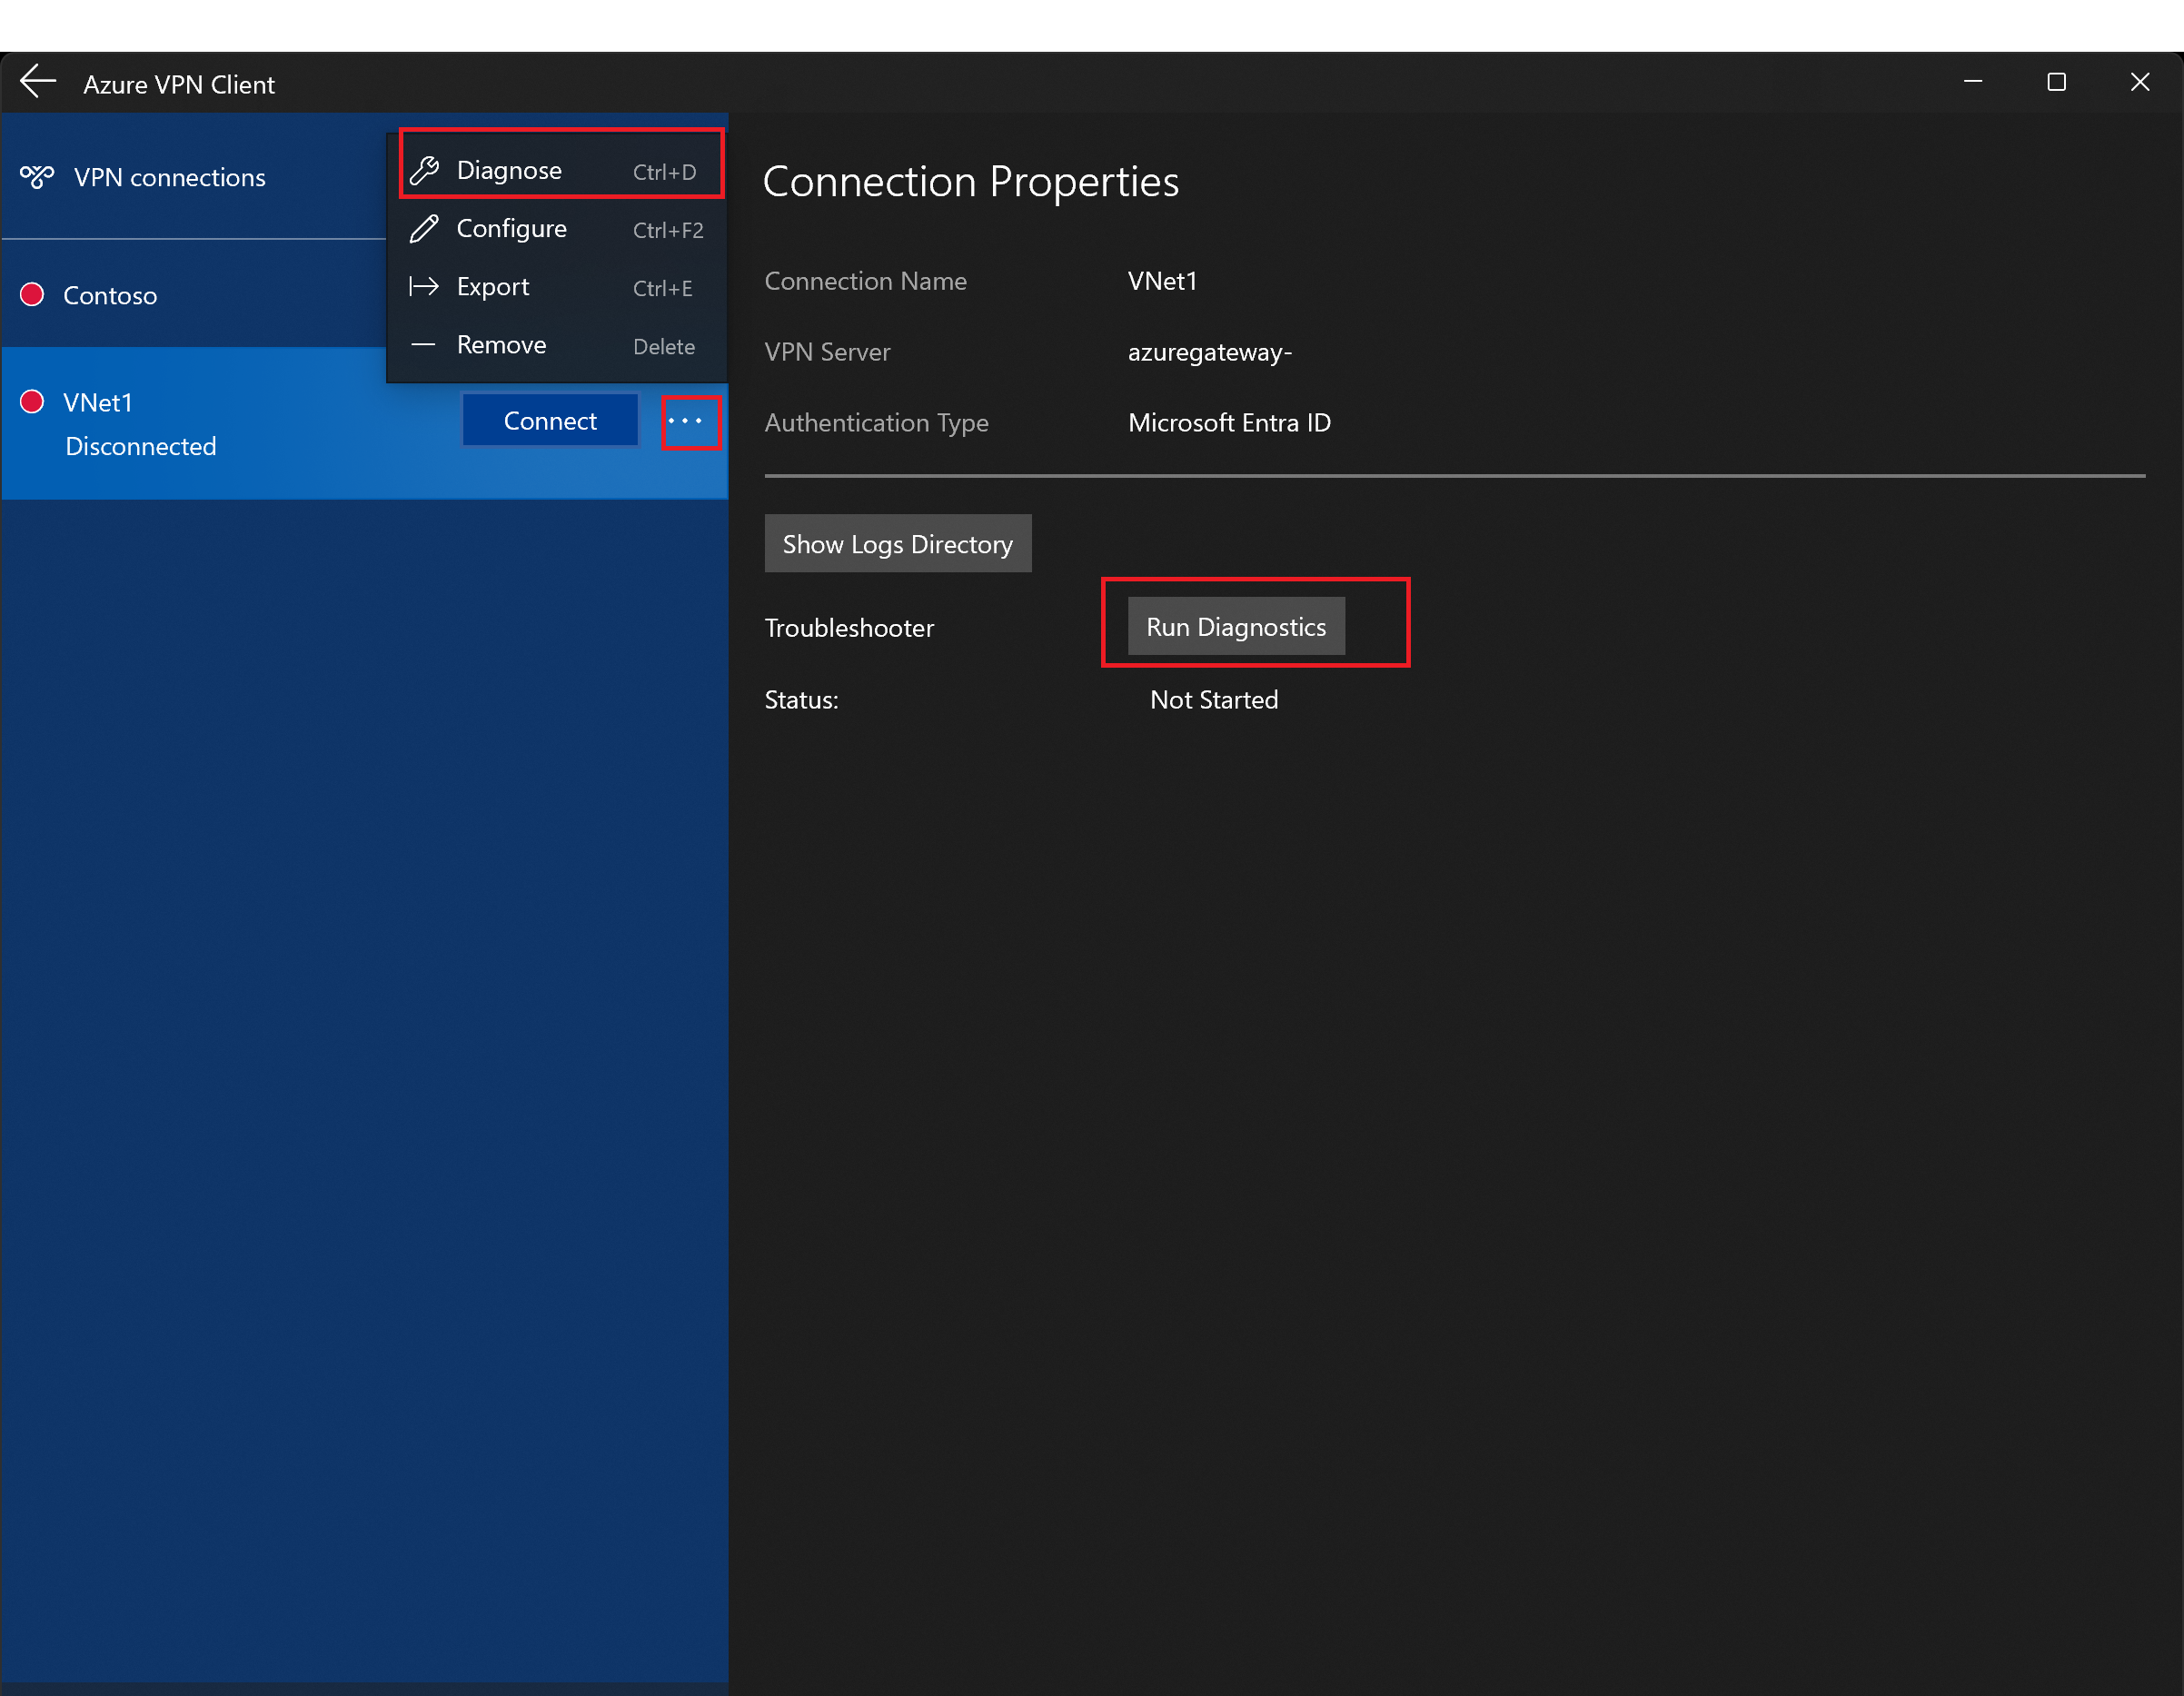
If asked, sign in with your credentials.
View the results.

Optional client configuration settings
You can configure the Azure VPN Client with optional configuration settings such as additional DNS servers, custom DNS, forced tunneling, custom routes, and other settings. For more information, see Azure VPN Client - optional settings.
Azure VPN Client version information
For Azure VPN Client version information, see Azure VPN Client versions.
Next steps
Pripomienky
Pripravujeme: V priebehu roka 2024 postupne zrušíme službu Problémy v službe GitHub ako mechanizmus pripomienok týkajúcich sa obsahu a nahradíme ju novým systémom pripomienok. Ďalšie informácie nájdete na stránke: https://aka.ms/ContentUserFeedback.
Odoslať a zobraziť pripomienky pre