Build your first app using C#
Start Microsoft Teams app development by building your first Teams app with a tab, a bot, or a message extension capability.
In this tutorial, you'll learn:
- How to set up a new project.
- How to build apps with tab capability using C# and Microsoft Visual Studio 2022.
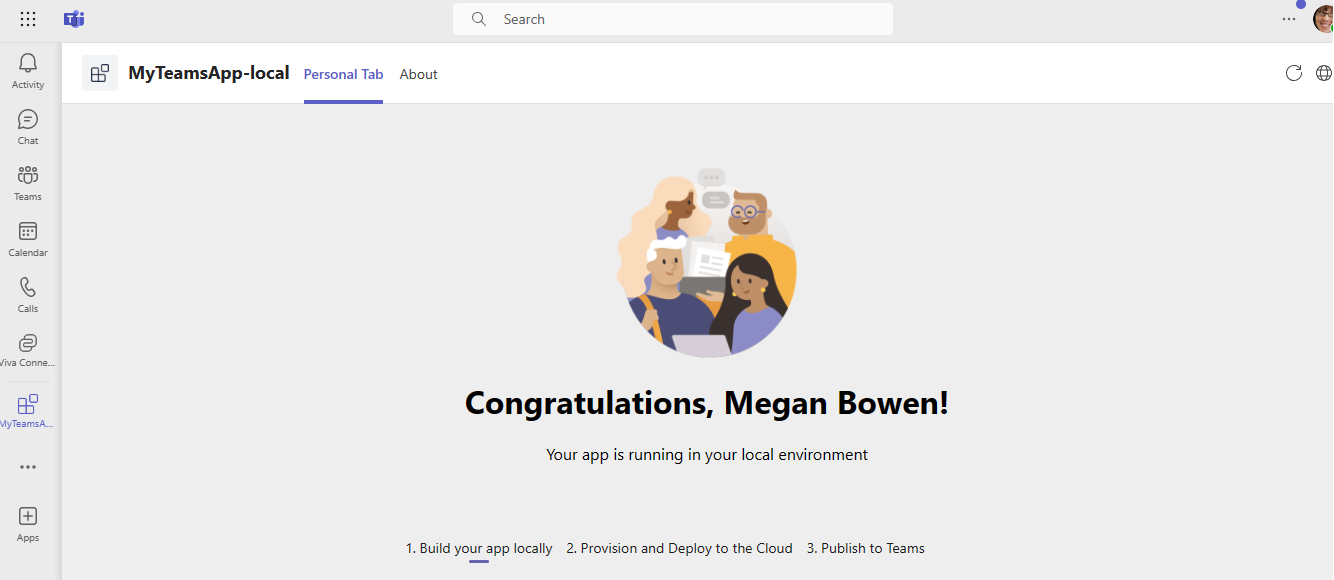
This step-by-step guide helps you to build a tab with Teams Toolkit. You'll see the following output after you've completed this guide:
Prerequisites
Here's a list of tools you need to install for building and deploying a Teams app.
| Install | For using... | |
|---|---|---|
| Microsoft Teams | Microsoft Teams to collaborate with everyone you work with through apps for chat, meetings, and call all in one place. | |
| Visual Studio 2022 |
You can install the enterprise version in Visual Studio 2022, and install the ASP.NET and web development workloads. Use the latest version. | |
| Teams Toolkit | A Visual Studio extension that creates a project scaffolding for your app. Use the latest version. |
Install Teams Toolkit
Teams Toolkit helps simplify the development process with tools to create a project scaffolding for your app. It creates the necessary directory structure for all selected capabilities with the required files in place, ready to build the project.
You can download the latest Visual Studio installer. Teams Toolkit is available as an extension in Visual Studio.
After you open the Visual Studio installer, in the pop-up workloads window.
Select ASP.NET and web development.
Under installation details > Optional, select Microsoft Teams development tools.
Select Install.
Select Launch. Visual Studio 2022 app window appears.

Go to Extensions > Manage Extensions.
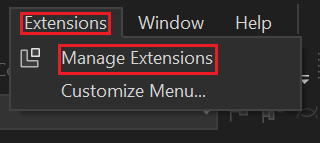
The Manage Extension window appears:
From the left pane, select Installed. The Teams Toolkit extension is avaialble.
Set up your Teams development tenant
A tenant is like a space or a container for your organization in Teams, where you chat, share files, and run meetings. This space is also where you upload and test your custom app. Let's verify if you're ready to develop with the tenant.
Check for custom app upload option
After creating the app, you must load your app in Teams without distributing it. This process is known as custom app upload. Sign in to your Microsoft 365 account to view this option.
Note
Custom app upload is necessary for previewing and testing apps in Teams local environment. If it isn't enabled, you won't be able to preview and test your app in Teams local environment.
Do you already have a tenant, and admin access? Let's check if you do!
Verify if you can upload a custom apps in Teams:
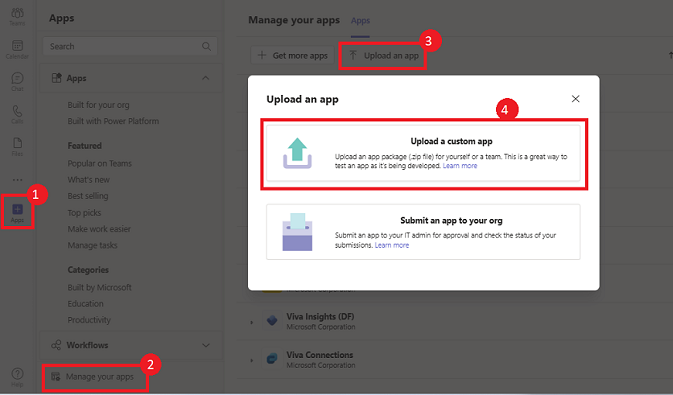
Open Microsoft Teams, select the Apps icon.
Select Manage your apps.
Select Upload an app.
Look for the Upload a custom app option. If you see the option, custom app upload is enabled.
Note
If you don't find the option to upload a custom app, contact your Teams administrator.
Create a free Teams developer tenant (optional)
If you don't have a Teams account, you can get it for free. Join the Microsoft 365 developer program!
Go to the Microsoft 365 developer program.
Select Join Now and follow the onscreen instructions.
In the welcome screen, select Setup E5 subscription.
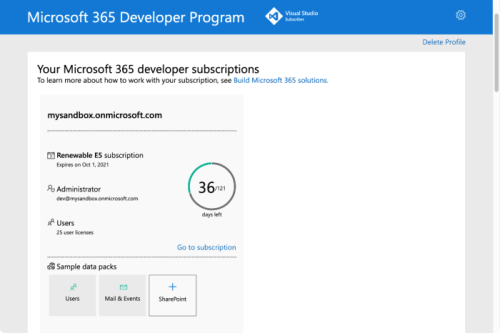
Set up your administrator account. After you finish, the following screen appears:
Sign in to Teams using the administrator account you set up. Verify that you've the Upload a custom app option in Teams.
Get a free Azure account
If you wish to host your app or access resources in Azure, you must have an Azure subscription. Create a free account before you begin.
Now you've got all the tools to set up your account. Next, let's set up your development environment and start building! Select the app you want to create first.
Create project workspace for your tab app using C#
Start Microsoft Teams app development by creating your first app. This app uses the tab capability.
If the prerequisites are in place, let's begin!
The following steps help you to create project workspace for your tab app in Visual Studio:
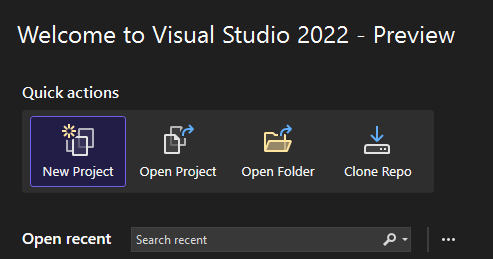
Open Visual Studio.
Select New Project.
In the search box, enter Teams.
Select Microsoft Teams App > Next.
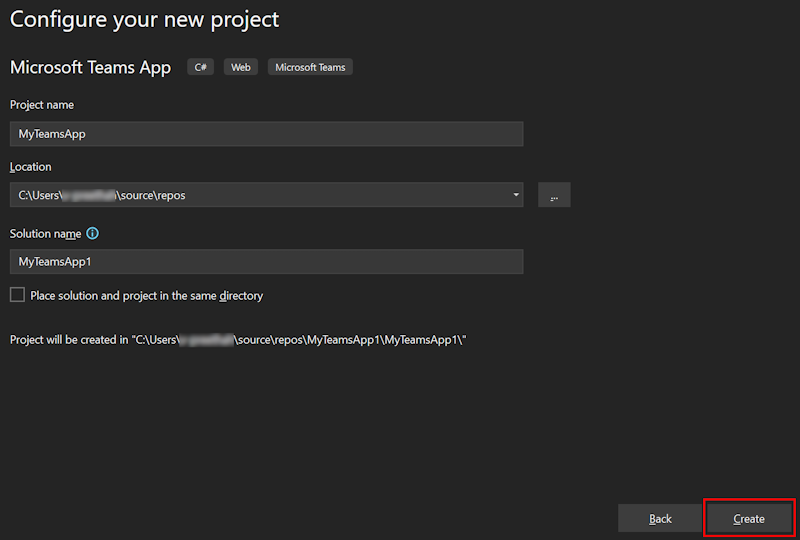
Enter the following details to configure your new project.
- Enter required project name in Project name.
- Select required location to save project files and folders.
- Select Create.
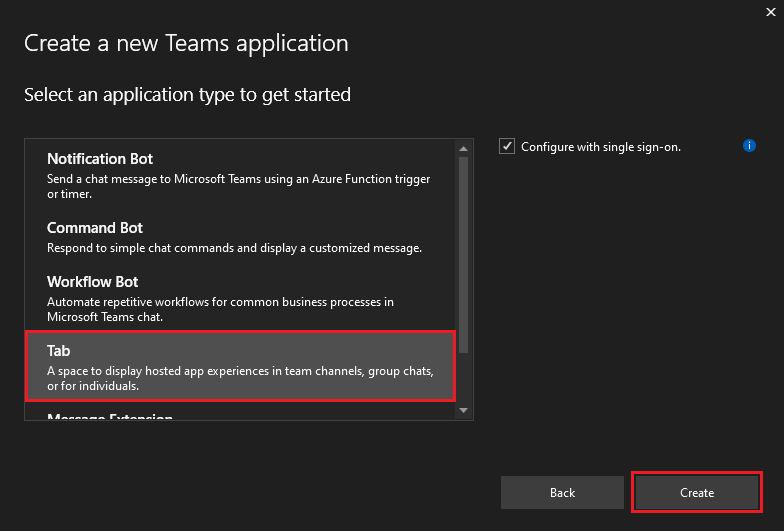
Select Tab > Create.
The Teams tab app is created in few seconds.
Take a tour of tab app source code
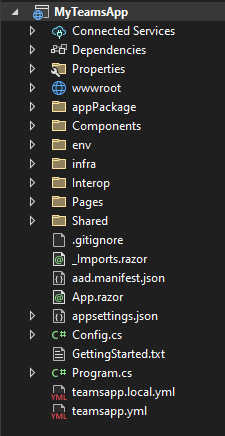
Teams Toolkit provides all components for building an app. After creating the project, you can view the project folders and files under Solution Explorer.
Build and run your first tab app using C#
After you set up your project workspace with Teams Toolkit, build your tab app.
Sign in to your Microsoft 365 account
Use your Microsoft 365 account to sign in to Teams. If you're using a Microsoft 365 developer program tenant, the admin account you set up while registering is your Microsoft 365 account.
In the Solution Explorer, under Solution MyTeamsApp, right-click on MyTeamsApp.
Select Teams Toolkit > Prepare Teams App Dependencies.
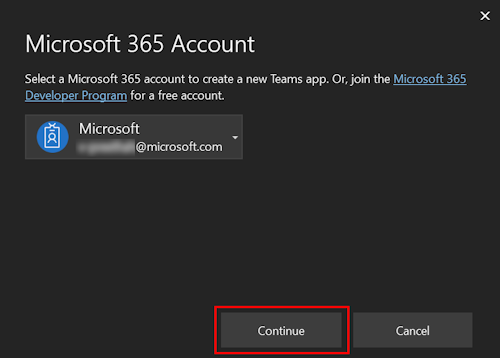
Select Microsoft 365 Account > Continue.
Build and run your app locally in Visual Studio
To build and run your app locally:
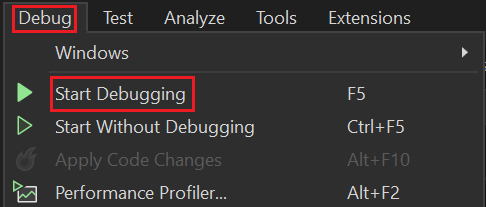
Select Debug > Start Debugging or select F5.
Visual Studio starts the debugging process and opens the Teams web client in a browser. If prompted, sign in with your Microsoft 365 account.
Select Add.
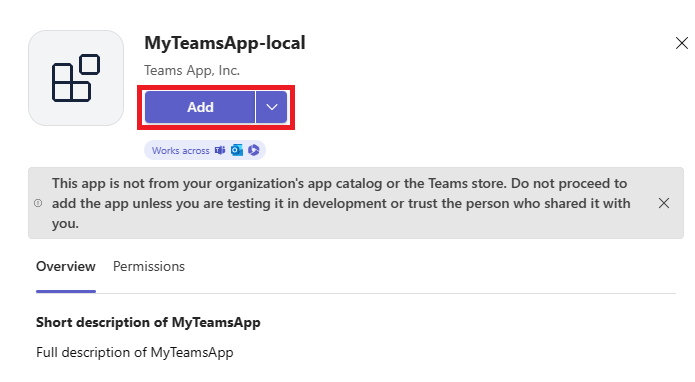
Select Open to open the app in personal scope.
Alternatively, you can either search and select the required scope or select a channel or chat from the list, and move through the dialog to select Go.
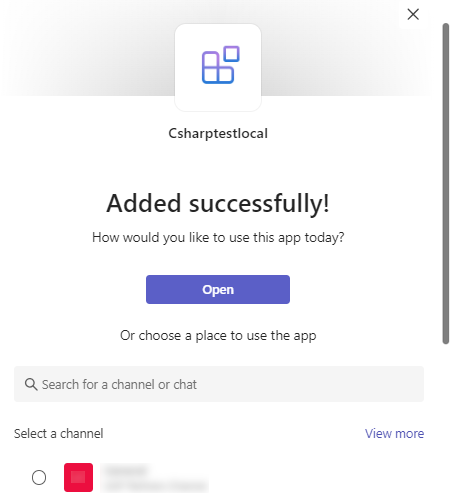
Congratulations, your first tab app is running on Teams!

Learn how to troubleshoot if your app doesn't run locally.
To successfully run your app in Teams, ensure that you've enabled custom app upload in your Teams account. You can learn more about custom app upload in the Prerequisites section.
Congratulations!
You have successfully created a tab app using C#. Teams Toolkit has added the necessary scaffolding to your app's directory structure. The tutorial is now complete.
Have an issue with this section? If so, please give us some feedback so we can improve this section.


