Get started by running the Enable Database for Stretch Wizard
Applies to:
SQL Server 2016 (13.x) and later - Windows only
Important
Stretch Database is deprecated in SQL Server 2022 (16.x) and Azure SQL Database. This feature will be removed in a future version of the Database Engine. Avoid using this feature in new development work, and plan to modify applications that currently use this feature.
To configure a database for Stretch Database, run the Enable Database for Stretch Wizard. This article describes the info that you have to enter and the choices that you have to make in the wizard.
To learn more about Stretch Database, see Stretch Database.
Note
Later, if you disable Stretch Database, remember that disabling Stretch Database for a table or for a database does not delete the remote object. If you want to delete the remote table or the remote database, you have to drop it by using the Azure management portal. The remote objects continue to incur Azure costs until you delete them manually.
Launch the wizard
In SQL Server Management Studio, in Object Explorer, select the database on which you want to enable Stretch.
Right-click and select Tasks > Stretch > Enable to launch the wizard.
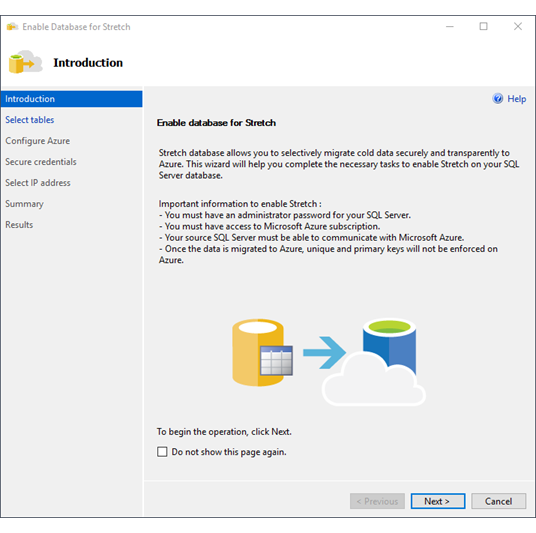
Introduction
Review the purpose of the wizard and the prerequisites.
The important prerequisites include the following.
- You have to be an administrator to change database settings.
- You have to have a Microsoft Azure subscription.
- Your SQL Server has to be able to communicate with the remote Azure server.
Select tables
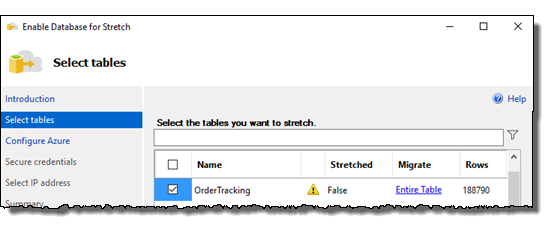
Select the tables that you want to enable for Stretch.
Tables with lots of rows appear at the top of the sorted list. Before the Wizard displays the list of tables, it analyzes them for data types that aren't currently supported by Stretch Database.
| Column | Description |
|---|---|
| (no title) | Check the check box in this column to enable the selected table for Stretch. |
| Name | Specifies the name of the table in the database. |
| (no title) | A symbol in this column may represent a warning that doesn't prevent you from enabling the selected table for Stretch. It may also represent a blocking issue that prevents you from enabling the selected table for Stretch - for example, because the table uses an unsupported data type. Hover over the symbol to display more info in a tooltip. For more info, see Limitations for Stretch Database. |
| Stretched | Indicates whether the table is already enabled for Stretch. |
| Migrate | You can migrate an entire table (Entire Table) or you can specify a filter on an existing column in the table. If you want to use a different filter function to select rows to migrate, run the ALTER TABLE statement to specify the filter function after you exit the wizard. For more info about the filter function, see Select rows to migrate by using a filter function. For more info about how to apply the function, see Enable Stretch Database for a table or ALTER TABLE (Transact-SQL). |
| Rows | Specifies the number of rows in the table. |
| Size (KB) | Specifies the size of the table in KB. |
Optionally provide a row filter
If you want to provide a filter function to select rows to migrate, do the following things on the Select tables page.
In the Select the tables you want to stretch list, select Entire Table in the row for the table. The Select rows to stretch dialog box opens.
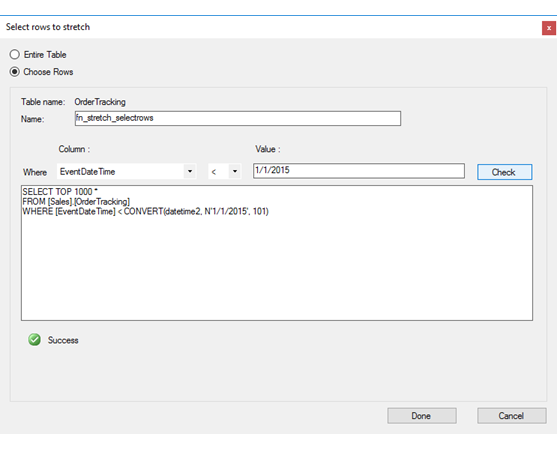
In the Select rows to stretch dialog box, select Choose Rows.
In the Name field, provide a name for the filter function.
For the Where clause, pick a column from the table, pick an operator, and provide a value.
Select Check to test the function. If the function returns results from the table - that is, if there are rows to migrate that satisfy the condition - the test reports Success.
Note
The textbox that displays the filter query is read-only. You can't edit the query in the textbox.
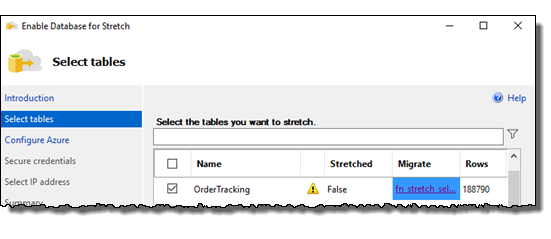
Select Done to return to the Select tables page.
The filter function is created in SQL Server only when you finish the wizard. Until then, you can return to the Select tables page to change or rename the filter function.
If you want to use a different type of filter function to select rows to migrate, do one of the following things.
Exit the wizard and run the ALTER TABLE statement to enable Stretch for the table and to specify a filter function. For more info, see Enable Stretch Database for a table.
Run the ALTER TABLE statement to specify a filter function after you exit the wizard. For the required steps, see Add a filter function after running the Wizard.
Configure Azure
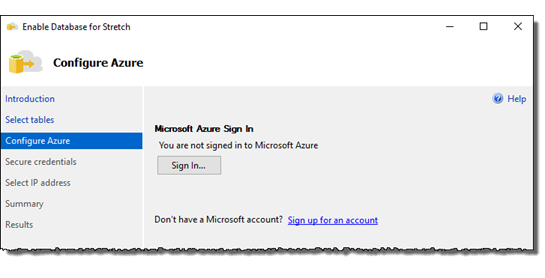
Sign in to Microsoft Azure with a Microsoft account.
Select the existing Azure subscription to use for Stretch Database.
Note
To enable Stretch on a database you must have administrator rights to the subscription you are using. Stretch Database wizard will only show subscriptions where the user has administrator rights.
Select the Azure region to use for Stretch Database.
If you create a new server, the server is created in this region.
If you have existing servers in the selected region, the wizard lists them when you choose Existing server.
To minimize latency, pick the Azure region in which your SQL Server is located. For more info about regions, see Azure Regions.
Specify whether you want to use an existing server or create a new Azure server.
If the Active Directory on your SQL Server is federated with Microsoft Entra ID (formerly Azure Active Directory), you can optionally use a federated service account for SQL Server to communicate with the remote Azure server. For more info about the requirements for this option, see ALTER DATABASE SET Options (Transact-SQL).
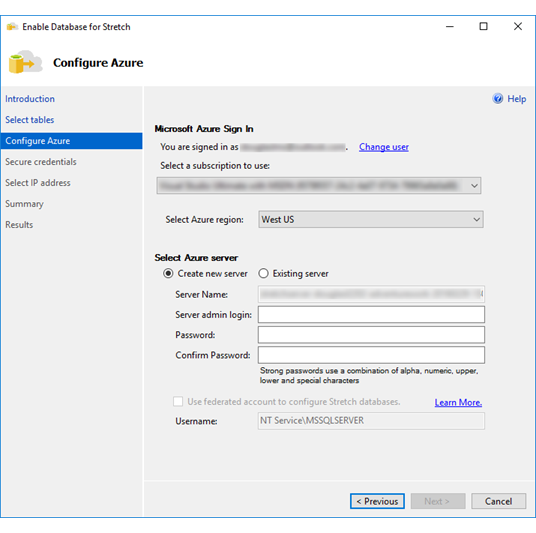
Create new server
Create a login and password for the server administrator.
Optionally, use a federated service account for SQL Server to communicate with the remote Azure server.
Existing server
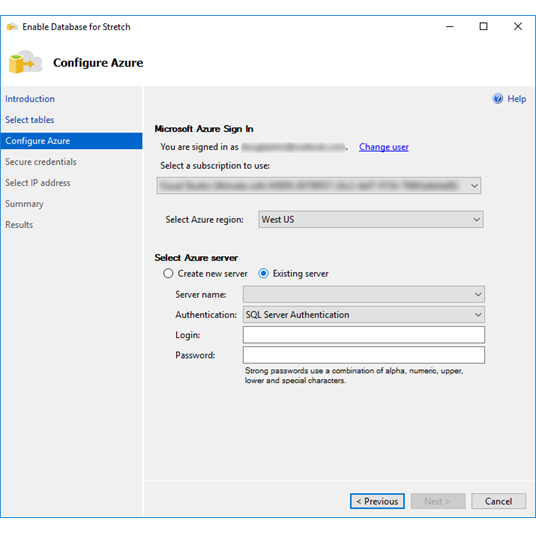
Select the existing Azure server.
Select the authentication method.
If you select SQL Server Authentication, provide the administrator login and password.
Select Active Directory Integrated Authentication to use a federated service account for SQL Server to communicate with the remote Azure server. If the selected server isn't federated with Microsoft Entra ID, this option doesn't appear.
Secure credentials
You have to have a database master key to secure the credentials that Stretch Database uses to connect to the remote database.
If a database master key already exists, enter the password for it.
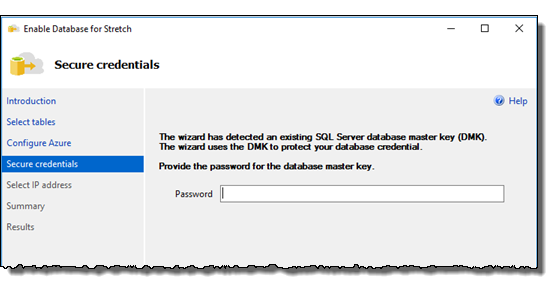
If the database doesn't have an existing master key, enter a strong password to create a database master key.
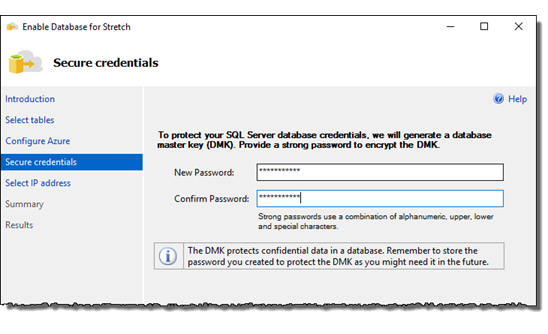
For more info about the database master key, see CREATE MASTER KEY (Transact-SQL) and Create a Database Master Key. For more info about the credential that the wizard creates, see CREATE DATABASE SCOPED CREDENTIAL (Transact-SQL).
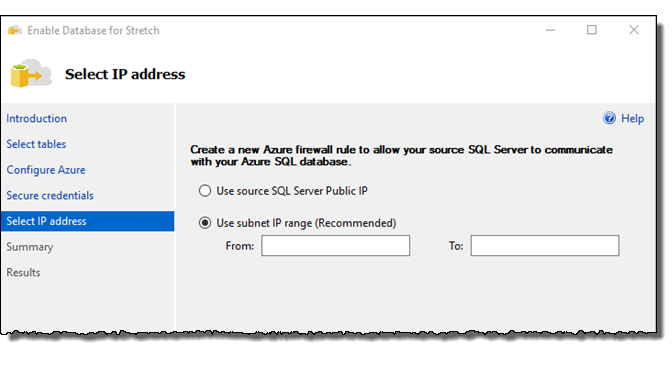
Select IP address
Use the subnet IP address range (recommended), or the public IP address of your SQL Server, to create a firewall rule on Azure that lets SQL Server communicate with the remote Azure server.
The IP address or addresses that you provide on this page tell the Azure server to allow incoming data, queries, and management operations initiated by SQL Server to pass through the Azure firewall. The wizard doesn't change anything in the firewall settings on the SQL Server.
Summary
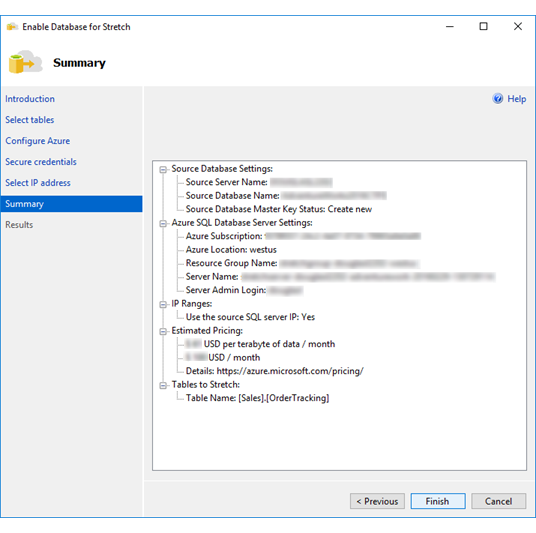
Review the values that you entered and the options that you selected in the wizard and the estimated costs on Azure. Then select Finish to enable Stretch.
Results
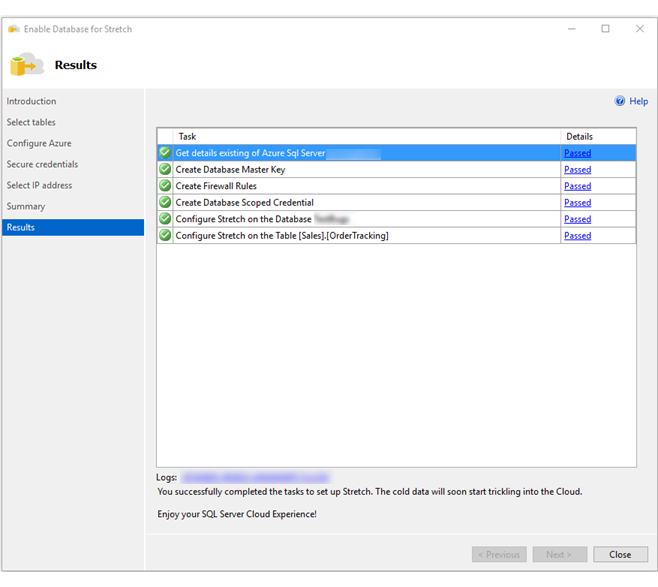
Review the results.
To monitor the status of data migration, see Monitor and troubleshoot data migration (Stretch Database).
Troubleshoot the wizard
The Stretch Database wizard failed. If Stretch Database isn't yet enabled at the server level, and you run the wizard without the system administrator permissions to enable it, the wizard fails. Ask the system administrator to enable Stretch Database on the local server instance, and then run the wizard again. For more info, see Prerequisite: Permission to enable Stretch Database on the server.