opomba,
Dostop do te strani zahteva pooblastilo. Poskusite se vpisati alispremeniti imenike.
Dostop do te strani zahteva pooblastilo. Poskusite lahko spremeniti imenike.
Azure Event Grid is an event-routing service for the cloud. Azure Functions is one of the supported event handlers.
In this quickstart, you use the Azure portal to create a custom topic, subscribe to the custom topic, and trigger the event to view the result. You send the events to an Azure function.
If you don't have an Azure account, create a free account before you begin.
Prerequisites
- Visual Studio Code installed on one of the supported platforms
- Azure Functions extension
Create a function with an Event Grid trigger by using Visual Studio Code
In this section, you use Visual Studio Code to create a function with an Event Grid trigger.
Create a function
Open Visual Studio Code.
On the left bar, select Azure.
On the left pane, in the WORKSPACE section, select Azure Functions on the command bar. Then select Create Function.

Select a folder where you want to save the function code.
For the Create new project command, for Language, select C#. Select Enter.

For .NET runtime, select .NET 8.0 Isolated LTS, and then select Enter.
For Template for the function, select Azure Event Grid trigger. Select Enter.
For Function name, enter a name for your function. Select Enter.
For Namespace, enter a name for the function's namespace. Select Enter.
Open the project in the current window or a new window, or add it to a workspace.
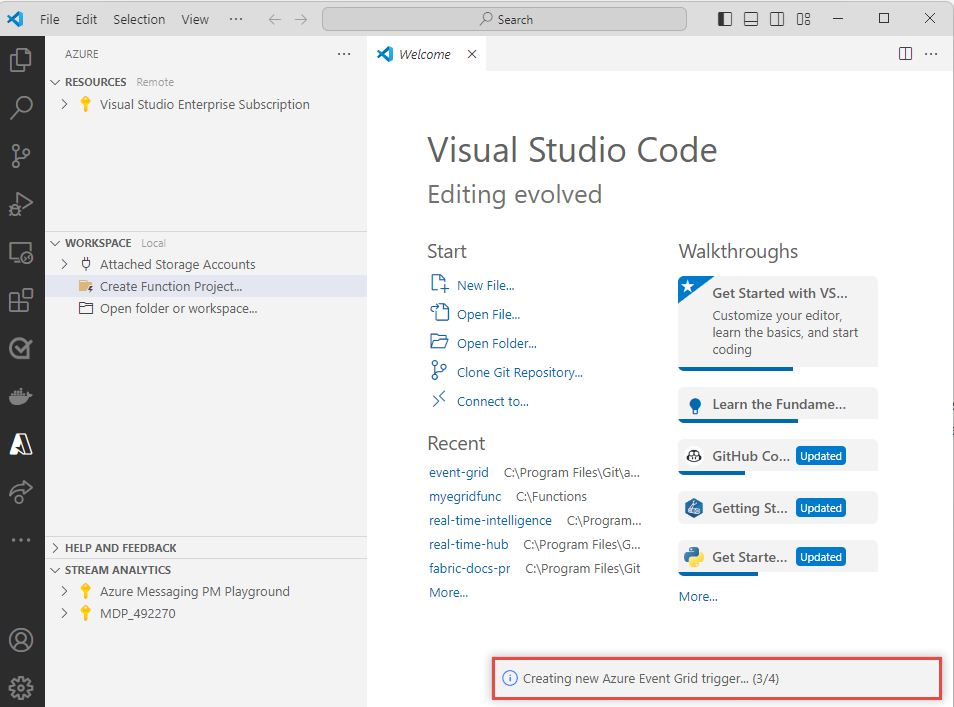
Wait for the function to be created. The status of the function creation appears in the lower-right corner.
View the code in the YourFunctionName.cs file, specifically the
Runmethod. It prints the information by using a logger.[Function(nameof(MyEventGridTriggerFunc))] public void Run([EventGridTrigger] CloudEvent cloudEvent) { _logger.LogInformation("Event type: {type}, Event subject: {subject}", cloudEvent.Type, cloudEvent.Subject); }


Deploy the function to Azure
Select the Azure button on the left bar if the Azure pane isn't already open.
Hover over your project and select the Deploy to Azure button.

In the dropdown list of the command palette, select + Create new function app, and then select Enter.
For Name, enter a globally unique name for the new function app. Select Enter.
For Runtime stack, select .NET 8 Isolated.
For Location for your Azure resources, select a region that's close to you.
The status of function app creation appears on the AZURE tab of the bottom pane. After the function app is created, you see the status of deploying the function that you created locally to the function app.
After the deployment succeeds, expand the Create Function App succeeded message. Select Click to view resource. Confirm that your function is selected in the RESOURCES section on the left pane.
Right-click your function, and then select Open in Portal.

Sign in to Azure if necessary, and confirm that the Function App page appears for your function.
On the bottom pane, select your function.

Switch to the Logs tab. Keep this tab open so that you can see logged messages when you send an event to an Event Grid topic later in this article.


Create a custom topic
An Event Grid topic provides a user-defined endpoint that you post your events to.
On a new tab of the web browser window, sign in to the Azure portal.
On the search bar at the topic, search for Event Grid Topics, and then select Event Grid Topics.

On the Topics page, select + Create on the command bar.

On the Create Topic pane, follow these steps:
For Subscription, select your Azure subscription.
For Resource group, select the same resource group from the previous steps.
For Name, provide a unique name for the custom topic. The topic name must be unique because a Domain Name System (DNS) entry represents it.
Don't use the name shown in the example image. Instead, create your own name. It must be 3-50 characters and contain only the values a-z, A-Z, 0-9, and a hyphen (
-).For Region, select a location for the Event Grid topic.
Select Review + create.

On the Review + create tab, review settings and then select Create.
After the custom topic is created, select Go to resource to open the Event Grid Topic page for that topic.


Subscribe to a custom topic
You subscribe to an Event Grid topic to tell Event Grid which events you want to track, and where to send the events.
On the Event Grid Topic page for your custom topic, select + Event Subscription on the toolbar.

On the Create Event Subscription pane, follow these steps:
For Name, enter a name for the event subscription.
For Event Schema, select Cloud Event Schema v1.0.
For Endpoint Type, select Azure Function.
Select Configure an endpoint.

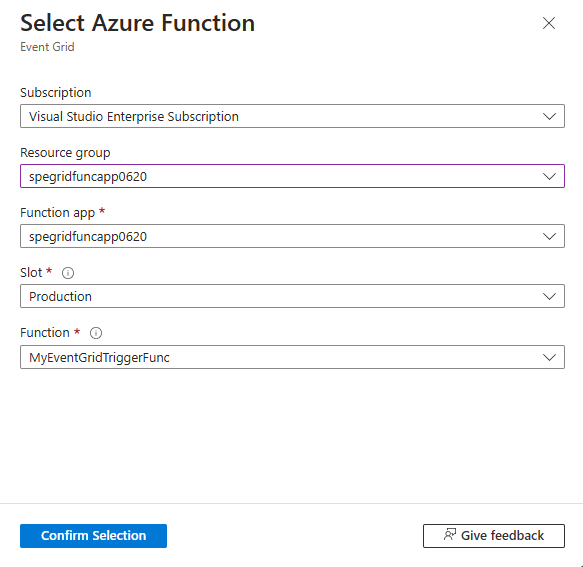
On the Select Azure Function pane, follow these steps:
For Subscription, select the Azure subscription that has the function.
For Resource group, select the resource group that has the function.
For Function app, select your function app.
For Function, select the function in the function app.
Select Confirm Selection.
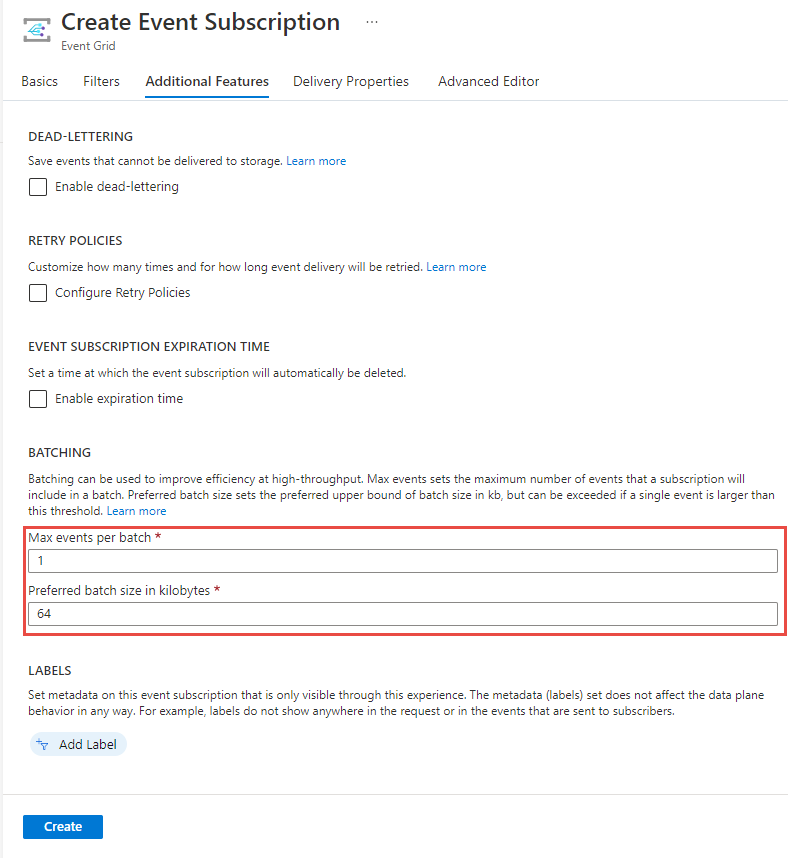
This step is optional, but we recommend it for production scenarios. On the Create Event Subscription pane, go to the Additional Features tab and set values for Max events per batch and Preferred batch size in kilobytes.
Batching can give you high throughput. For Max events per batch, set the maximum number of events that a subscription includes in a batch. Preferred batch size in kilobytes sets the preferred upper bound of batch size, but it can be exceeded if a single event is larger than this threshold.
On the Create Event Subscription pane, select Create.

Send an event to your topic
Now, trigger an event to see how Event Grid distributes the message to your endpoint. Use either the Azure CLI or Azure PowerShell to send a test event to your custom topic. Typically, an application or an Azure service would send the event data.
The first example uses the Azure CLI. It gets the URL and key for the custom topic and sample event data. Use your custom topic name for topicname. It creates sample event data.
The data element of the JSON is the payload of your event. Any well-formed JSON can go in this field. You can also use the subject field for advanced routing and filtering.
The cURL tool sends HTTP requests. In this article, you use cURL to send the event to the custom topic.
Azure CLI
In the Azure portal, select Cloud Shell. If you're in Azure PowerShell mode, select Switch to Bash.

Set the
topicnameandresourcegroupnamevariables that are used in the commands.Replace
TOPICNAMEwith the name of your Event Grid topic.topicname="TOPICNAME"Replace
RESOURCEGROUPNAMEwith the name of the Azure resource group that contains the Event Grid topic.resourcegroupname="RESOURCEGROUPNAME"Use the following command to get the endpoint for the topic. After you copy and paste the command, update the topic name and resource group name before you run it.
endpoint=$(az eventgrid topic show --name $topicname -g $resourcegroupname --query "endpoint" --output tsv)Use the following command to get the key for the custom topic. After you copy and paste the command, update the topic name and resource group name before you run it.
key=$(az eventgrid topic key list --name $topicname -g $resourcegroupname --query "key1" --output tsv)Copy the following statement with the event definition, and then select Enter.
event='[ {"id": "'"$RANDOM"'", "eventType": "recordInserted", "subject": "myapp/vehicles/motorcycles", "eventTime": "'`date +%Y-%m-%dT%H:%M:%S%z`'", "data":{ "make": "Ducati", "model": "Monster"},"dataVersion": "1.0"} ]'Run the following cURL command to post the event:
curl -X POST -H "aeg-sas-key: $key" -d "$event" $endpointConfirm that the message from the function appears on the Logs tab for your function in the Azure portal.


Azure PowerShell
The second example uses Azure PowerShell to perform similar steps.
In the Azure portal, select Cloud Shell or go to the Azure Cloud Shell page. In the upper-left corner of the Cloud Shell window, select Switch to PowerShell.
Set the following variables. After you copy and paste each command, update the topic name and resource group name before you run it.
$resourceGroupName = "RESOURCEGROUPNAME"$topicName = "TOPICNAME"Run the following commands to get the endpoint and the keys for the topic:
$endpoint = (Get-AzEventGridTopic -ResourceGroupName $resourceGroupName -Name $topicName).Endpoint
$keys = Get-AzEventGridTopicKey -ResourceGroupName $resourceGroupName -Name $topicName
Prepare the event. Copy and run these statements in the Cloud Shell window:
$eventID = Get-Random 99999

#Date format should be SortableDateTimePattern (ISO 8601)
$eventDate = Get-Date -Format s

#Construct the body by using a hash table
$htbody = @{
    id= $eventID
    eventType="recordInserted"
    subject="myapp/vehicles/motorcycles"
    eventTime= $eventDate
    data= @{
        make="Ducati"
        model="Monster"
    }
    dataVersion="1.0"
}

#Use ConvertTo-Json to convert the event body from a hash table to a JSON object
#Append square brackets to the converted JSON payload because they're expected in the event's JSON payload syntax
$body = "["+(ConvertTo-Json $htbody)+"]"
Use the
Invoke-WebRequestcmdlet to send the event:Invoke-WebRequest -Uri $endpoint -Method POST -Body $body -Headers @{"aeg-sas-key" = $keys.Key1}Confirm that the message from the function appears on the Logs tab for your function in the Azure portal.
Verify that the function received the event
You triggered the event, and Event Grid sent the message to the endpoint that you configured when subscribing. Now you can check whether the function received it.
Open the Invocation tab for your function.

To display the details, select the invocation.

You can also use the Logs tab.


Clean up resources
If you plan to continue working with this event, don't clean up the resources that you created in this article. Otherwise, delete the resources that you created in this article.
In the Azure portal search box, enter Resource groups and then select Resource groups.

Select the resource group to open the pane for its details.
On the toolbar, select Delete resource group.
Confirm the deletion by entering the name of the resource group, and then select Delete.
The Cloud Shell window created and used the other resource group that appears on the Resource groups page. Delete this resource group if you don't plan to use the Cloud Shell window later.
Related content
Now that you know how to create topics and event subscriptions, learn more about what Event Grid can help you do:
- About Event Grid
- Route Azure Blob Storage events to a custom web endpoint
- Monitor virtual machine changes with Azure Event Grid and Logic Apps
- Stream big data into a data warehouse
To learn about publishing events to, and consuming events from, Event Grid by using various programming languages, see the following samples: