opomba,
Dostop do te strani zahteva pooblastilo. Poskusite se vpisati alispremeniti imenike.
Dostop do te strani zahteva pooblastilo. Poskusite lahko spremeniti imenike.
This article explains how Git integration and deployment pipelines work for notebooks in Microsoft Fabric. Learn how to set up a connection to your repository, manage your notebooks, and deploy them across different environments.
Notebook Git integration
Fabric notebooks offer Git integration for source control with Azure DevOps. With Git integration, you can back up and version your notebook, revert to previous stages as needed, collaborate or work alone using Git branches, and manage your notebook content lifecycle entirely within Fabric.
Note
Start from October 2024, Notebook git integration supports persisting the mapping relationship of the attached Environment when syncing to new workspace, which means when you commit the notebook and attached environment together to git repo, and sync it to another workspace, the newly generated notebook and environment are bound together. This upgrade has impact to existing Notebooks and dependent Environments that are versioned in git, the Physical id of attached environment in notebook metadata content is replaced with a Logical id, and the change gets reflected on the diff view.
Set up a connection
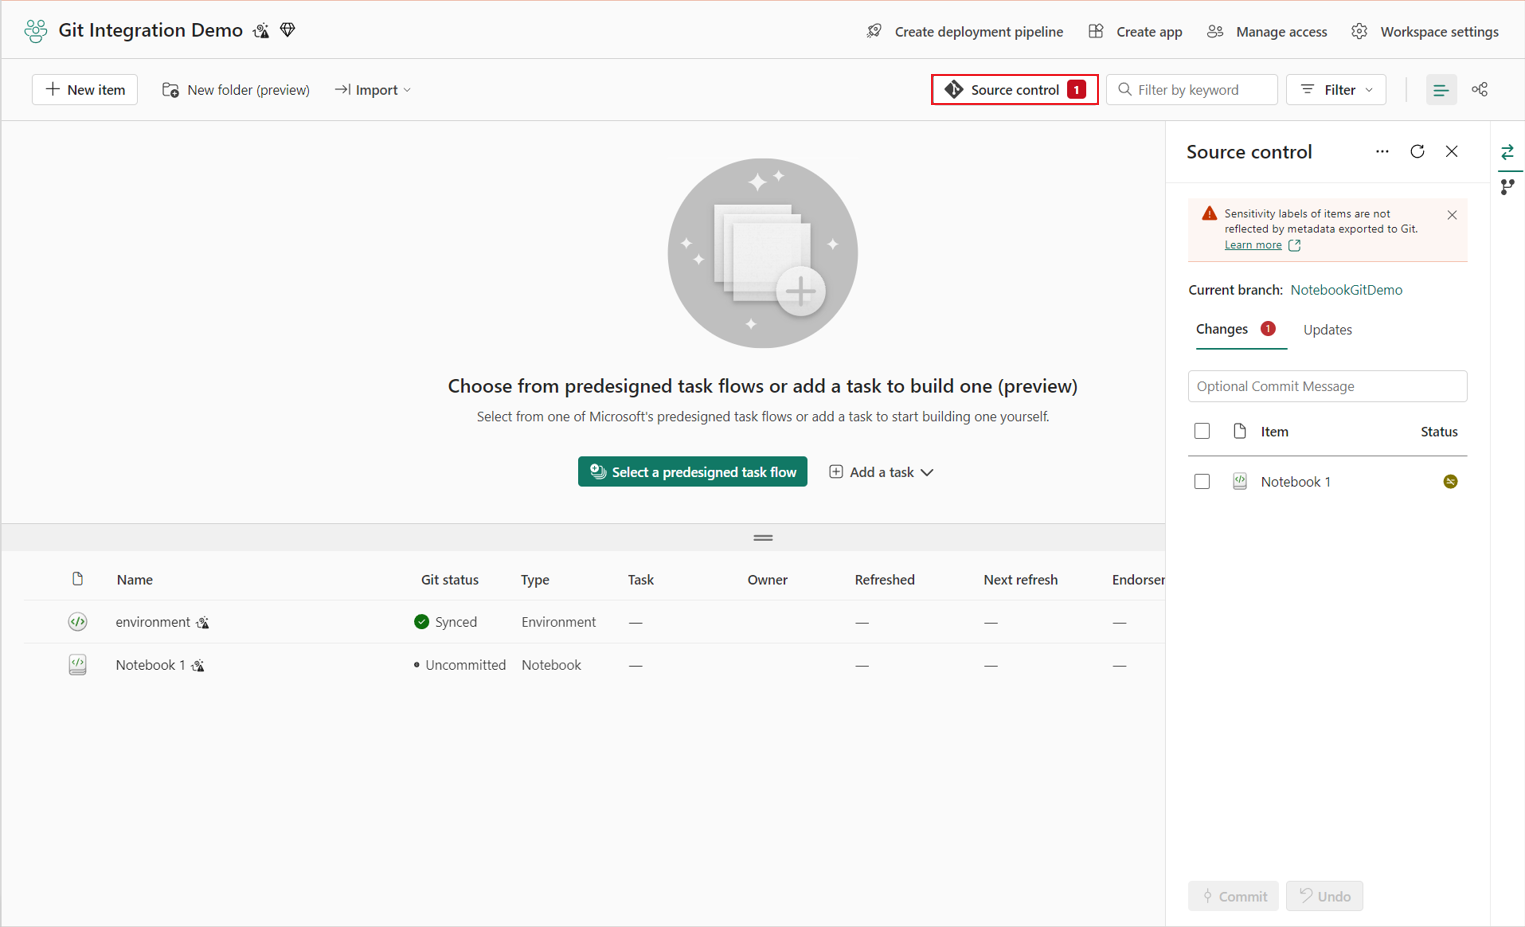
From your workspace settings, you can easily set up a connection to your repo to commit and sync changes. To set up the connection, see Get started with Git integration. Once connected, your items, including notebooks, appear in the Source control panel.
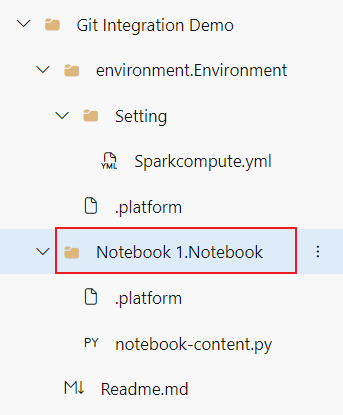
After you successfully commit the notebook instances to the Git repo, you see the notebook folder structure in the repo.
You can now execute future operations, like Create pull request.
Notebook representation in Git
The following image is an example of the file structure of each notebook item in the repo:
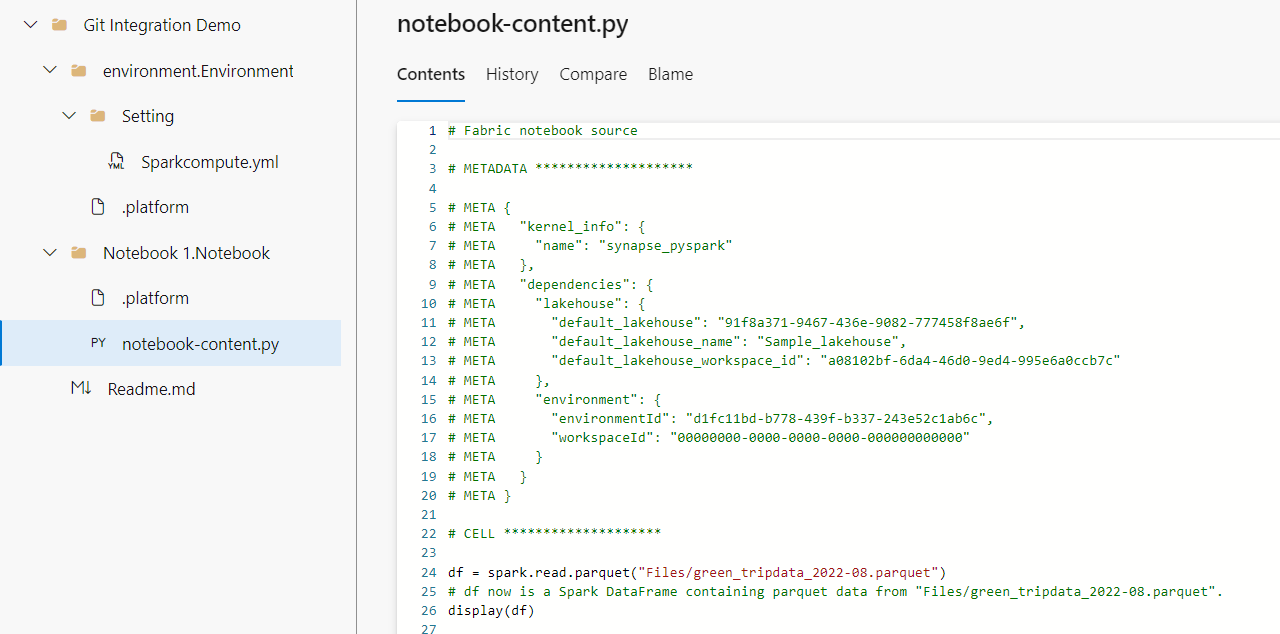
When you commit the notebook item to the Git repo, the notebook code is converted to a source code format, instead of a standard .ipynb file. For example, a PySpark notebook converts to a notebook-content.py file. This approach allows for easier code reviews using built-in diff features.
In the item content source file, metadata (including the default lakehouse and attached environment), markdown cells, and code cells are preserved and distinguished. This approach supports a precise recovery when you sync back to a Fabric workspace.
Notebook cell output isn't included when syncing to Git.
Note
- Currently, files in Notebook resources aren't committed to the repo. Committing these files is supported in an upcoming release.
- We recommend you to manage the notebooks and their dependent environment in the same workspace, and use git to version control both notebook and environment items. The Fabric Git system handles the mapping relationship when syncing the notebook and attached environment to new workspaces.
- The default lakehouse ID persists in the notebook when you sync from the repo to a Fabric workspace. If you commit a notebook with the default lakehouse, you must refer a newly created lakehouse item manually. For more information, see Lakehouse Git integration.
Notebook in deployment pipelines
You can also use Deployment pipeline to deploy your notebook code across different environments, such as development, test, and production. This feature can enable you to streamline your development process, ensure quality and consistency, and reduce manual errors with lightweight low-code operations. You can also use deployment rules to customize the behavior of your notebooks when they're deployed, such as changing the default lakehouse of a notebook.
Note
- You're using the new design of deployment pipeline now. The old UI can be accessed by turning off 'New Deployment pipeline'.
- Start from October, Fabric notebook supports auto-binding feature that will bind the default lakehouse and attached environment within the same workspace when deploying to next stage. The change will have impacts to existing notebooks in deployment pipeline.
- The default lakehouse and attached environment (when all dependent items are in the same workspace) will be replaced by newly generated items in target workspace, the notebook metadata change will be highlighted in the diff view in next round of deployment.
- You can set deployment rules for default lakehouse to override the auto-binded lakehouse.
- Known issue: Frozen cell status in the notebook will be lost during deployment. We are currently working on related tasks.
Use the following steps to complete your notebook deployment using the deployment pipeline.
Create a new deployment pipeline or open an existing deployment pipeline. (For more information, see Get started with deployment pipelines.)
Assign workspaces to different stages according to your deployment goals.
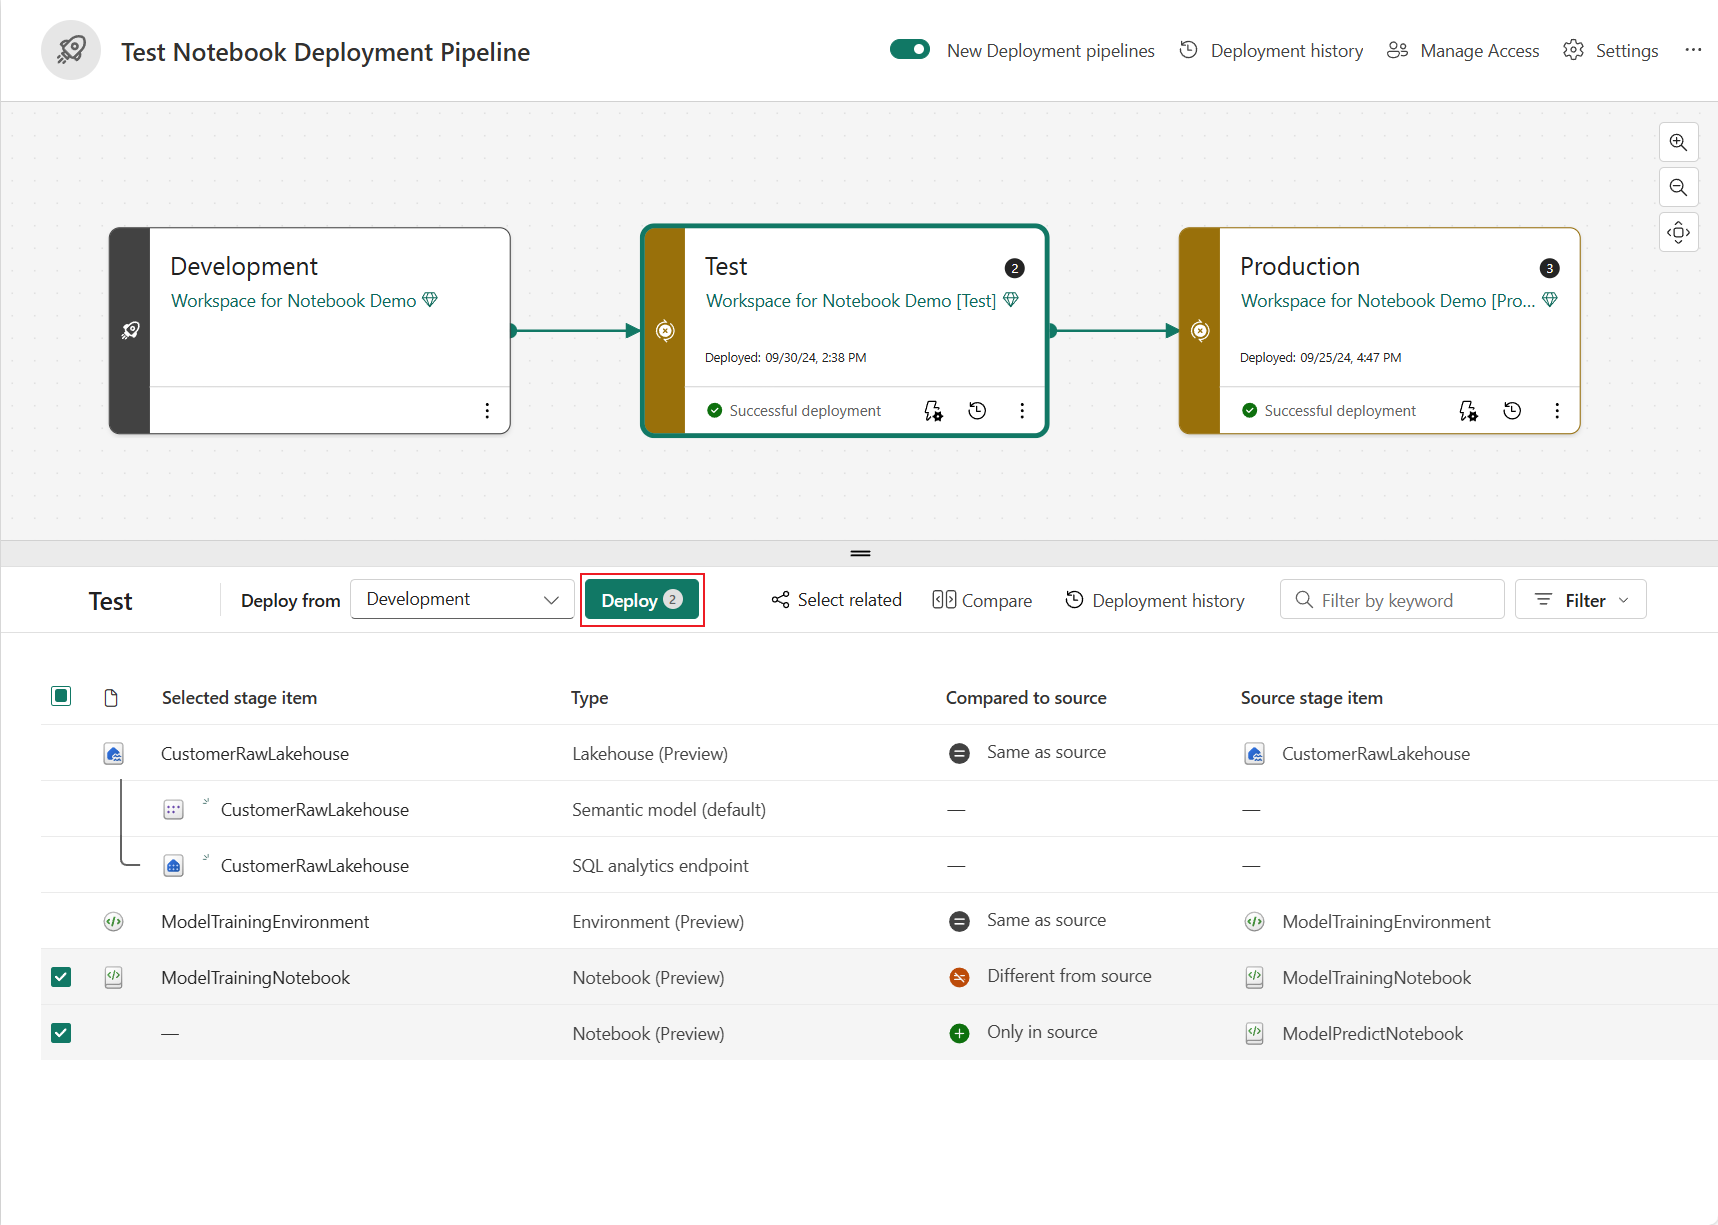
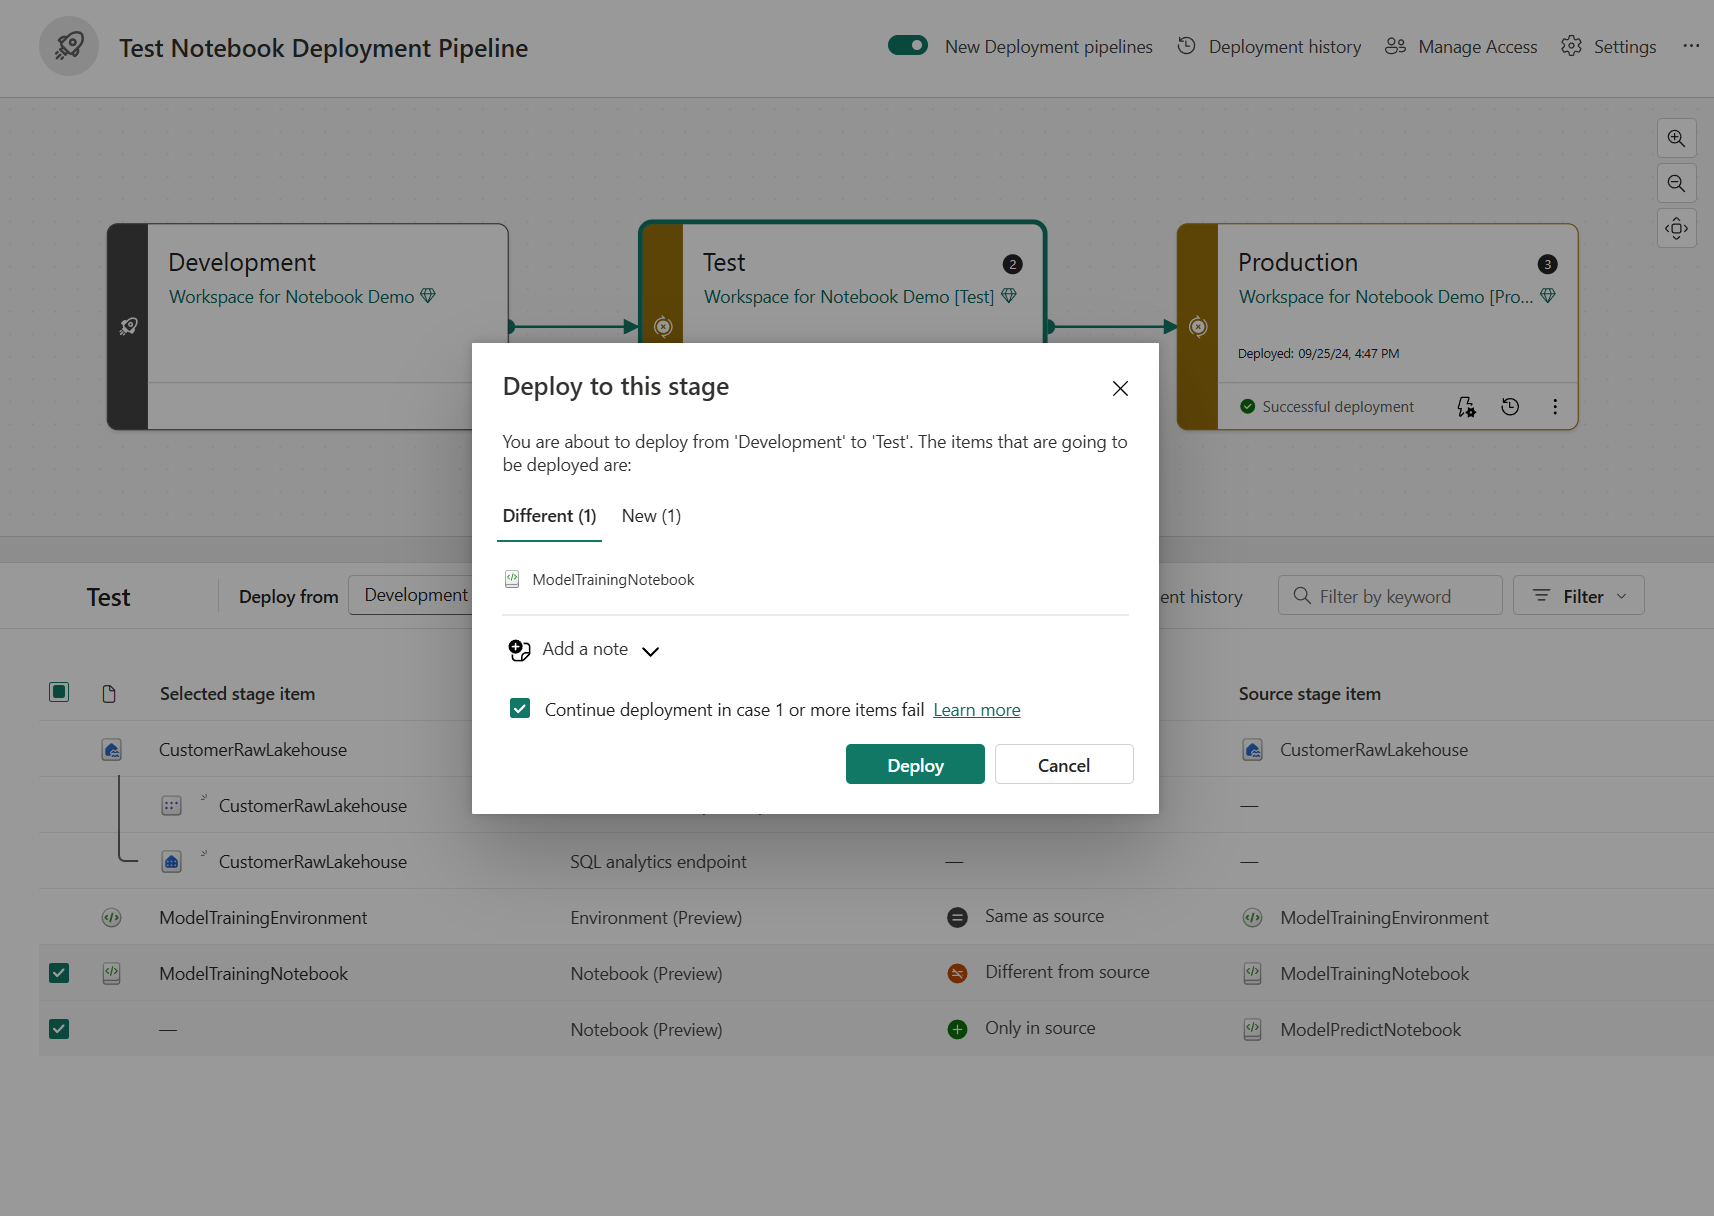
Select, view, and compare items including notebooks between different stages, as shown in the following example. The highlighted badge indicating changed item count between the previous stage and current stage.
Select Deploy to deploy your notebooks across the Development, Test, and Production stages.
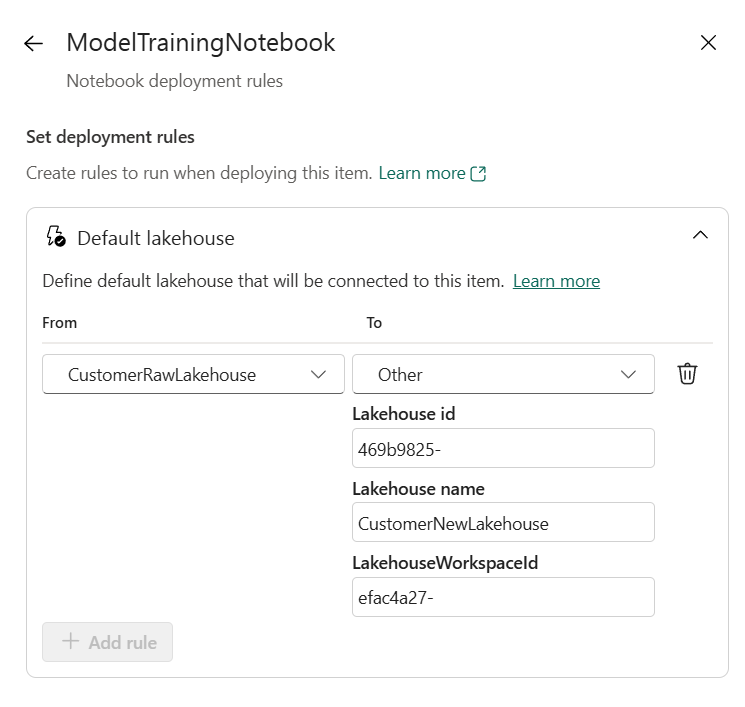
(Optional.) You can select Deployment rules to create deployment rules for a deployment process. Deployment rules entry is on the target stage for a deployment process.
Fabric supports parameterizing the default lakehouse for each notebook instance when deploying with deployment rules. Three options are available to specify the target default lakehouse: Same with source lakehouse, N/A(no default lakehouse), and other lakehouse.
You can achieve secured data isolation by setting up this rule. Your notebook's default lakehouse is replaced by the one you specified as target during deployment.
Note
When setting default lakehouse in deployment rules, the Lakehouse ID is must have. You can get the lakehouse id from the item URL link. The deployment rules has higher priority than auto-binding, the auto-binded lakehouse will be overwritten when there's deployment rule configured.
Monitor the deployment status from Deployment history.
