Mesh 101 Tutorial Chapter 3: Add interactivity with Mesh Visual Scripting
Now that we've completed the setup phase, let's move on to making your GameObjects interactive! In this chapter, we'll dive into Mesh Visual Scripting, which you can use to add custom logic to your Environment.
Note
There are two types of Mesh Scripting: Mesh Cloud Scripting, which uses C# code, and Mesh Visual Scripting, where you create a Script Graph and then add nodes (also called units) in a sequence to create your coding logic. This version of the Mesh 101 tutorial uses Mesh Visual Scripting; the previous version used Mesh Cloud Scripting.
Mesh Scripting isn't required for every Environment, but you'll need it for the features we'll be adding here: making a button interactive, triggering an informational text popup, and teleporting around the scene.
Station 3.1: Create an Interactable Button
For our first task, we want to create a button that will play a video when it's pressed by an avatar. The avatar can then press the same button to stop the video.
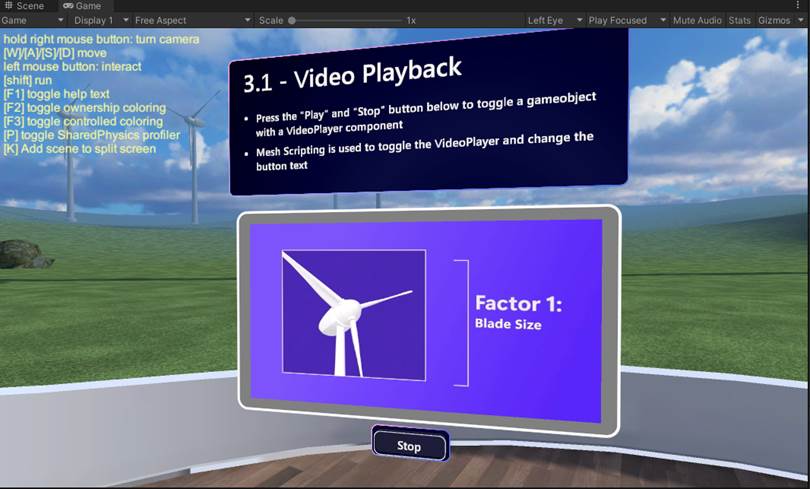
- In the Scene window, navigate to the Sphere Terrace that contains the stations for Chapter 3, and adjust the view so that you're looking at the first station, 3.1 -- Video Playback, as shown below.
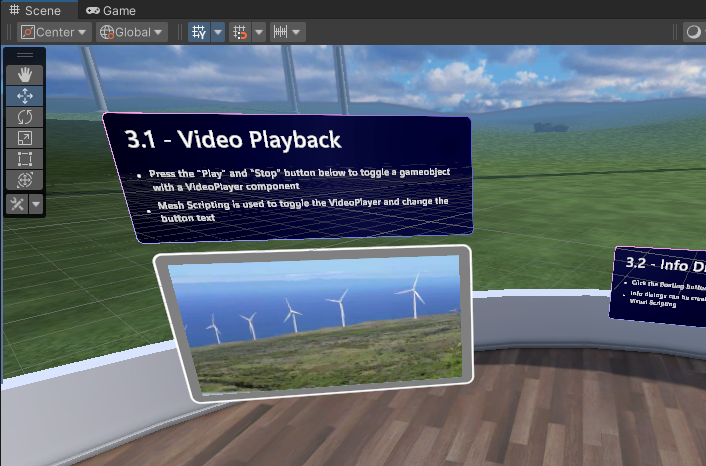
As you can see, there's already a video screen in place, but it needs a Play/Stop button. As the text box for the station explains, we'll create a Script Graph with some button logic so that the button can be used to toggle the VideoPlayer on and off and change the button text.
Add the button to the scene
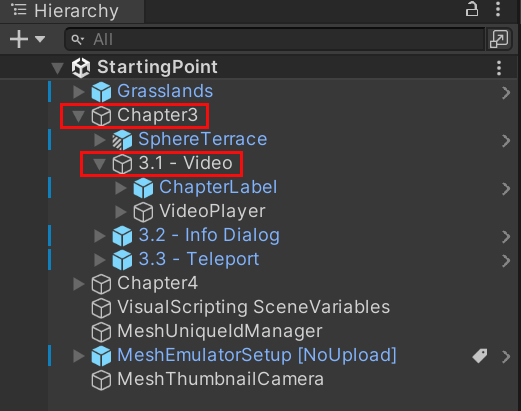
In Unity, make sure the GameObject named Chapter3 and its child object named 3.1 - Video are expanded.
In the Project window, search for the ButtonBase prefab. Make sure you choose ALL for the Search filter.

Drag ButtonBase from the Project window and then, in the Hierarchy, drop it on the GameObject named 3.1 -- Video so that ButtonBase is placed as a child to 3.1 -- Video.
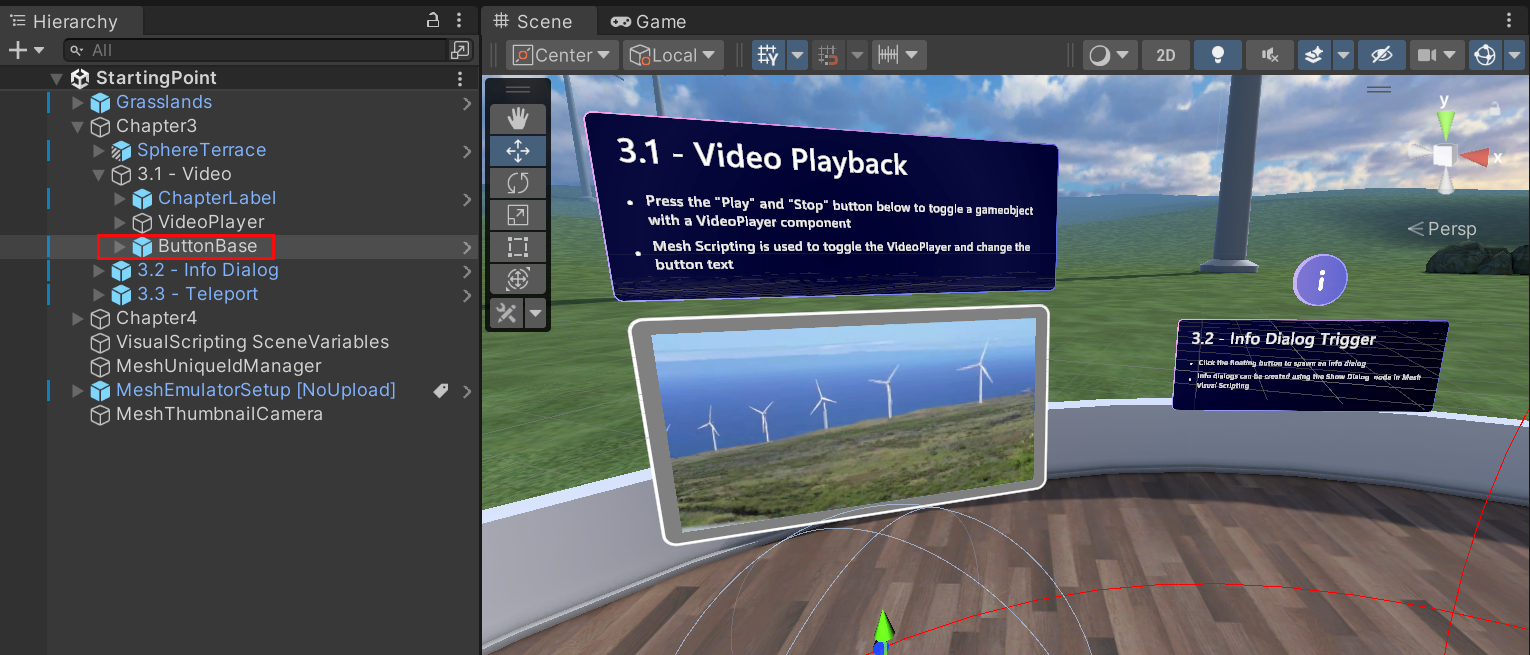
Make sure the Transform > Position values for ButtonBase are 0, 0, 0.
ButtonBase is placed in the scene a little lower than where we want it. Let's fix that.
Ensure that ButtonBase is selected in the Hierarchy.
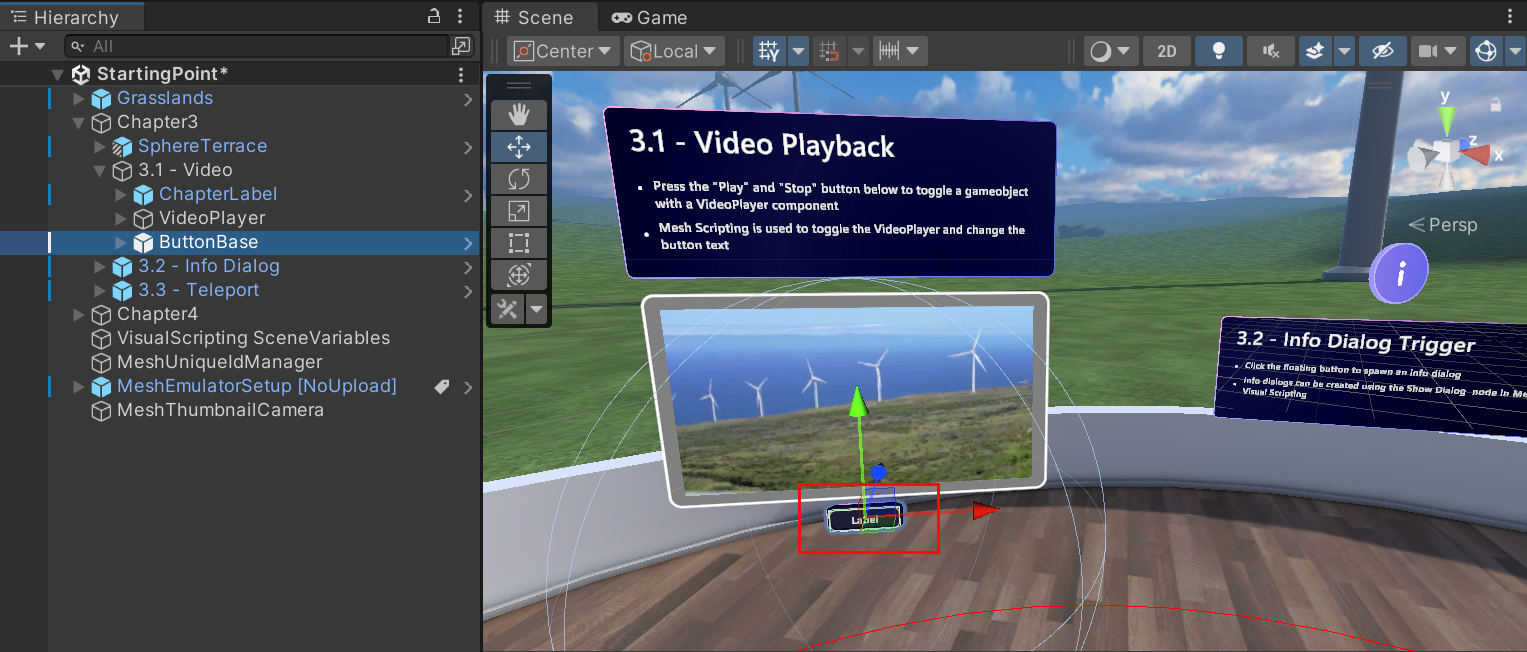
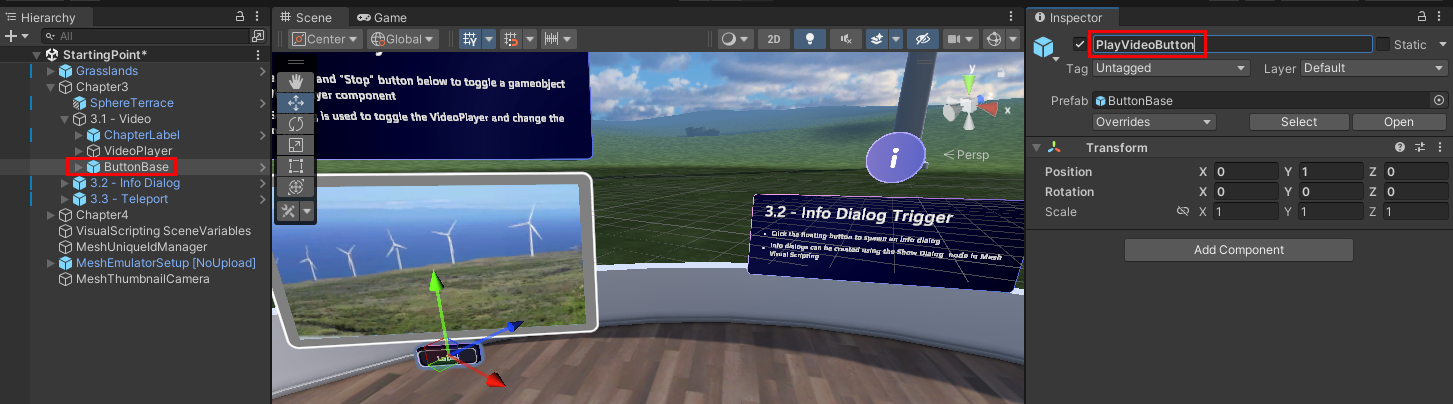
In the Inspector, change the Transform > Position > Y value to "1".
Perfect! Now ButtonBase is correctly located just below the video screen.
Rename the button
With ButtonBase selected, in the Inspector, change the name of ButtonBase to "PlayVideoButton."
Change the label of the button
Right now, the text on the button says Label. Let's change that to "Play."
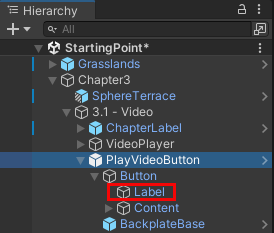
In the Hierarchy, expand the PlayVideoButton GameObject to display its child object Button, then expand Button to display its child objects, and then select the Label child object.
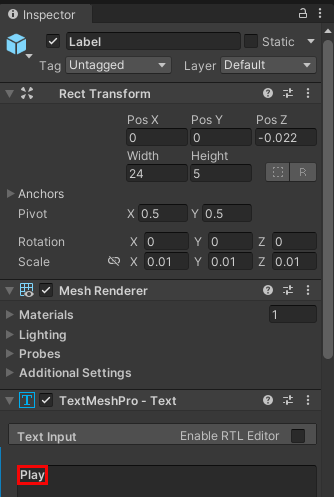
In the Inspector, navigate to the TextMeshPro -- Text component, and then, in the Text Input box, change the text to "Play."
Create the Visual Script for the button
In the Hierarchy, ensure that PlayVideoButton is selected.
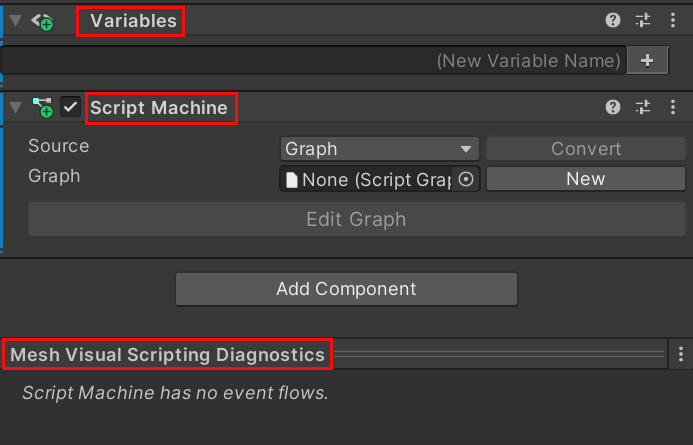
In the Inspector, click Add Component, and then select Script Machine.
Note that two new components have been added in the Inspector: Script Machine and Variables. There's also a new window named Mesh Visual Scripting Diagnostics at the bottom of the Inspector. This window will give you feedback on your visual script and can be useful for troubleshooting.
Note that in the Script Machine component, the Source option is set to Graph. You have two choices for Source: Graph and Embed. Click the Source drop-down and then select Embed.
Tip
Graph and Embed each have advantages and disadvantages; you can learn more about them in the Unity Script Machine article. We're choosing to use Embed here because, among other things, you can directly reference your scene nodes without making intermediate Object variables.
In the Script Machine component, enter a name in the Title field for the graph: "Video Player Behavior."
Enter a description in the Summary field for the graph: "Video player behavior definition."
Setting up the script graph
In the Script Machine component, click Edit Graph. This opens the Script Graph window. Drag and place it next to the Project and Console tab, if it's not already there, so that we can see the script graph and Scene window at the same time.
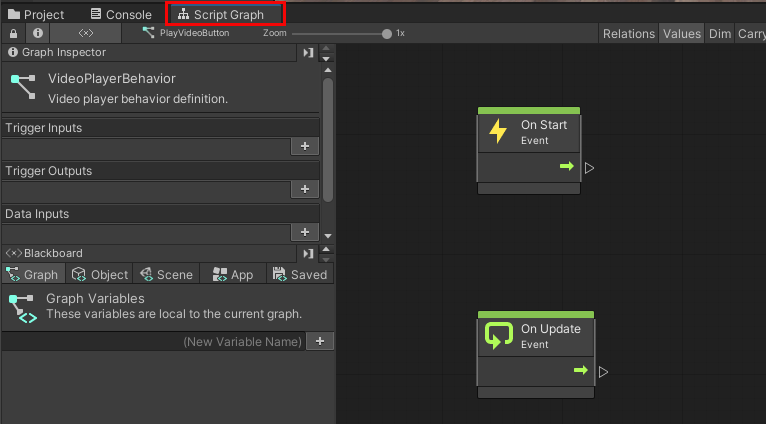
As we add nodes, you may want more space in the window; you can click the three-dot button and then select Maximize to achieve this, or click the Full Screen button in the upper right corner of the window.
We don't need the default OnStart and OnUpdate nodes; delete them.
Detect if the button is clicked
We can think of this script graph as having three main goals:
- Detect when the video player Play/Stop button gets clicked.
- When it gets clicked, play the video.
- When it gets clicked again, stop the video.
The first goal, detect when the button gets clicked, will require three nodes. The GameObject in the project that actually "listens" for and reacts to a click is Button. Let's add that to the script graph.
Note
A node is also called a unit in Visual Scripting. In this tutorial, we'll continue using the term node.
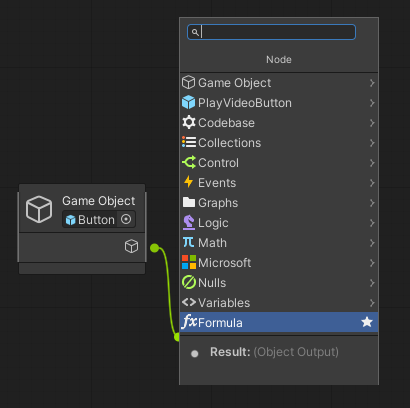
Drag Button from the Hierarchy and then drop it in the script graph.
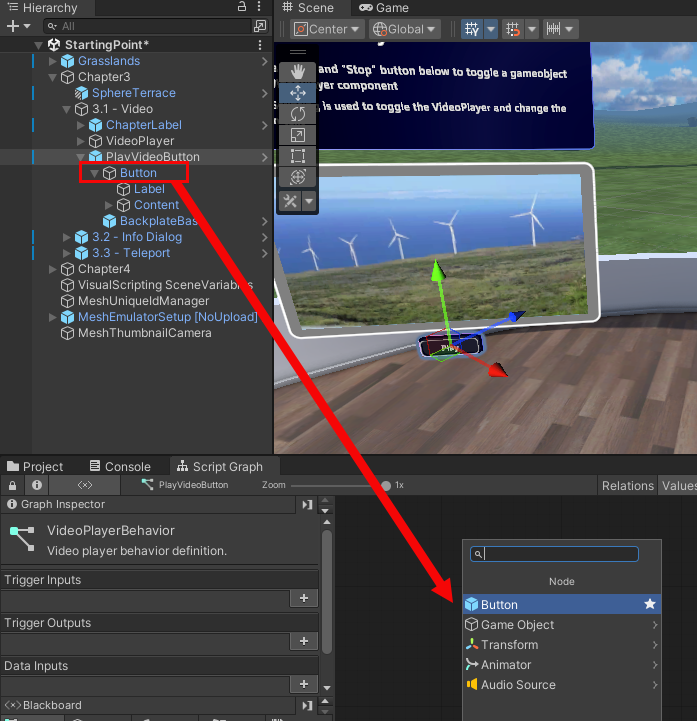
In the Node menu, select Button. A Game Object Literal node referencing that object is added to the graph.

TIP: You may want to take a moment here to examine some of the components for the Button GameObject:
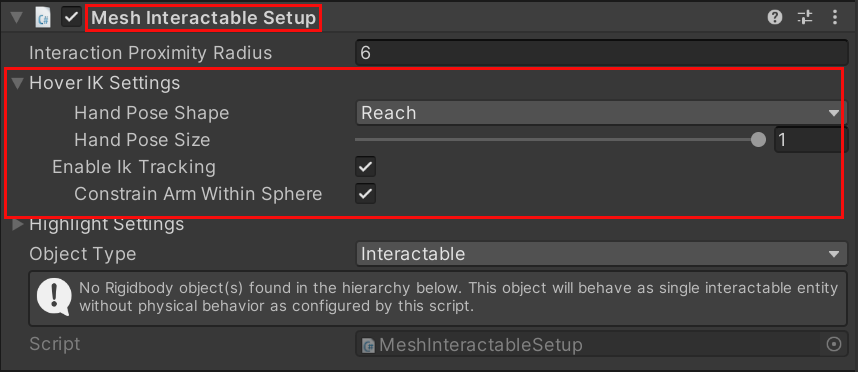
Mesh Interactable Setup: This makes Button an object that you can interact with. This component helps to track interactions--note that in the image below it has some "hover" settings chosen. You can learn more about this component in our article named Grab, hold and throw with Interactables.
Script Machine: This has a script graph named Button Base Behaviour.

If you go into Play mode, you'll see that a new component named Mesh Interactable Body is added to Button.
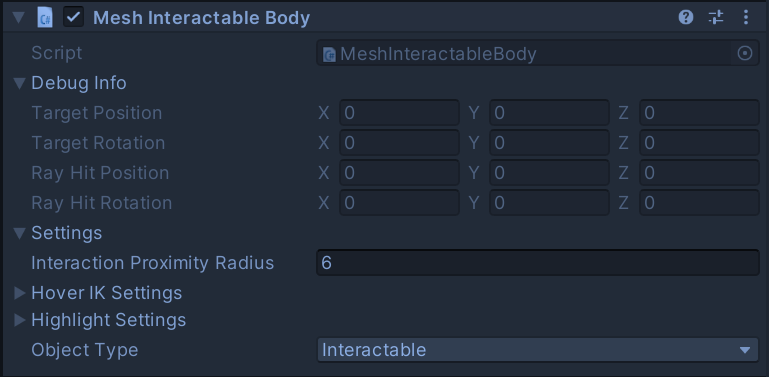
This component is added automatically at runtime to interactable bodies; it exposes various properties to Visual Scripting such as IsHovered and IsSelected, which will come in handy in a moment.
In the script graph, let's add a node that lets us know when the button is selected.
If you need to, exit Play mode, and then select PlayVideoButton in the Hierarchy to ensure that you're seeing its embedded graph in the Script Graph window.
In the script graph, click and hold on the outport port of the Game Object node, and then release the mouse button. This opens the Fuzzy Finder. WARNING: Once you open the Fuzzy Finder, don't click anywhere outside of the Unity interface. This closes the Fuzzy Finder and causes unpredictable behavior in the Script Graph.
Search for Is Selected, and then, in the list, select Mesh Interactable Body: IsSelected.
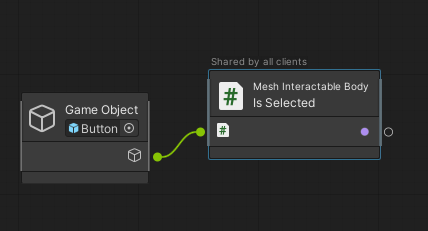
Note: This node outputs a Boolean value; you can confirm this in the Graph Inspector.
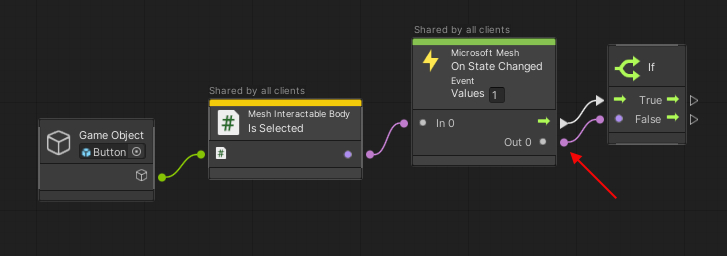
Drag a connector from the output port of the Is Selected node and then create a new node called Microsoft Mesh: On State Changed. (In the Fuzzy Finder, search for on state changed.)
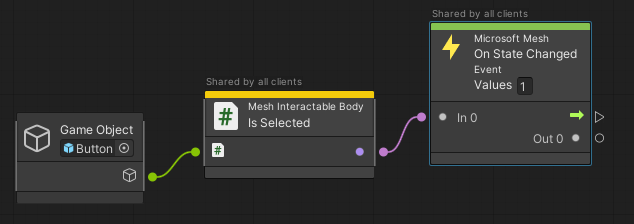
These are our three button-click detection nodes. The Is Selected node starts out with a value of False, but when the button is clicked, the value changes to True and is passed to the On State Changed node. This node then triggers the play/stop nodes that we'll add next.
Play or stop the video
If On State Changed has a value of true, the video will play. If it's already playing and the button is pressed, On State Changed changes to a value of false and the video stops playing. Our next step is to add an if node to determine this flow.
Drag a connector from the Control Output port of the On State Changed node and then create a new if node. (In the Fuzzy Finder, search for if.)
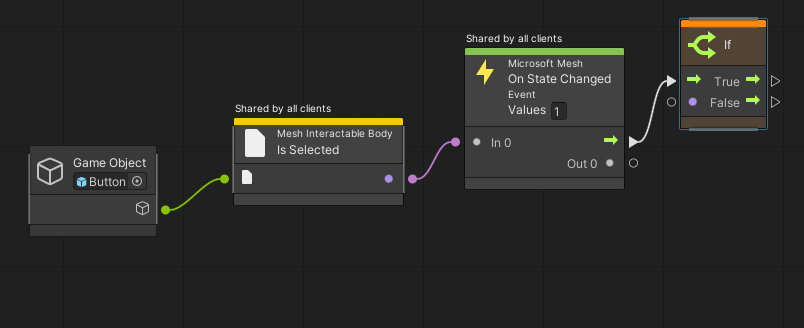
Drag a connector from the Data Output port of the On State Changed node to the Data Input port of the if node.
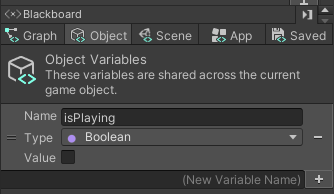
Create a variable to determine if the video is playing or not
In the Blackboard, go to the Object tab, and then create a variable named "isPlaying." Make the Type "Boolean" and leave the Value check box unselected. This gives the Boolean the default value of false.
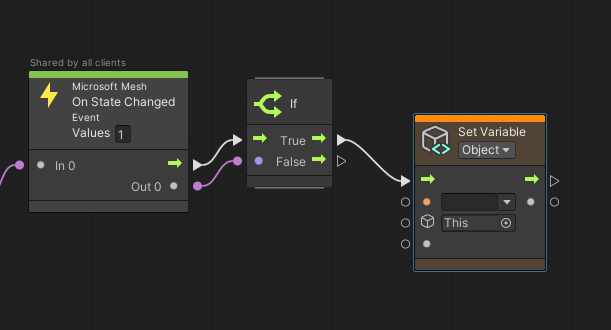
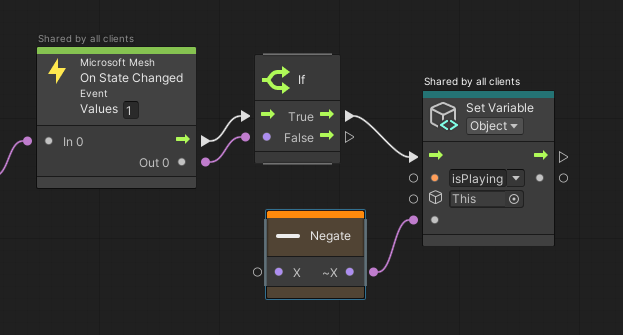
Drag a connector from the True Control Output port of the If node and then create a new Set Object Variable node. (In the Fuzzy Finder, search for set object.).
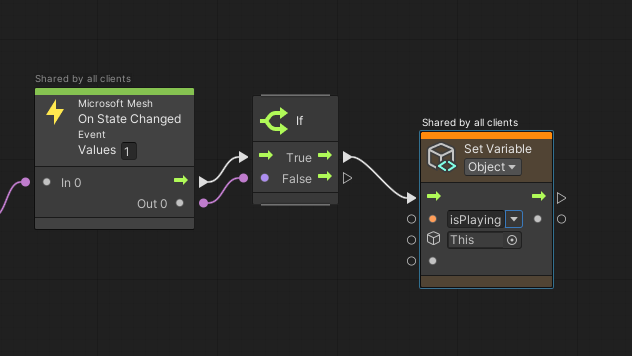
In the Set Object Variable node, click the variable name drop-down and then select isPlaying.
The isPlaying variable has to perform double-duty here. To ensure that isPlaying always has the correct value, let's give it input from a Negate node.
Drag a connector from the Data Input port of the Set Object Variable: isPlaying node and then create a new Negate node. (In the Fuzzy Finder, search for negate.)
Drag a connector from the Data Input port of the Negate node and then create a new Get Object Variable node. (In the Fuzzy Finder, search for get object variable.)
In the Get Object Variable node, click the variable name drop-down and then select isPlaying.
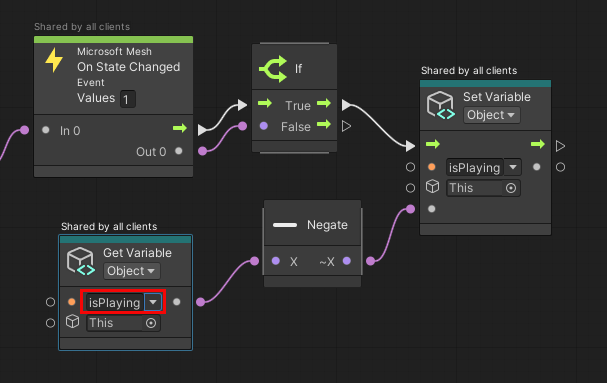
The Negate node makes the value of IsPlaying change to the opposite of whatever it's currently set to. When the scene starts, isPlaying is false (the default). When the Play/Stop button is clicked, the Negate node causes isPlaying in the Set Object Variable node to be set to true and this makes the video play. When the button is clicked again, the Negate node will cause isPlaying to be reset to false and this will make the video stop.
Turning the video on or off
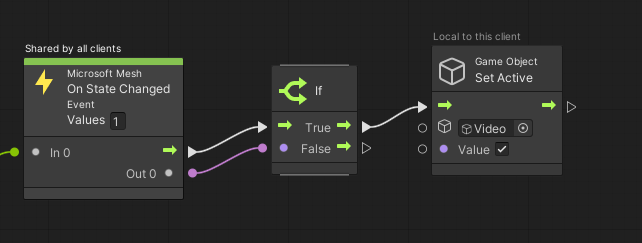
Now we'll add the nodes that detect if isPlaying changes; the video will play or stop based on that change.
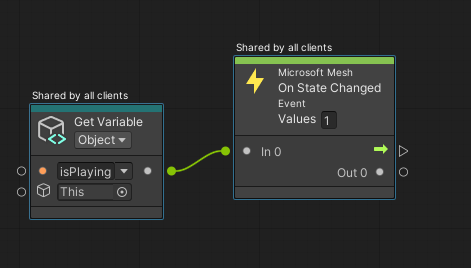
In the lower part of the graph, add a Get Object Variable node and set its value to isPlaying. (You can right-click in the graph and then select Add Node.)

Drag a connector from the data output port of the Get Object Variable: isPlaying node and then create a new On State Changed node. (In the Fuzzy Finder, search for on state changed.)
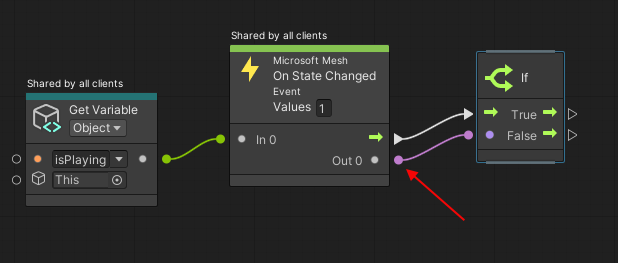
Drag a connector from the control output port of the On State Changed node and then create a new If node. (In the Fuzzy Finder, search for if.)
Drag a connector from the data output port of the On State Changed node and then connect it to the Data Input port of the if node.
Making the video play
In the Hierarchy, expand the VideoPlayer GameObject and and note that it has two child objects: Video and VideoStill.
Select Video and then, in the Inspector, note the following:
- Video has a component named Video Player, which has a video attached named WindTurbine.
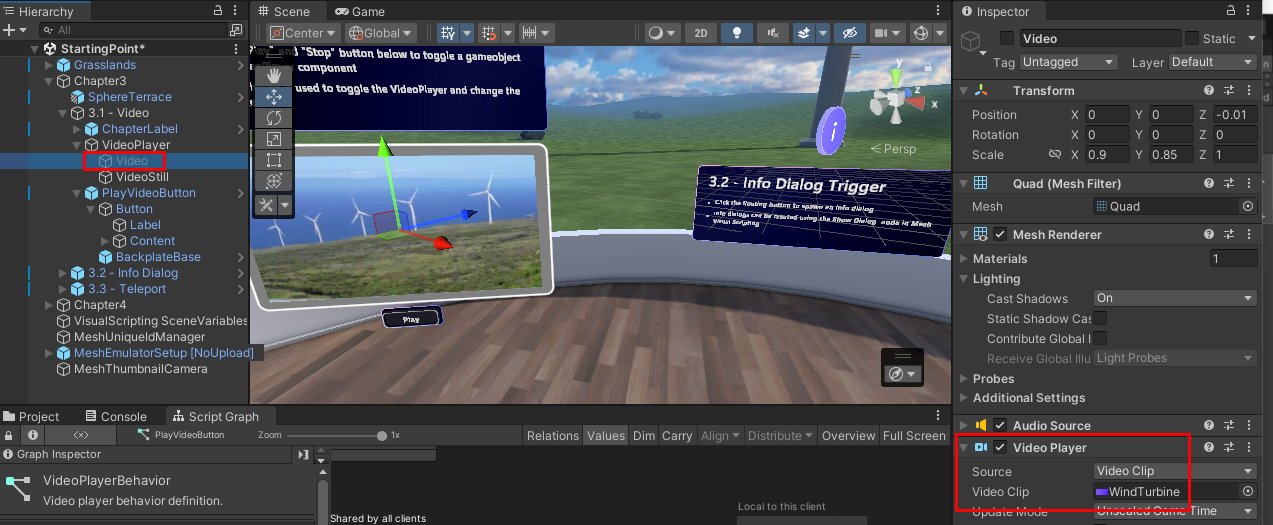
- Video is inactive (the check box next to its name is empty).
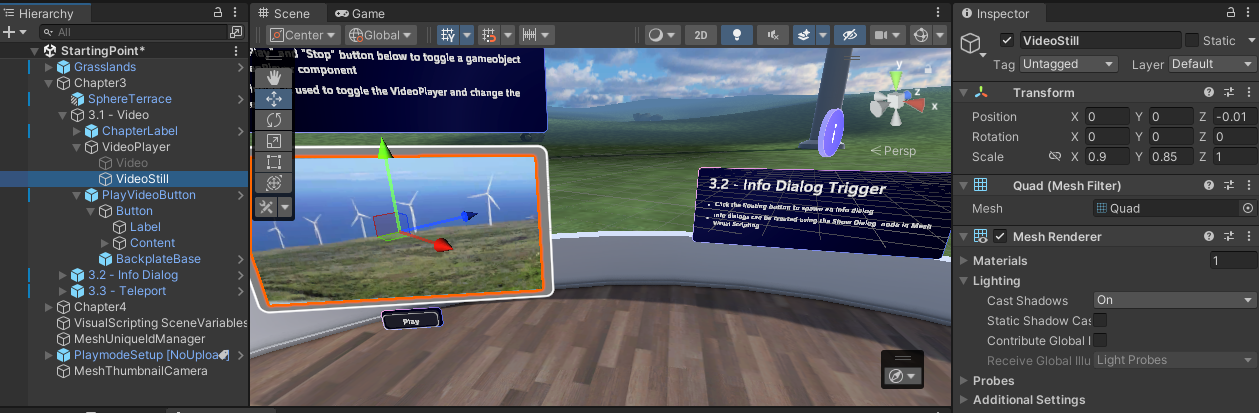
In the Hierarchy, select the VideoStill GameObject and then, in the Inspector, note the following:
VideoStill has a still image attached.
VideoStill is active (the check box next to its name is selected).
When the scene starts, the video screen displays a still image (due to VideoStill being active) and does not play a video (which is due to Video being inactive). When the attendee presses the Play/Stop button while it's showing Play, it makes Video active, which causes the video to play, and simultaneously makes VideoStill inactive, which hides the still image. The button's label also changes from Play to Stop When the attendee presses the button again, Video is made inactive, stopping the video, and VideoStill is made active again, which makes the video screen display the still image again.
The remaining nodes in our graph make all of this happen.
Drag a connector from the True Control Output port of the if node and create a new Game Object: Set Active node. (In the Fuzzy Finder, search for set active.)
In the Game Object: Set Active node, click the round button in the GameObject field, and then, in the Select GameObject window, search for and select Video.
Select the node's Value check box, which makes the node active.
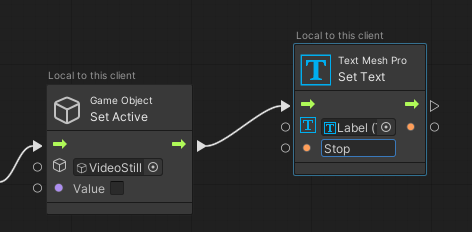
Drag a connector from the Control Output port of the Game Object: Set Active node and then create another new Game Object: Set Active node.
In the new Game Object: Set Active node, click the round button in the GameObject field (which currently displays This), and then, in the Select GameObject window, search for and select VideoStill.
Keep the Value check box unselected. This makes the node inactive.
Now when the button is clicked, the video will play and the still image will be hidden. We need just one more thing in this sequence. Since the Play/Stop button is a toggle, we have to make sure that after the attendee clicks Play, the button's label changes to Stop, and then when it's clicked again, the label changes back to Play. To achieve this, we'll add a TextMeshPro node.
Drag a connector from the Control Output port of the last Game Object: Set Active node and create a new Text Mesh Pro: Set Text node. (In the Fuzzy Finder, search for set text.)
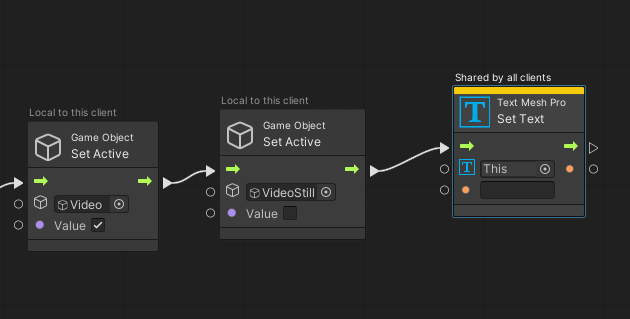
We need to set this node's target GameObject to Label. However, there are lots of "Label" GameObjects in the project, and they all look the same in the node's popup list, so let's add this object by using the drag and drop method.
Drag the Label GameObject that's a child of the Button object from the Hierarchy and then drop it in the first field in the Set Test node.
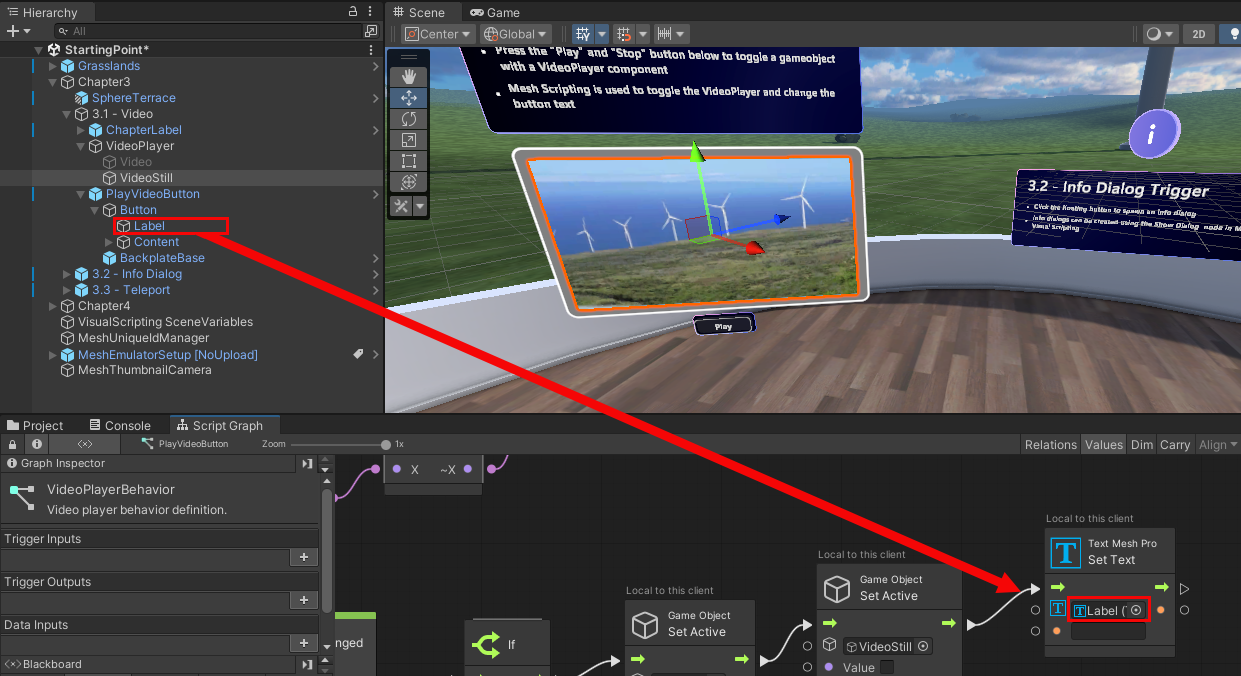
In the text field for the node, type in "Stop."
Making the video stop
Just three more nodes to go for this graph! We need to set up the false condition for the button, so that if the button is clicked while the video is playing, the isPlaying variable becomes false and it causes the video to stop and the button label to change to Play again.
We can take a shortcut here.
Control-click the last three nodes you added. This selects them.
Right-click in the script graph and then, in the popup menu, select Duplicate Selection.
Drag the duplicated nodes to an empty space in the graph just below the nodes you duplicated.
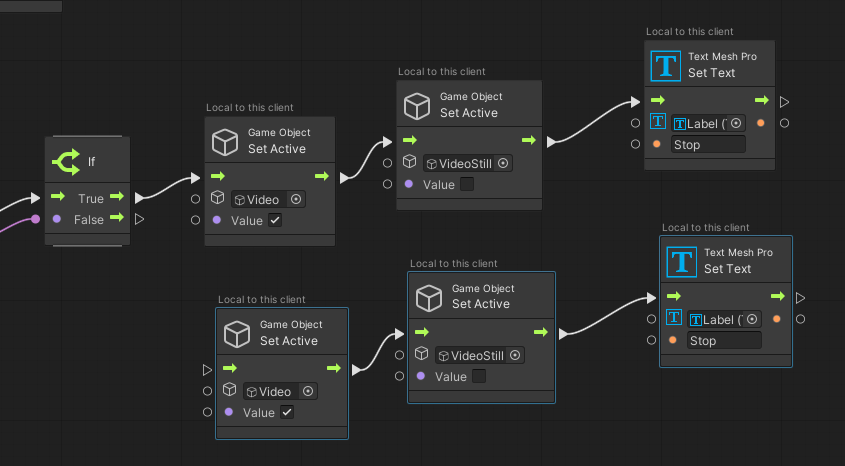
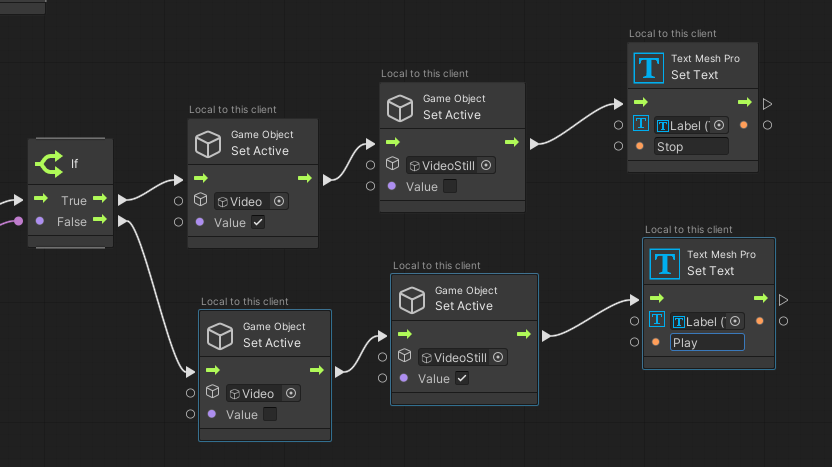
Drag a connector from the False Control Output port of the last if node and connect it to the control input port of the first Game Object: Set Active node in the duplicated set of nodes.
In that same first Game Object: Set Active node (the one that contains Video), deselect Value.
In the second Game Object: Set Active node in the duplicated set (the one that contains VideoStill), select Value.
In the Set Text node, change the text from Stop to Play.
Share the video player interactions with others in the experience
There may be times when you want a script's events to be experienced only by the attendee triggering the events, and other times when you want the events to be experienced by everyone in the scene. You can control this with the Local Script Scope component.
In the Hierarchy, ensure that PlayVideoButton is selected.
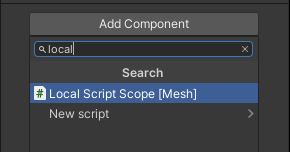
In the Inspector, click the Add Component button and then add Local Script Scope.
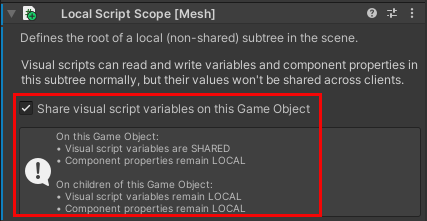
For this tutorial, we want all attendees in the experience to be able to see any interactions with the video player and see the video itself play and pause. To ensure this, make sure the Share visual script variables on this Game Object option is selected. The information box below this option tells you what's shared and what remains local.
Test your work
In Unity, save the project and then press the Unity Editor Play button.
In the Game window, click the Play button below the video player. This causes the label on the button to change to Stop and a brief video about wind turbines to play on the screen above the button.
When you've finished watching the video, press the button you've been editing again (it now has the label Stop).
Press the Unity Editor Play button to exit Play mode.
Station 3.2: Trigger an info dialog
For this feature, we'll enhance an existing visual script that causes an info dialog to appear when the avatar presses a button.
In the Hierarchy, collapse the 3.1 -- Video GameObject.
In the Scene window, note that the Info Dialog Trigger station is to the right of the 3.1 -- Video Playback station. Adjust the view so that you can clearly see Station 3.2.

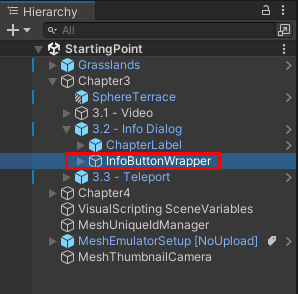
In the Inspector, expand the GameObject named 3.2 -- Info Dialog.
In the Hierarchy, select InfoButtonWrapper.
In the Inspector, note that InfoButtonWrapper has the Local Script Scope component attached and that its Share visual script variables on this Game Object option isn't selected.
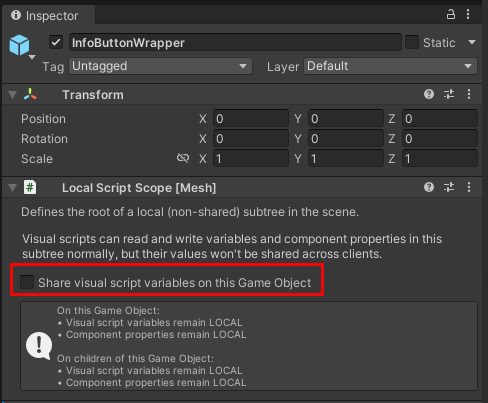
This is because after an attendee clicks the button that makes the info dialog appear, the button becomes hidden to them. If this option was selected, the button would become hidden to everyone in the scene, and we don't want that.
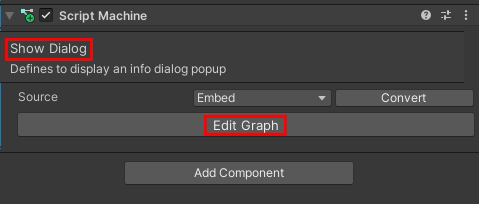
In the Inspector, navigate to the Script Machine component, which contains the Show Dialog graph, and then click the Edit Graph button.
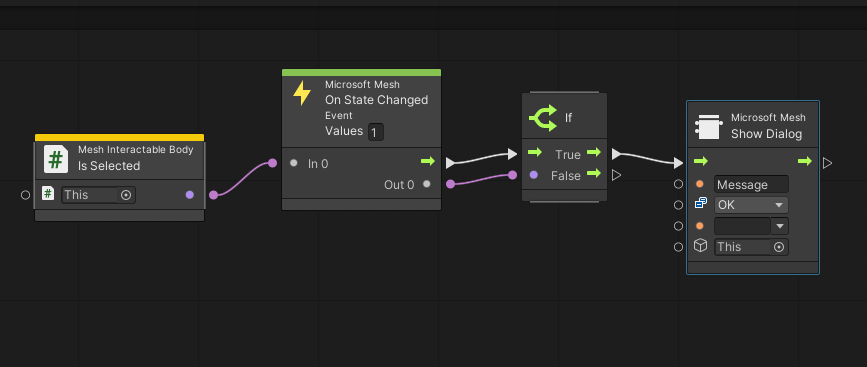
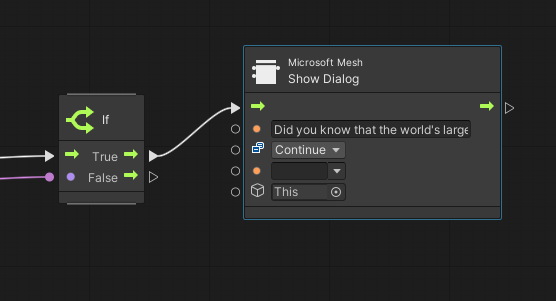
In the graph, drag a connector from the True Control Output port of the If node and then create a new Microsoft Mesh: Show Dialog node . (In the Fuzzy Finder, search for show dialog.)
In the Show Dialog node, click the Message field and then replace the word Message with this sentence:
Did you know that the world's largest wind turbine has blades longer than a football field?
This is the message that will appear in the info dialog.
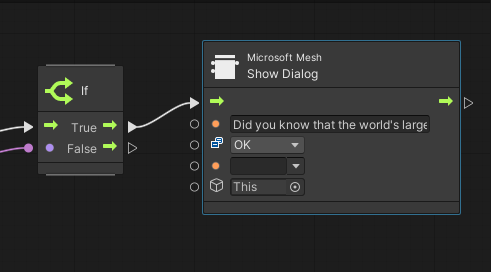
Select the drop-down that currently displays OK, and then, in the popup list, deselect OK and select Continue. This will add a Continue button to the info dialog that the user can click to close the dialog after they finish reading its message.
Test your work
In the Unity Editor, save the project and then press the Unity Editor Play button.
Use the navigation keys to make your avatar back away from the button. Note that when your avatar is a certain distance away, the button rotates and isn't selectable.
Walk towards the button. At a certain point, the button stops rotating, signaling that you can now select it.
Select the button. The info dialog appears and displays the message you added to the Show Dialog node earlier.
Note
The appearance of the info dialog in Play mode is different than how it will appear in Mesh, where it will appear much like the other panels in the Sphere Terrace.
When you're finished with the info dialog, click its Continue button. Note that after you click the button, it disappears. To use the button again, you must exit and then re-enter Play mode.
Tip
The distance and triggering elements in effect here are determined by the components of the ProximityDetector GameObject.
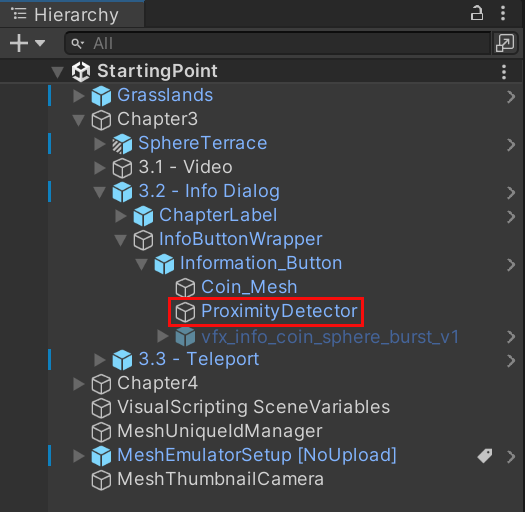
Press the Unity Editor Play button to exit Play mode.
Station 3.3: Teleport to the turbine generator
For this feature, we'll add some nodes to a script graph that allows attendees in the scene to teleport. When a attendee presses the button, they're teleported from their current location at Station 3.3 to an elevated platform that's attached to a wind turbine generator. They can then examine the generator.
Update the script graph
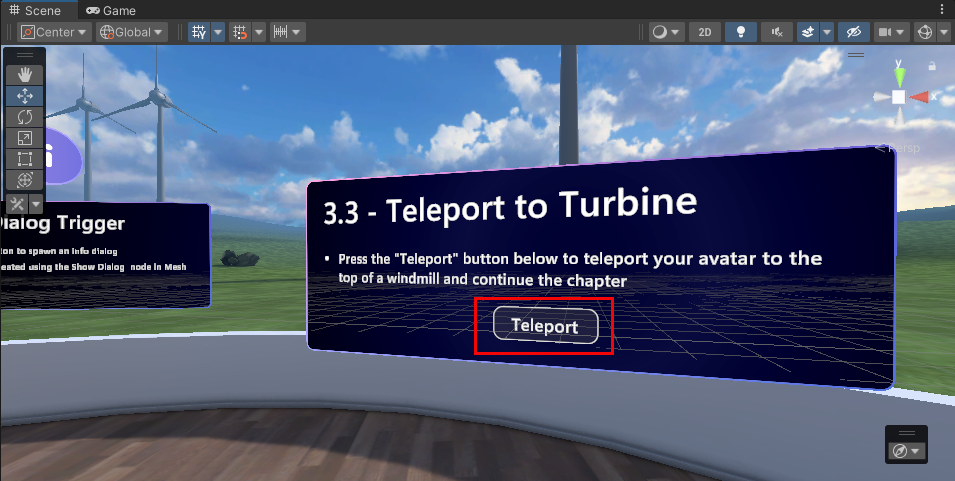
In the Scene window, note that the 3.3 - Teleport to Turbine station is to the right of the 3.2 -- Info Dialog Trigger station. Adjust the view so that you can clearly see Station 3.3.
In the Hierarchy, collapse the 3.2 - Info Dialog GameObject, and then expand the 3.3 - Teleport GameObject.

The button is all set up for you---we just need to add the nodes in the script graph that give it the teleport behavior.
In the Hierarchy, expand the ChapterLabel GameObject and then select the TeleportToWindTurbineButton GameObject.
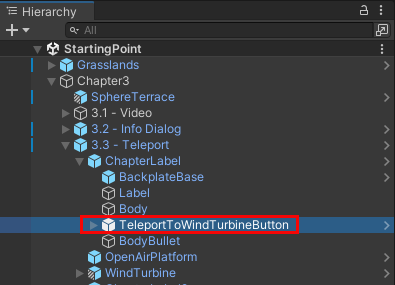
Note that in the Inspector, there's a Script Machine component with a script graph named Teleport to Open Air Platform. The Source option is set to Embed, which means the script graph is embedded in the scene.
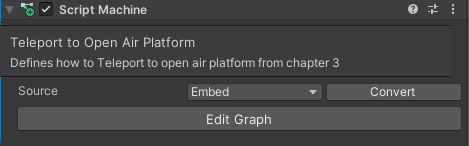
Click the Edit Graph button. Just as in the previous chapter, our graph already has some nodes set up for you.
We'll add nodes to this script graph in a moment.
Create a Travel Point and add a reference to it
So what's a "Travel Point", you might be asking ... ? Basically, it's a component that you can use to define a point in space to spawn or teleport to. Normally, you would first create a Travel Group, and then add one or more Travel Points to it. We've already created the Travel Group for you in this project, so in the steps below, we'll add a Travel Point to that group. We'll then use that Travel point as the location the avatar will go to when they click the Teleport button. To learn more, see our article named Create avatar spawn and teleport points.
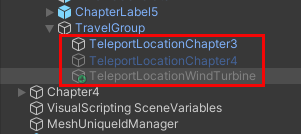
In the Hierarchy, create a new empty GameObject as a child object to TravelGroup and then rename it "TeleportLocationWindTurbine".

In the Inspector, click the Add Component button and then search for and add the Travel Point component.
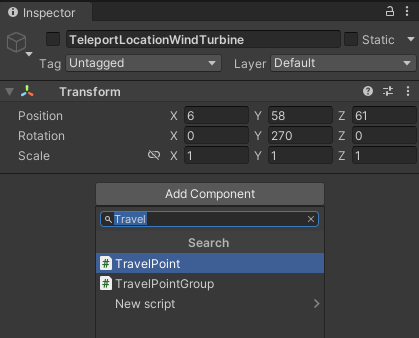
In the Inspector, in the Transform component, enter the following values:
Position:
X = 6
Y = 58
Z = 61Rotation:
X = 0
Y = 270
Z = 0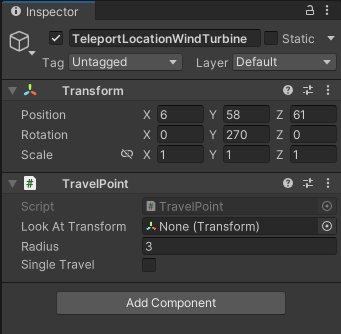
The avatar will teleport to this location.
In the Inspector, make the TeleportLocationWindTurbine GameObject inactive by deselecting the check box next to its name. If you have more than one TravelPoint object active at runtime, Unity randomly picks one of the active Travel Points as the spawning point for the avatar. We want to ensure that the avatar spawns at the point indicated by the TeleportLocationChapter3 GameObject, so that should be the only active Travel Point. As a result of being made inactive, TeleportLocationWindTurbine appears dimmed in the Hierarchy.
Adding the teleport nodes
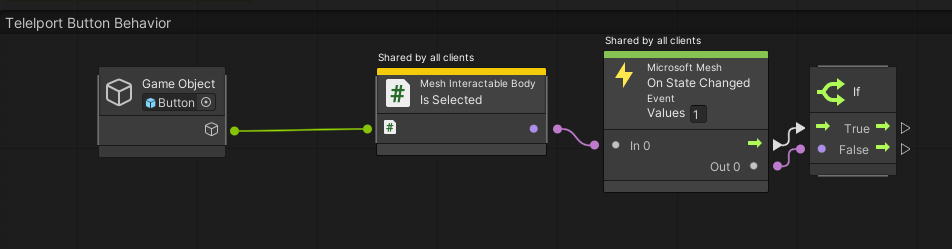
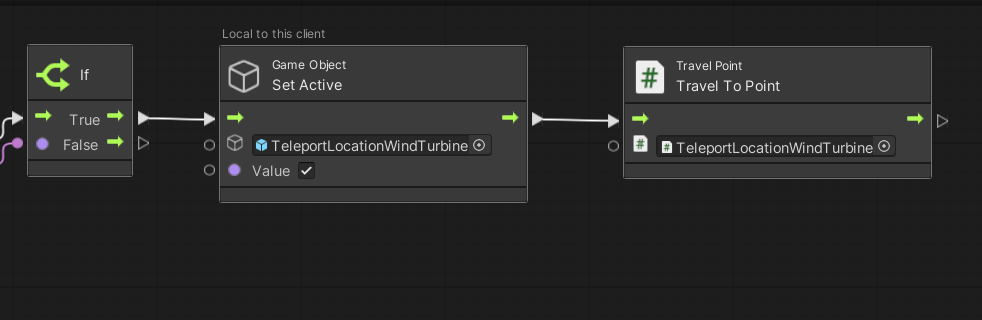
In the Teleport to Open Air Platform script graph, drag a connector from the True output control port of the If node and then create a new node called Game Object: Set Active. (In the Fuzzy Finder, search for set active.)
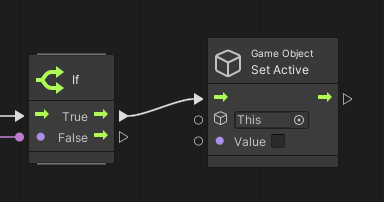
Drag the TeleportLocationWindTurbine object from the Hierarchy and then drop it in the field that displays This in the Game Object: Set Active node.
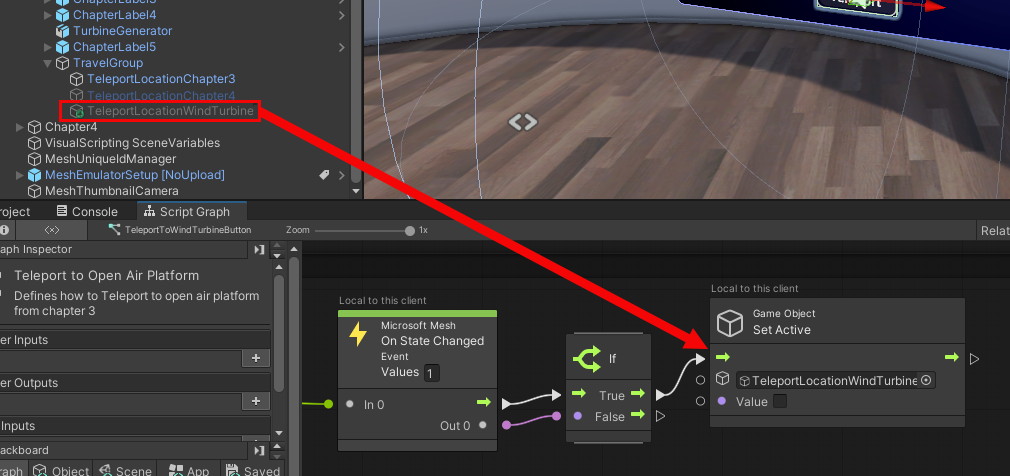
Select the node's Value option to make it active.
Add the Travel Point node
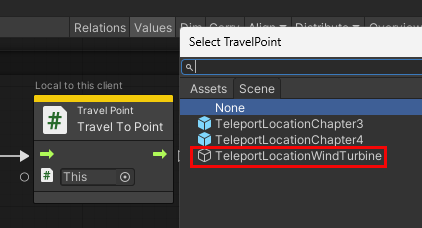
Drag a connector from the Control Output port of the Game Object: Set Active node and then create a new node called Travel Point: Travel to Point. (In the Fuzzy Finder, search for travel point: travel.)
In the Travel Point: Travel to Point node, click the round button in the field that displays This, and then, in the Select TravelPoint window, select TeleportLocationWindTurbine.
This completes the graph.
Test your work
In the Unity Editor, save the project and then press the Unity Editor Play button.
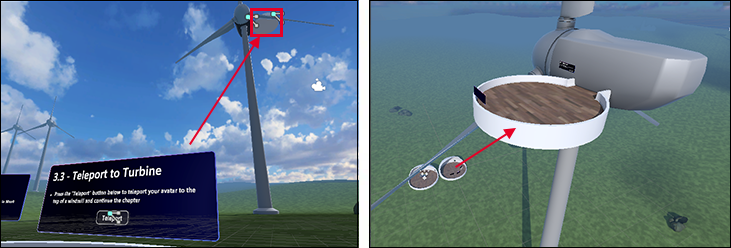
Go to Station 3.3 and then click the Teleport button to teleport up to the wind turbine generator.
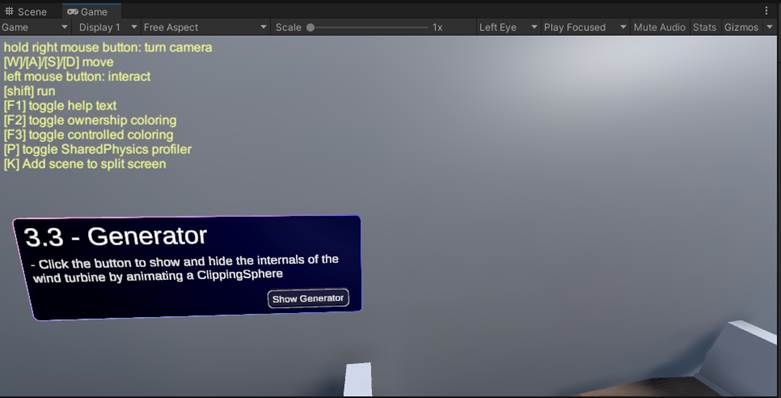
In the 3.3 -- Generator information box, select the Show/Hide Generator button. A window opens up in the side of the wind turbine and you can see the generator inside.
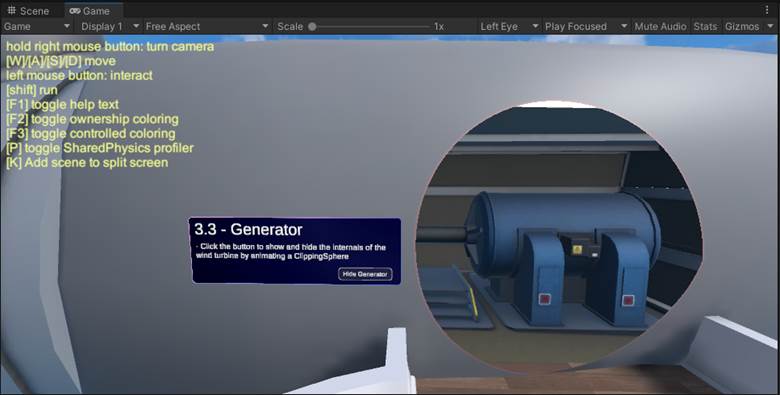
Feel free to step up close to the generator and have a look. It's pretty cool! When you've finished, navigate back out and then press the Show/Hide Generator button. This closes the window.
Go to Chapter 4
At this point, the attendee in the experience would be ready to move on to Chapter 4 and learn about wind turbine activities related to physics. Just like with Chapter 3, there's a Sphere Terrace that contains the stations for Chapter 4. To get there:
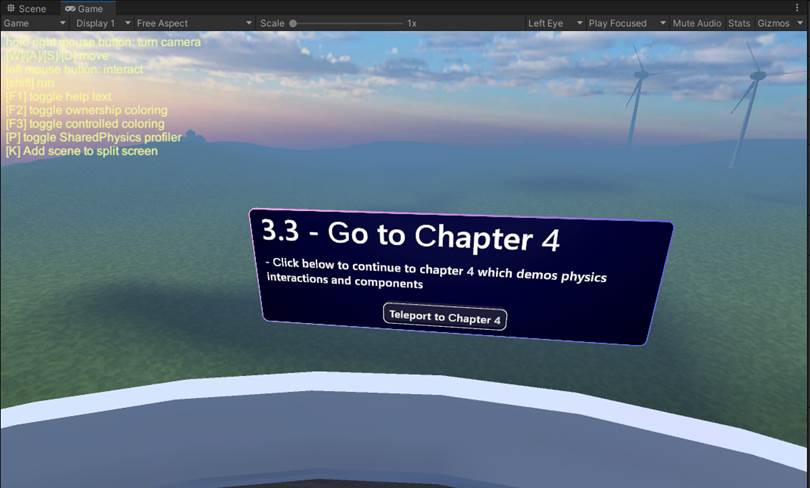
Rotate around in the opposite direction from the wind turbine generator and walk towards the 3.3 -- Go to Chapter 4 information box.
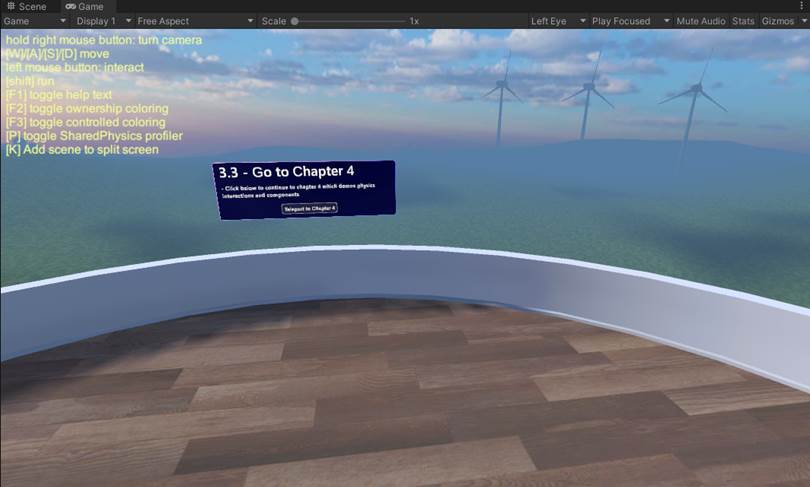
Press the Teleport to Chapter 4 button.
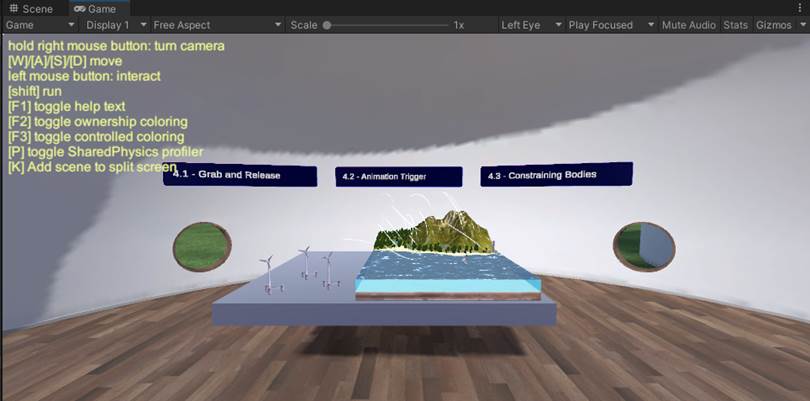
As advertised, this places the avatar in front of the stations for Chapter 4 and Mesh Physics.
Chapter 3: Summary
In this chapter, you used Mesh Visual Scripting to add features that empower attendees in your experience to do the following:
Press a button that causes an educational video about wind turbines to play.
Press a button that triggers the display of an info dialog about wind turbines.
Press a button that teleports the attendee from the ground up to a platform attached to a wind turbine generator, where they can examine the generator up close.
Next steps
Povratne informacije
Kmalu na voljo: V letu 2024 bomo ukinili storitev Težave v storitvi GitHub kot mehanizem za povratne informacije za vsebino in jo zamenjali z novim sistemom za povratne informacije. Za več informacij si oglejte: https://aka.ms/ContentUserFeedback.
Pošlji in prikaži povratne informacije za