Set up SQL Server TDE Extensible Key Management by using Azure Key Vault
Applies to: ![]() SQL Server
SQL Server
In this article, you install and configure the SQL Server Connector for Azure Key Vault.
Note
Microsoft Entra ID was previously known as Azure Active Directory (Azure AD).
Extensible Key Management using Azure Key Vault (AKV) is available for SQL Server on Linux environments, starting with SQL Server 2022 (16.x) Cumulative Update 12. Follow the same instructions, but skip steps 3 and 4.
Prerequisites
Before you begin using Azure Key Vault with your SQL Server instance, be sure that you've met the following prerequisites:
You must have an Azure subscription.
Create a Microsoft Entra tenant.
Familiarize yourself with the principles of Extensible Key Management (EKM) storage with Azure Key Vault by reviewing EKM with Azure Key Vault (SQL Server).
Be able to modify the registry on the SQL Server computer.
Install the version of Visual Studio C++ Redistributable that's based on the version of SQL Server that you're running:
SQL Server version Visual Studio C++ Redistributable version 2008, 2008 R2, 2012, 2014 Visual C++ Redistributable packages for Visual Studio 2013 2016, 2017, 2019, 2022 Visual C++ Redistributable for Visual Studio 2015 Familiarize yourself with Access Azure Key Vault behind a firewall if you plan to use the SQL Server Connector for Azure Key Vault behind a firewall or with a proxy server.
Step 1: Set up a Microsoft Entra service principal
To grant your SQL Server instance access permissions to your Azure key vault, you need a service principal account in Microsoft Entra ID.
Sign in to the Azure portal, and do either of the following:
Select the Microsoft Entra ID button.
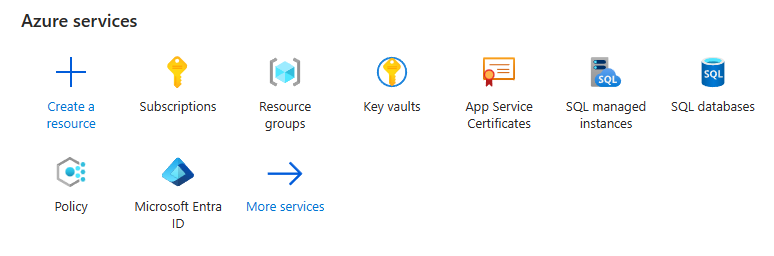
Select More services and then, in the All services pane, type Microsoft Entra ID.
Register an application with Microsoft Entra ID by doing the following. For detailed step-by-step instructions, see the Get an identity for the application section of the Azure Key Vault blog post, Azure Key Vault – Step by Step.
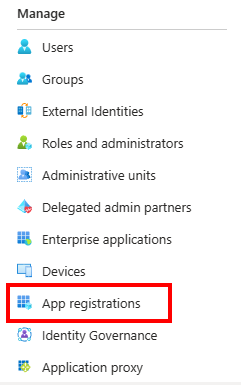
On the Manage section of your Microsoft Entra ID resource, select App registrations.
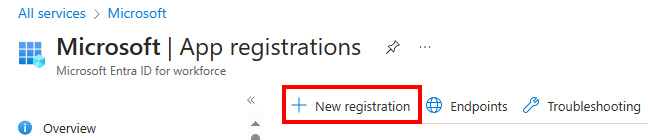
On the App registrations page, select New registration.
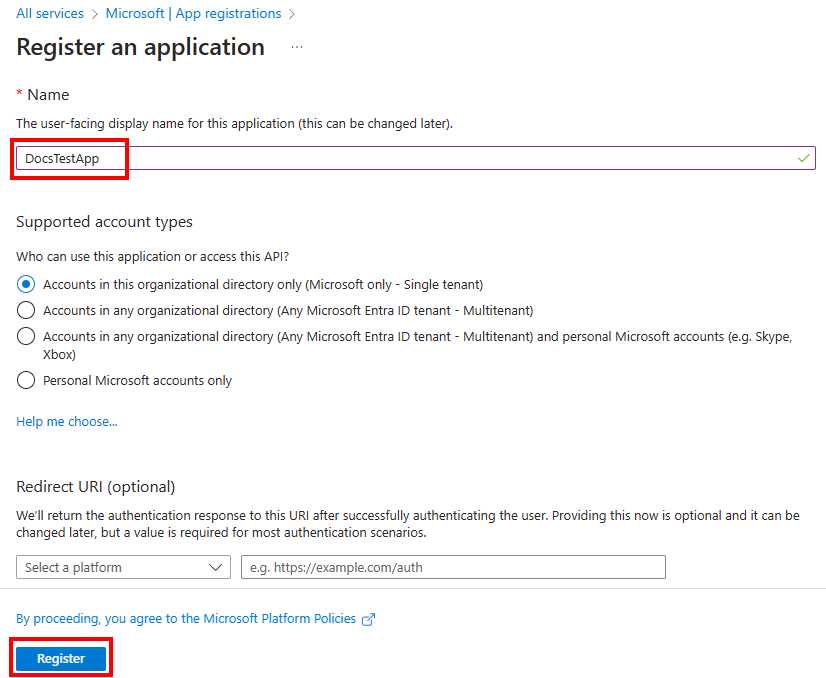
On the Register an application pane, enter the user-facing name for the app, and then select Register.
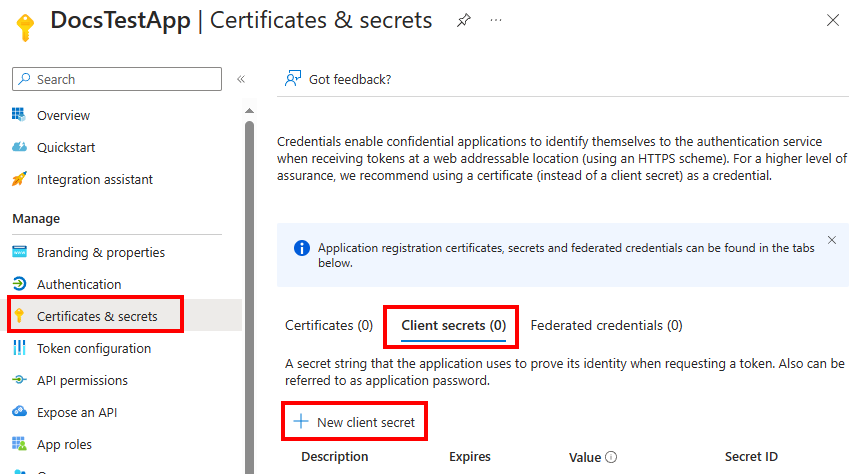
In the left pane, select Certificates & secrets > Client secrets > New client secret.
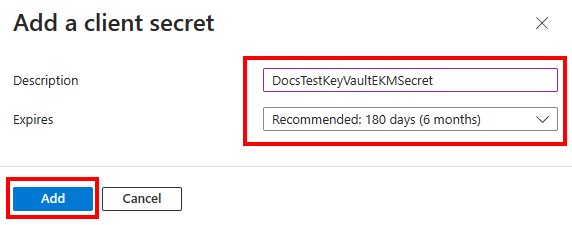
Under Add a client secret, enter a description and an appropriate expiration, and then select Add. You can't choose an expiration period greater than 24 months. For more information, see Add a client secret.
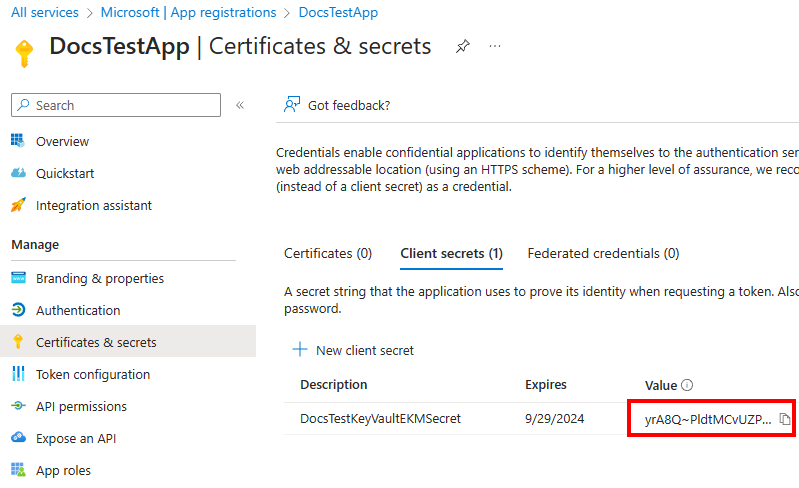
On the Certificates & secrets pane, under Value, select the Copy button next to the value of the client secret to be used to create an asymmetric key in SQL Server.
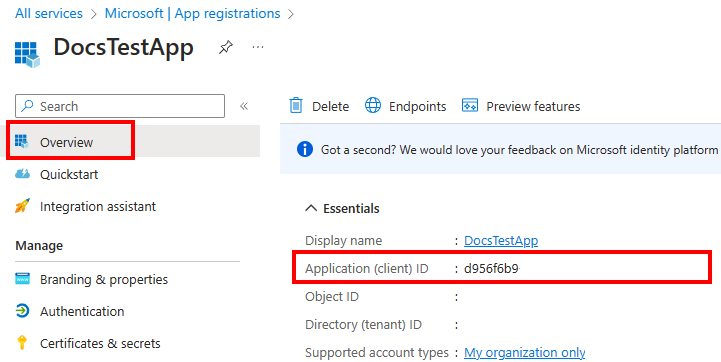
In the left pane, select Overview and then, in the Application (client) ID box, copy the value to be used to create an asymmetric key in SQL Server.
Step 2: Create a key vault
Select the method you want to use to create a key vault.
Create a key vault by using the Azure portal
You can use the Azure portal to create the key vault and then add a Microsoft Entra principal to it.
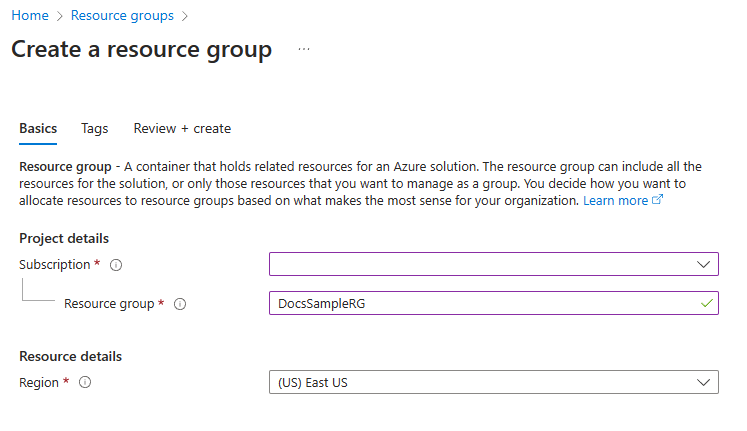
Create a resource group.
All Azure resources that you create via the Azure portal must be contained in a resource group, which you create to house your key vault. The resource name in this example is DocsSampleRG. Choose your own resource group and key vault name, because all key vault names must be globally unique.
On the Create a resource group pane, under Project details, enter the values, and then select Review + create.
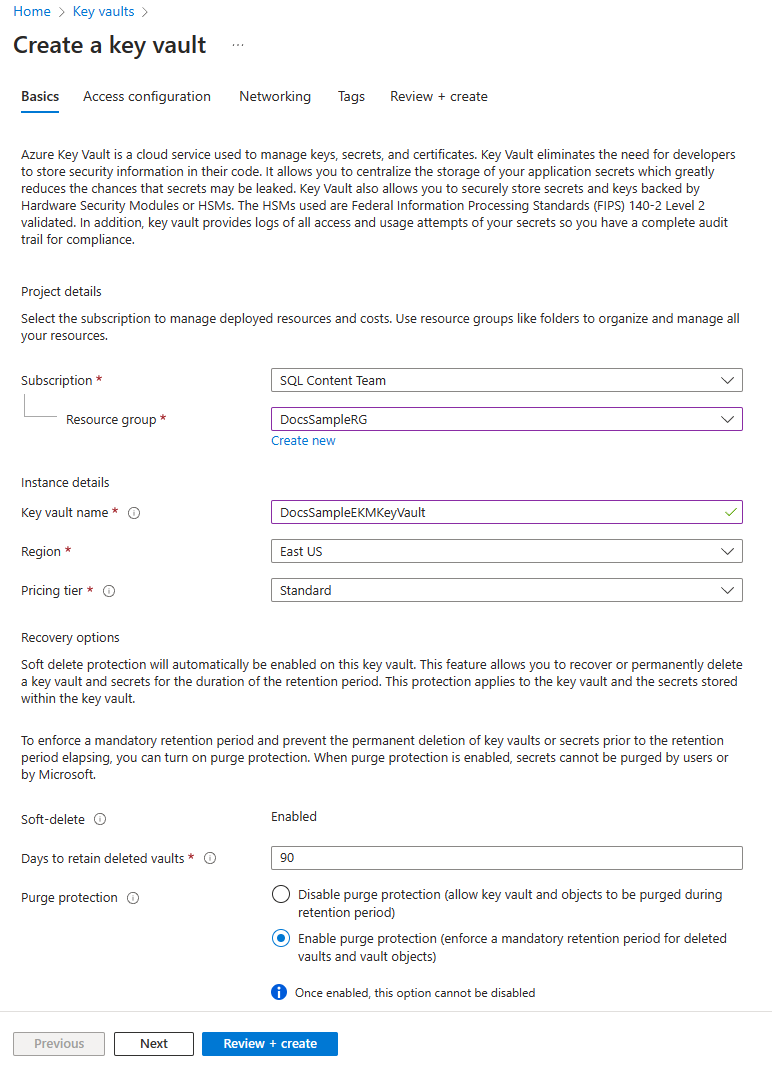
In the Azure portal, search or select the Key vaults services to create a key vault. Select Create.
On the Create a key vault pane, select the Basics tab, enter the appropriate values for the tab. We also recommend enabling purge protection.
On the Access configuration tab, you have the option of selecting Azure role-based access control or Vault access policy. We go over both options, but the Azure role-based access control option is recommended. For more information, see Access model overview.
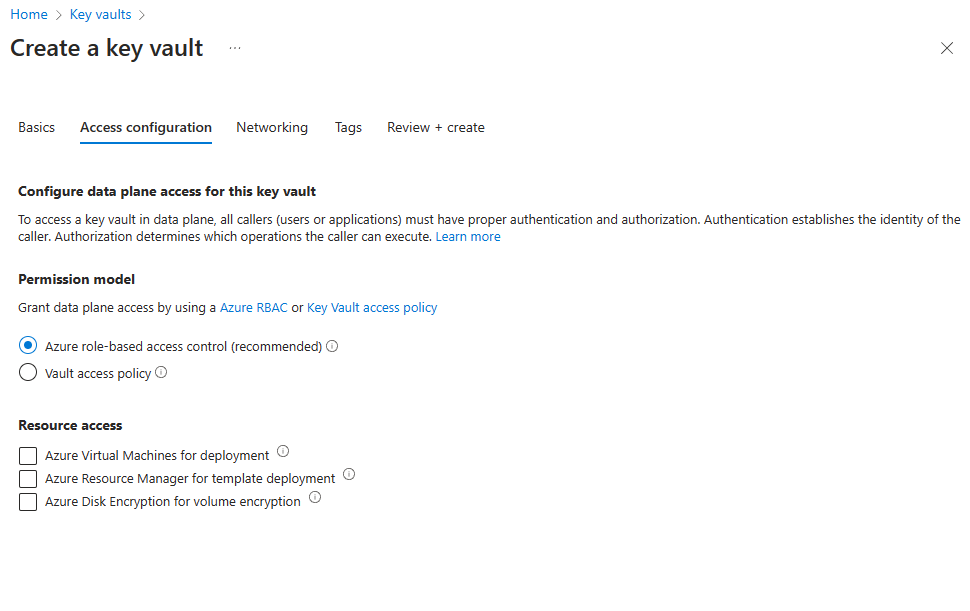
Select Review + create and create the key vault.
Azure role-based access control
The recommended method is to use Azure role-based access control (RBAC) to assign permissions to the key vault. This method allows you to assign permissions to users, groups, and applications at a more granular level. You can assign permissions to the key vault at the management plane (Azure role assignments), and at the data plane (key vault access policies). If you're only able to use access policy, you can skip this section and go to the Vault access policy section. For more information on Azure Key Vault RBAC permissions, see Azure built-in roles for Key Vault data plane operations.
Go to the key vault resource that you created, and select the Access control (IAM) setting.
Select Add > Add role assignment.
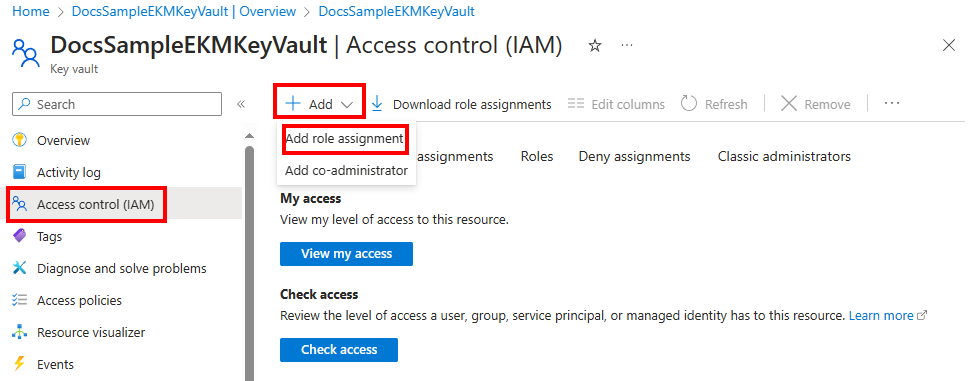
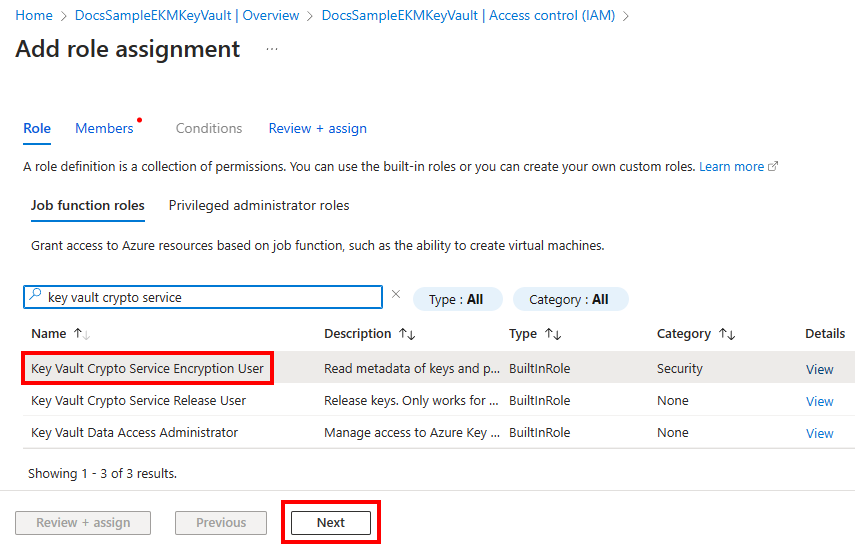
The EKM application needs the Key Vault Crypto Service Encryption User role to perform wrap and unwrap operations. Search for Key Vault Crypto Service Encryption User and select the role. Select Next.
In the Members tab, select the Select members option, and then search for the Microsoft Entra application that you created in Step 1. Select the application and then the Select button.

Select Review + assign twice to complete the role assignment.
The user creating the key needs the Key Vault Administrator role. Search for Key Vault Administrator and select the role. Select Next.
Just like the previous steps, add the member creating the key and assign the role.
Vault access policy
Note
If you are using the Azure role-based access control option, you can skip this section. If you are changing the permission model, you can do so by going to the Access configuration menu of the key vault. Make sure you have the correct permissions to manage the key vault. For more information, see Enable Azure RBAC permissions on Key Vault.
From the Access configuration tab, select Vault access policy. If you're using an existing Key vault, you can select the Access policies menu from the Key vault resource, and select Create.
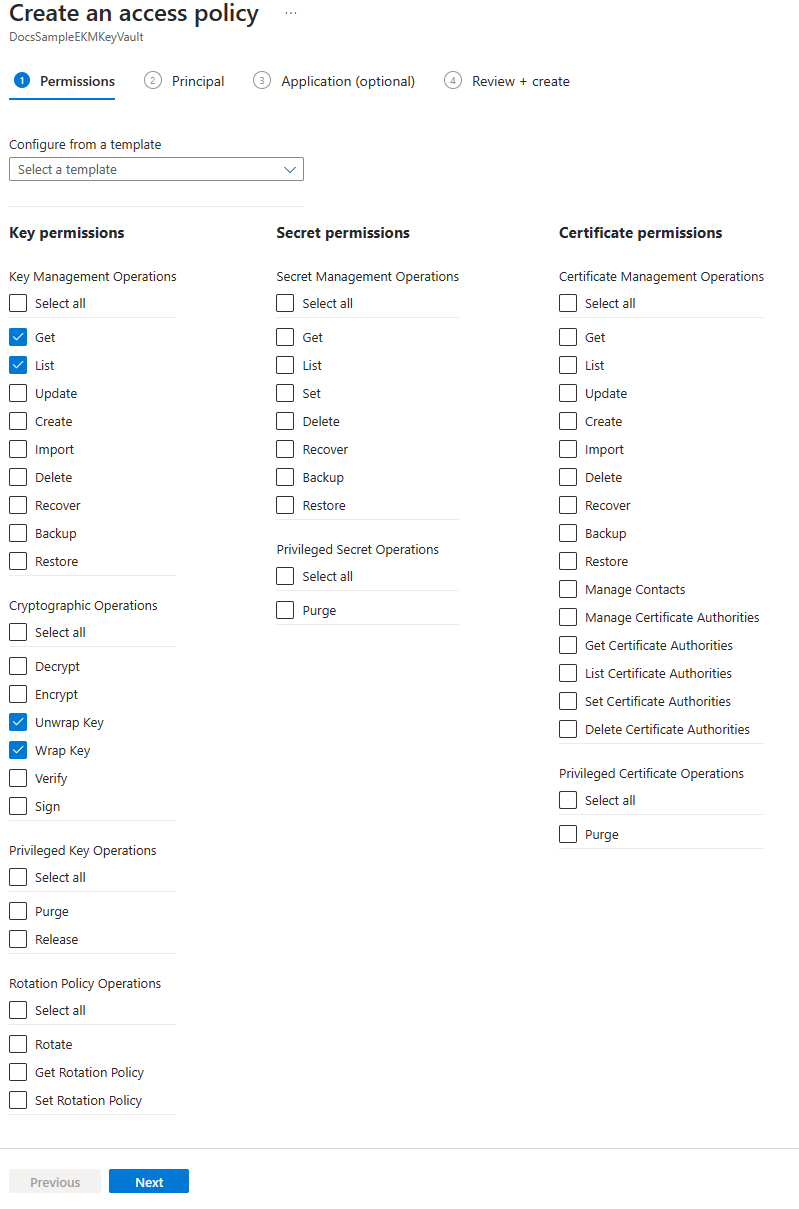
On the Create an access policy pane, select Get and List permissions from the Key Management Operations options. Select Unwrap Key and Wrap Key permissions from the Cryptographic Operations options. Select Next
On the Principal tab, select the application that was created in Step 1.
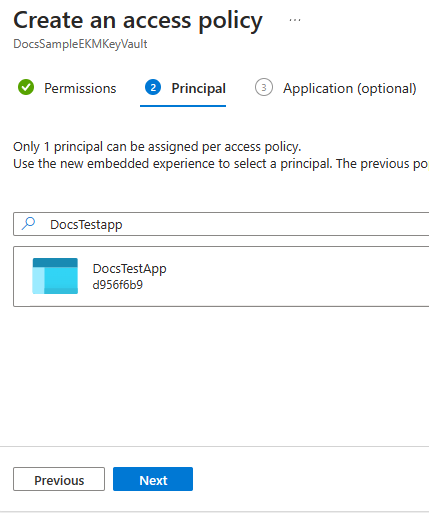
Select Next and then Create.
Create a key
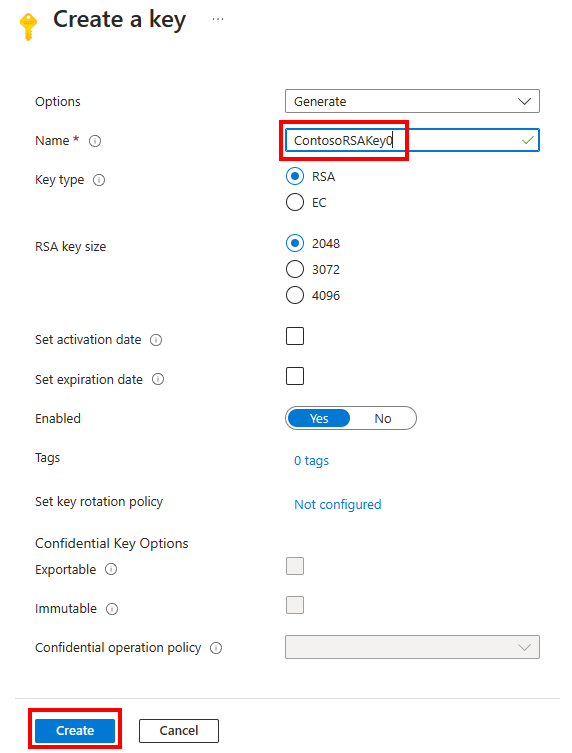
On the Key Vault pane, select Keys and then select the option Generate/Import. This opens the Create a key pane. Enter a key vault name. Select the Generate option, and enter a name for the key.
Use key type RSA and RSA key size as 2048. EKM currently only supports an RSA key. Set activation and expiration dates as appropriate and set Enabled as Yes.
Best practices
To ensure quick key recovery and be able to access your data outside of Azure, we recommend the following best practices:
Create your encryption key locally on a local hardware security module (HSM) device. Be sure to use an asymmetric RSA 2048 or 3072 key so that it's supported by SQL Server.
Import the encryption key to your Azure key vault. This process is described in the next sections.
Before you use the key in your Azure key vault for the first time, do an Azure key vault key backup using the
Backup-AzureKeyVaultKeyPowerShell cmdlet.Whenever you make any changes to the key (for example, adding ACLs, tags, or key attributes), be sure to do another Azure key vault key backup.
Note
Backing up a key is an Azure Key Vault key operation which returns a file that can be saved anywhere.
Using the SQL Server Connector for Azure Key Vault behind a firewall or proxy server can affect performance if traffic is delayed or blocked. Familiarize yourself with Access Azure Key Vault behind a firewall to ensure the correct rules are in place.
Step 3: Install the SQL Server Connector
Download the SQL Server Connector from the Microsoft Download Center. The download should be done by the administrator of the SQL Server computer.
Note
- SQL Server Connector versions 1.0.0.440 and older have been replaced and are no longer supported in production environments and using the instructions on the SQL Server Connector Maintenance & Troubleshooting page under Upgrade of SQL Server Connector.
- Starting with version 1.0.3.0, the SQL Server Connector reports relevant error messages to the Windows event logs for troubleshooting.
- Starting with version 1.0.4.0, there is support for private Azure clouds, including Azure operated by 21Vianet, Azure Germany, and Azure Government.
- There is a breaking change in version 1.0.5.0 in terms of the thumbprint algorithm. You may experience database restore failures after upgrading to 1.0.5.0. For more information, see KB article 447099.
- Starting with version 1.0.5.0 (TimeStamp: September 2020), the SQL Server Connector supports filtering messages and network request retry logic.
- Starting with updated version 1.0.5.0 (TimeStamp: November 2020), the SQL Server Connector supports RSA 2048, RSA 3072, RSA-HSM 2048 and RSA-HSM 3072 keys.
- Starting with updated version 1.0.5.0 (TimeStamp: November 2020), you can refer to a specific key version in the Azure Key Vault.
By default, the Connector is installed at C:\Program Files\SQL Server Connector for Microsoft Azure Key Vault. This location can be changed during setup. If you do change it, adjust the scripts in the next section.
There's no interface for the Connector, but if it's installed successfully, the Microsoft.AzureKeyVaultService.EKM.dll is installed on the machine. This assembly is the cryptographic EKM provider DLL that needs to be registered with SQL Server by using the CREATE CRYPTOGRAPHIC PROVIDER statement.
The SQL Server Connector installation also allows you to optionally download sample scripts for SQL Server encryption.
To view error code explanations, configuration settings, or maintenance tasks for the SQL Server Connector, see:
- A. Maintenance Instructions for the SQL Server Connector
- C. Error Code Explanations for the SQL Server Connector
Step 4: Add registry key to support EKM provider
Warning
Modifying the registry should be performed by users that know exactly what they are doing. Serious problems might occur if you modify the registry incorrectly. For added protection, back up the registry before you modify it. You can restore the registry if a problem occurs.
Make sure that SQL Server is installed and running.
Run regedit to open the Registry Editor.
Create a
SQL Server Cryptographic Providerregistry key onHKEY_LOCAL_MACHINE\SOFTWARE\Microsoft. The full path isHKEY_LOCAL_MACHINE\SOFTWARE\Microsoft\SQL Server Cryptographic Provider.Right-click the
SQL Server Cryptographic Providerregistry key, and then select Permissions.Give Full Control permissions on the
SQL Server Cryptographic Providerregistry key to the user account running the SQL Server service.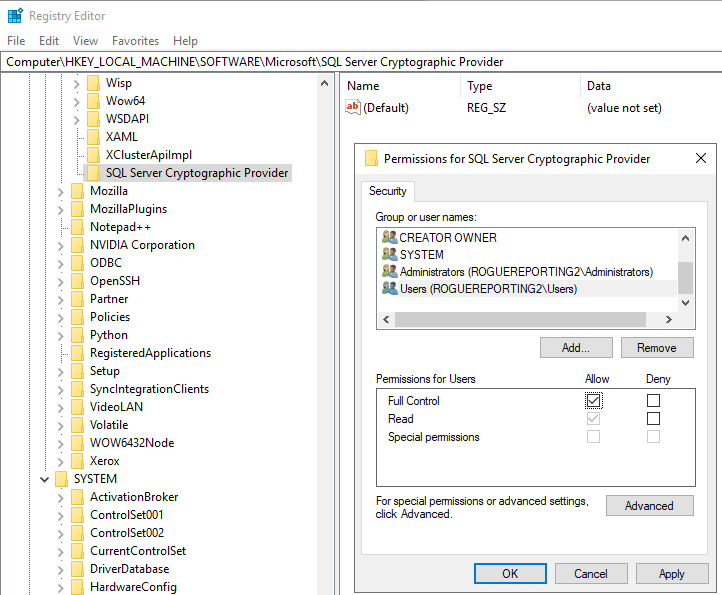
Select Apply and then OK.
Close Registry Editor and restart the SQL Server service.
Note
If you use TDE with EKM or Azure Key Vault on a failover cluster instance, you must complete an additional step to add
HKEY_LOCAL_MACHINE\SOFTWARE\Microsoft\SQL Server Cryptographic Providerto the Cluster Registry Checkpoint routine, so the registry can sync across the nodes. Syncing facilitates database recovery after failover and key rotation.To add the registry key to the Cluster Registry Checkpoint routine, in PowerShell, run the following command:
Add-ClusterCheckpoint -RegistryCheckpoint "SOFTWARE\Microsoft\SQL Server Cryptographic Provider" -Resourcename "SQL Server"
Step 5: Configure SQL Server
For a note about the minimum permission levels needed for each action in this section, see B. Frequently Asked Questions.
Configure the master database
Run sqlcmd or open SQL Server Management Studio.
Configure SQL Server to use EKM by running the following Transact-SQL script:
-- Enable advanced options.
USE master;
GO

EXEC sp_configure 'show advanced options', 1;
GO
RECONFIGURE;
GO

-- Enable EKM provider
EXEC sp_configure 'EKM provider enabled', 1;
GO
RECONFIGURE;
Register the SQL Server Connector as an EKM provider with SQL Server.
Create a cryptographic provider by using the SQL Server Connector, which is an EKM provider for the Azure Key Vault. In this example, the provider name is
AzureKeyVault_EKM.CREATE CRYPTOGRAPHIC PROVIDER AzureKeyVault_EKM FROM FILE = 'C:\Program Files\SQL Server Connector for Microsoft Azure Key Vault\Microsoft.AzureKeyVaultService.EKM.dll'; GONote
The file path length can't exceed 256 characters.
Set up a SQL Server credential for a SQL Server login to use the key vault.
A credential must be added to each login that will perform encryption by using a key from the key vault. This might include:
A SQL Server administrator login that uses the key vault to set up and manage SQL Server encryption scenarios.
Other SQL Server logins that might enable TDE or other SQL Server encryption features.
There's one-to-one mapping between credentials and logins. That is, each login must have a unique credential.
Modify this Transact-SQL script in the following ways:
Edit the
IDENTITYargument (DocsSampleEKMKeyVault) to point to your Azure Key Vault.- If you're using global Azure, replace the
IDENTITYargument with the name of your Azure Key Vault from Step 2: Create a key vault. - If you're using a private Azure cloud (for example, Azure Government, Microsoft Azure operated by 21Vianet, or Azure Germany), replace the
IDENTITYargument with the Vault URI that's returned in step 3 of the Create a key vault and key by using PowerShell section. Don't includehttps://in the key vault URI.
- If you're using global Azure, replace the
Replace the first part of the
SECRETargument with the Microsoft Entra Client ID from Step 1: Set up a Microsoft Entra service principal. In this example, the Client ID isd956f6b9xxxxxxx.Important
Be sure to remove the hyphens from the App (Client) ID.
Complete the second part of the
SECRETargument with Client Secret from Step 1: Set up a Microsoft Entra service principal. In this example, the Client Secret isyrA8X~PldtMCvUZPxxxxxxxx. The final string for theSECRETargument will be a long sequence of letters and numbers, without hyphens (except for the Client Secret section, in case the Client Secret contains any hyphens).USE master; CREATE CREDENTIAL sysadmin_ekm_cred WITH IDENTITY = 'DocsSampleEKMKeyVault', -- for public Azure -- WITH IDENTITY = 'DocsSampleEKMKeyVault.vault.usgovcloudapi.net', -- for Azure Government -- WITH IDENTITY = 'DocsSampleEKMKeyVault.vault.azure.cn', -- for Microsoft Azure operated by 21Vianet -- WITH IDENTITY = 'DocsSampleEKMKeyVault.vault.microsoftazure.de', -- for Azure Germany --<----Application (Client) ID ---><--Microsoft Entra app (Client) ID secret--> SECRET = 'd956f6b9xxxxxxxyrA8X~PldtMCvUZPxxxxxxxx' FOR CRYPTOGRAPHIC PROVIDER AzureKeyVault_EKM; -- Add the credential to the SQL Server administrator's domain login ALTER LOGIN [<domain>\<login>] ADD CREDENTIAL sysadmin_ekm_cred;
For an example of using variables for the
CREATE CREDENTIALargument and programmatically removing the hyphens from the Client ID, see CREATE CREDENTIAL (Transact-SQL).Open your Azure Key Vault key in your SQL Server instance.
Whether you created a new key or imported an asymmetric key, as described in Step 2: Create a key vault, you need to open the key. Open it by providing your key name in the following Transact-SQL script.
Important
Be sure to first complete the Registry prerequisites for this step.
- Replace
EKMSampleASYKeywith the name you'd like the key to have in SQL Server. - Replace
ContosoRSAKey0with the name of your key in your Azure Key Vault. Below is an example of a version-less key.
CREATE ASYMMETRIC KEY EKMSampleASYKey
FROM PROVIDER [AzureKeyVault_EKM]
WITH PROVIDER_KEY_NAME = 'ContosoRSAKey0',
CREATION_DISPOSITION = OPEN_EXISTING;
Beginning with updated version 1.0.5.0 of the SQL Server connector, you can refer to a specific key version in the Azure Key Vault:
CREATE ASYMMETRIC KEY EKMSampleASYKey
FROM PROVIDER [AzureKeyVault_EKM]
WITH PROVIDER_KEY_NAME = 'ContosoRSAKey0/1a4d3b9b393c4678831ccc60def75379',
CREATION_DISPOSITION = OPEN_EXISTING;
In the preceding example script,
1a4d3b9b393c4678831ccc60def75379represents the specific version of the key that will be used. If you use this script, it doesn't matter if you update the key with a new version. The key version (for example)1a4d3b9b393c4678831ccc60def75379will always be used for database operations.- Replace
Create a new login by using the asymmetric key in SQL Server that you created in the preceding step.
--Create a Login that will associate the asymmetric key to this login
CREATE LOGIN TDE_Login
FROM ASYMMETRIC KEY EKMSampleASYKey;
Create a new login from the asymmetric key in SQL Server. Drop the credential mapping from Step 5: Configure SQL Server so that the credentials can be mapped to the new login.
--Now drop the credential mapping from the original association
ALTER LOGIN [<domain>\<login>]
DROP CREDENTIAL sysadmin_ekm_cred;
Alter the new login, and map the EKM credentials to the new login.
--Now add the credential mapping to the new Login
ALTER LOGIN TDE_Login
ADD CREDENTIAL sysadmin_ekm_cred;
Configure the user database to be encrypted
Create a test database that will be encrypted with the Azure Key Vault key.
--Create a test database that will be encrypted with the Azure Key Vault key
CREATE DATABASE TestTDE;
Create a database encryption key by using the
ASYMMETRIC KEY(EKMSampleASYKey).USE <DB Name>; --Create an ENCRYPTION KEY using the ASYMMETRIC KEY (EKMSampleASYKey) CREATE DATABASE ENCRYPTION KEY WITH ALGORITHM = AES_256 ENCRYPTION BY SERVER ASYMMETRIC KEY EKMSampleASYKey;Encrypt the test database. Enable TDE by setting
ENCRYPTION ON.--Enable TDE by setting ENCRYPTION ON ALTER DATABASE TestTDE SET ENCRYPTION ON;
Registry details
Execute the following Transact-SQL query in the
masterdatabase to show the asymmetric key used.SELECT name, algorithm_desc, thumbprint FROM sys.asymmetric_keys;The statement returns:
name            algorithm_desc    thumbprint
EKMSampleASYKey RSA_2048          <key thumbprint>
In the user database (
TestTDE), execute the following Transact-SQL query to show the encryption key used.SELECT encryptor_type, encryption_state_desc, encryptor_thumbprint FROM sys.dm_database_encryption_keys WHERE database_id = DB_ID('TestTDE');The statement returns:
encryptor_type encryption_state_desc encryptor_thumbprint
ASYMMETRIC KEY ENCRYPTED             <key thumbprint>
Clean up
Clean up the test objects. Delete all the objects that were created in this test script.
-- CLEAN UP
USE master;
GO
ALTER DATABASE [TestTDE] SET SINGLE_USER WITH ROLLBACK IMMEDIATE;
DROP DATABASE [TestTDE];
GO

ALTER LOGIN [TDE_Login] DROP CREDENTIAL [sysadmin_ekm_cred];
DROP LOGIN [TDE_Login];
GO

DROP CREDENTIAL [sysadmin_ekm_cred];
GO

USE master;
GO
DROP ASYMMETRIC KEY [EKMSampleASYKey];
DROP CRYPTOGRAPHIC PROVIDER [AzureKeyVault_EKM];
GO
For sample scripts, see the blog at SQL Server Transparent Data Encryption and Extensible Key Management with Azure Key Vault.
The
SQL Server Cryptographic Providerregistry key isn't cleaned up automatically after a key or all EKM keys are deleted. It must be cleaned up manually. Cleaning the registry key should be done with extreme caution, since cleaning the registry prematurely can break the EKM functionality. To clean up the registry key, delete theSQL Server Cryptographic Providerregistry key onHKEY_LOCAL_MACHINE\SOFTWARE\Microsoft.
Troubleshooting
If the registry key HKEY_LOCAL_MACHINE\SOFTWARE\Microsoft\SQL Server Cryptographic Provider isn't created or the required permissions aren't granted, the following DDL statement will fail:
CREATE ASYMMETRIC KEY EKMSampleASYKey
FROM PROVIDER [AzureKeyVault_EKM]
WITH PROVIDER_KEY_NAME = 'ContosoRSAKey0',
CREATION_DISPOSITION = OPEN_EXISTING;
Msg 33049, Level 16, State 2, Line 65
Key with name 'ContosoRSAKey0' does not exist in the provider or access is denied. Provider error code: 2058.  (Provider Error - No explanation is available, consult EKM Provider for details)
Client secrets that are about to expire
If the credential has a client secret that is about to expire, a new secret can be assigned to the credential.
Update the secret originally created in Step 1: Set up a Microsoft Entra service principal.
Alter the credential using the same identity and new secret using the following code. Replace
<New Secret>with your new secret:ALTER CREDENTIAL sysadmin_ekm_cred WITH IDENTITY = 'DocsSampleEKMKeyVault', SECRET = '<New Secret>';Restart the SQL Server service.
Note
If you are using EKM in an availability group (AG), you will need to alter the credential and restart the SQL Server service on all nodes of the AG.
Rotate asymmetric key with a new AKV key or a new AKV key version
Note
- When manually rotating an AKV key, SQL Server supports both AKV version-less key or versioned key and there's no need to use a different AKV key.
- The original AKV key can be rotated creating a new version that can replace the previous key created in SQL Server.
- For manual key rotation, a new SQL Server asymmetric key must be created referring to the version-less key or versioned key that was rotated in AKV. For the new SQL Server asymmetric key, the version-less AKV key will automatically be chosen using the highest key version in AKV. For the versioned key, you must indicate the highest version in AKV using the syntax
WITH PROVIDER_KEY_NAME = <key_name>/<version>. You can alter the database encryption key to re-encrypt with the new asymmetric key. The same key name (versioned or version-less) can be used with AKV rotation policy. For versioned key, the current version must be added. For version-less key, use the same key name.
SQL Server doesn't have a mechanism to automatically rotate the asymmetric key used for TDE. The steps to rotate an asymmetric key manually are as follows.
The credential used in our initial setup (
sysadmin_ekm_cred) can also be reused for the key rotation. Optionally, create a new credential for the new asymmetric key.CREATE CREDENTIAL <new_credential_name> WITH IDENTITY = <key vault>, SECRET = 'existing/new secret' FOR CRYPTOGRAPHIC PROVIDER AzureKeyVault_EKM;Add the credential to the principal:
ALTER LOGIN [domain\userName];
ADD CREDENTIAL <new_credential_name>;
Create the new asymmetric key based on the new key (after rotating the key). The new key could be a version-less key (
ContosoRSAKey0in our example) or a versioned key (ContosoRSAKey0/1a4d3b9b393c4678831ccc60def75379where1a4d3b9b393c4678831ccc60def75379is the version of the updated key in AKV):CREATE ASYMMETRIC KEY <new_ekm_key_name> FROM PROVIDER [AzureKeyVault_EKM] WITH PROVIDER_KEY_NAME = <new_key_from_key_vault>, CREATION_DISPOSITION = OPEN_EXISTING;Create a new login from the new asymmetric key:
CREATE LOGIN <new_login_name>
FROM ASYMMETRIC KEY <new_ekm_key_name>;
Drop the credential from the principal:
ALTER LOGIN [domain\username]
DROP CREDENTIAL <new_credential_name>;
Map AKV credential to the new login:
ALTER LOGIN <new_login_name>;
ADD CREDENTIAL <new_credential_name>;
Alter the database encryption key (DEK) to re-encrypt with the new asymmetric key:
USE [databaseName];
GO
ALTER DATABASE ENCRYPTION KEY ENCRYPTION BY SERVER ASYMMETRIC KEY <new_ekm_key_name>;
You can verify the new asymmetric key and the encryption key used in the database:
SELECT encryptor_type, encryption_state_desc, encryptor_thumbprint
FROM sys.dm_database_encryption_keys
WHERE database_id = DB_ID('databaseName');
This thumbprint should match the registry key under the path
HKEY_LOCAL_MACHINE\SOFTWARE\Microsoft\SQL Server Cryptographic Provider\Azure Key Vault\<key_vault_url>\<thumbprint>and give you theKeyUrifor your rotated key.
Important
Rotating the logical TDE protector for a server means switching to a new asymmetric key or certificate that protects the database encryption key (DEK). Key rotation is an online operation and should only take a few seconds to complete, because this only decrypts and re-encrypts the DEK and not the entire database.
Don't delete previous versions of the key after rotation. When keys are rotated, some data is still encrypted with the previous keys, such as older database backups, backed-up log files, virtual log files (VLF), and transaction log files. Previous keys might also be required for a database recovery or a database restore.
Related content
Feedback
Coming soon: Throughout 2024 we will be phasing out GitHub Issues as the feedback mechanism for content and replacing it with a new feedback system. For more information see: https://aka.ms/ContentUserFeedback.
Submit and view feedback for