Accessing Azure Health Data Services using the REST Client Extension in Visual Studio Code
In this article, you learn how to access Azure Health Data Services using REST Client extension in Visual Studio Code.
Install REST Client extension
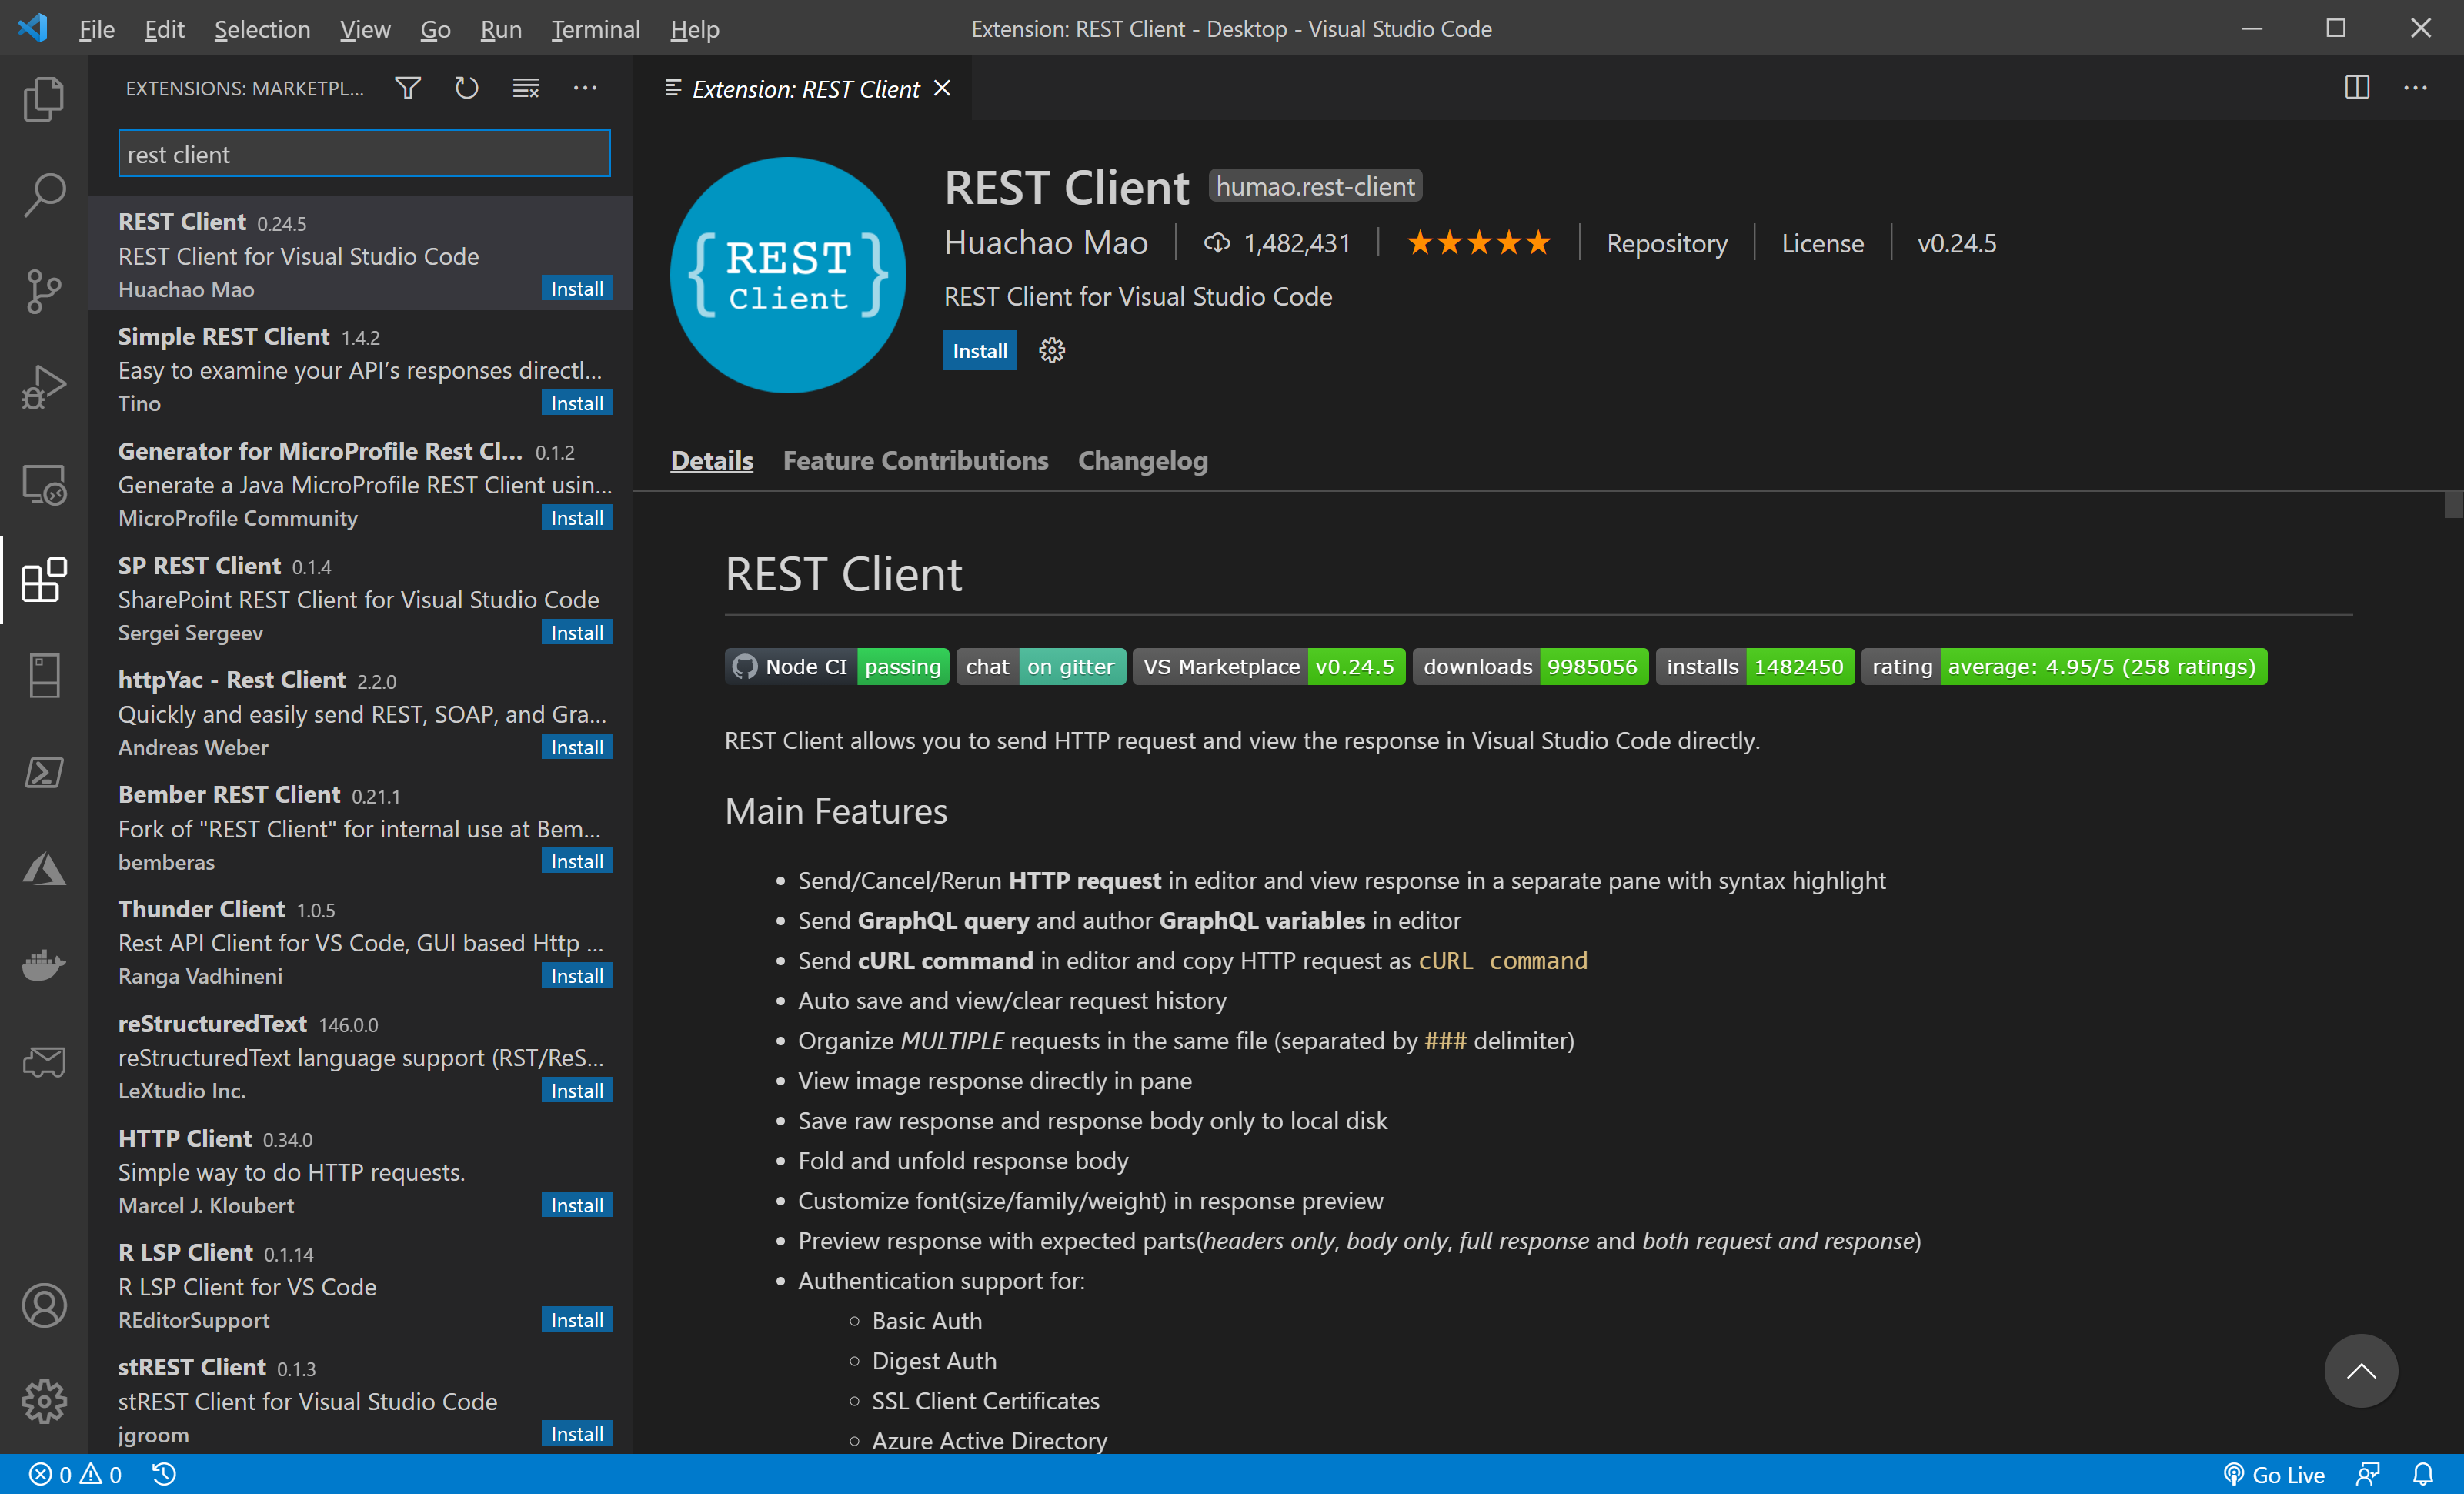
Select the Extensions icon on the left side panel of your Visual Studio Code, and search for "REST Client". Find the REST Client extension and install.
Create a .http file and define variables
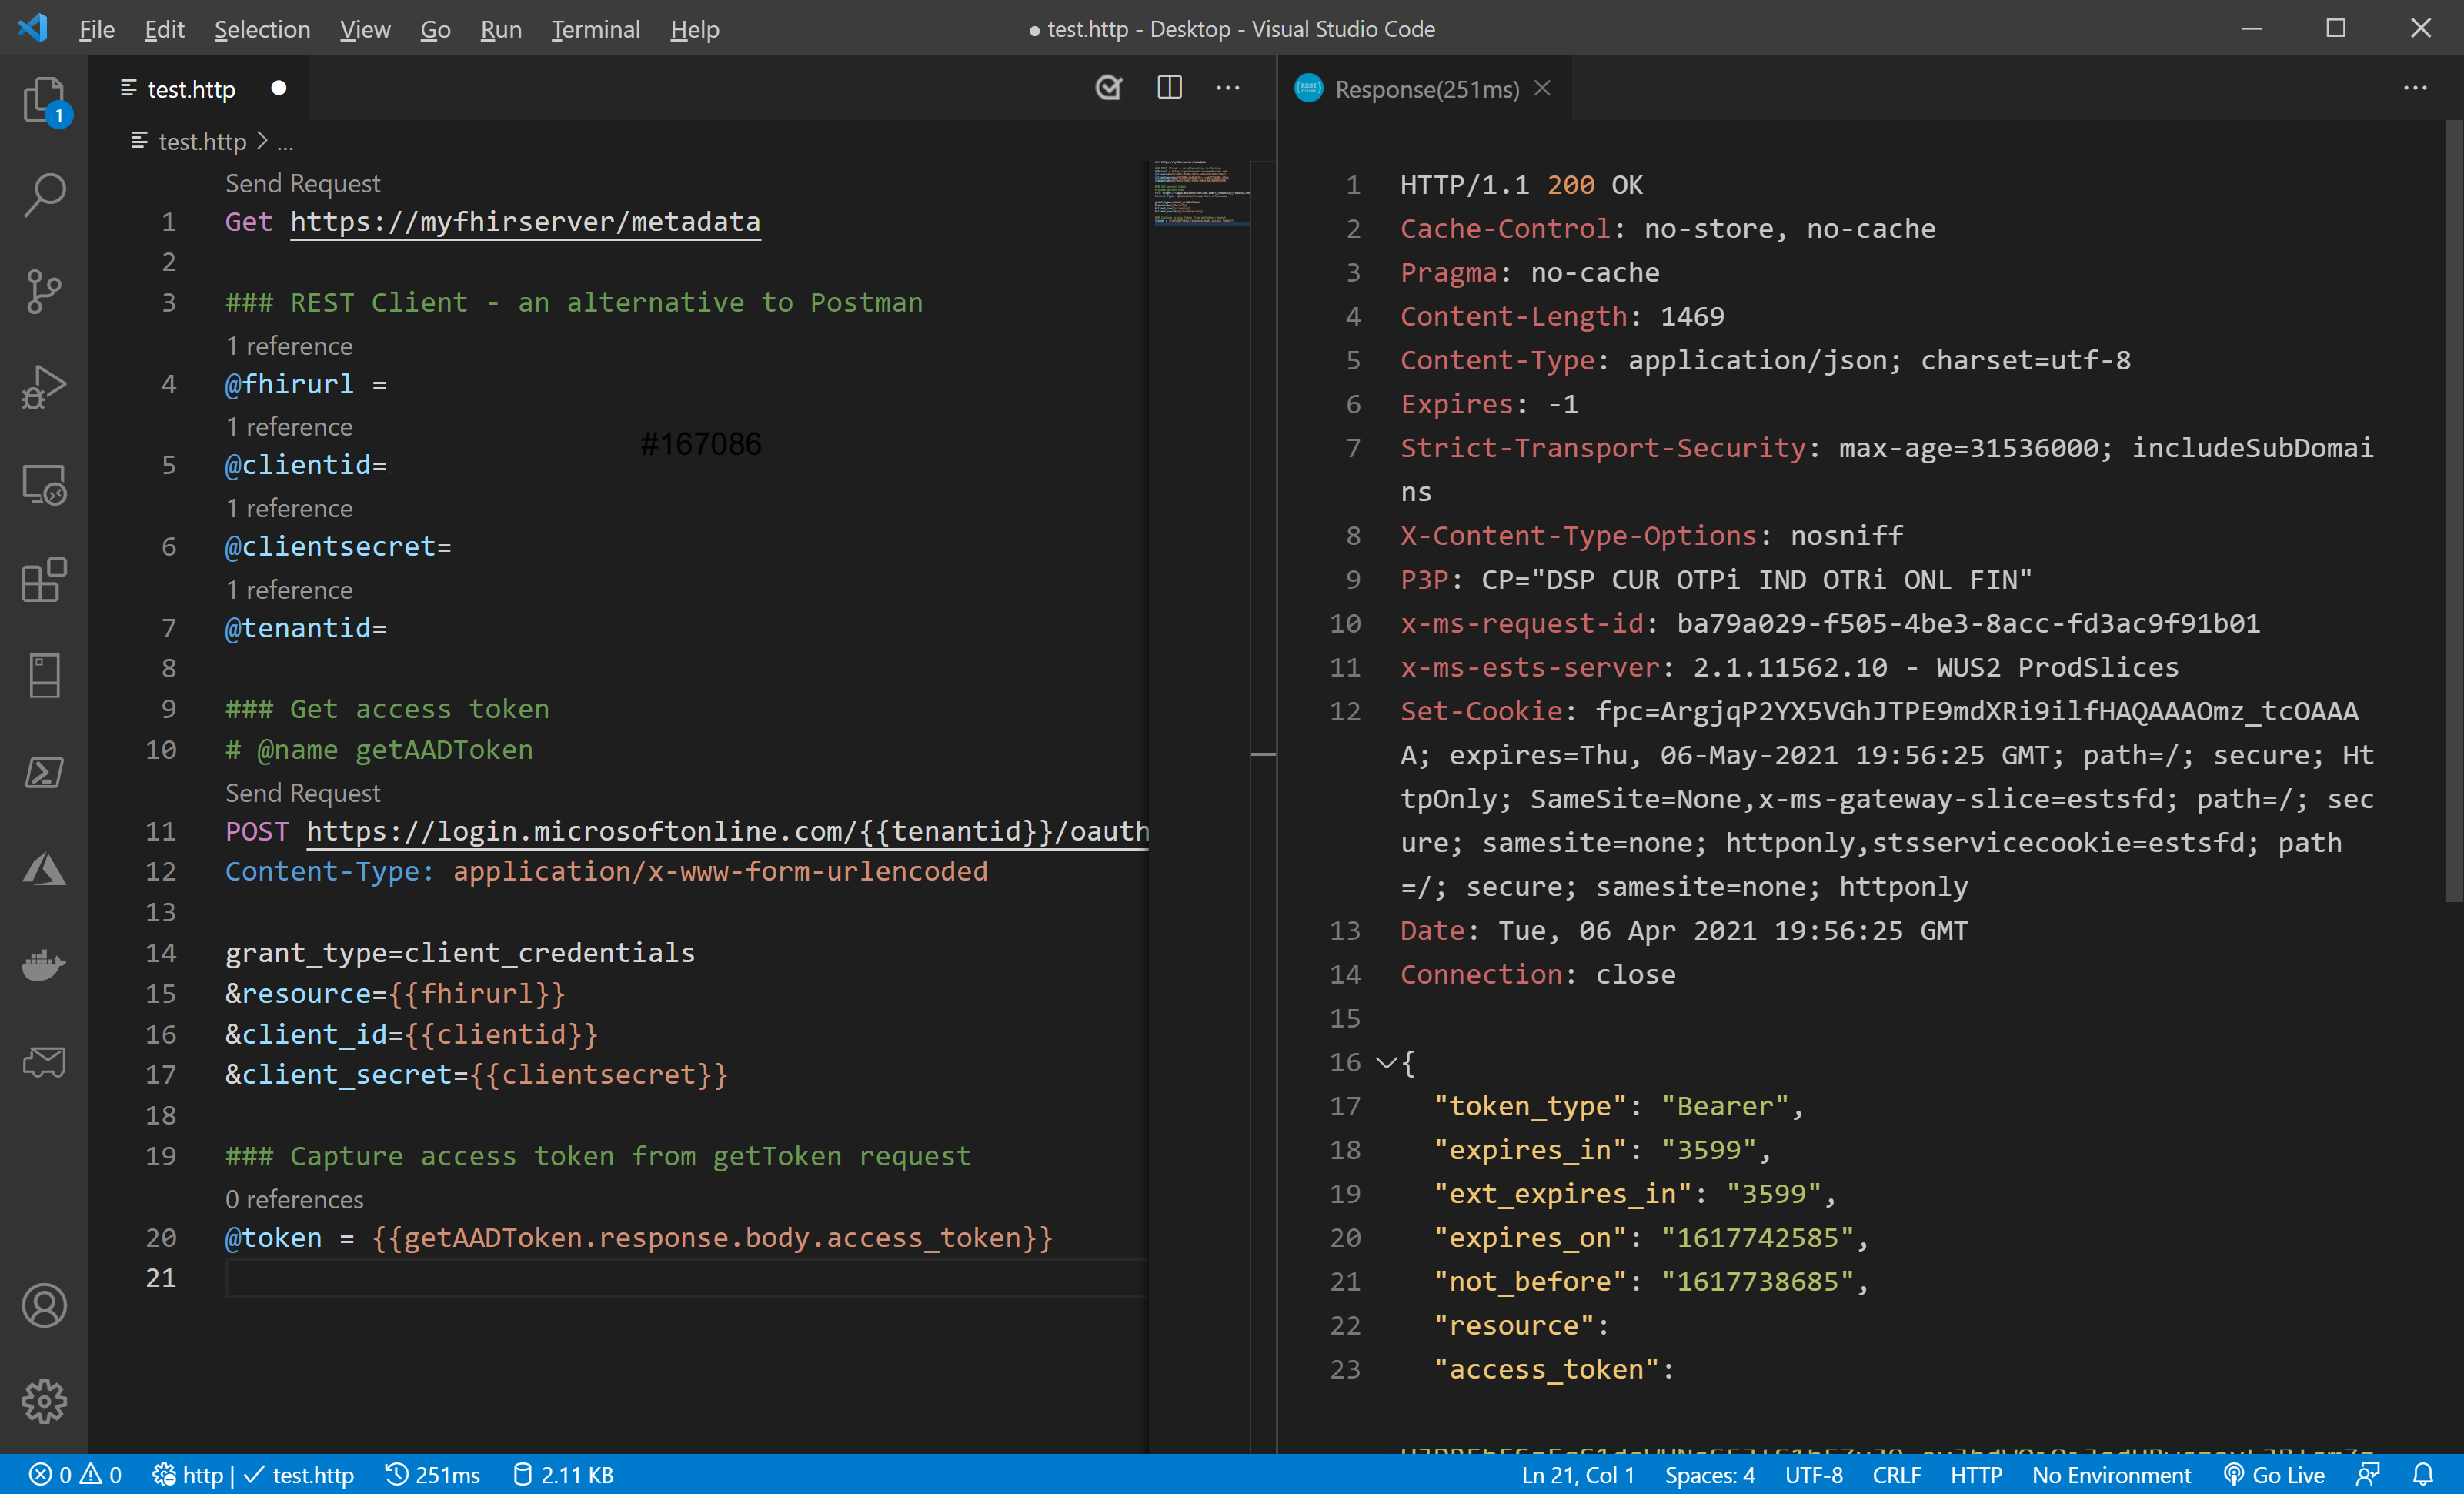
Create a new file in Visual Studio Code. Enter a GET request command line in the file, and save it as test.http. The file suffix .http automatically activates the REST Client environment. Select Send Request to get the metadata.
Get client application values
Important
Before calling the FHIR® server REST API (other than getting the metadata), you must complete application registration. Make a note of your Azure tenant ID, client ID, client secret and the service URL.
While you can use values such as the client ID directly in calls to the REST API, it's a good practice that you define a few variables for these values and use the variables instead.
In your test.http file, include the following information obtained from registering your application.
### REST Client
@fhirurl =https://xxx.azurehealthcareapis.com
@clientid =xxx....
@clientsecret =xxx....
@tenantid =xxx....
Get Microsoft Entra access token
After including the following information in your test.http file, hit Send Request. You'll see an HTTP response that contains your access token.
The line starting with @name contains a variable that captures the HTTP response containing the access token. The variable, @token, is used to store the access token.
Note
The grant_type of client_credentials is used to obtain an access token.
### Get access token
# @name getAADToken
POST https://login.microsoftonline.com/{{tenantid}}/oauth2/token
Content-Type: application/x-www-form-urlencoded

grant_type=client_credentials
&resource={{fhirurl}}
&client_id={{clientid}}
&client_secret={{clientsecret}}
&scope={{fhirurl}}/.default

### Extract access token from getAADToken request
@token = {{getAADToken.response.body.access_token}}
Note
When the FHIR service audience parameter is not mapped to the FHIR service endpoint url, the resource parameter value should be mapped to the Audience value under the FHIR Service Authentication blade.
Get FHIR Patient data
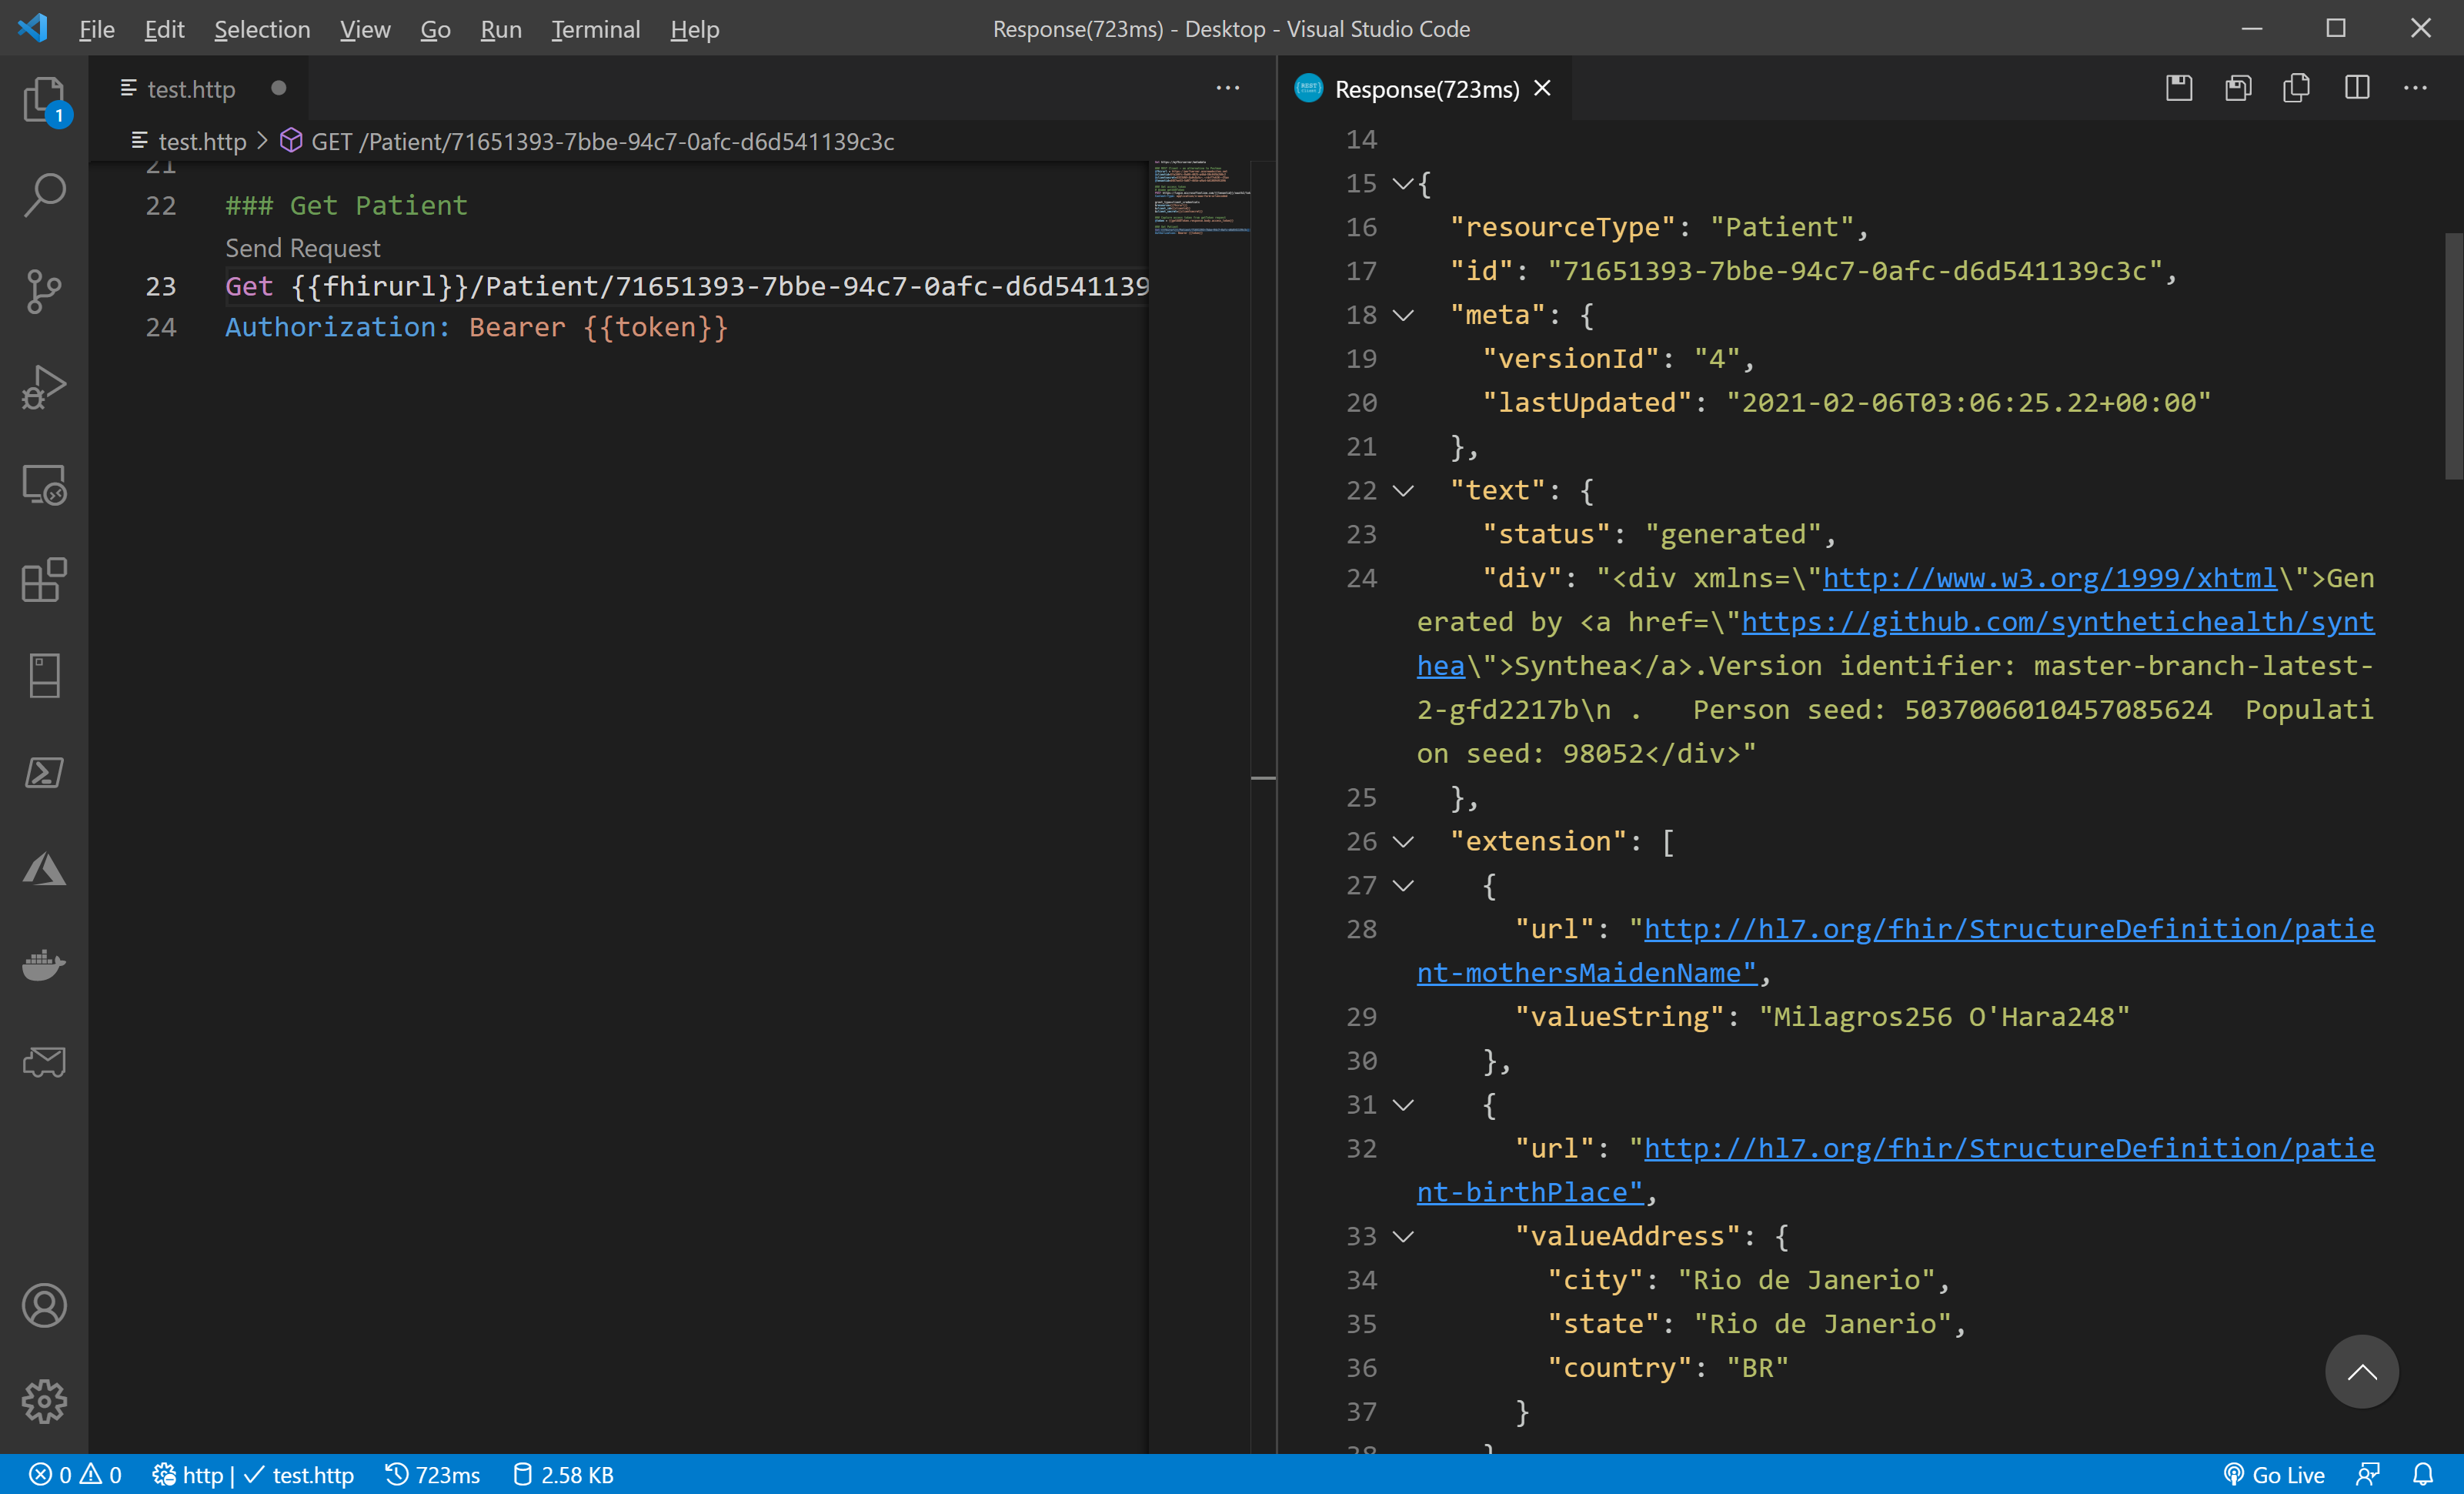
You can now get a list of patients or a specific patient with the GET request. The line with Authorization is the header info for the GET request. You can also send PUT or POST requests to create and update FHIR resources.
### GET Patient
GET {{fhirurl}}/Patient/<patientid>
Authorization: Bearer {{token}}
Run PowerShell or CLI
You can run PowerShell or CLI scripts within Visual Studio Code. Press CTRL and the ~ key and select PowerShell or Bash. You can find more details on Integrated Terminal.
PowerShell in Visual Studio Code
CLI in Visual Studio Code
Troubleshooting
If you're unable to get the metadata (which doesn't require access token based on the HL7 specification) check that your FHIR server is running properly.
If you're unable to get an access token, make sure that the client application is registered properly and you're using the correct values from the application registration step.
If you're unable to get data from the FHIR server, make sure that the client application (or the service principal) has been granted access permissions such as "FHIR Data Contributor" to the FHIR server.
Next steps
In this article, you learned how to access Azure Health Data Services data using the REST Client extension in Visual Studio Code.
To learn about how to validate FHIR resources against profiles in Azure Health Data Services, see
Note
FHIR® is a registered trademark of HL7 and is used with the permission of HL7.


