Tutorial: Analyze data with a notebook
Applies to: ✅ SQL analytics endpoint and Warehouse in Microsoft Fabric
In this tutorial, learn about how you can use analyze data using T-SQL notebook or using a notebook with a Lakehouse shortcut.
Option 1: Create a T-SQL notebook on the warehouse
To get started, create a T-SQL notebook in one of the following two ways:
Create a T-SQL notebook from the Microsoft Fabric Warehouse homepage. Navigate to the Data Warehouse workload, and choose Notebook.
Select + Warehouses and add the
WideWorldImporterswarehouse. Select theWideWorldImporterswarehouse from OneLake data hub dialog box.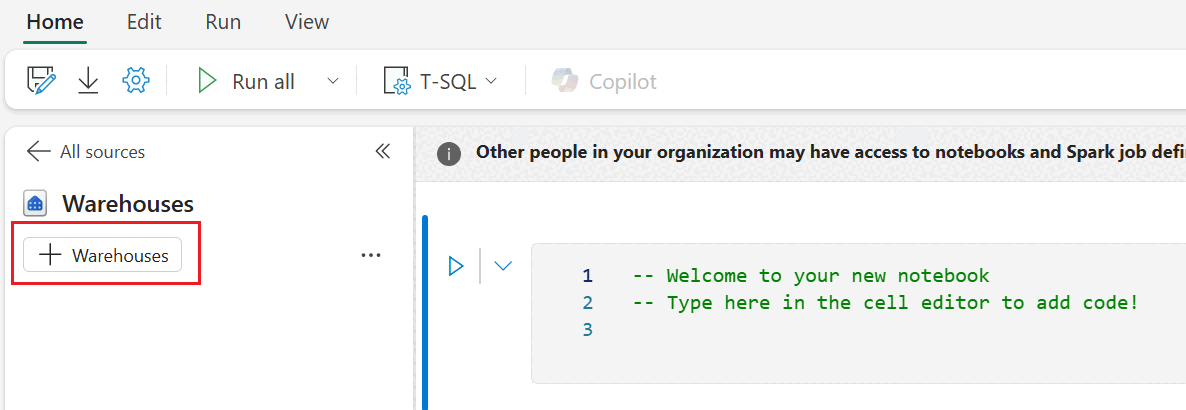
Create a T-SQL notebook from the warehouse editor. From your
WideWorldImporterswarehouse, from the top navigation ribbon, select New SQL query and then New SQL query in notebook.
Once the notebook is created, you can see
WideWorldImporterswarehouse is loaded into the explorer, and the ribbon shows T-SQL as the default language.Right-click to launch the More menu option on the
dimension_citytable. Select SELECT TOP 100 to generate a quick SQL template to explore 100 rows from the table.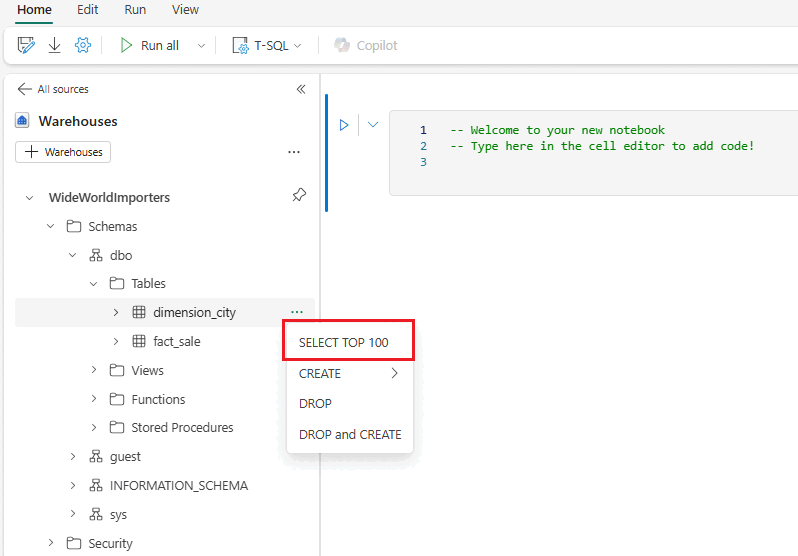
Run the code cell and you can see messages and results.


Option 2: Create a lakehouse shortcut and analyze data with an notebook
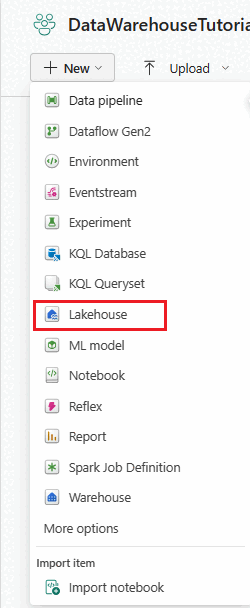
First, we create a new lakehouse. To create a new lakehouse in your Microsoft Fabric workspace:
Select the
Data Warehouse Tutorialworkspace in the navigation menu.Select + New > Lakehouse.
In the Name field, enter
ShortcutExercise, and select Create.The new lakehouse loads and the Explorer view opens up, with the Get data in your lakehouse menu. Under Load data in your lakehouse, select the New shortcut button.

In the New shortcut window, select the button for Microsoft OneLake.

In the Select a data source type window, scroll through the list until you find the Warehouse named
WideWorldImportersyou created previously. Select it, then select Next.In the OneLake object browser, expand Tables, expand the
dboschema, and then select the checkbox fordimension_customer. Select Next. Select Create.If you see a folder called
Unidentifiedunder Tables, select the Refresh icon in the horizontal menu bar.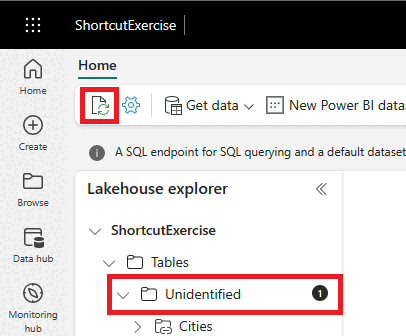
Select the
dimension_customerin the Table list to preview the data. The lakehouse is showing the data from thedimension_customertable from the Warehouse!
Next, create a new notebook to query the
dimension_customertable. In the Home ribbon, select the dropdown list for Open notebook and choose New notebook.In the Explorer, select the Lakehouses source folder.
Select, then drag the
dimension_customerfrom the Tables list into the open notebook cell. You can see a PySpark query has been written for you to query all the data fromShortcutExercise.dimension_customer. This notebook experience is similar to Visual Studio Code Jupyter notebook experience. You can also open the notebook in VS Code.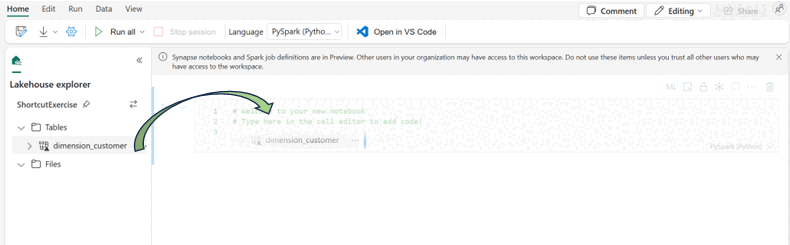
In the Home ribbon, select the Run all button. Once the query is completed, you will see you can easily use PySpark to query the Warehouse tables!


