Använda certifikat med Azure Cloud Services (extended-support)
Key Vault används för att lagra certifikat som är associerade med Cloud Services (utökad support). Key Vaults kan skapas via Azure-portalen och PowerShell. Lägg till certifikaten i Key Vault och referera sedan till certifikatets tumavtryck i tjänstkonfigurationsfilen. Du måste också aktivera Key Vault för lämpliga behörigheter så att Cloud Services-resursen (utökad support) kan hämta certifikat som lagras som hemligheter från Key Vault.
Ladda upp ett certifikat till Key Vault
Logga in på Azure-portalen och gå till Key Vault. Om du inte har konfigurerat ett Key Vault kan du välja att skapa ett i samma fönster.
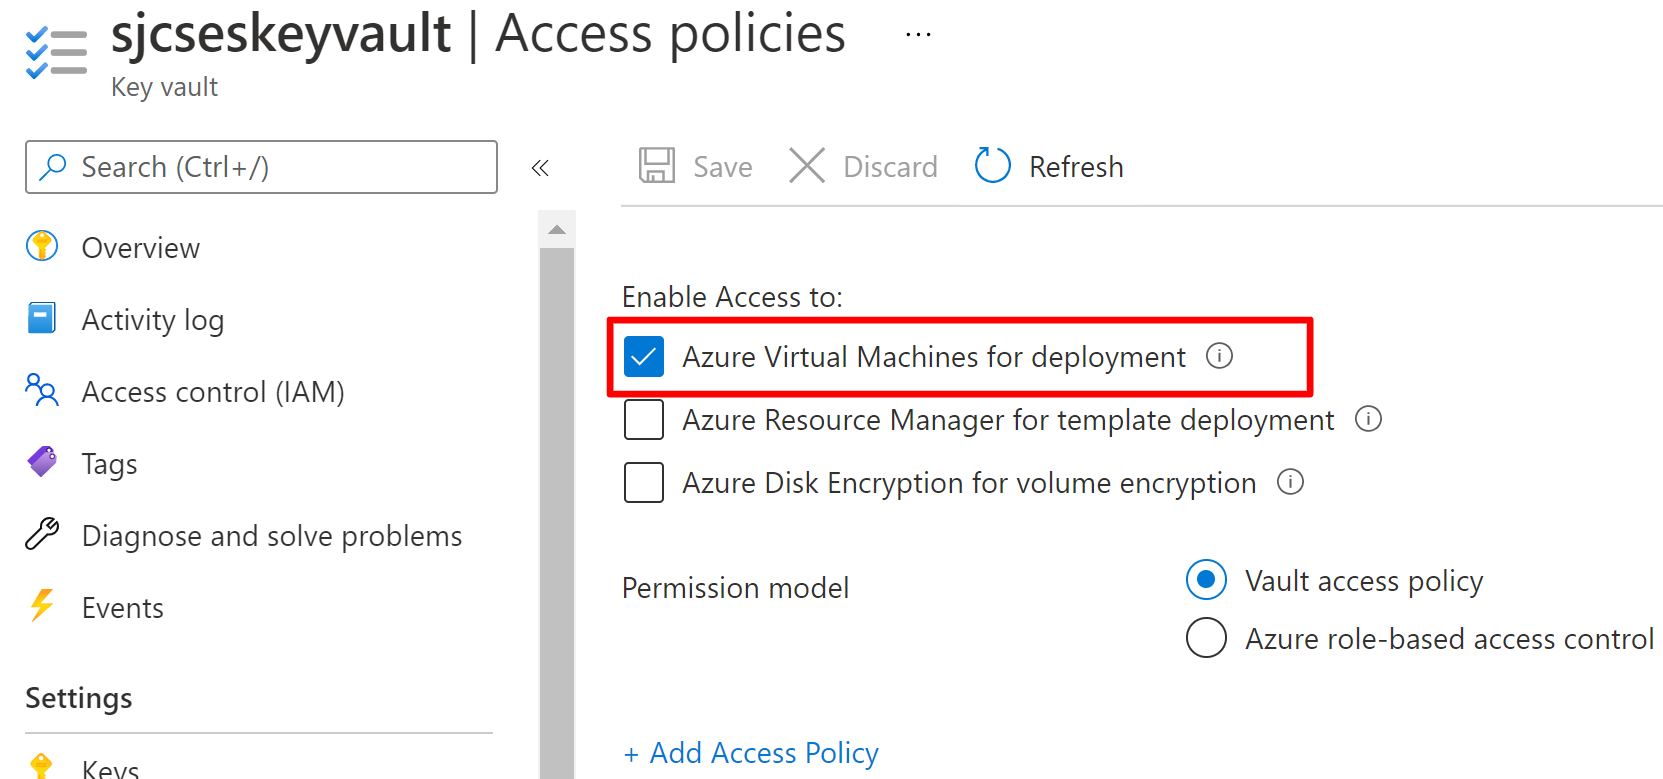
Välj Åtkomstkonfiguration
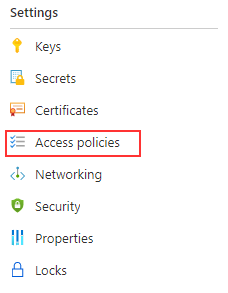
Se till att åtkomstkonfigurationen innehåller följande egenskap:
- Aktivera åtkomst till virtuella Azure-datorer för distribution
Välj Certifikat
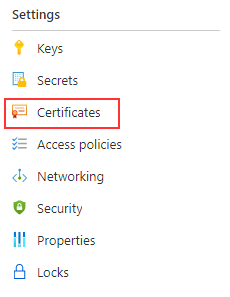
Välj Generera/importera
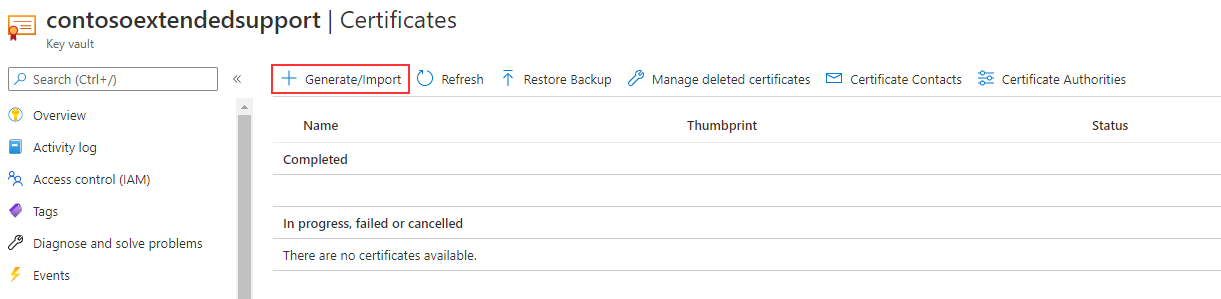
Slutför den information som krävs för att slutföra uppladdningen av certifikatet. Certifikatet måste finnas i . PFX-format .
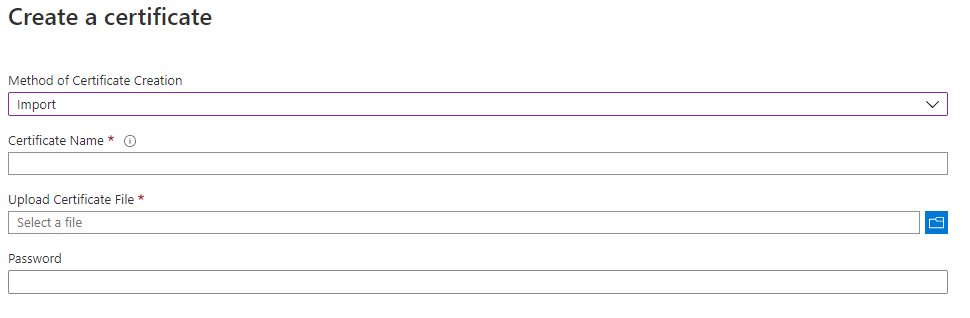
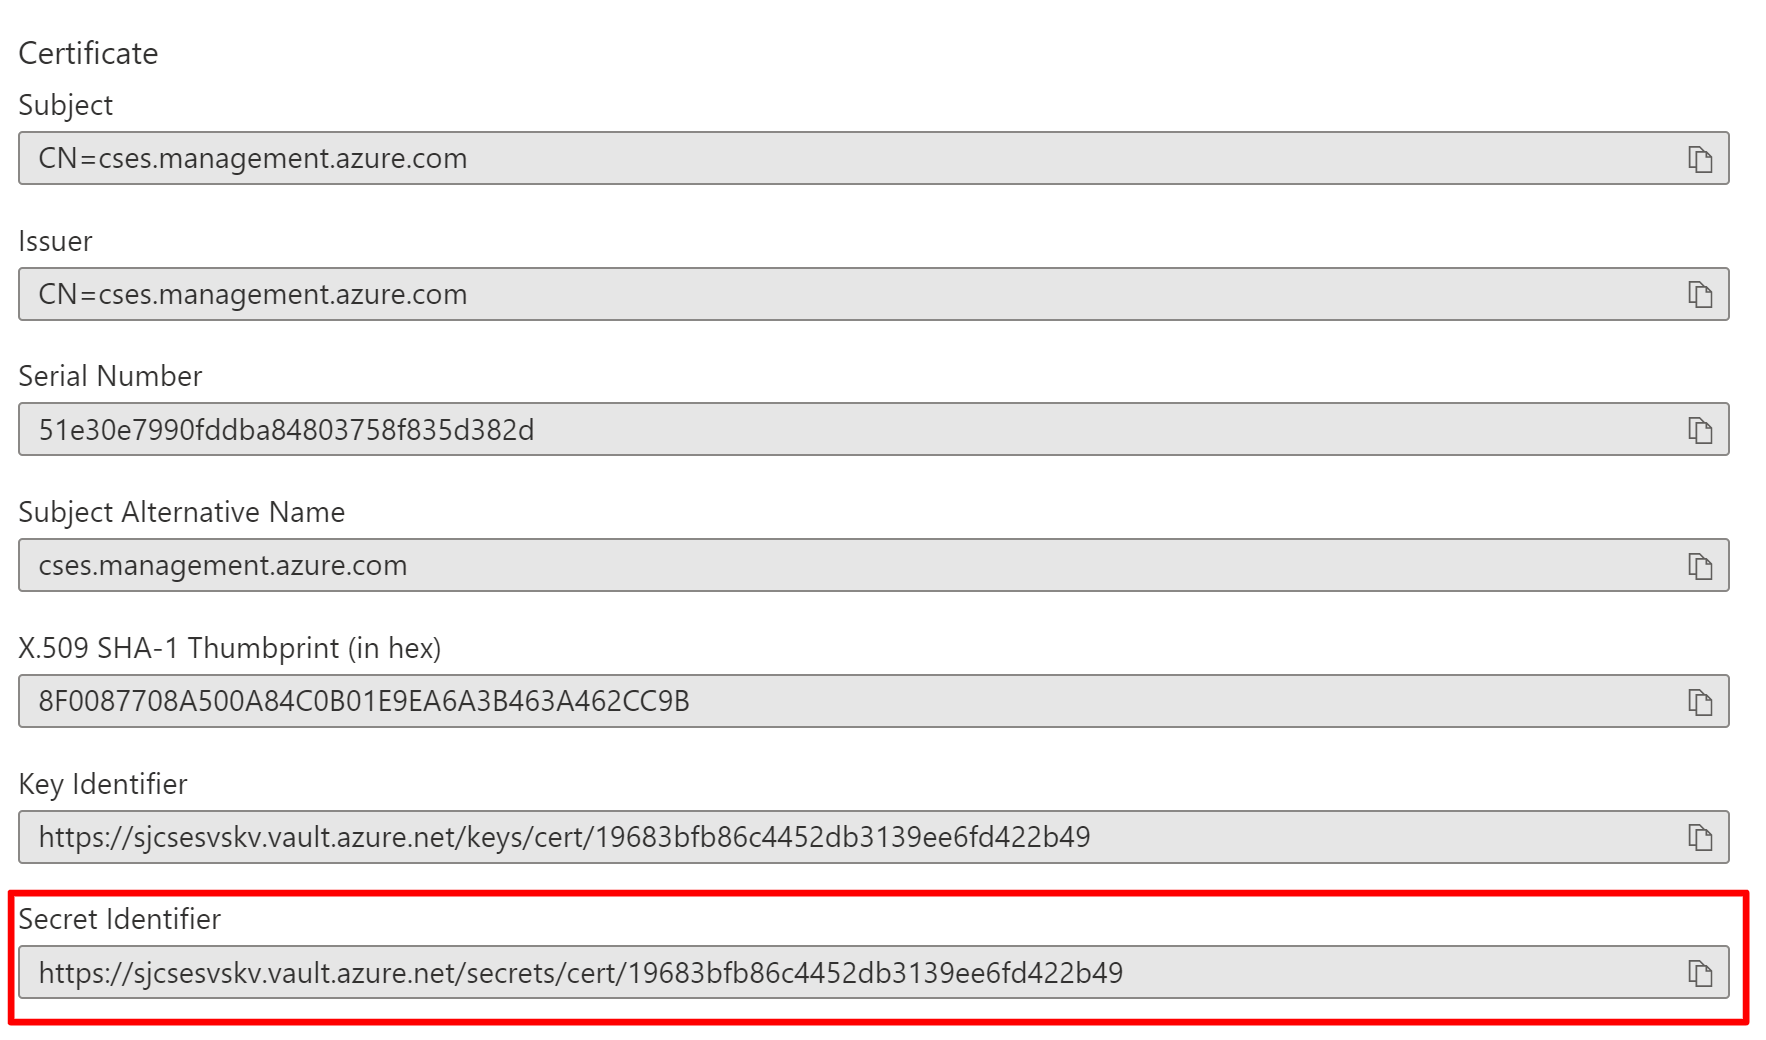
Lägg till certifikatinformationen i din roll i filen Service Configuration (.cscfg). Kontrollera att tumavtrycket för certifikatet i Azure-portalen matchar tumavtrycket i filen Service Configuration (.cscfg).
<Certificate name="<your cert name>" thumbprint="<thumbprint in key vault" thumbprintAlgorithm="sha1" />För distribution via ARM-mall kan du hitta certificateUrl genom att navigera till certifikatet i nyckelvalvet märkt som hemlig identifierare
Nästa steg
- Granska distributionskraven för Cloud Services (utökad support).
- Granska vanliga frågor och svar om Cloud Services (utökad support).
- Distribuera en molntjänst (utökad support) med hjälp av Azure-portalen, PowerShell, mallen eller Visual Studio.
Feedback
Kommer snart: Under hela 2024 kommer vi att fasa ut GitHub-problem som feedbackmekanism för innehåll och ersätta det med ett nytt feedbacksystem. Mer information finns i: https://aka.ms/ContentUserFeedback.
Skicka och visa feedback för