Distribuera en anpassad container till Azure App Service med Azure Pipelines
Azure DevOps Services | Azure DevOps Server 2022 – Azure DevOps Server 2019
Med Hjälp av Azure Pipelines kan du skapa, testa och automatiskt distribuera din webbapp till en Azure App Service Web App-container i Linux. I den här artikeln får du lära dig hur du använder YAML eller klassiska pipelines för att:
- Skapa och publicera en Docker-avbildning till Azure Container Registry
- Skapa en Azure Web App
- Distribuera en container till Azure App Service
- Distribuera till distributionsplatser
Förutsättningar
- Ett Azure-konto med en aktiv prenumeration. Skapa ett konto utan kostnad.
- Ett GitHub-konto. Skapa ett kostnadsfritt GitHub-konto om du inte redan har ett.
- En Azure DevOps-organisation. Skapa en organisation om du inte redan har en.
- Ett Azure Container Registry. Skapa ett Azure-containerregister om du inte redan har ett.
Hämta koden
Förgrena följande exempelapp på GitHub.
https://github.com/spring-guides/gs-spring-boot-docker.git
Skapa och publicera en Docker-avbildning till Azure Container Registry
För att slutföra det här avsnittet måste du ha ett Azure Container Registry. Mer information finns i avsnittet om förhandskrav.
Logga in på din Azure DevOps-organisation och gå till projektet.
Välj Pipelines och sedan Ny pipeline.
Välj GitHub när du uppmanas att ange platsen för källkoden och välj sedan lagringsplatsen.
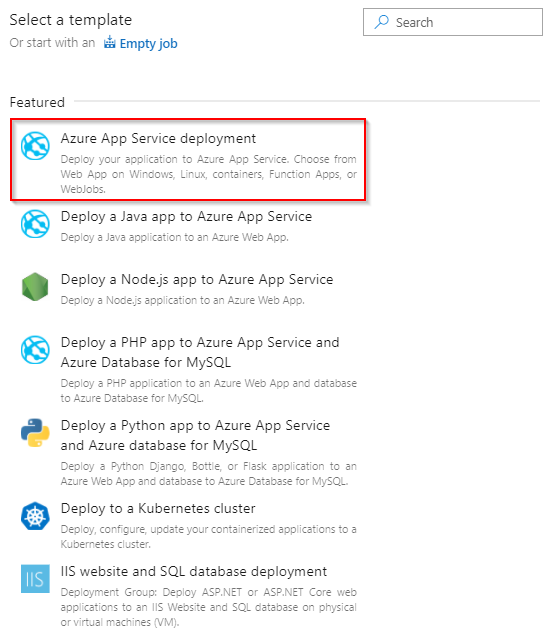
Välj mallen Docker: skapa och push-överför en avbildning till Azure Container Registry-pipelinemallen .

Välj din Azure-prenumeration och välj sedan Fortsätt.
Välj containerregistret i den nedrullningsbara menyn och välj sedan Verifiera och konfigurera.

Granska YAML-mallen för pipelinen och välj sedan Spara och kör för att skapa och publicera Docker-avbildningen i Azure Container Registry.
trigger:
- main

resources:
- repo: self

variables:
    # Container registry service connection established during pipeline creation
    dockerRegistryServiceConnection: '{{ containerRegistryConnection.Id }}'
    imageRepository: 'javascriptdocker'
    containerRegistry: 'sampleappcontainerregistry.azurecr.io'
    dockerfilePath: '$(Build.SourcesDirectory)/app/Dockerfile'
    tag: '$(Build.BuildId)'

    # Agent VM image name
    vmImageName: 'ubuntu-latest'

stages:
- stage: Build
    displayName: Build and push stage
    jobs:
    - job: Build
    displayName: Build
    pool:
        vmImage: $(vmImageName)
    steps:
    - task: Docker@2
        displayName: Build and push an image to container registry
        inputs:
        command: buildAndPush
        repository: $(imageRepository)
        dockerfile: $(dockerfilePath)
        containerRegistry: $(dockerRegistryServiceConnection)
        tags: |
            $(tag)
Om du vill visa den publicerade Docker-avbildningen när pipelinekörningen har slutförts går du till containerregistret i Azure Portal och väljer sedan Lagringsplatser.

Om du vill distribuera avbildningen från containerregistret måste du aktivera administratörsanvändarkontot. Gå till containerregistret i Azure Portal och välj Åtkomstnycklar. Välj sedan växlingsknappen för att aktivera administratörsanvändare.
Skapa en webbapp
Navigera till Azure-portalen.
Välj Skapa en resurscontainer> och välj sedan Webbapp för containrar.

Ange ett namn för den nya webbappen och skapa en ny resursgrupp. Välj Linux för operativsystemet.

I avsnittet Prisplaner väljer du den kostnadsfria F1-planen.
Välj Granska och skapa. Granska konfigurationen och välj Skapa när du är klar.
Distribuera till Web App for Containers
I den här YAML-filen skapar och push-överför du en Docker-avbildning till ett containerregister och distribuerar den sedan till Azure Web App for Containers. I byggfasen skapar och push-överför du en Docker-avbildning till ett Azure Container Registry med Docker@2 uppgift. Uppgiften AzureWebAppContainer@1 distribuerar avbildningen till Web App for Containers.
trigger:
- main

resources:
- repo: self

variables:
  ## Add this under variables section in the pipeline
  azureSubscription: <Name of the Azure subscription>
  appName: <Name of the Web App>
  containerRegistry: <Name of the Azure container registry>
  dockerRegistryServiceConnection: '4fa4efbc-59af-4c0b-8637-1d5bf7f268fc'
  imageRepository: <Name of image repository>
  dockerfilePath: '$(Build.SourcesDirectory)/Dockerfile'
  tag: '$(Build.BuildId)'

  vmImageName: 'ubuntu-latest'

stages:
- stage: Build
  displayName: Build and push stage
  jobs:
  - job: Build
    displayName: Build
    pool:
      vmImage: $(vmImageName)
    steps:
    - task: Docker@2
      displayName: Build and push an image to container registry
      inputs:
        command: buildAndPush
        repository: $(imageRepository)
        dockerfile: $(dockerfilePath)
        containerRegistry: $(dockerRegistryServiceConnection)
        tags: |
          $(tag)


    ## Add the below snippet at the end of your pipeline
    - task: AzureWebAppContainer@1
      displayName: 'Azure Web App on Container Deploy'
      inputs:
        azureSubscription: $(azureSubscription)
        appName: $(appName)
        containers: $(containerRegistry)/$(imageRepository):$(tag)
Distribuera till ett distributionsfack
Du kan konfigurera Azure Web App-containern så att den har flera platser. Med fack kan du distribuera din app på ett säkert sätt och testa den innan du gör den tillgänglig för dina kunder. Mer information finns i Skapa mellanlagringsmiljöer .
Följande YAML-kodfragment visar hur du distribuerar till ett mellanlagringsfack och sedan byter till en produktionsplats:
- task: AzureWebAppContainer@1
  inputs:
    azureSubscription: '<Azure service connection>'
    appName: '<Name of the web app>'
    containers: $(containerRegistry)/$(imageRepository):$(tag)
    deployToSlotOrASE: true
    resourceGroupName: '<Name of the resource group>'
    slotName: staging

- task: AzureAppServiceManage@0
  inputs:
    azureSubscription: '<Azure service connection>'
    WebAppName: '<name of web app>'
    ResourceGroupName: '<name of resource group>'
    SourceSlot: staging
    SwapWithProduction: true
Vanliga frågor
F: Hur hittar jag mina autentiseringsuppgifter för Docker-registret?
S: Gå till Azure Portal och välj sedan webbappen för containrar. Välj Inställningar för konfigurationsprogram>och klicka sedan för att visa värdet.


