Automatically update your signature when switching between Exchange accounts
Applying the correct signature to messages when using multiple Exchange accounts is now made easier with the addition of the OnMessageFromChanged and OnAppointmentFromChanged events to the event-based activation feature. The OnMessageFromChanged event occurs when the account in the From field of a message being composed is changed, while the OnAppointmentFromChanged event occurs when the organizer of a meeting being composed is changed. These events further extend the capabilities of signature add-ins and allow them to:
- Provide users with the convenience to apply custom signatures for each of their accounts.
- Enable mailbox delegates to more accurately and efficiently manage outgoing messages and meeting requests from multiple mailboxes.
- Ensure that users' messages and appointments meet their organization's communication and marketing policies.
The following sections walk you through how to develop an event-based add-in that handles the OnMessageFromChanged event to automatically update a message's signature when the mail account in the From field is changed.
Note
The OnMessageFromChanged and OnAppointmentFromChanged events were introduced in requirement set 1.13. For information about client support for these events, see Supported clients and platforms.
Supported clients and platforms
The following tables list client-server combinations that support the OnMessageFromChanged and OnAppointmentFromChanged events. Select the tab for the applicable event.
| Client | Exchange Online | Exchange 2019 on-premises (Cumulative Update 12 or later) | Exchange 2016 on-premises (Cumulative Update 22 or later) |
|---|---|---|---|
| Web browser (modern UI) new Outlook on Windows |
Supported | Not applicable | Not applicable |
| Windows (classic) Version 2304 (Build 16327.20248) or later |
Supported | Supported | Supported |
| Mac Version 16.77 (23081600) or later |
Supported | Not applicable | Not applicable |
| iOS | Not applicable | Not applicable | Not applicable |
| Android | Not applicable | Not applicable | Not applicable |
Prerequisites
To test the walkthrough, you must have at least two Exchange accounts.
Set up your environment
Complete the Outlook quick start, which creates an add-in project with the Yeoman generator for Office Add-ins.
Configure the manifest
Open the manifest.json file.
Navigate to the "authorization.permissions.resourceSpecific" array. In the array object, replace the value of the "name" property with "MailboxItem.ReadWrite.User". This is needed by the add-in to be able to update the signature of a message.
...
"authorization": {
    "permissions": {
        "resourceSpecific": [
            {
                "name": "MailboxItem.ReadWrite.User",
                "type": "Delegated"
            }
        ]
    }
},
...
Add the following object to the "extensions.runtimes" array. Note the following about this markup.
The "minVersion" of the Mailbox requirement set is configured as "1.13" because this is the lowest version of the requirement set that supports the
OnMessageFromChangedevent. For more information, see the "Supported events" table in Configure your Outlook add-in for event-based activation.The "id" of the runtime is set to a descriptive name, "autorun_runtime".
The "code" property has a child "page" property set to an HTML file and a child "script" property set to a JavaScript file. You'll create or edit these files in later steps. Office uses one of these values depending on the platform.
- Classic Outlook on Windows executes the event handler in a JavaScript-only runtime, which loads a JavaScript file directly.
- Outlook on the web and on Mac, and new Outlook on Windows execute the handler in a browser runtime, which loads an HTML file. The HTML file contains a
<script>tag that then loads the JavaScript file.
For more information, see Runtimes in Office Add-ins.
The "lifetime" property is set to "short". This means the runtime starts up when the event occurs and shuts down when the handler completes.
There are "actions" to run handlers for the
OnMessageFromChangedandOnNewMessageComposeevents. You'll create the handlers in a later step.
{
    "requirements": {
        "capabilities": [
            {
                "name": "Mailbox",
                "minVersion": "1.13"
            }
        ]
    },
    "id": "autorun_runtime",
    "type": "general",
    "code": {
        "page": "https://localhost:3000/commands.html",
        "script": "https://localhost:3000/launchevent.js"
    },
    "lifetime": "short",
    "actions": [
        {
            "id": "onMessageFromChangedHandler",
            "type": "executeFunction",
            "displayName": "onMessageFromChangedHandler"
        },
        {
            "id": "onNewMessageComposeHandler",
            "type": "executeFunction",
            "displayName": "onNewMessageComposeHandler"
        }
    ]
}
Add an "autoRunEvents" array as a property of the object in the "extensions" array. The "autoRunEvents" array contains an object with the following key properties.
- The "events" property assigns handlers to the
OnMessageFromChangedandOnNewMessageComposeevents. For information on event names used in the unified manifest, see the "Supported events" table in Configure your Outlook add-in for event-based activation. - The function name provided in "actionId" must match the "id" property of its corresponding object in the "actions" array configured earlier.
"autoRunEvents": [ { "requirements": { "capabilities": [ { "name": "Mailbox", "minVersion": "1.13" } ], "scopes": [ "mail" ] }, "events": [ { "type": "messageFromChanged", "actionId": "onMessageFromChangedHandler" }, { "type": "newMessageComposeCreated", "actionId": "onNewMessageComposeHandler" } ] } ]- The "events" property assigns handlers to the
Tip
- To learn about runtimes in add-ins, see Runtimes in Office Add-ins.
- To learn more about manifests for Outlook add-ins, see Office Add-in manifests.
Implement the event handlers
Event handlers must be configured for the OnNewMessageCompose and OnMessageFromChanged events. The onNewMessageComposeHandler function adds a signature to a newly created message if a default one isn't already configured on the current account. When the account in the From field is changed, the onMessageFromChangedHandler function updates the signature based on this newly selected account.
From the same quick start project, navigate to the ./src directory, then create a new folder named launchevent.
In the ./src/launchevent folder, create a new file named launchevent.js.
Open the file ./src/launchevent/launchevent.js in your code editor and add the following JavaScript code.
/*
 * Copyright (c) Microsoft Corporation. All rights reserved. Licensed under the MIT license.
 * See LICENSE in the project root for license information.
 */

// The OnNewMessageCompose event handler that adds a signature to a new message.
function onNewMessageComposeHandler(event) {
    const item = Office.context.mailbox.item;

    // Check if a default Outlook signature is already configured.
    item.isClientSignatureEnabledAsync({ asyncContext: event }, (result) => {
        if (result.status === Office.AsyncResultStatus.Failed) {
            console.log(result.error.message);
            return;
        }

        // Add a signature if there's no default Outlook signature configured.
        if (result.value === false) {
            item.body.setSignatureAsync(
                "<i>This is a sample signature.</i>",
                { asyncContext: result.asyncContext, coercionType: Office.CoercionType.Html },
                addSignatureCallback
            );
        }
    });
}

// The OnMessageFromChanged event handler that updates the signature when the email address in the From field is changed.
function onMessageFromChangedHandler(event) {
    const item = Office.context.mailbox.item;
    const signatureIcon =
    "iVBORw0KGgoAAAANSUhEUgAAACcAAAAnCAMAAAC7faEHAAAAAXNSR0IArs4c6QAAAARnQU1BAACxjwv8YQUAAAAzUExURQAAAAAAAAAAAAAAAAAAAAAAAAAAAAAAAAAAAAAAAAAAAAAAAAAAAAAAAAAAAAAAAAAAAKMFRskAAAAQdFJOUwAQIDBAUGBwgI+fr7/P3+8jGoKKAAAACXBIWXMAAA7DAAAOwwHHb6hkAAABT0lEQVQ4T7XT2ZalIAwF0DAJhMH+/6+tJOQqot6X6joPiouNBo3w9/Hd6+hrYnUt6vhLcjEAJevVW0zJxABSlcunhERpjY+UKoNN5+ZgDGu2onNz0OngjP2FM1VdyBW1LtvGeYrBLs7U5I1PTXZt+zifcS3Icw2GcS3vxRY3Vn/iqx31hUyTnV515kdTfbaNhZLI30AceqDiIo4tyKEmJpKdP5M4um+nUwfDWxAXdzqMNKQ14jLdL5ntXzxcRF440mhS6yu882Kxa30RZcUIjTCJg7lscsR4VsMjfX9Q0Vuv/Wd3YosD1J4LuSRtaL7bzXGN1wx2cytUdncDuhA3fu6HPTiCvpQUIjZ3sCcHVbvLtbNTHlysx2w9/s27m9gEb+7CTri6hR1wcTf2gVf3wBRe3CMbcHYvTODkXhnD0+178K/pZ9+n/C1ru/2HAPwAo7YM1X4+tLMAAAAASUVORK5CYII=";

    // Get the currently selected From account.
    item.from.getAsync({ asyncContext: event }, (result) => {
        if (result.status === Office.AsyncResultStatus.Failed) {
            console.log(result.error.message);
            return;
        }

        // Create a signature based on the currently selected From account.
        const name = result.value.displayName;
        const options = { asyncContext: { event: result.asyncContext, name: name }, isInline: true };
        item.addFileAttachmentFromBase64Async(signatureIcon, "signatureIcon.png", options, (result) => {
            if (result.status === Office.AsyncResultStatus.Failed) {
                console.log(result.error.message);
                return;
            }

            // Add the created signature to the mail item.
            const signature = "<img src='cid:signatureIcon.png'>" + result.asyncContext.name;
            item.body.setSignatureAsync(
                signature,
                { asyncContext: result.asyncContext.event, coercionType: Office.CoercionType.Html },
                addSignatureCallback
            );
        });
    });
}

// Callback function to add a signature to the mail item.
function addSignatureCallback(result) {
    if (result.status === Office.AsyncResultStatus.Failed) {
        console.log(result.error.message);
        return;
    }

    console.log("Successfully added signature.");
    result.asyncContext.completed();
}

// IMPORTANT: To ensure your add-in is supported in Outlook, remember to
// map the event handler name specified in the manifest's LaunchEvent element (with the add-in only manifest)
// or the "autoRunEvents.events.actionId" property (with the unified manifest for Microsoft 365)
// to its JavaScript counterpart.
Office.actions.associate("onNewMessageComposeHandler", onNewMessageComposeHandler);
Office.actions.associate("onMessageFromChangedHandler", onMessageFromChangedHandler);
Important
Windows: At present, imports aren't supported in the JavaScript file where you implement the handling for event-based activation.
Tip
Event-based add-ins running in classic Outlook on Windows don't run code included in the Office.onReady() and Office.initialize functions. We recommend adding your add-in startup logic, such as checking the user's Outlook version, to your event handlers instead.
Update the commands HTML file
From the ./src/commands folder, open commands.html.
Add the following code below the existing script tag.
<script type="text/javascript" src="../launchevent/launchevent.js"></script>Save your changes.
Update webpack config settings
From the root directory of the project, open the webpack.config.js file.
Locate the
pluginsarray within theconfigobject and add the following new object to the beginning of the array.new CopyWebpackPlugin({ patterns: [ { from: "./src/launchevent/launchevent.js", to: "launchevent.js", }, ], }),Save your changes.
Try it out
Run the following commands in the root directory of your project. When you run
npm start, the local web server will start (if it isn't already running) and your add-in will be sideloaded.npm run buildnpm startNote
If your add-in wasn't automatically sideloaded, follow the instructions in Sideload Outlook add-ins for testing to manually sideload the add-in in Outlook.
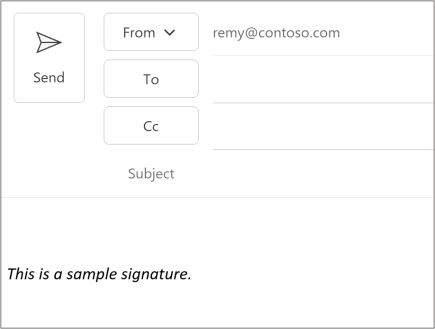
In your preferred Outlook client, create a new message. If you don't have a default Outlook signature configured, the add-in adds one to the newly created message.
Enable the From field, if applicable. For guidance on how to enable it, see the "Why is the From button missing?" section of Change the account used to send email messages.
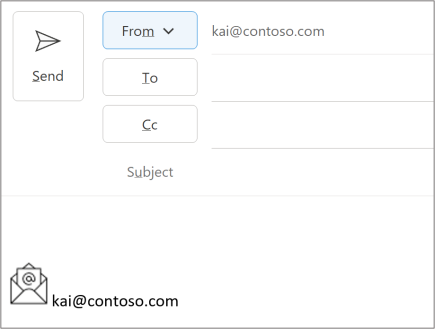
Select From, then choose a different Exchange account. Alternatively, manually enter the Exchange email address by selecting From > Other Email Address. An updated signature is added to the message, replacing the previous one.
When you want to stop the local web server and uninstall the add-in, follow the applicable instructions:
To stop the server, run the following command. If you used
npm start, the following command should also uninstall the add-in.npm stopIf you manually sideloaded the add-in, see Remove a sideloaded add-in.
Troubleshoot your add-in
For guidance on how to troubleshoot your event-based activation add-in, see Troubleshoot event-based and spam-reporting add-ins.
Deploy to users
Similar to other event-based add-ins, add-ins that use the OnMessageFromChanged and OnAppointmentFromChanged events must be deployed by an organization's administrator. For guidance on how to deploy your add-in via the Microsoft 365 admin center, see the "Deploy to users" section of Configure your Outlook add-in for event-based activation.
Event behavior and limitations
Because the OnMessageFromChanged and OnAppointmentFromChanged events are supported through the event-based activation feature, the same behavior and limitations apply to add-ins that activate as a result of this event. For a detailed description, see Event-based activation behavior and limitations.
In addition to these characteristics, the following aspects also apply when an add-in activates on these events.
- The
OnMessageFromChangedevent is only supported in message compose mode, while theOnAppointmentFromChangedevent is only supported in appointment compose mode. - In classic Outlook on Windows, only the
OnMessageFromChangedevent is supported. - The
OnMessageFromChangedandOnAppointmentFromChangedevents only support Exchange accounts. In messages being composed, the Exchange account is selected from the From field dropdown list or manually entered in the field. In appointments being composed, the Exchange account is selected from the organizer field dropdown list. If a user switches to a non-Exchange account in the From or organizer field, the Outlook client automatically clears out the signature set by the previously selected account. - Delegate and shared mailbox scenarios are supported.
- The
OnAppointmentFromChangedevent isn't supported in Microsoft 365 group calendars. If a user switches from their Exchange account to a Microsoft 365 group calendar account in the organizer field, the Outlook client automatically clears out the signature set by the Exchange account. - When switching to another Exchange account in the From or organizer field, the add-ins for the previously selected account, if any, are terminated, and the add-ins associated with the newly selected account are loaded before the
OnMessageFromChangedorOnAppointmentFromChangedevent is initiated. - Email account aliases are supported. When an alias for the current account is selected in the From or organizer field, the
OnMessageFromChangedorOnAppointmentFromChangedevent occurs without reloading the account's add-ins. - When the From or organizer field dropdown list is opened by mistake or the same account that appears in the From or organizer field is reselected, the
OnMessageFromChangedorOnAppointmentFromChangedevent occurs, but the account's add-ins aren't terminated or reloaded.
See also
Office Add-ins