Not
Åtkomst till den här sidan kräver auktorisering. Du kan prova att logga in eller ändra kataloger.
Åtkomst till den här sidan kräver auktorisering. Du kan prova att ändra kataloger.
This article describes how to publish an Office Add-in that you created using the Yeoman generator and developed with Visual Studio Code (VS Code) or any other editor.
Note
- For information about publishing an Office Add-in that you created using Visual Studio, see Publish your add-in using Visual Studio.
- The process described in this article doesn't apply to add-ins that use the unified manifest for Microsoft 365. Add-ins created using Microsoft 365 Agents Toolkit use the unified manifest. For information about publishing an add-in that you created using Agents Toolkit, see Deploy Teams app to the cloud and Deploy your first Teams app. The latter article is about Teams tab apps, but it is applicable to Office Add-ins created with Agents Toolkit.
Publishing an add-in for other users to access
The simplest Office Add-in is made up of a manifest file and an HTML page. The manifest file describes the add-in's characteristics, such as its name, what Office applications it can run in, and the URL for the add-in's HTML page. The HTML page is contained in a web app that users interact with when they install and run your add-in within an Office application. You can host the web app of an Office Add-in on any web hosting platform, including Azure.
While you're developing, you can run the add-in on your local web server (localhost). When you're ready to publish it for other users to access, you'll need to deploy the web application and update the manifest to specify the URL of the deployed application.
When your add-in is working as desired, you can publish it directly through Visual Studio Code using the Azure Storage extension.
Using Visual Studio Code to publish
Note
These steps only work for projects created with the Yeoman generator, and that use the add-in only manifest. They don't apply if you created the add-in using Agents Toolkit or created it with the Yeoman generator and it uses the unified manifest for Microsoft 365.
Open your project from its root folder in Visual Studio Code (VS Code).
Select View > Extensions (Ctrl+Shift+X) to open the Extensions view.
Search for the Azure Storage extension and install it.
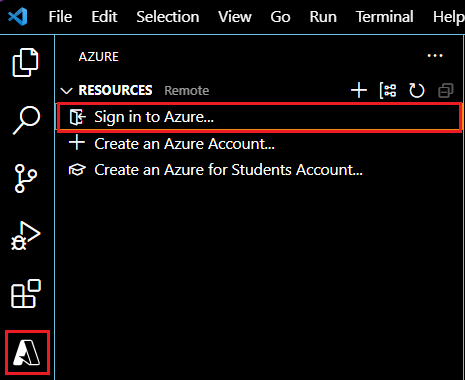
Once installed, an Azure icon is added to the Activity Bar. Select it to access the extension. If the Activity Bar is hidden, open it by selecting View > Appearance > Activity Bar.
Select Sign in to Azure to sign in to your Azure account. If you don't already have an Azure account, create one by selecting Create an Azure Account. Follow the provided steps to set up your account.
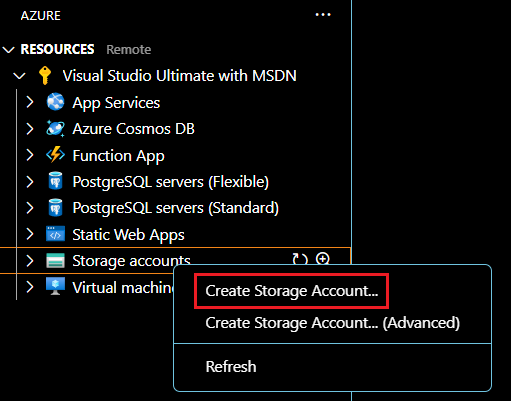
Once you're signed in, you'll see your Azure storage accounts appear in the extension. If you don't already have a storage account, create one using the Create Storage Account option in the command palette. Name your storage account a globally unique name, using only 'a-z' and '0-9'. Note that by default, this creates a storage account and a resource group with the same name. It automatically puts the storage account in West US. This can be adjusted online through your Azure account.
Right-click (or select and hold) your storage account and select Configure Static Website. You'll be asked to enter the index document name and the 404 document name. Change the index document name from the default
index.htmltotaskpane.html. You may also change the 404 document name but aren't required to.Right-click (or select and hold) your storage account again and this time select Browse Static Website. From the browser window that opens, copy the website URL.
Open your project's manifest file and change all references to your localhost URL (such as
https://localhost:3000) to the URL you've copied. This endpoint is the static website URL for your newly created storage account. Save the changes to your manifest file.Open a command line prompt or terminal window and go to the root directory of your add-in project. Run the following command to prepare all files for production deployment.
npm run buildWhen the build completes, the dist folder in the root directory of your add-in project will contain the files that you'll deploy in subsequent steps.
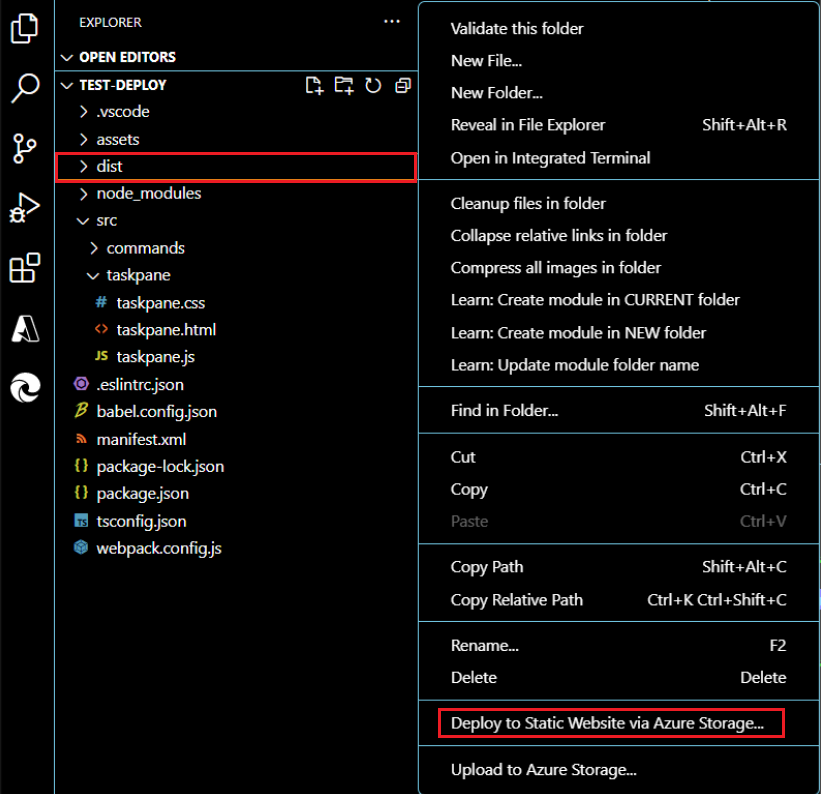
In VS Code, go to the Explorer and right-click (or select and hold) the dist folder, and select Deploy to Static Website via Azure Storage. When prompted, select the storage account you created previously.
When deployment is complete, right-click (or select and hold) the storage account that you created previously and select Browse Static Website. This opens the static web site and displays the task pane.
Finally, sideload the manifest file and the add-in will load from the static web site you just deployed.
Deploy custom functions for Excel
If your add-in has custom functions, there are a few more steps to enable them on the Azure Storage account. First, enable CORS so that Office can access the functions.json file.
Right-click (or select and hold) the Azure storage account and select Open in Portal.
In the Settings group, select Resource sharing (CORS). You can also use the search box to find this.
Create a new CORS rule for the Blob service with the following settings.
Property Value Allowed origins * Allowed methods GET Allowed headers * Exposed headers Access-Control-Allow-Origin Max age 200 Select Save.
Caution
This CORS configuration assumes all files on your server are publicly available to all domains.
Next, add a MIME type for JSON files.
Create a new file in the /src folder named web.config.
Insert the following XML and save the file.
<?xml version="1.0"?>
<configuration>
  <system.webServer>
    <staticContent>
      <mimeMap fileExtension=".json" mimeType="application/json" />
    </staticContent>
  </system.webServer>
</configuration>
Open the webpack.config.js file.
Add the following code in the list of
pluginsto copy the web.config into the bundle when the build runs.new CopyWebpackPlugin({ patterns: [ { from: "src/web.config", to: "src/web.config", }, ], }),Open a command line prompt and go to the root directory of your add-in project. Then, run the following command to prepare all files for deployment.
npm run buildWhen the build completes, the dist folder in the root directory of your add-in project will contain the files that you'll deploy.
To deploy, in the VS Code Explorer, right-click (or select and hold) the dist folder and select Deploy to Static Website via Azure Storage. When prompted, select the storage account you created previously. If you already deployed the dist folder, you'll be prompted if you want to overwrite the files in the Azure storage with the latest changes.
Deploy updates
You'll deploy updates to your web application in the same manner as described previously. Changes to the manifest require redistributing your manifest to users. The process to do so depends on your publishing method. For more information on updating your add-in, see Maintain your Office Add-in.
See also
Samarbeta med oss på GitHub
Källan för det här innehållet finns på GitHub, där du också kan skapa och granska problem och pull-begäranden. Mer information finns i vår deltagarguide.
Office Add-ins