Deploying an App with Visual Studio
Deploying and debugging your application is straightforward with Visual Studio. We'll use the Remote Debugging feature to deploy the app to your locally connected Windows 10 IoT Core device.
Note
Visual Studio will generate a cryptic error when deploying to a RS5 (or RS4 with OpenSSH enabled) IoT image unless a SDK from RS4 or greater is installed that Visual Studio can access.
Note
In order to use remote debugging, your IoT Core device must first be connected to the same local network as your development PC and UDP/TCP communications should be allowed on the network. If in doubt, check with your IT on allowed network traffic. See Connecting to a device for instructions.
Deploy apps to your Windows 10 IoT Core device
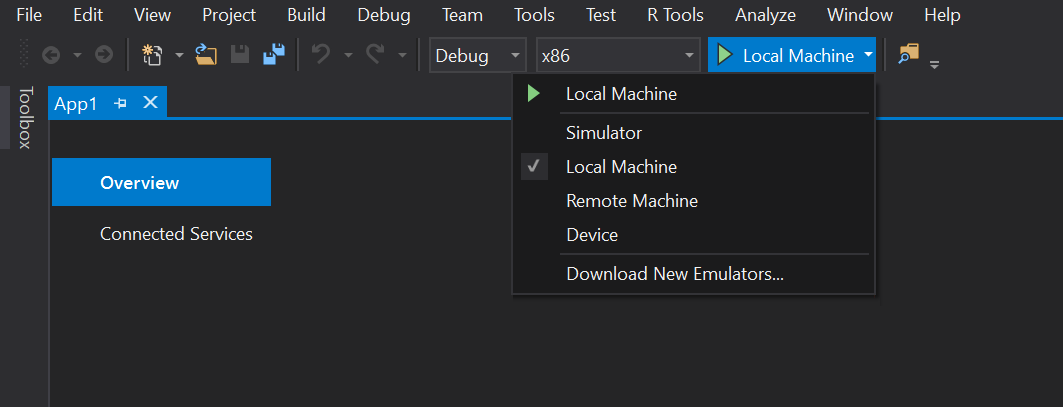
With the application open in Visual Studio, set the architecture in the toolbar dropdown. If you're building for a Minnowboard Max, select
x86. If you're building for Raspberry Pi 2, Raspberry Pi 3 or the Dragonboard, selectARM.Next, in the Visual Studio toolbar, click on the
Local Machinedropdown and selectRemote Machine.
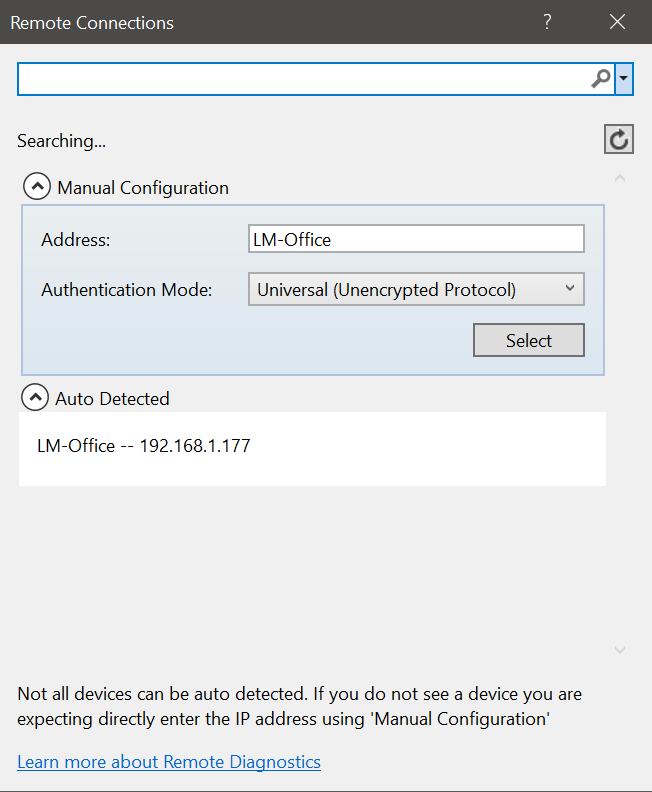
At this point, Visual Studio will present the Remote Connections dialog. If you previously used PowerShell to set a unique name for your device, you can enter it here (in this example, we're using my device). Otherwise, use the IP address of your Windows IoT Core device.
After entering the device name/IP select
Universal (Unencrypted Protocol)Authentication Mode, then click Select.
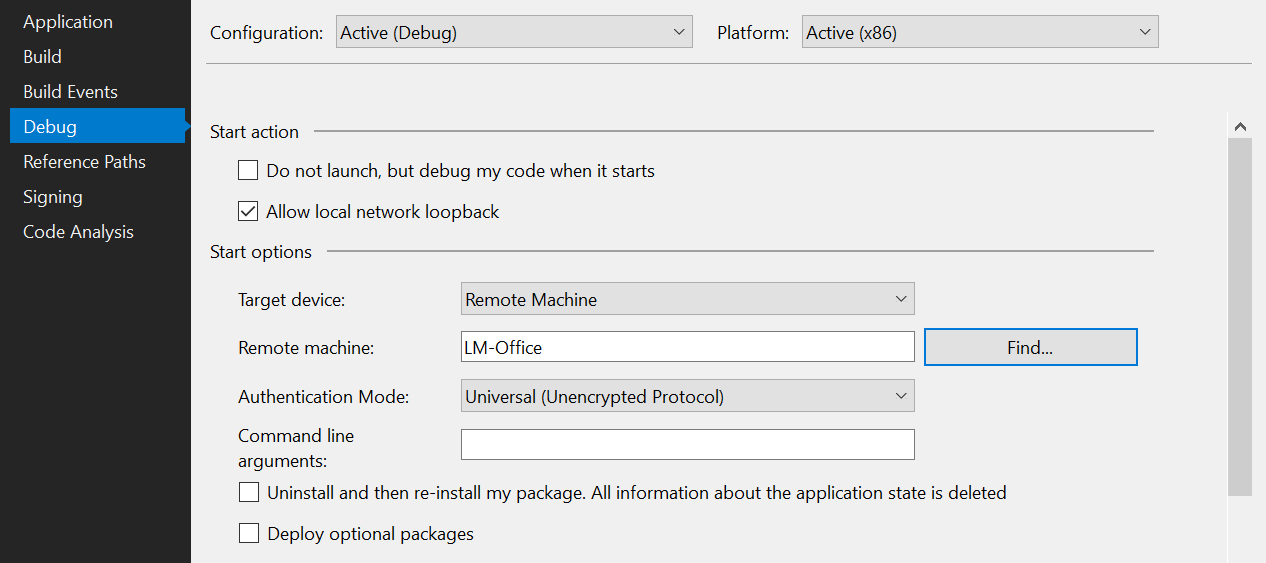
You can verify or modify these values by navigating to the project properties (select Properties in the Solution Explorer) and choosing the
Debugtab on the left:
Now we're ready to deploy. Simply press F5 (or select Debug | Start Debugging) to start debugging our app. You should see the app come up on your device's screen.
Once deployed, you can set breakpoints, see variable values, etc. To stop the app press on the 'Stop Debugging' button (or select Debug | Stop Debugging).
After successfully deploying and debugging your UWP application, create a Release version - change the Visual Studio toolbar configuration dropdown from
DebugtoRelease. You can now build and deploy your app to your device by selecting Build | Rebuild Solution and Build | Deploy Solution.