Exercise - Work with Dataverse relational data
Contoso, like many companies, has multiple locations and allows employees to work from home. Occasionally, these employees need to come into the office and need a desk to use during their visit. Previously, Contoso instructed their employees to walk around the office location on arrival to find an available desk. The company has since discovered that this type of shared workspace system, or hot desking, has created challenges for IT support and licensing. As a result, Contoso has recently built a Microsoft Power Platform solution that will allow employees to view which desks are available and reserve one in advance.
In this exercise, you'll be enhancing the canvas app from Power Apps.
Objectives
The objectives for this exercise are for you to learn how to work with the following relationships:
One-to-many and many-to-one
Many-to-many
Prerequisite
To complete this exercise, you'll need an environment with Microsoft Dataverse.
Exercise 1: Import a solution
In this exercise, you'll import a starting solution into your test environment and then load sample data by using a Microsoft Power Automate cloud flow. This solution contains five tables, one canvas application, one model-driven application, and one cloud flow.
Task 1: Import the starting solution
In this task, you'll import a solution into your environment.
You'll need to download the zip file to complete this exercise. Select download once the link opens.
Navigate to Power Apps maker portal and select the environment you would like to use for this lab.
Select Solutions > Import Solution.
Select Browse.
Select the ContosoHotDesking_1_0_0_0.zip solution, and select Open.
Select Next.
Select Next again.
In the Select a connection dropdown list, select + New connection.
Select Create.
Provide your credentials.
Close the connections browser window or tab.
Select Refresh.
Select Import and then wait for the solution importing to complete.
Task 2: Load sample data
In this task, you'll run a cloud flow that will create sample data.
Select Solutions and then select to open the Contoso hot desking solution that you imported.
Select Cloud flows and then select to open the Load Sample Hot Desk Data flow.
Select Run.
Select Run flow.
Select Done and then wait for the flow run to complete. Select the Refresh button to view the flow run status. A Succeeded status should display when the flow run completes.
Task 3: Run apps
In this task, you'll run the Hot Desking Manager and Hot Desking applications to become familiar with them. Then, you'll finish setting up the data.
Go to the Power Apps maker portal and select the environment that you're using for this lab.
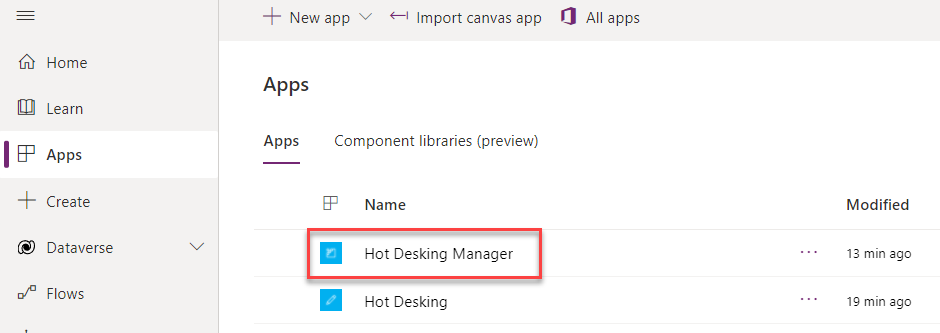
Select Apps and select to launch the Hot Desking Manager application.
Select Desks and then make sure that you have sample data.
Select Locations and then make sure that you have sample data.
Select Desk Features and then make sure that you have sample data.
Select Locations, select three locations, and then select Edit.
In the Primary Contact field, select your user and then select Change.
Close the Hot Desking Manager application.
Make sure that you still have Apps selected, select the Hot Desking application, and then select Edit. The application should open in app studio.
> [!div class="mx-imgBorder"] > [](../media/edit-application.png#lightbox)Select the HomeScreen and then select Play.
Select New Reservation.
Select Building 1, Enclosed Office, and Desk # 1.
Select a future date and then select Book for 9:00.
Select New Reservation again.
Select Building 2, Teams Room, and Desk # 2.
Select a future date and then select Book for 13:00.
Add a few more reservations with different combinations.
You should now have at least four reservations. Close the preview.
Expand the ReserveDeskScreen dropdown list, expand Gallery3, and then select Button1.
Go the formula and review the formula for OnSelect. When the user selects the Book option, a Patch() function is used to create a new Reservation row. This new row has relationships to the desk and your user. The user relationship is set from a global variable that is established in the app on start.
Review other formulas in the application to become familiar with how the process works.
Select the Back button after you're done reviewing the formulas.
Don't navigate away from this page.
Exercise 2: Create a relationship
In this exercise, you'll create a relationship for favorite desks. This relationship will be a many-to-many relationship between the User and Desk tables. This relationship will allow you to implement a feature where a user can tag a desk as a favorite.
Task: Create a relationship
In this task, you'll create a relationship for favorite desks.
Select Tables.
Search for and select the Desk table.
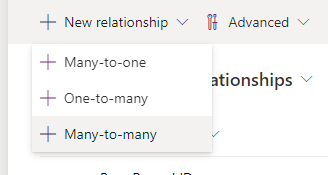
Select the Relationships option, select + New relationship, and then select Many-to-many.
Select User for Related (Many) Table and then select Done.
Select Save table.
Select Solutions and then select Publish all customizations.
Wait for the publishing process to complete.
Exercise 3: Add information to a reservation display
In this exercise, you'll change the reservation gallery to show reservations that have been created by the current user instead of showing all reservations. You'll also show more information on the reservation list.
Task: Edit the application
In this task, you'll edit the Contoso product manager application.
Go to the Power Apps maker portal and select the environment that you're using for this lab.
Select Apps, select the Hot Desking application, and then select Edit.
Expand HomeScreen and select Gallery5.
Go to the formula bar and change the Items formula to the following formula. This formula will filter for a reservation that is associated with current user, and it uses the one-to-many relationship between the user and reservation table.
LookUp(Users,'Primary Email'=currentUserEmail).'Reservations (contoso_Reservation_ReservedFor_SystemUser)'Select the edit gallery icon.
Go to the Insert dropdown and select Text label.
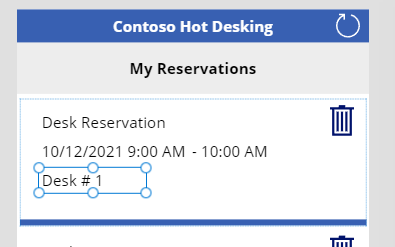
Then change the Text value to the following formula. This formula uses the one-to-many relationship between the reservation and desk tables.
ThisItem.Desk.NameResize and reposition the label.
While still in edit mode, select to add another Label.
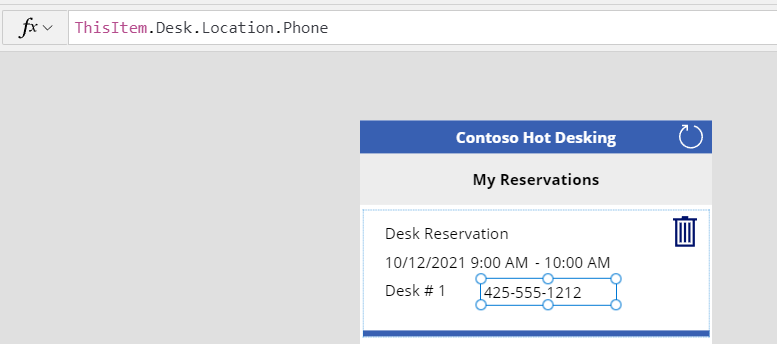
Select the label that you added and set the Text value to the following formula. The following formula shows that you're using two levels deep in the relationships, starting from the reservation, and using Desk to get the Location.
ThisItem.Desk.Location.PhoneResize and reposition the label.
While still in edit mode, select Label one more time.
Select the label that you added and set the Text value to the following formula.
If(IsBlank(ThisItem.Desk.Location.'Primary Contact'),"No Primary Contact",ThisItem.Desk.Location.'Primary Contact'.'Full Name')Resize and reposition the label.
The reservation gallery should now appear similar to the following image.
Select File > Save.
Select the back button.
Don't navigate away from this page.
Exercise 4: Add a favorite desk
In this exercise, you'll add an icon that will let users select favorite desks. You'll also add a label that will show desk features.
Task: Add a favorite
In this task, you'll add a favorite desk and add a label to show desk features.
Expand FindDeskScreen and then select GalleryDesks.
Select the Edit gallery icon.
Go to the Insert tab, select Icons, and then select one of the icons. You'll set the specific icon in the next step by using a formula. Therefore, for this step, it doesn't matter which icon you choose.
Select the icon that you added and change the Icon value to the following formula. This formula will show the thumbs up icon filled if the user didn't indicate this desk as a favorite, or it will show the thumbs up icon if the user has already selected the desk as a favorite.
`If(CountIf(ThisItem.Users, ThisRecord.User = currentUser.User) > 0, Icon.ThumbsUp,Icon.ThumbsUpFilled)`

> [!NOTE]
> The CountIf does encounter [delegation](/power-apps/maker/canvas-apps/delegation-overview/?azure-portal=true) challenges, if you have a large amount of rows in your app you might have to use an alternate approach.
Make sure that you still have the icon selected. Select OnSelect and then paste the following formula. This formula will relate or unrelate this desk and signed-in user, depending on whether the user has already added the desk as a favorite.
If(CountIf(ThisItem.Users, ThisRecord.User = currentUser.User) > 0, Unrelate(ThisItem.Users, currentUser), Relate(ThisItem.Users, currentUser))Reposition the icon in the gallery, as shown in the following image.
Make sure you're still in gallery edit mode. Go to the Insert tab and select Label.
Select the label that you added and set the Text value to the following formula. This formula will concatenate the desk feature names and uses the many-to-many relationship between the Desk and Desk Features tables.
Concat(ThisItem.'Desk Features', Name, " , " )Resize and reposition the label to better fit the space.
Select the Save icon.
Select the back button.
Select Play to preview the app.
The gallery should appear like the following image. Select the thumbs up icon of one of the desks.
The icon should change to thumbs up. Select the icon again.
The icon should change back to showing the thumbs up icon as filled. Select the icon again.
Close the preview.
Don't navigate away from this page.
Exercise 5: Filter desks
In this exercise, you'll add a filter to the desks gallery if the user selects a feature from the dropdown list.
Task: Filter for features
In this task, you'll add a filter for features.
Select GalleryDesks.
Go to the formula bar and add the following formula to the formula for Items. This formula will filter the desks to show only desks that have the selected feature. Don't forget to include the comma.
,IsBlank(filterFeatures.Selected) || Desk in filterFeatures.Selected.Desks.DeskSelect File > Save.
Select the back button.
Select Play.
Note the desk features that are available for the selected building.
Select a feature from the dropdown list. Only desks that have the selected feature should display.
Select different buildings and features to make sure that the application behaves as expected.
Close the preview.
Close the app designer.


