Kommentar
Åtkomst till den här sidan kräver auktorisering. Du kan prova att logga in eller ändra kataloger.
Åtkomst till den här sidan kräver auktorisering. Du kan prova att ändra kataloger.
Det här är den andra delen i en fullständig genomgång om hur du använder Windows Hello som ett alternativ till traditionella system för användarnamn och lösenordsautentisering i paketerade Windows-appar. Den här artikeln tar upp var del 1, Windows Hello inloggningsapp, slutade och utökar funktionerna för att visa hur du kan integrera Windows Hello i ditt befintliga program.
För att kunna skapa den här project behöver du lite erfarenhet av C#och XAML. Du måste också använda Visual Studio 2026 på en Windows 10- eller Windows 11-dator. Mer information om hur du konfigurerar utvecklingsmiljön finns i Börja utveckla Windows-appar .
Övning 1: Logik på serversidan
I den här övningen börjar du med det Windows Hello program som skapades i det första labbet och skapar en lokal modellserver och databas. Det här praktiska labbet är utformat för att lära ut hur Windows Hello kan integreras i ett befintligt system. Genom att använda en falsk server och en falsk databas elimineras många orelaterade inställningar. I dina egna program måste du ersätta de falska objekten med de verkliga tjänsterna och databaserna.
Börja med att öppna lösningen WindowsHelloLogin från den första Windows Hello Hands On Lab.
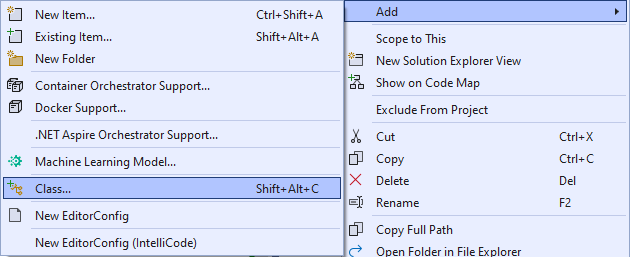
Du börjar med att implementera mock-servern och mock-databasen. Skapa en ny mapp med namnet "AuthService". I Solution Explorer högerklickar du på WindowsHelloLogin project och väljer Lägg till>Ny mapp.
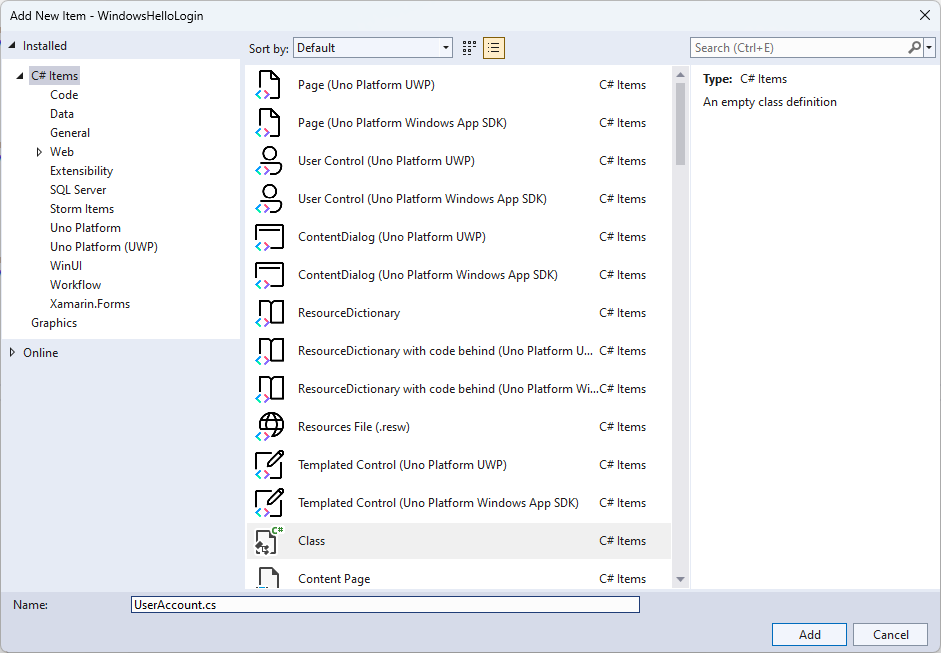
Skapa UserAccount - och WindowsHelloDevices-klasser som fungerar som modeller för data som ska sparas i den falska databasen. UserAccount liknar användarmodellen som implementeras på en traditionell autentiseringsserver. Högerklicka på mappen AuthService och lägg till en ny klass med namnet "UserAccount".
Ändra klassomfånget så att det blir offentligt och lägg till följande offentliga egenskaper för klassen UserAccount . Du måste lägga till en using-instruktion för
System.ComponentModel.DataAnnotationsnamnområdet.using System; using System.ComponentModel.DataAnnotations; namespace WindowsHelloLogin.AuthService { public class UserAccount { [Key, Required] public Guid UserId { get; set; } [Required] public string Username { get; set; } public string Password { get; set; } // public List<WindowsHelloDevice> WindowsHelloDevices = new(); } }Du kanske har lagt märke till den utkommenterade listan över WindowsHelloEnheter. Det här är en ändring som du måste göra i en befintlig användarmodell i den aktuella implementeringen. Listan över WindowsHelloDevices innehåller ett deviceID, den offentliga nyckeln från Windows Hello och en KeyCredentialAttestationResult. I den här övningen måste du implementera keyAttestationResult eftersom de endast tillhandahålls av Windows Hello på enheter som har ett TPM-chip (Trusted Platform Modules). KeyCredentialAttestationResult är en kombination av flera egenskaper och skulle behöva delas för att spara och hämta dem från en databas.
Skapa en ny klass i mappen AuthService med namnet "WindowsHelloDevice.cs". Det här är modellen för de Windows Hello enheterna enligt beskrivningen ovan. Ändra klassomfånget så att det blir offentligt och lägg till följande egenskaper.
using System;

namespace WindowsHelloLogin.AuthService
{
    public class WindowsHelloDevice
    {
        // These are the new variables that will need to be added to the existing UserAccount in the Database
        // The DeviceName is used to support multiple devices for the one user.
        // This way the correct public key is easier to find as a new public key is made for each device.
        // The KeyAttestationResult is only used if the User device has a TPM (Trusted Platform Module) chip,
        // in most cases it will not. So will be left out for this hands on lab.
        public Guid DeviceId { get; set; }
        public byte[] PublicKey { get; set; }
        // public KeyCredentialAttestationResult KeyAttestationResult { get; set; }
    }
}
Gå tillbaka till UserAccount.cs och avkommentera listan över Windows Hello-enheter.
using System.Collections.Generic;

namespace WindowsHelloLogin.AuthService
{
    public class UserAccount
    {
        [Key, Required]
        public Guid UserId { get; set; }
        [Required]
        public string Username { get; set; }
        public string Password { get; set; }
        public List<WindowsHelloDevice> WindowsHelloDevices = new();
    }
}
Med modellen för UserAccount och WindowsHelloDevice skapad måste du skapa en annan ny klass i mappen AuthService som fungerar som en falsk databas, eftersom det här är en falsk databas där du sparar och läser in en lista över användarkonton lokalt. I verkligheten skulle det här vara din databasimplementering. Skapa en ny klass i mappen AuthService med namnet "MockStore.cs". Ändra klassomfånget till offentligt.
Eftersom mock store sparar och läser in en lista över användarkonton lokalt kan du implementera logiken för att spara och läsa in listan med hjälp av en XmlSerializer. Du måste också komma ihåg filnamnet och spara platsen. I MockStore.cs implementera följande:
using System.Collections.Generic;
using System;
using System.IO;
using System.Linq;
using System.Text;
using System.Threading.Tasks;
using System.Xml.Serialization;
using Windows.Storage;

namespace WindowsHelloLogin.AuthService
{
    public class MockStore
    {
        private const string USER_ACCOUNT_LIST_FILE_NAME = "userAccountsList.txt";
        // This cannot be a const because the LocalFolder is accessed at runtime
        private string _userAccountListPath = Path.Combine(
            ApplicationData.Current.LocalFolder.Path, USER_ACCOUNT_LIST_FILE_NAME);
        private List<UserAccount> _mockDatabaseUserAccountsList;

#region Save and Load Helpers
        /// <summary>
        /// Create and save a useraccount list file. (Replacing the old one)
        /// </summary>
        private async Task SaveAccountListAsync()
        {
            string accountsXml = SerializeAccountListToXml();

            if (File.Exists(_userAccountListPath))
            {
                StorageFile accountsFile = await StorageFile.GetFileFromPathAsync(_userAccountListPath);
                await FileIO.WriteTextAsync(accountsFile, accountsXml);
            }
            else
            {
                StorageFile accountsFile = await ApplicationData.Current.LocalFolder.CreateFileAsync(USER_ACCOUNT_LIST_FILE_NAME);
                await FileIO.WriteTextAsync(accountsFile, accountsXml);
            }
        }

        /// <summary>
        /// Gets the useraccount list file and deserializes it from XML to a list of useraccount objects.
        /// </summary>
        /// <returns>List of useraccount objects</returns>
        private async Task LoadAccountListAsync()
        {
            if (File.Exists(_userAccountListPath))
            {
                StorageFile accountsFile = await StorageFile.GetFileFromPathAsync(_userAccountListPath);

                string accountsXml = await FileIO.ReadTextAsync(accountsFile);
                DeserializeXmlToAccountList(accountsXml);
            }

            // If the UserAccountList does not contain the sampleUser Initialize the sample users
            // This is only needed as it in a Hand on Lab to demonstrate a user being migrated.
            // In the real world, user accounts would just be in a database.
            if (!_mockDatabaseUserAccountsList.Any(f => f.Username.Equals("sampleUsername")))
            {
                //If the list is empty, call InitializeSampleAccounts and return the list
                //await InitializeSampleUserAccountsAsync();
            }
        }

        /// <summary>
        /// Uses the local list of accounts and returns an XML formatted string representing the list
        /// </summary>
        /// <returns>XML formatted list of accounts</returns>
        private string SerializeAccountListToXml()
        {
            var xmlizer = new XmlSerializer(typeof(List<UserAccount>));
            var writer = new StringWriter();
            xmlizer.Serialize(writer, _mockDatabaseUserAccountsList);
            return writer.ToString();
        }

        /// <summary>
        /// Takes an XML formatted string representing a list of accounts and returns a list object of accounts
        /// </summary>
        /// <param name="listAsXml">XML formatted list of accounts</param>
        /// <returns>List object of accounts</returns>
        private List<UserAccount> DeserializeXmlToAccountList(string listAsXml)
        {
            var xmlizer = new XmlSerializer(typeof(List<UserAccount>));
            TextReader textreader = new StreamReader(new MemoryStream(Encoding.UTF8.GetBytes(listAsXml)));
            return _mockDatabaseUserAccountsList = (xmlizer.Deserialize(textreader)) as List<UserAccount>;
        }
#endregion
    }
}
I metoden LoadAccountListAsync kanske du har märkt att metoden InitializeSampleUserAccountsAsync har kommenterats ut. Du måste skapa den här metoden i MockStore.cs. Den här metoden fyller i listan över användarkonton så att en inloggning kan ske. I verkligheten skulle användardatabasen redan vara ifylld. I det här steget skapar du också en konstruktor som initierar användarlistan och anropar LoadAccountListAsync.
namespace WindowsHelloLogin.AuthService
{
    public class MockStore
    {
        private const string USER_ACCOUNT_LIST_FILE_NAME = "userAccountsList.txt";
        // This cannot be a const because the LocalFolder is accessed at runtime
        private string _userAccountListPath = Path.Combine(
            ApplicationData.Current.LocalFolder.Path, USER_ACCOUNT_LIST_FILE_NAME);
        private List<UserAccount> _mockDatabaseUserAccountsList;

        public MockStore()
        {
            _mockDatabaseUserAccountsList = new List<UserAccount>();
            _ = LoadAccountListAsync();
        }

        private async Task InitializeSampleUserAccountsAsync()
        {
            // Create a sample Traditional User Account that only has a Username and Password
            // This will be used initially to demonstrate how to migrate to use Windows Hello

            var sampleUserAccount = new UserAccount()
            {
                UserId = Guid.NewGuid(),
                Username = "sampleUsername",
                Password = "samplePassword",
            };

            // Add the sampleUserAccount to the _mockDatabase
            _mockDatabaseUserAccountsList.Add(sampleUserAccount);
            await SaveAccountListAsync();
        }
    }
}
Nu när metoden InitializeSampleUserAccountsAsync finns, avkommentarer metodanropet i metoden LoadAccountListAsync .
private async Task LoadAccountListAsync()
{
    if (File.Exists(_userAccountListPath))
    {
        StorageFile accountsFile = await StorageFile.GetFileFromPathAsync(_userAccountListPath);

        string accountsXml = await FileIO.ReadTextAsync(accountsFile);
        DeserializeXmlToAccountList(accountsXml);
    }

    // If the UserAccountList does not contain the sampleUser Initialize the sample users
    // This is only needed as it in a Hand on Lab to demonstrate a user migrating
    // In the real world user accounts would just be in a database
    if (!_mockDatabaseUserAccountsList.Any(f = > f.Username.Equals("sampleUsername")))
            {
        //If the list is empty InitializeSampleUserAccountsAsync and return the list
        await InitializeSampleUserAccountsAsync();
    }
}
Användarkontolistan i mock store kan nu sparas och läsas in. Andra delar av programmet måste ha access till den här listan, så det måste finnas några metoder för att hämta dessa data. Under metoden InitializeSampleUserAccountsAsync lägger du till följande metoder för att hämta data. De gör att du kan hämta ett användar-ID, en enskild användare, en lista över användare för en specifik Windows Hello enhet och även hämta den offentliga nyckeln för användaren på en specifik enhet.
public Guid GetUserId(string username)
{
    if (_mockDatabaseUserAccountsList.Any())
    {
        UserAccount account = _mockDatabaseUserAccountsList.FirstOrDefault(f => f.Username.Equals(username));
        if (account != null)
        {
            return account.UserId;
        }
    }
    return Guid.Empty;
}

public UserAccount GetUserAccount(Guid userId)
{
    return _mockDatabaseUserAccountsList.FirstOrDefault(f => f.UserId.Equals(userId));
}

public List<UserAccount> GetUserAccountsForDevice(Guid deviceId)
{
    var usersForDevice = new List<UserAccount>();

    foreach (UserAccount account in _mockDatabaseUserAccountsList)
    {
        if (account.WindowsHelloDevices.Any(f => f.DeviceId.Equals(deviceId)))
        {
            usersForDevice.Add(account);
        }
    }

    return usersForDevice;
}

public byte[] GetPublicKey(Guid userId, Guid deviceId)
{
    UserAccount account = _mockDatabaseUserAccountsList.FirstOrDefault(f => f.UserId.Equals(userId));
    if (account != null)
    {
        if (account.WindowsHelloDevices.Any())
        {
            return account.WindowsHelloDevices.FirstOrDefault(p => p.DeviceId.Equals(deviceId)).PublicKey;
        }
    }
    return null;
}
Nästa metoder att implementera hanterar enkla åtgärder för att lägga till ett konto, ta bort ett konto och även ta bort en enhet. Det krävs att du tar bort en enhet eftersom Windows Hello är enhetsspecifikt. För varje enhet som du loggar in på skapas ett nytt offentligt och privat nyckelpar av Windows Hello. Det är som att ha olika lösenord för varje enhet som du loggar in på, det enda är att du inte behöver komma ihåg alla dessa lösenord. servern gör det. Lägg till följande metoder i MockStore.cs.
public async Task<UserAccount> AddAccountAsync(string username)
{
    UserAccount newAccount = null;
    try
    {
        newAccount = new UserAccount()
        {
            UserId = Guid.NewGuid(),
            Username = username,
        };

        _mockDatabaseUserAccountsList.Add(newAccount);
        await SaveAccountListAsync();
    }
    catch (Exception)
    {
        throw;
    }
    return newAccount;
}

public async Task<bool> RemoveAccountAsync(Guid userId)
{
    UserAccount userAccount = GetUserAccount(userId);
    if (userAccount != null)
    {
        _mockDatabaseUserAccountsList.Remove(userAccount);
        await SaveAccountListAsync();
        return true;
    }
    return false;
}

public async Task<bool> RemoveDeviceAsync(Guid userId, Guid deviceId)
{
    UserAccount userAccount = GetUserAccount(userId);
    WindowsHelloDevice deviceToRemove = null;
    if (userAccount != null)
    {
        foreach (WindowsHelloDevice device in userAccount.WindowsHelloDevices)
        {
            if (device.DeviceId.Equals(deviceId))
            {
                deviceToRemove = device;
                break;
            }
        }
    }

    if (deviceToRemove != null)
    {
        //Remove the WindowsHelloDevice
        userAccount.WindowsHelloDevices.Remove(deviceToRemove);
        await SaveAccountListAsync();
    }

    return true;
}
I klassen MockStore lägger du till en metod som lägger till Windows Hello relaterad information till en befintlig UserAccount. Den här metoden kallas "WindowsHelloUpdateDetailsAsync" och tar parametrar för att identifiera användaren och Windows Hello information. KeyAttestationResult har tagits bort genom att kommentera när du skapar WindowsHelloDevice; i en verklig applikation skulle du behöva detta.
using System.Threading.Tasks;
using Windows.Security.Credentials;

public async Task WindowsHelloUpdateDetailsAsync(Guid userId, Guid deviceId, byte[] publicKey,
    KeyCredentialAttestationResult keyAttestationResult)
{
    UserAccount existingUserAccount = GetUserAccount(userId);
    if (existingUserAccount != null)
    {
        if (!existingUserAccount.WindowsHelloDevices.Any(f => f.DeviceId.Equals(deviceId)))
        {
            existingUserAccount.WindowsHelloDevices.Add(new WindowsHelloDevice()
            {
                DeviceId = deviceId,
                PublicKey = publicKey,
                // KeyAttestationResult = keyAttestationResult
            });
        }
    }
    await SaveAccountListAsync();
}
MockStore-klassen är nu klar eftersom den representerar databasen som den ska betraktas som privat. För att få tillgång till MockStore behövs en AuthService-klass för att hantera databasdata. I mappen AuthService skapar du en ny klass med namnet "AuthService.cs". Ändra klassomfånget till offentligt och lägg till ett singleton-instansmönster så att endast en instans skapas.
namespace WindowsHelloLogin.AuthService
{
    public class AuthService
    {
        // Singleton instance of the AuthService
        // The AuthService is a mock of what a real world server and service implementation would be
        private static AuthService _instance;
        public static AuthService Instance
        {
            get
            {
                if (null == _instance)
                {
                    _instance = new AuthService();
                }
                return _instance;
            }
        }

        private AuthService()
        { }
    }
}
Klassen AuthService måste skapa en instans av klassen MockStore och ange access egenskaperna för objektet MockStore.
namespace WindowsHelloLogin.AuthService
{
    public class AuthService
    {
        //Singleton instance of the AuthService
        //The AuthService is a mock of what a real world server and database implementation would be
        private static AuthService _instance;
        public static AuthService Instance
        {
            get
            {
                if (null == _instance)
                {
                    _instance = new AuthService();
                }
                return _instance;
            }
        }

        private AuthService()
        { }

        private MockStore _mockStore = new();

        public Guid GetUserId(string username)
        {
            return _mockStore.GetUserId(username);
        }

        public UserAccount GetUserAccount(Guid userId)
        {
            return _mockStore.GetUserAccount(userId);
        }

        public List<UserAccount> GetUserAccountsForDevice(Guid deviceId)
        {
            return _mockStore.GetUserAccountsForDevice(deviceId);
        }
    }
}
Du behöver metoder i klassen AuthService för att access lägga till, ta bort och uppdatera Windows Hello informationsmetoder i objektet MockStore. Lägg till följande metoder i slutet av AuthService-klassdefinitionen .
using System.Threading.Tasks;
using Windows.Security.Credentials;

public async Task RegisterAsync(string username)
{
    await _mockStore.AddAccountAsync(username);
}

public async Task<bool> WindowsHelloRemoveUserAsync(Guid userId)
{
    return await _mockStore.RemoveAccountAsync(userId);
}

public async Task<bool> WindowsHelloRemoveDeviceAsync(Guid userId, Guid deviceId)
{
    return await _mockStore.RemoveDeviceAsync(userId, deviceId);
}

public async Task WindowsHelloUpdateDetailsAsync(Guid userId, Guid deviceId, byte[] publicKey,
    KeyCredentialAttestationResult keyAttestationResult)
{
    await _mockStore.WindowsHelloUpdateDetailsAsync(userId, deviceId, publicKey, keyAttestationResult);
}
Klassen AuthService måste ange en metod för att verifiera autentiseringsuppgifter. Den här metoden tar ett användarnamn och lösenord och kontrollerar att kontot finns och att lösenordet är giltigt. Ett befintligt system skulle ha en motsvarande metod som kontrollerar att användaren är auktoriserad. Lägg till följande ValidateCredentials-metod i filen AuthService.cs.
public bool ValidateCredentials(string username, string password)
{
    if (!string.IsNullOrEmpty(username) && !string.IsNullOrEmpty(password))
    {
        // This would be used for existing accounts migrating to use Windows Hello
        Guid userId = GetUserId(username);
        if (userId != Guid.Empty)
        {
            UserAccount account = GetUserAccount(userId);
            if (account != null)
            {
                if (string.Equals(password, account.Password))
                {
                    return true;
                }
            }
        }
    }
    return false;
}
Klassen AuthService behöver en begärandeutmaningsmetod som returnerar en utmaning till klienten för att verifiera om användaren är den användaren påstår sig vara. Sedan behövs en annan metod i klassen AuthService för att ta emot den signerade utmaningen från klienten. För den här laboratorieövningen har metoden för hur du avgör om den signerade utmaningen har slutförts lämnats ospecifierad. Varje implementering av Windows Hello i ett befintligt autentiseringssystem skiljer sig något åt. Den offentliga nyckeln som lagras på servern måste matcha resultatet som klienten returnerade till servern. Lägg till dessa två metoder i AuthService.cs.
using Windows.Security.Cryptography;
using Windows.Storage.Streams;

public IBuffer WindowsHelloRequestChallenge()
{
    return CryptographicBuffer.ConvertStringToBinary("ServerChallenge", BinaryStringEncoding.Utf8);
}

public bool SendServerSignedChallenge(Guid userId, Guid deviceId, byte[] signedChallenge)
{
    // Depending on your company polices and procedures this step will be different
    // It is at this point you will need to validate the signedChallenge that is sent back from the client.
    // Validation is used to ensure the correct user is trying to access this account.
    // The validation process will use the signedChallenge and the stored PublicKey
    // for the username and the specific device signin is called from.
    // Based on the validation result you will return a bool value to allow access to continue or to block the account.

    // For this sample validation will not happen as a best practice solution does not apply and will need to
       // be configured for each company.
    // Simply just return true.

    // You could get the User's Public Key with something similar to the following:
    byte[] userPublicKey = _mockStore.GetPublicKey(userId, deviceId);
    return true;
}
Övning 2: Logik på klientsidan
I den här övningen ändrar du klientsidans vyer och hjälpklasser från det första labbet för att använda klassen AuthService . I verkligheten skulle AuthService vara autentiseringsservern och du skulle behöva använda webb-API:erna för att skicka och ta emot data från servern. För den här praktiska övningen är både klienten och servern lokala för att göra det enklare. Målet är att lära dig hur du använder Windows Hello API:er.
I MainPage.xaml.cs kan du ta bort metoden AccountHelper.LoadAccountListAsync i den inlästa metoden eftersom klassen AuthService skapar en instans av MockStore för att läsa in kontolistan. Metoden
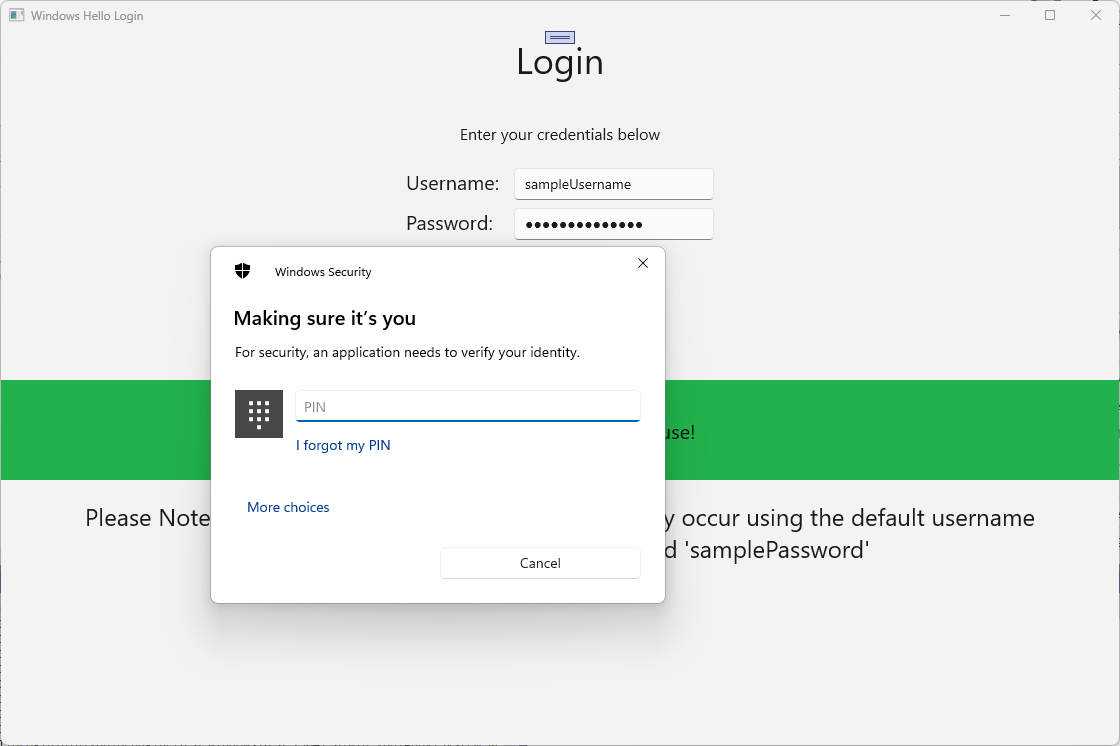
Loadedbör nu se ut som kodfragmentet nedan. Observera att den asynkrona metoddefinitionen tas bort eftersom ingenting är avvaktat.private void MainPage_Loaded(object sender, RoutedEventArgs e) { Frame.Navigate(typeof(UserSelection)); }Uppdatera inloggningssidans gränssnitt för att kräva att ett lösenord anges. Det här praktiska labbet visar hur ett befintligt system kan migreras för att använda Windows Hello och befintliga konton har ett användarnamn och ett lösenord. Uppdatera också förklaringen längst ned i XAML för att inkludera standardlösenordet. Uppdatera följande XAML i Login.xaml.
<Grid>
  <StackPanel>
    <TextBlock Text="Login" FontSize="36" Margin="4" TextAlignment="Center"/>

    <TextBlock x:Name="ErrorMessage" Text="" FontSize="20" Margin="4" Foreground="Red" TextAlignment="Center"/>

    <TextBlock Text="Enter your credentials below" Margin="0,0,0,20"
               TextWrapping="Wrap" Width="300"
               TextAlignment="Center" VerticalAlignment="Center" FontSize="16"/>

    <StackPanel Orientation="Horizontal" HorizontalAlignment="Center">
      <!-- Username Input -->
      <TextBlock x:Name="UserNameTextBlock" Text="Username: "
                 FontSize="20" Margin="4" Width="100"/>
      <TextBox x:Name="UsernameTextBox" PlaceholderText="sampleUsername" Width="200" Margin="4"/>
    </StackPanel>

    <StackPanel Orientation="Horizontal" HorizontalAlignment="Center">
      <!-- Password Input -->
      <TextBlock x:Name="PasswordTextBlock" Text="Password: "
                 FontSize="20" Margin="4" Width="100"/>
      <PasswordBox x:Name="PasswordBox" PlaceholderText="samplePassword" Width="200" Margin="4"/>
    </StackPanel>

    <Button x:Name="LoginButton" Content="Login" Background="DodgerBlue" Foreground="White"
            Click="LoginButton_Click" Width="80" HorizontalAlignment="Center" Margin="0,20"/>

    <TextBlock Text="Don't have an account?"
               TextAlignment="Center" VerticalAlignment="Center" FontSize="16"/>
    <TextBlock x:Name="RegisterButtonTextBlock" Text="Register now"
               PointerPressed="RegisterButtonTextBlock_OnPointerPressed"
               Foreground="DodgerBlue"
               TextAlignment="Center" VerticalAlignment="Center" FontSize="16"/>

    <Border x:Name="WindowsHelloStatus" Background="#22B14C"
            Margin="0,20" Height="100">
      <TextBlock x:Name="WindowsHelloStatusText" Text="Windows Hello is ready to use!"
                 Margin="4" TextAlignment="Center" VerticalAlignment="Center" FontSize="20"/>
    </Border>

    <TextBlock x:Name="LoginExplanation" FontSize="24" TextAlignment="Center" TextWrapping="Wrap"
               Text="Please Note: To demonstrate a login, validation will only occur using the default username 'sampleUsername' and default password 'samplePassword'"/>
  </StackPanel>
</Grid>
I filen bakom koden för klassen Login måste du ändra den
Accountprivata variabeln högst upp i klassen till enUserAccount. ÄndraOnNavigateTo-händelsen till att konvertera typen till enUserAccount. Du behöver även följande using-sats.using WindowsHelloLogin.AuthService; namespace WindowsHelloLogin.Views { public sealed partial class Login : Page { private UserAccount _account; private bool _isExistingAccount; public Login() { this.InitializeComponent(); } protected override async void OnNavigatedTo(NavigationEventArgs e) { //Check Windows Hello is setup and available on this machine if (await WindowsHelloHelper.WindowsHelloAvailableCheckAsync()) { if (e.Parameter != null) { _isExistingAccount = true; //Set the account to the existing account being passed in _account = (UserAccount)e.Parameter; UsernameTextBox.Text = _account.Username; await SignInWindowsHelloAsync(); } } } private async void LoginButton_Click(object sender, RoutedEventArgs e) { ErrorMessage.Text = ""; await SignInWindowsHelloAsync(); } } }Eftersom inloggningssidan använder ett
UserAccountobjekt i stället för föregåendeAccountobjekt måste WindowsHelloHelper.cs uppdateras för att använda enUserAccountsom parametertyp för vissa metoder. Du måste ändra följande parametrar för metoderna CreateWindowsHelloKeyAsync, RemoveWindowsHelloAccountAsync och GetWindowsHelloAuthenticationMessageAsync .UserAccountEftersom klassen har ettGuidför ett UserId börjar du använda ID:t på fler platser för att vara mer exakt.public static async Task<bool> CreateWindowsHelloKeyAsync(Guid userId, string username) { KeyCredentialRetrievalResult keyCreationResult = await KeyCredentialManager.RequestCreateAsync(username, KeyCredentialCreationOption.ReplaceExisting); return true; } public static async Task RemoveWindowsHelloAccountAsync(UserAccount account) { } public static async Task<bool> GetWindowsHelloAuthenticationMessageAsync(UserAccount account) { KeyCredentialRetrievalResult openKeyResult = await KeyCredentialManager.OpenAsync(account.Username); //Calling OpenAsync will allow the user access to what is available in the app and will not require user credentials again. //If you wanted to force the user to sign in again you can use the following: //var consentResult = await Windows.Security.Credentials.UI.UserConsentVerifier.RequestVerificationAsync(account.Username); //This will ask for the either the password of the currently signed in Microsoft Account or the PIN used for Windows Hello. if (openKeyResult.Status == KeyCredentialStatus.Success) { //If OpenAsync has succeeded, the next thing to think about is whether the client application requires access to backend services. //If it does here you would Request a challenge from the Server. The client would sign this challenge and the server //would check the signed challenge. If it is correct it would allow the user access to the backend. //You would likely make a new method called RequestSignAsync to handle all this //for example, RequestSignAsync(openKeyResult); //Refer to the second Windows Hello sample for information on how to do this. //For this sample there is not concept of a server implemented so just return true. return true; } else if (openKeyResult.Status == KeyCredentialStatus.NotFound) { //If the _account is not found at this stage. It could be one of two errors. //1. Windows Hello has been disabled //2. Windows Hello has been disabled and re-enabled cause the Windows Hello Key to change. //Calling CreateWindowsHelloKeyAsync and passing through the account will attempt to replace the existing Windows Hello Key for that account. //If the error really is that Windows Hello is disabled then the CreateWindowsHelloKeyAsync method will output that error. if (await CreateWindowsHelloKeyAsync(account.UserId, account.Username)) { //If the Windows Hello Key was again successfully created, Windows Hello has just been reset. //Now that the Windows Hello Key has been reset for the account retry sign in. return await GetWindowsHelloAuthenticationMessageAsync(account); } } // Can't use Windows Hello right now, try again later return false; }Metoden SignInWindowsHelloAsync i Login.xaml.cs filen måste uppdateras för att använda AuthService i stället för AccountHelper. Verifiering av autentiseringsuppgifter sker via AuthService. För den här övningen är det enda kontot som är konfigurerat "sampleUsername". Det här kontot skapas i metoden InitializeSampleUserAccountsAsync i MockStore.cs. Uppdatera metoden SignInWindowsHelloAsync i Login.xaml.cs nu för att återspegla kodfragmentet nedan.
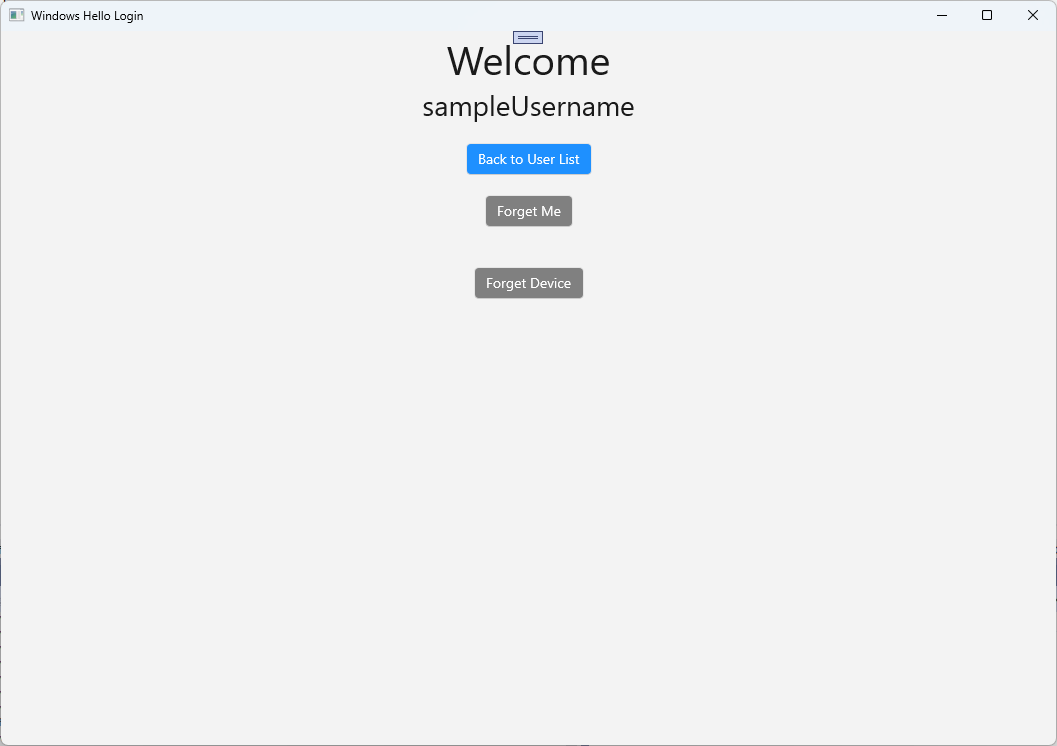
private async Task SignInWindowsHelloAsync()
{
    if (_isExistingAccount)
    {
        if (await WindowsHelloHelper.GetWindowsHelloAuthenticationMessageAsync(_account))
        {
            Frame.Navigate(typeof(Welcome), _account);
        }
    }
    else if (AuthService.AuthService.Instance.ValidateCredentials(UsernameTextBox.Text, PasswordBox.Password))
    {
        Guid userId = AuthService.AuthService.Instance.GetUserId(UsernameTextBox.Text);

        if (userId != Guid.Empty)
        {
            //Now that the account exists on server try and create the necessary details and add them to the account
            if (await WindowsHelloHelper.CreateWindowsHelloKeyAsync(userId, UsernameTextBox.Text))
            {
                Debug.WriteLine("Successfully signed in with Windows Hello!");
                //Navigate to the Welcome Screen.
                _account = AuthService.AuthService.Instance.GetUserAccount(userId);
                Frame.Navigate(typeof(Welcome), _account);
            }
            else
            {
                //The Windows Hello account creation failed.
                //Remove the account from the server as the details were not configured
                await AuthService.AuthService.Instance.WindowsHelloRemoveUserAsync(userId);

                ErrorMessage.Text = "Account Creation Failed";
            }
        }
    }
    else
    {
        ErrorMessage.Text = "Invalid Credentials";
    }
}
Eftersom Windows Hello skapar olika offentliga och privata nyckelpar för varje konto på varje enhet måste sidan Welcome visa en lista över registrerade enheter för det inloggade kontot och låta var och en glömmas bort. I Welcome.xaml lägger du till följande XAML under
ForgetButton. Detta implementerar en glöm-enhet-knapp, ett textområde för fel och en lista för att visa alla enheter.<Grid> <StackPanel> <TextBlock x:Name="Title" Text="Welcome" FontSize="40" TextAlignment="Center"/> <TextBlock x:Name="UserNameText" FontSize="28" TextAlignment="Center"/> <Button x:Name="BackToUserListButton" Content="Back to User List" Click="Button_Restart_Click" HorizontalAlignment="Center" Margin="0,20" Foreground="White" Background="DodgerBlue"/> <Button x:Name="ForgetButton" Content="Forget Me" Click="Button_Forget_User_Click" Foreground="White" Background="Gray" HorizontalAlignment="Center"/> <Button x:Name="ForgetDeviceButton" Content="Forget Device" Click="Button_Forget_Device_Click" Foreground="White" Background="Gray" Margin="0,40,0,20" HorizontalAlignment="Center"/> <TextBlock x:Name="ForgetDeviceErrorTextBlock" Text="Select a device first" TextWrapping="Wrap" Width="300" Foreground="Red" TextAlignment="Center" VerticalAlignment="Center" FontSize="16" Visibility="Collapsed"/> <ListView x:Name="UserListView" MaxHeight="500" MinWidth="350" Width="350" HorizontalAlignment="Center"> <ListView.ItemTemplate> <DataTemplate> <Grid Background="Gray" Height="50" Width="350" HorizontalAlignment="Center" VerticalAlignment="Stretch" > <TextBlock Text="{Binding DeviceId}" HorizontalAlignment="Center" TextAlignment="Center" VerticalAlignment="Center" Foreground="White"/> </Grid> </DataTemplate> </ListView.ItemTemplate> </ListView> </StackPanel> </Grid>I filen Welcome.xaml.cs måste du ändra den privata
Accountvariabeln överst i klassen till en privatUserAccountvariabel. UppdateraOnNavigatedTosedan metoden för att använda AuthService och hämta information för det aktuella kontot. När du har kontoinformationenItemsSourcekan du ange att listan ska visa enheterna. Du måste lägga till en referens till namnområdet AuthService .using WindowsHelloLogin.AuthService; namespace WindowsHelloLogin.Views { public sealed partial class Welcome : Page { private UserAccount _activeAccount; public Welcome() { InitializeComponent(); } protected override void OnNavigatedTo(NavigationEventArgs e) { _activeAccount = (UserAccount)e.Parameter; if (_activeAccount != null) { UserAccount account = AuthService.AuthService.Instance.GetUserAccount(_activeAccount.UserId); if (account != null) { UserListView.ItemsSource = account.WindowsHelloDevices; UserNameText.Text = account.Username; } } } } }Eftersom du kommer att använda AuthService när du tar bort ett konto kan referensen till AccountHelper i
Button_Forget_User_Clickmetoden tas bort. Metoden bör nu se ut som nedan.private async void Button_Forget_User_Click(object sender, RoutedEventArgs e) { //Remove it from Windows Hello await WindowsHelloHelper.RemoveWindowsHelloAccountAsync(_activeAccount); Debug.WriteLine($"User {_activeAccount.Username} deleted."); //Navigate back to UserSelection page. Frame.Navigate(typeof(UserSelection)); }WindowsHelloHelper-metoden använder inte AuthService för att ta bort kontot. Du måste ringa ett anrop till AuthService och skicka userId.
public static async Task RemoveWindowsHelloAccountAsync(UserAccount account)
{
    //Open the account with Windows Hello
    KeyCredentialRetrievalResult keyOpenResult = await KeyCredentialManager.OpenAsync(account.Username);

    if (keyOpenResult.Status == KeyCredentialStatus.Success)
    {
        // In the real world you would send key information to server to unregister
        await AuthService.AuthService.Instance.WindowsHelloRemoveUserAsync(account.UserId);
    }

    //Then delete the account from the machines list of Windows Hello Accounts
    await KeyCredentialManager.DeleteAsync(account.Username);
}
Innan du kan slutföra implementeringen av välkomstsidan måste du skapa en metod i WindowsHelloHelper.cs som gör att en enhet kan tas bort. Skapa en ny metod som anropar WindowsHelloRemoveDeviceAsync i AuthService.
public static async Task RemoveWindowsHelloDeviceAsync(UserAccount account, Guid deviceId)
{
    await AuthService.AuthService.Instance.WindowsHelloRemoveDeviceAsync(account.UserId, deviceId);
}
I Welcome.xaml.cs implementerar du händelsehanteraren för Button_Forget_Device_Click . Detta använder den valda enheten från listan över enheter och använder Windows Hello-hjälpen för att anropa ta bort enhet. Kom ihåg att göra händelsehanteraren asynkron.
private async void Button_Forget_Device_Click(object sender, RoutedEventArgs e)
{
    WindowsHelloDevice selectedDevice = UserListView.SelectedItem as WindowsHelloDevice;
    if (selectedDevice != null)
    {
        //Remove it from Windows Hello
        await WindowsHelloHelper.RemoveWindowsHelloDeviceAsync(_activeAccount, selectedDevice.DeviceId);

        Debug.WriteLine($"User {_activeAccount.Username} deleted.");

        if (!UserListView.Items.Any())
        {
            //Navigate back to UserSelection page.
            Frame.Navigate(typeof(UserSelection));
        }
    }
    else
    {
        ForgetDeviceErrorTextBlock.Visibility = Visibility.Visible;
    }
}
Nästa sida som du kommer att uppdatera är sidan UserSelection . Sidan UserSelection måste använda AuthService för att hämta alla användarkonton för den aktuella enheten. För närvarande finns det inget sätt för dig att få ett enhets-ID att skickas till AuthService så att det kan returnera användarkonton för den enheten. I mappen Utils skapar du en ny klass med namnet "Helpers.cs". Ändra klassomfånget så att det är offentligt statiskt och lägg sedan till följande metod som gör att du kan hämta det aktuella enhets-ID:t.
using System;
using Windows.Security.ExchangeActiveSyncProvisioning;

namespace WindowsHelloLogin.Utils
{
    public static class Helpers
    {
        public static Guid GetDeviceId()
        {
            //Get the Device ID to pass to the server
            var deviceInformation = new EasClientDeviceInformation();
            return deviceInformation.Id;
        }
    }
}
I sidklassen UserSelection behöver bara koden bakom ändras, inte användargränssnittet. I UserSelection.xaml.cs uppdaterar du metoden UserSelection_Loaded och metoden UserSelectionChanged för att använda
UserAccountklassen i stället förAccountklassen. Du måste också hämta alla användare för den här enheten via AuthService.using System.Linq; using WindowsHelloLogin.AuthService; namespace WindowsHelloLogin.Views { public sealed partial class UserSelection : Page { public UserSelection() { InitializeComponent(); Loaded += UserSelection_Loaded; } private void UserSelection_Loaded(object sender, RoutedEventArgs e) { List<UserAccount> accounts = AuthService.AuthService.Instance.GetUserAccountsForDevice(Helpers.GetDeviceId()); if (accounts.Any()) { UserListView.ItemsSource = accounts; UserListView.SelectionChanged += UserSelectionChanged; } else { //If there are no accounts navigate to the Login page Frame.Navigate(typeof(Login)); } } /// <summary> /// Function called when an account is selected in the list of accounts /// Navigates to the Login page and passes the chosen account /// </summary> private void UserSelectionChanged(object sender, RoutedEventArgs e) { if (((ListView)sender).SelectedValue != null) { UserAccount account = (UserAccount)((ListView)sender).SelectedValue; if (account != null) { Debug.WriteLine($"Account {account.Username} selected!"); } Frame.Navigate(typeof(Login), account); } } } }Sidan WindowsHelloRegister måste få sin code-behind-fil uppdaterad. Användargränssnittet behöver inga ändringar. I WindowsHelloRegister.xaml.cs tar du bort den privata
Accountvariabeln överst i klassen eftersom den inte längre behövs. Uppdatera RegisterButton_Click_Async händelsehanteraren för att använda AuthService. Den här metoden skapar ett nytt UserAccount och försöker sedan uppdatera kontoinformationen. Om Windows Hello inte kan skapa en nyckel tas kontot bort eftersom registreringsprocessen misslyckades.private async void RegisterButton_Click_Async(object sender, RoutedEventArgs e) { ErrorMessage.Text = ""; //Validate entered credentials are acceptable if (!string.IsNullOrEmpty(UsernameTextBox.Text)) { //Register an Account on the AuthService so that we can get back a userId await AuthService.AuthService.Instance.RegisterAsync(UsernameTextBox.Text); Guid userId = AuthService.AuthService.Instance.GetUserId(UsernameTextBox.Text); if (userId != Guid.Empty) { //Now that the account exists on server try and create the necessary details and add them to the account if (await WindowsHelloHelper.CreateWindowsHelloKeyAsync(userId, UsernameTextBox.Text)) { //Navigate to the Welcome Screen. Frame.Navigate(typeof(Welcome), AuthService.AuthService.Instance.GetUserAccount(userId)); } else { //The Windows Hello account creation failed. //Remove the account from the server as the details were not configured await AuthService.AuthService.Instance.WindowsHelloRemoveUserAsync(userId); ErrorMessage.Text = "Account Creation Failed"; } } } else { ErrorMessage.Text = "Please enter a username"; } }Skapa och kör programmet. Logga in på exempelanvändarkontot med autentiseringsuppgifterna "sampleUsername" och "samplePassword". På välkomstskärmen kanske du ser att knappen Glöm enheter visas, men det finns inga enheter. När du skapar eller migrerar en användare för att arbeta med Windows Hello skickas inte kontoinformationen till AuthService.
För att få Windows Hello kontoinformation till AuthService måste WindowsHelloHelper.cs uppdateras. I metoden CreateWindowsHelloKeyAsync måste du anropa en ny metod som försöker hämta
truei stället för att bara returnera om det lyckas. Även om den här labbövningen inte registrerar denna information i AuthService, kommer du att lära dig hur du kan hämta denna information på klientsidan. Uppdatera metoden CreateWindowsHelloKeyAsync på följande sätt:public static async Task<bool> CreateWindowsHelloKeyAsync(Guid userId, string username) { KeyCredentialRetrievalResult keyCreationResult = await KeyCredentialManager.RequestCreateAsync(username, KeyCredentialCreationOption.ReplaceExisting); switch (keyCreationResult.Status) { case KeyCredentialStatus.Success: Debug.WriteLine("Successfully made key"); await GetKeyAttestationAsync(userId, keyCreationResult); return true; case KeyCredentialStatus.UserCanceled: Debug.WriteLine("User cancelled sign-in process."); break; case KeyCredentialStatus.NotFound: // User needs to setup Windows Hello Debug.WriteLine($"Windows Hello is not set up!{Environment.NewLine}Please go to Windows Settings and set up a PIN to use it."); break; default: break; } return false; }Skapa en GetKeyAttestationAsync-metod i WindowsHelloHelper.cs. Den här metoden visar hur du hämtar all nödvändig information som kan tillhandahållas av Windows Hello för varje konto på en specifik enhet.
using Windows.Storage.Streams;

private static async Task GetKeyAttestationAsync(Guid userId, KeyCredentialRetrievalResult keyCreationResult)
{
    KeyCredential userKey = keyCreationResult.Credential;
    IBuffer publicKey = userKey.RetrievePublicKey();
    KeyCredentialAttestationResult keyAttestationResult = await userKey.GetAttestationAsync();
    IBuffer keyAttestation = null;
    IBuffer certificateChain = null;
    bool keyAttestationIncluded = false;
    bool keyAttestationCanBeRetrievedLater = false;
    KeyCredentialAttestationStatus keyAttestationRetryType = 0;

    if (keyAttestationResult.Status == KeyCredentialAttestationStatus.Success)
    {
        keyAttestationIncluded = true;
        keyAttestation = keyAttestationResult.AttestationBuffer;
        certificateChain = keyAttestationResult.CertificateChainBuffer;
        Debug.WriteLine("Successfully made key and attestation");
    }
    else if (keyAttestationResult.Status == KeyCredentialAttestationStatus.TemporaryFailure)
    {
        keyAttestationRetryType = KeyCredentialAttestationStatus.TemporaryFailure;
        keyAttestationCanBeRetrievedLater = true;
        Debug.WriteLine("Successfully made key but not attestation");
    }
    else if (keyAttestationResult.Status == KeyCredentialAttestationStatus.NotSupported)
    {
        keyAttestationRetryType = KeyCredentialAttestationStatus.NotSupported;
        keyAttestationCanBeRetrievedLater = false;
        Debug.WriteLine("Key created, but key attestation not supported");
    }

    Guid deviceId = Helpers.GetDeviceId();

    //Update the Windows Hello details with the information we have just fetched above.
    //await UpdateWindowsHelloDetailsAsync(userId, deviceId, publicKey.ToArray(), keyAttestationResult);
}
Du kanske har märkt i metoden GetKeyAttestationAsync att du precis lägger till att den sista raden var kommenterad. Den sista raden kommer att vara en ny metod som du skapar för att skicka all Windows Hello-informationen till AuthService. I verkligheten skulle du behöva skicka detta till en faktisk server via ett webb-API.
using System.Runtime.InteropServices.WindowsRuntime;
using System.Threading.Tasks;

public static async Task<bool> UpdateWindowsHelloDetailsAsync(Guid userId, Guid deviceId, byte[] publicKey, KeyCredentialAttestationResult keyAttestationResult)
{
    //In the real world, you would use an API to add Windows Hello signing info to server for the signed in account.
    //For this tutorial, we do not implement a Web API for our server and simply mock the server locally.
    //The CreateWindowsHelloKey method handles adding the Windows Hello account locally to the device using the KeyCredential Manager

    //Using the userId the existing account should be found and updated.
    await AuthService.AuthService.Instance.WindowsHelloUpdateDetailsAsync(userId, deviceId, publicKey, keyAttestationResult);
    return true;
}
Avkommentar den sista raden i metoden GetKeyAttestationAsync så att Windows Hello-informationen skickas till AuthService.
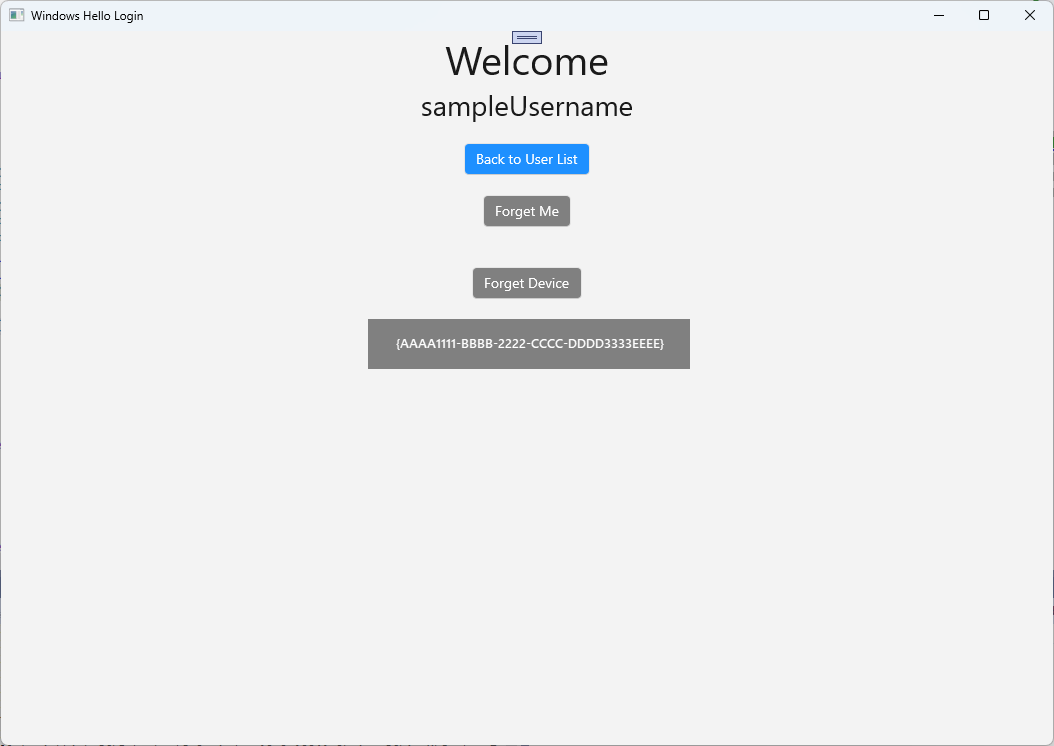
Skapa och kör programmet och logga in med standardautentiseringsuppgifterna som tidigare. På sidan Välkommen ser du nu att enhets-ID:t visas. Om du loggade in på en annan enhet som också skulle visas här (om du hade en molnbaserad autentiseringstjänst). För den här övningen visas det faktiska enhets-ID-numret. I en verklig implementering vill du visa ett vänligt namn som en person kan förstå och använda för att identifiera varje enhet.
För att slutföra det här praktiska labbet behöver du en begäran och en utmaning för användaren när de väljer från användarens urvalssida och loggar in igen. AuthService har två metoder som du har skapat för att begära en utmaning, en som använder en signerad utmaning. I WindowsHelloHelper.cs skapar du en ny metod med namnet RequestSignAsync. Detta begär en utmaning från AuthService, signerar den utmaningen lokalt med hjälp av ett Windows Hello API och skickar den signerade utmaningen till AuthService. I denna praktiska laboratorieövning får AuthService den signerade utmaningen och returnerar
true. I en faktisk implementering skulle du behöva implementera en verifieringsmekanism för att avgöra om utmaningen signerades av rätt användare på rätt enhet. Lägg till metoden nedan i WindowsHelloHelper.csprivate static async Task<bool> RequestSignAsync(Guid userId, KeyCredentialRetrievalResult openKeyResult) { // Calling userKey.RequestSignAsync() prompts the uses to enter the PIN or use Biometrics (Windows Hello). // The app would use the private key from the user account to sign the sign-in request (challenge) // The client would then send it back to the server and await the servers response. IBuffer challengeMessage = AuthService.AuthService.Instance.WindowsHelloRequestChallenge(); KeyCredential userKey = openKeyResult.Credential; KeyCredentialOperationResult signResult = await userKey.RequestSignAsync(challengeMessage); if (signResult.Status == KeyCredentialStatus.Success) { // If the challenge from the server is signed successfully // send the signed challenge back to the server and await the servers response return AuthService.AuthService.Instance.SendServerSignedChallenge( userId, Helpers.GetDeviceId(), signResult.Result.ToArray()); } else if (signResult.Status == KeyCredentialStatus.UserCanceled) { // User cancelled the Windows Hello PIN entry. } else if (signResult.Status == KeyCredentialStatus.NotFound) { // Must recreate Windows Hello key } else if (signResult.Status == KeyCredentialStatus.SecurityDeviceLocked) { // Can't use Windows Hello right now, remember that hardware failed and suggest restart } else if (signResult.Status == KeyCredentialStatus.UnknownError) { // Can't use Windows Hello right now, try again later } return false; }I klassen WindowsHelloHelper anropar du metoden RequestSignAsync från metoden GetWindowsHelloAuthenticationMessageAsync .
public static async Task<bool> GetWindowsHelloAuthenticationMessageAsync(UserAccount account)
{
    KeyCredentialRetrievalResult openKeyResult = await KeyCredentialManager.OpenAsync(account.Username);
    // Calling OpenAsync will allow the user access to what is available in the app and will not require user credentials again.
    // If you wanted to force the user to sign in again you can use the following:
    // var consentResult = await Windows.Security.Credentials.UI.UserConsentVerifier.RequestVerificationAsync(account.Username);
    // This will ask for the either the password of the currently signed in Microsoft Account or the PIN used for Windows Hello.

    if (openKeyResult.Status == KeyCredentialStatus.Success)
    {
        //If OpenAsync has succeeded, the next thing to think about is whether the client application requires access to backend services.
        //If it does here you would Request a challenge from the Server. The client would sign this challenge and the server
        //would check the signed challenge. If it is correct it would allow the user access to the backend.
        //You would likely make a new method called RequestSignAsync to handle all this
        //for example, RequestSignAsync(openKeyResult);
        //Refer to the second Windows Hello sample for information on how to do this.

        return await RequestSignAsync(account.UserId, openKeyResult);
    }
    else if (openKeyResult.Status == KeyCredentialStatus.NotFound)
    {
        //If the _account is not found at this stage. It could be one of two errors.
        //1. Windows Hello has been disabled
        //2. Windows Hello has been disabled and re-enabled cause the Windows Hello Key to change.
        //Calling CreateWindowsHelloKeyAsync and passing through the account will attempt to replace the existing Windows Hello Key for that account.
        //If the error really is that Windows Hello is disabled then the CreateWindowsHelloKeyAsync method will output that error.
        if (await CreateWindowsHelloKeyAsync(account.UserId, account.Username))
        {
            //If the Windows Hello Key was again successfully created, Windows Hello has just been reset.
            //Now that the Windows Hello Key has been reset for the _account retry sign in.
            return await GetWindowsHelloAuthenticationMessageAsync(account);
        }
    }

    // Can't use Windows Hello right now, try again later
    return false;
}
Under den här övningen har du uppdaterat klientprogrammet så att det använder AuthService. Genom att göra detta har du kunnat eliminera behovet av klassen Konto och klassen AccountHelper . Ta bort klassen Konto , mappen Modeller och klassen AccountHelper i mappen Utils . Du måste ta bort alla referenser till
WindowsHelloLogin.Modelsnamnområdet i hela programmet innan lösningen kan skapas.Skapa och kör programmet och använd Windows Hello med den falska tjänsten och databasen.
I den här övningen har du lärt dig hur du använder Windows Hello API:er för att ersätta behovet av lösenord när du använder autentisering från en Windows-dator. När du tänker på hur mycket energi som förbrukas av personer som underhåller lösenord och stöder förlorade lösenord i befintliga system bör du se fördelen med att flytta till det nya Windows Hello autentiseringssystemet.
Vi har lämnat som en övning för dig information om hur du implementerar autentiseringen på tjänst- och serversidan. De flesta utvecklare förväntas ha befintliga system som måste migreras för att börja arbeta med Windows Hello. Information om vart och ett av dessa system skiljer sig åt.
Relaterade ämnen
Samarbeta med oss på GitHub
Källan för det här innehållet finns på GitHub, där du även kan skapa och granska ärenden och pull-begäranden. Se vår deltagarguide för mer information.

Windows developer