Windows Terminal tips and tricks
On first launch
When you first install Windows Terminal, you will be greeted with a Windows PowerShell prompt. Windows Terminal ships with Windows PowerShell, Command Prompt, and Azure Cloud Shell profiles by default.
In addition to these profiles, if you have any Windows Subsystem for Linux (WSL) distributions installed, the terminal will automatically create profiles for those distributions as well. If you would like to install additional WSL distributions on your machine, you can do so after installing terminal and on your next terminal launch, the profiles for those distributions will automatically appear. These profiles will have the Linux Tux image as their icon.
Note
You can change the icon of each WSL distribution if desired. Specific distribution icons do not come shipped inside the terminal but can be downloaded and assigned using the terminal settings.
View default settings
Windows Terminal comes with a large set of default settings, including color schemes and keyboard shortcuts (now called "Custom actions"). If you’d like to view the default settings file, you can hold Alt and click on the Settings button inside the dropdown menu.
Default profile settings
Windows Terminal enables you to apply a setting to every profile without having to duplicate the setting for each profile entry. This can be done by adding a setting inside the "defaults" array inside the profiles object. Learn more about General profile settings, Appearance profile settings, and Advanced profile settings.
"profiles":
    {
        "defaults":
        {
            // Put settings here that you want to apply to all profiles.
            "fontFace": "Cascadia Code"
        },
        "list":
        []
    }
Rename a tab
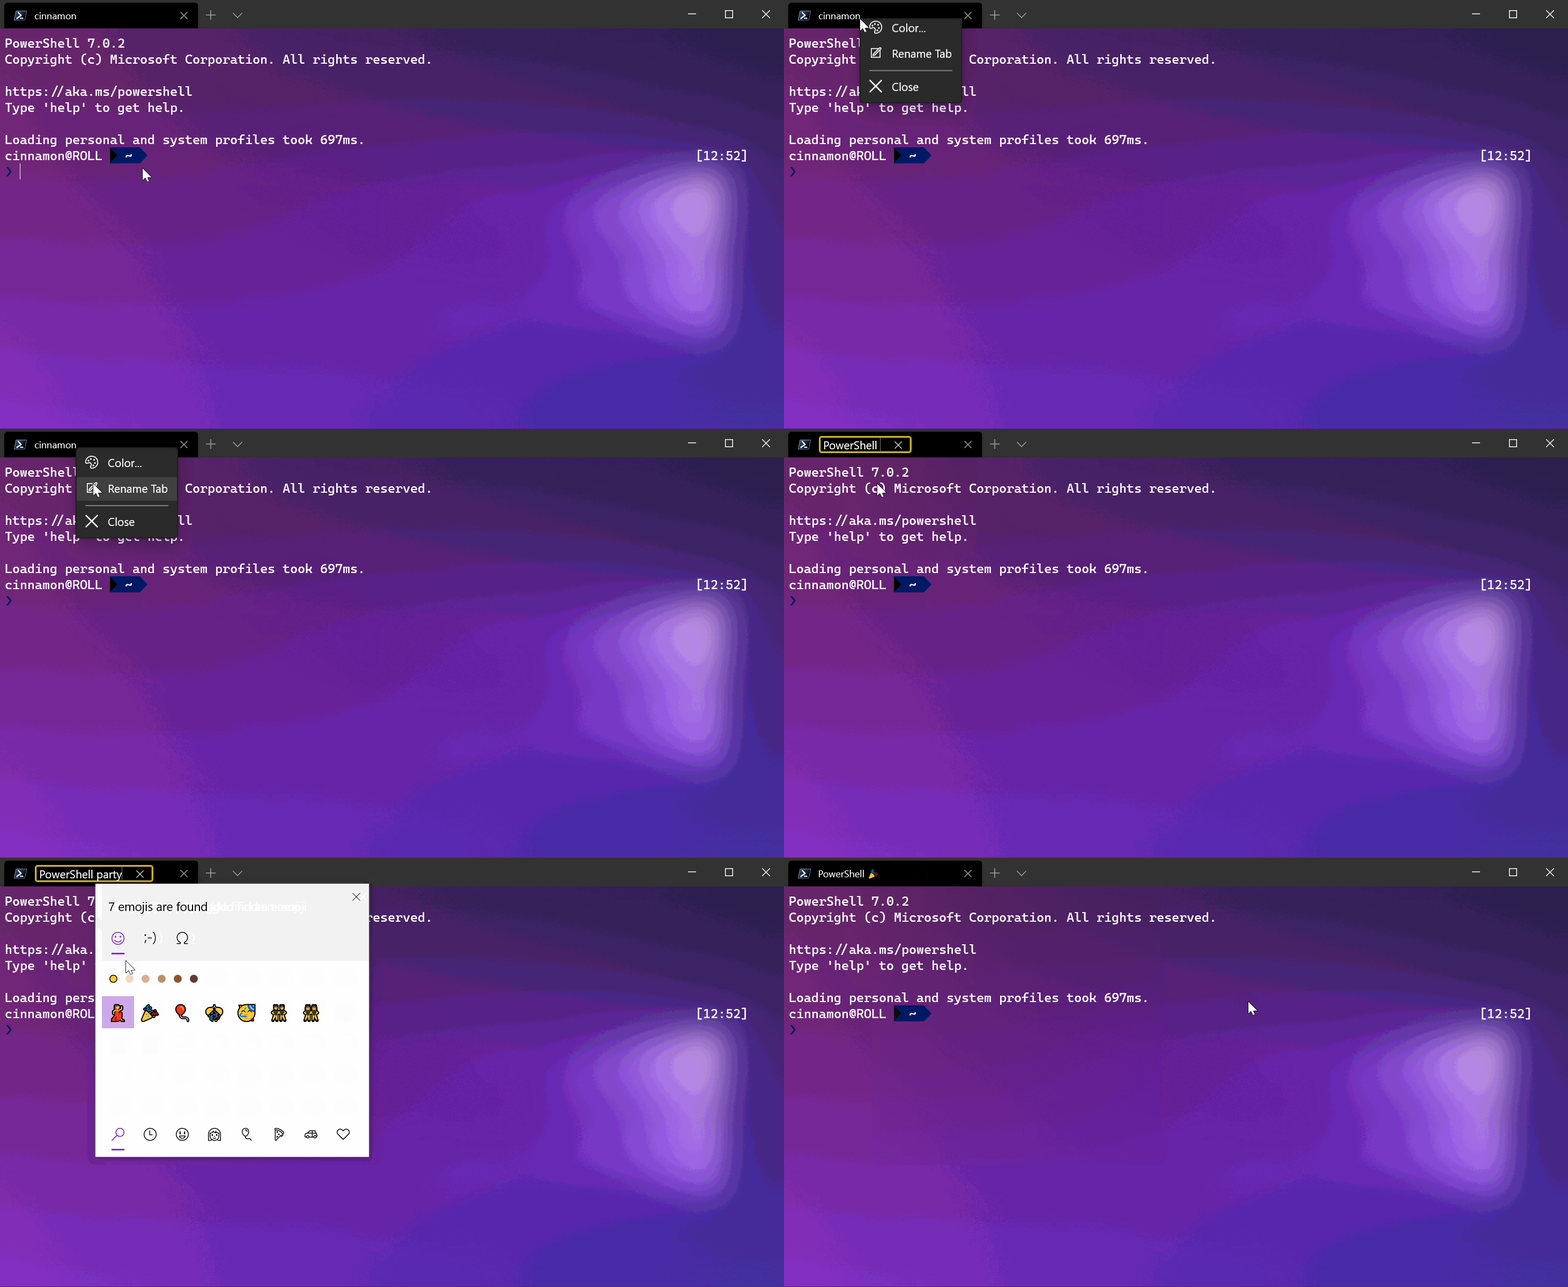
You can right click on a tab and select Rename Tab to rename a tab for that terminal session. Clicking this option in the context menu will change your tab title into a text field, where you can then edit the title. If you'd like to set the tab title for that profile for every terminal instance, you can learn more in the Tab title tutorial.

Color a tab
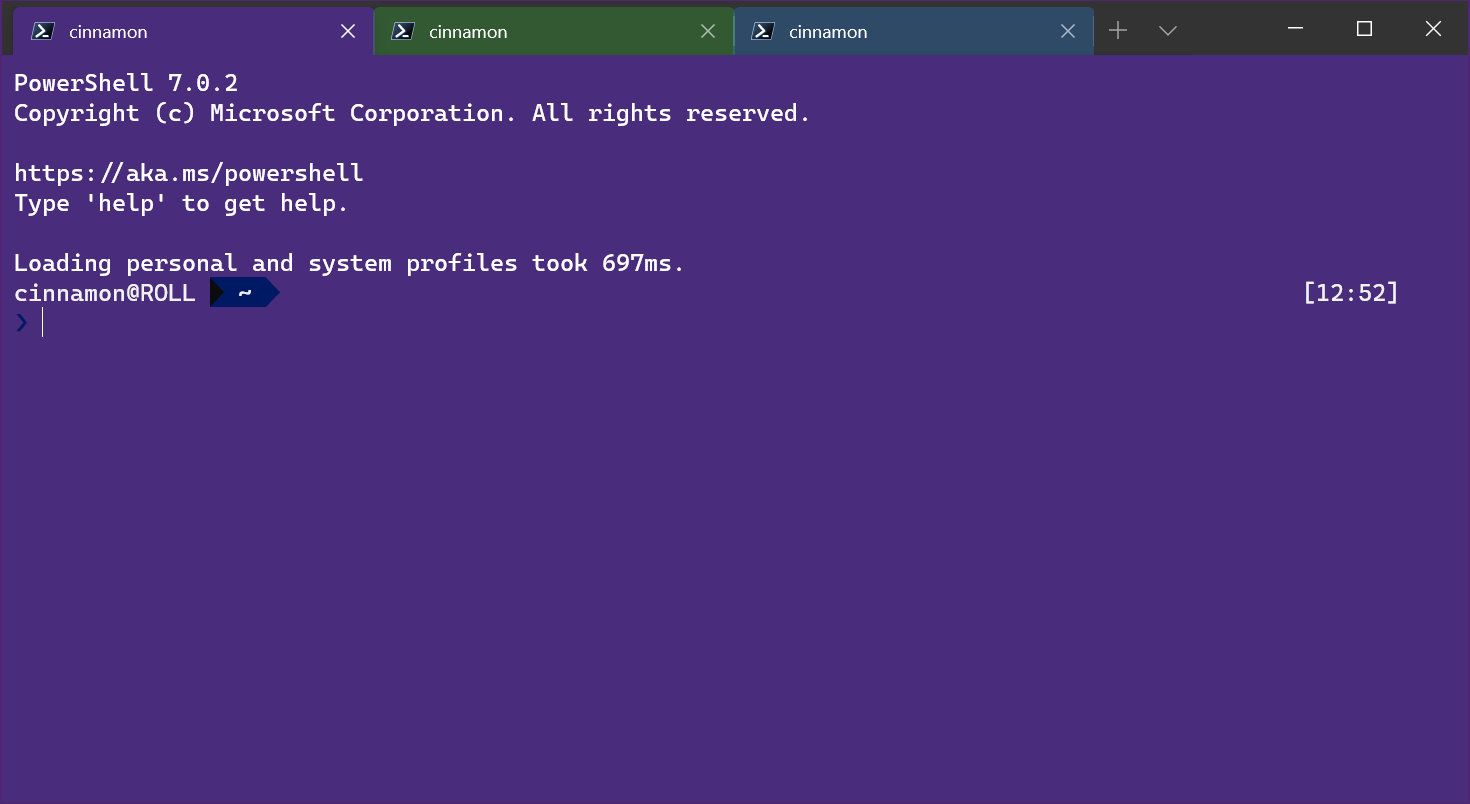
You can right-click on a tab and select Color... to color the tab for that terminal session. You can select from a predefined list of colors or you can select Custom... to pick any color using the color picker or the RGB/HSV or hex fields.

Tip
Use the hex field to set your tab to the same color as your background color for a seamless look.
The tabColor can be set as part of a profile. See Profile - Appearance: Tab color. For example:
 {
            "guid": "{1234abc-abcd-1234-12ab-1234abc}",
            "name": "Windows PowerShell",
            "background": "#012456",
            "tabColor": "#012456",
        },
The tabColor cannot be set as part of a color scheme. Additionally, while it is possible to set the tab title from the commandline with escape sequences, it currently isn't possible to set the tab color in this way.
Mouse interaction
There are several ways to interact with Windows Terminal using a mouse.
Zoom with the mouse
You can zoom the text window of Windows Terminal (making the text size larger or smaller) by holding Ctrl and scrolling. The zoom will persist for that terminal session. If you want to change your font size, you can learn more about the font size feature on the Profile - Appearance page.
Adjust background opacity with the mouse
You can adjust the opacity of the background by holding Ctrl+Shift and scrolling. The opacity will persist for that terminal session. If you want to change your acrylic opacity for a profile, you can learn more about acrylic background effects on the Profile - Appearance page.
Note
In Windows Terminal version 1.12, changing the background opacity with the mouse wheel will use vintage-style opacity by default, unless useAcrylic is set to true in your settings. Prior to 1.12, the terminal would always use acrylic for transparency.
Open a hyperlink
You can open a hyperlink from inside Windows Terminal with your mouse using Ctrl + click.
Drag and drop file/folder to open
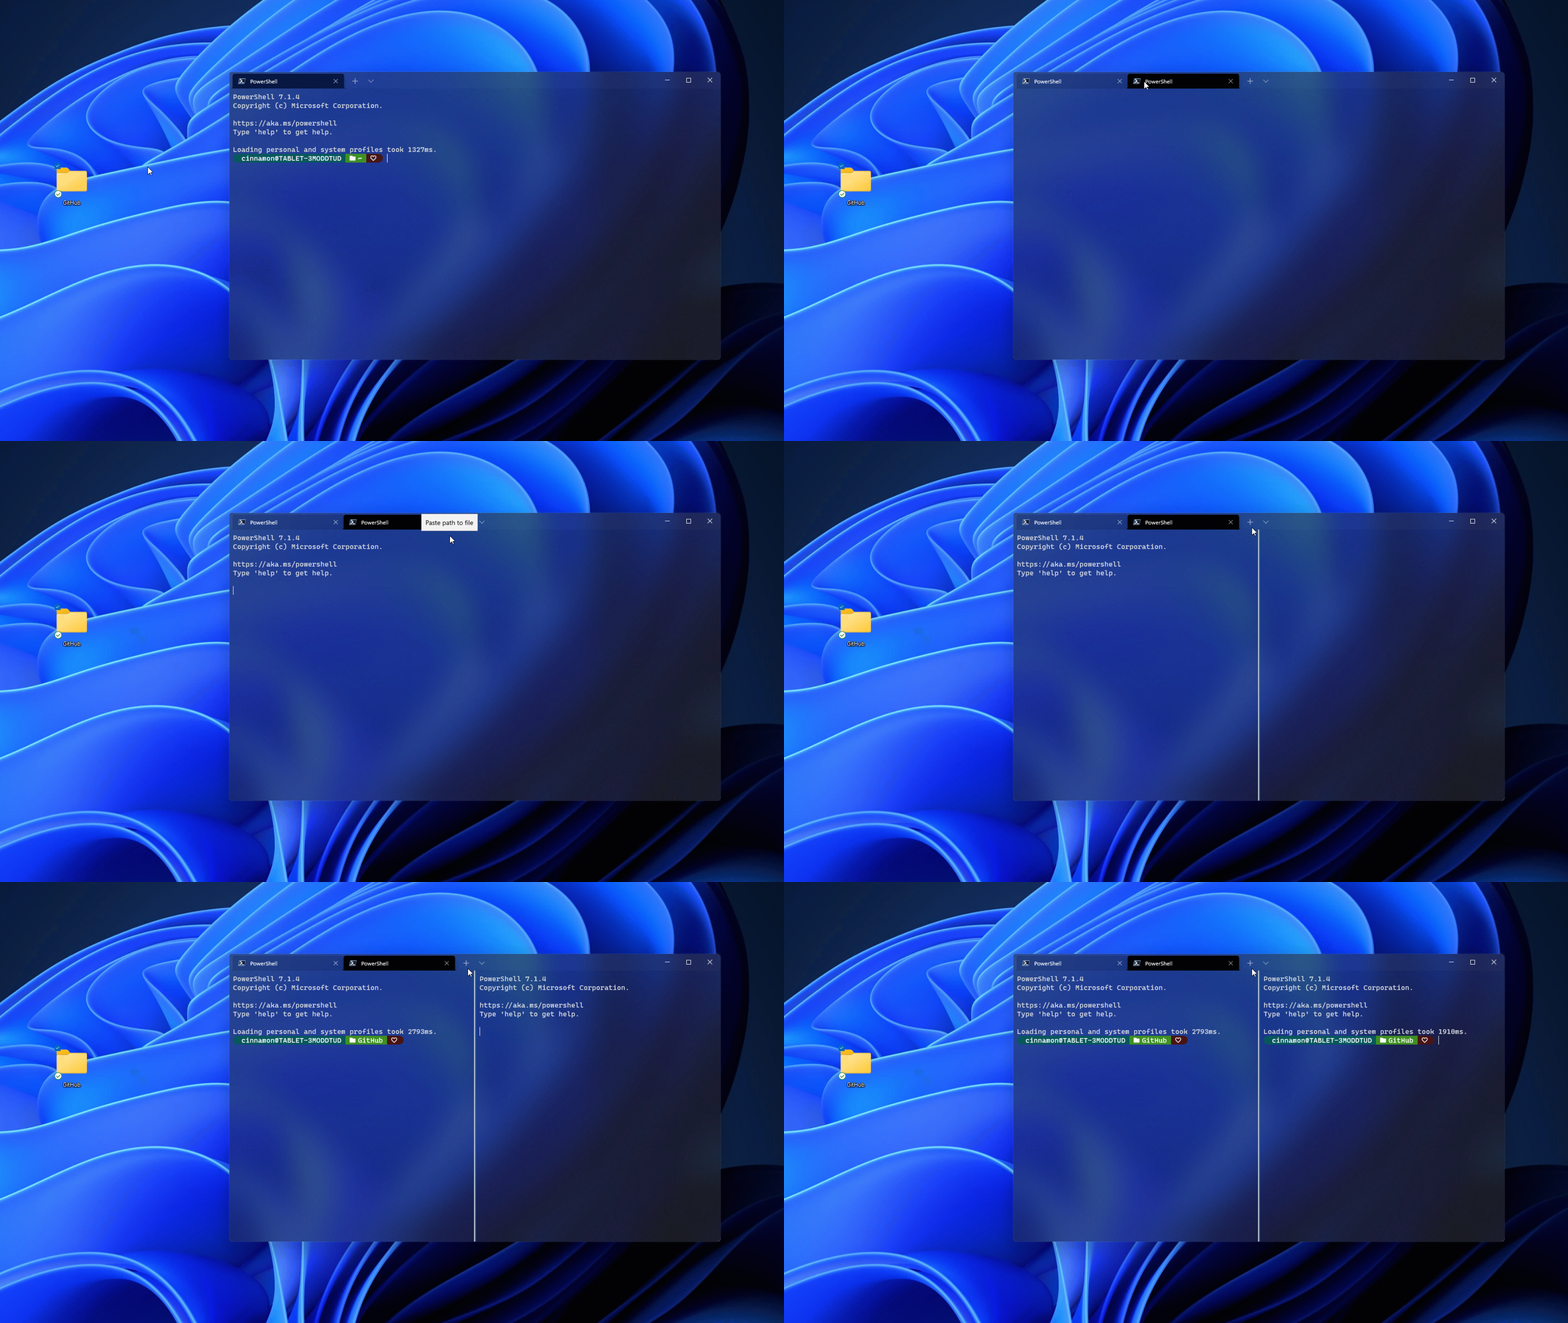
You can drag and drop a file or folder over the New Tab button to open your default profile with that given file or folder. By default, this will open a new tab. You can hold Alt to open a new pane in your current tab or hold Shift to open a new window.

Copy/paste
You can right-click with your mouse to copy and paste text within Windows Terminal using your clipboard storage.
Windows Terminal also includes a copyOnSelect setting that can be set to true in order for any text selected with your mouse to be immediately copied to your clipboard. The right-click on your mouse will always paste in this case.
Virtual Terminal and WSL mouse support
Windows Terminal supports mouse input in Windows Subsystem for Linux (WSL) applications as well as Windows applications that use virtual terminal (VT) input. This means applications such as tmux and Midnight Commander will recognize when you select items in the Terminal window. If an application is in mouse mode, you can hold down Shift to make a selection instead of sending VT input.
Send input commands with a key binding
Windows Terminal gives you the ability to send input to your shell with a key binding. This can be done with the following structure inside the "actions" array of your settings.json file.
{ "command": {"action": "sendInput", "input": ""}, "keys": "" }
You can also add a "name": "" value if desired.
Clear your screen
Sending input to the shell with a keyboard shortcut can be useful for commands you run often. One example would be clearing your screen:
{ "command": {"action": "sendInput", "input": "clear\r"}, "keys": "alt+k", "name": "clear terminal" }
Navigate to parent directory
Navigating to the parent directory with a key binding may also be helpful.
{ "command": {"action": "sendInput", "input": "cd ..\r"}, "keys": "ctrl+up" }
You can also use this functionality to run builds or test scripts.
Focus mode
"Focus mode" hides the title bar and tabs normally located at the top of Windows Terminal, letting you focus only on the terminal content. It is similar to "Zen mode" in Visual Studio Code.
To enter focus mode, open the command palette using Ctrl + Shift + p, enter "focus mode", and select "Toggle focus mode." To exit focus mode, repeat these same steps.
To set focus mode to launch every time you start Windows Terminal, open the Settings (Ctrl + ,) and select the Startup tab. Under Launch mode, select Focus (or Maximized focus, which is focus mode with your terminal window maximized). Select Save before exiting. The next time you launch the Windows Terminal, it will open up in focus mode. To stop Windows Terminal from launching in focus mode, follow these same steps, but select Default from the list of Launch mode options.
To add a shortcut key (or keybinding) for entering focus mode, open the settings.json file (Ctrl + Shift + ,). Inside your settings.json file, find the "actions": section and add the following command:
{ "command": "toggleFocusMode", "keys": "ctrl+f12" }
Replace "ctrl+f12" with the shortcut / keybinding of your choice, but be sure not to repeat any existing keybindings from the Actions list. You can also see a list of Actions with associated keybindings, and + Add new bindings, in the Actions tab of the Windows Terminal Settings dashboard. Remember to Save after making any changes. You can now toggle focus mode using the "action" shortcut key that you created. (In the case of our example, Ctrl + F12).
To learn more about this command, see toggleFocusMode.
Quake mode
"Quake mode" is the name for the special mode the terminal enters when naming a window _quake. When a window is in quake mode:
The terminal is automatically snapped to the top half of the monitor.
The window can no longer be resized horizontally or from the top. It can only be resized on the bottom.
The window automatically enters focus mode (note that you may have multiple tabs in focus mode).
When
windowingBehavioris set to"useExisting"or"useAnyExisting", they will ignore the existence of the_quakewindow.When minimized, the window will be hidden from the taskbar and from Alt+Tab.
Only one window may be the quake mode window at a time.
The quake mode window can be created either by binding the quakeMode action, or by manually running the command line:
wt -w _quake
Note
If you don't have a quakeMode action bound and minimize the quake window, you'll need to go into Task Manager to be able to exit that terminal window!
Windows Terminal
