How to: Provision an Azure Fluid Relay service
Before you can connect your app to an Azure Fluid Relay, you must provision an Azure Fluid Relay server resource in your Azure account. This article walks through the steps to get your Azure Fluid Relay service provisioned and ready to use.
Prerequisites
To create an Azure Fluid Relay resource, you must have an Azure account. If you don't have an account, you can try Azure for free.
Create a resource group
A resource group is a logical collection of Azure resources. All resources are deployed and managed in a resource group. To create a resource group:
Sign in to the Azure portal.
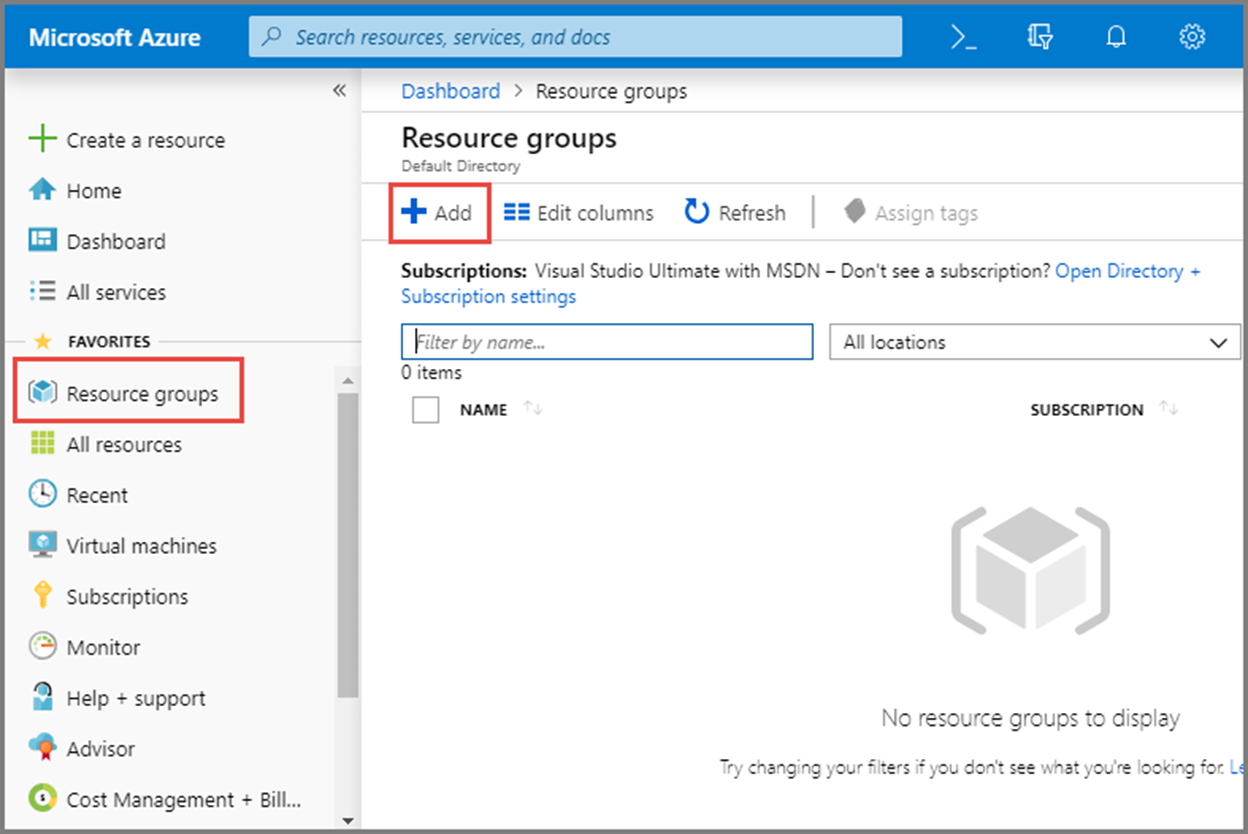
In the left navigation, select Resource groups. Then select Add.
For Subscription, select the name of the Azure subscription in which you want to create the resource group. For more information about subscriptions, see Describe core Azure architectural components.
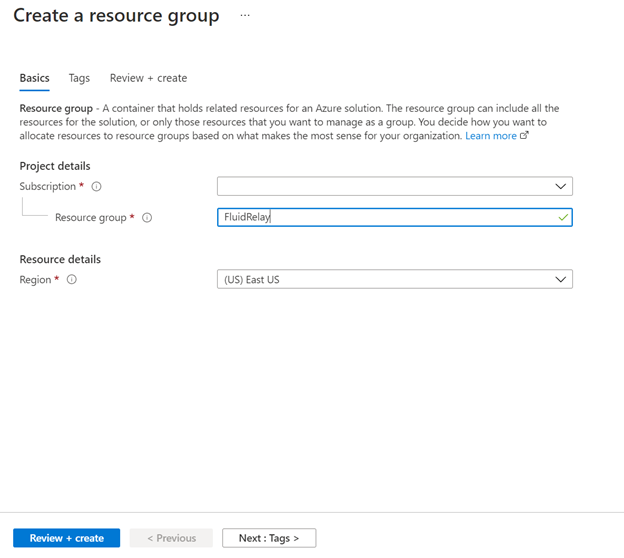
Type a unique name for the resource group. The system immediately checks to see if the name is available in the currently selected Azure subscription.
Select a region for the resource group.
Select Review + Create.
On the Review + Create page, select Create.
Create a Fluid Relay resource
Each Azure Fluid Relay server resource provides a tenant for you to use in your Fluid application. Within that tenant, you can create many containers/sessions. To create a Fluid Relay in your resource group using the portal:
In the Azure portal, and select Create a resource at the top left of the screen.
Search for 'Fluid'
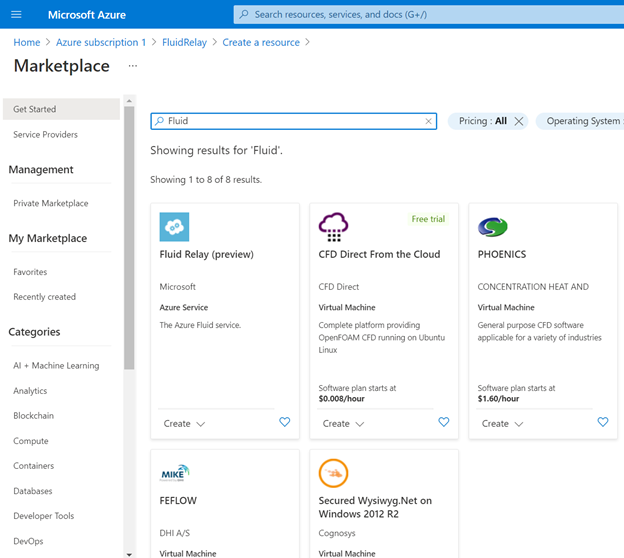
Select Fluid Relay, and select Create.
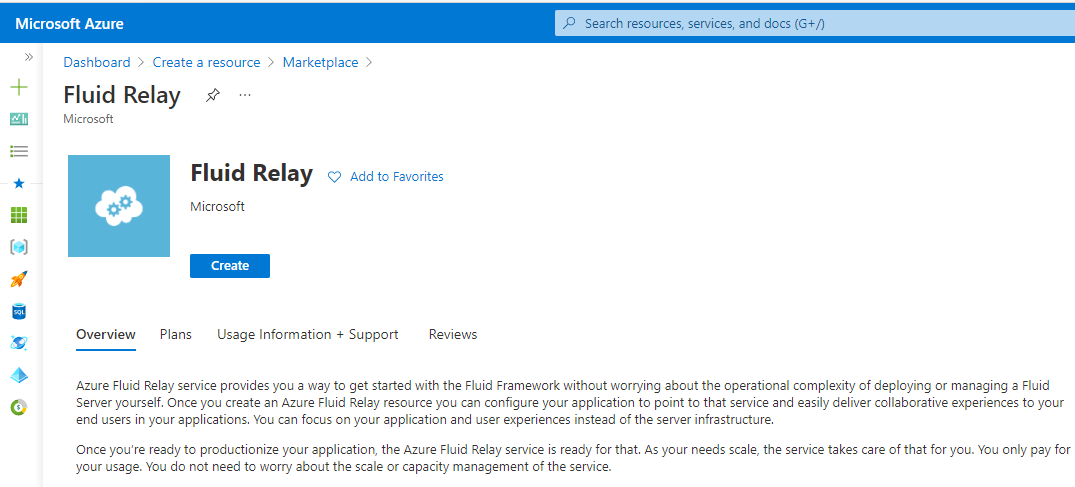
On the Create page, take the following steps:
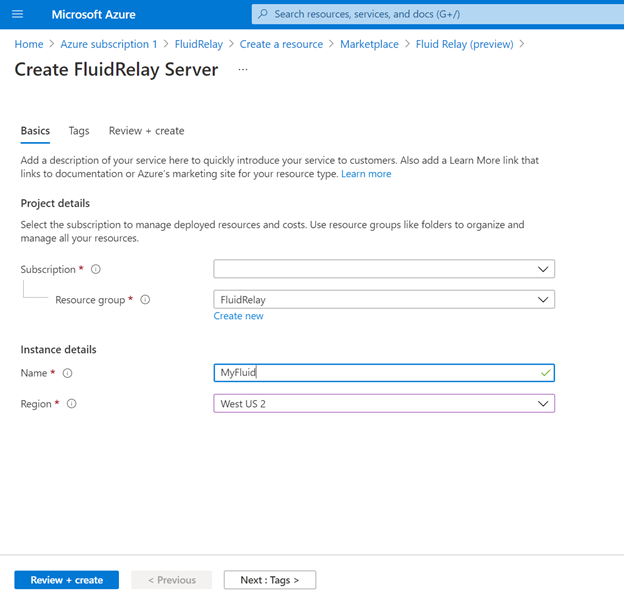
- Select the subscription in which you want to create the namespace.
- Select the resource group you created in the previous step.
- Enter a name for the Fluid Relay resource.
- Select a location for the namespace.
Click the Review + Create button at the bottom of the page.
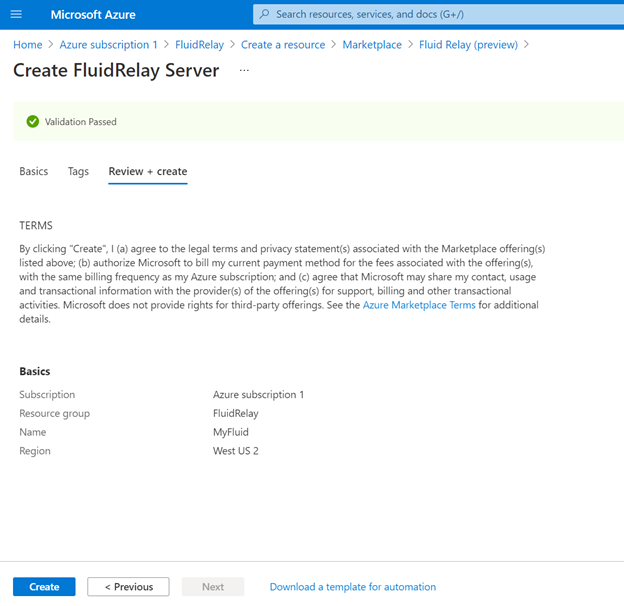
On the Review + Create page, review the settings, and select Create. Wait for the deployment to complete.
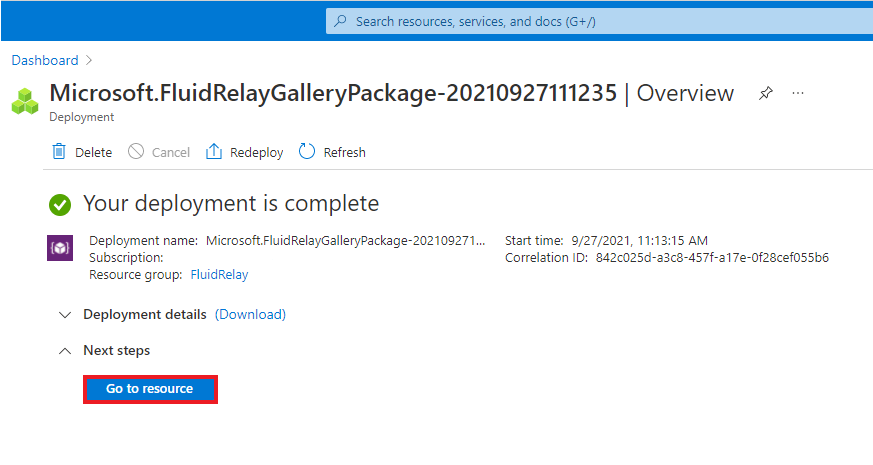
On the Deployment page, select Go to resource to navigate to the page for your namespace.
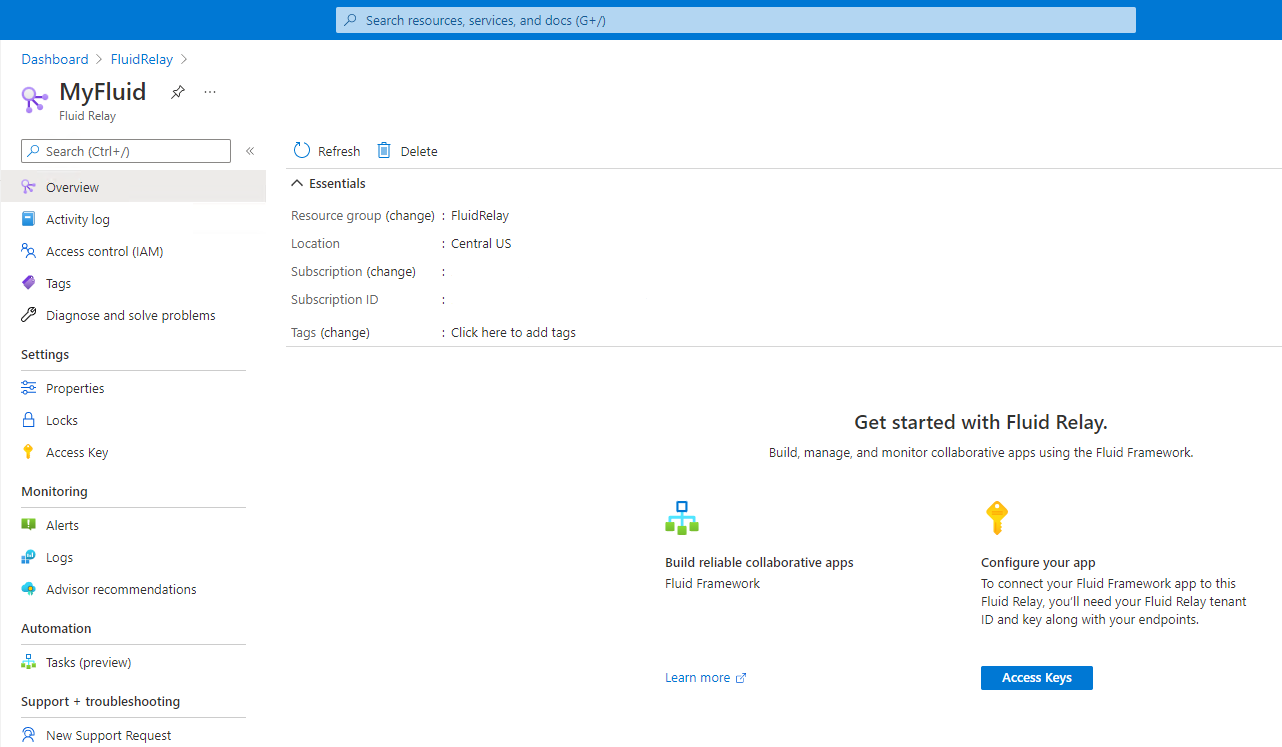
Confirm that you see the Fluid Relay page similar to this example.
Next steps
You just created a resource group and a provisioned an Azure Fluid Relay resource in that group. Next, you can connect to your Azure Fluid Relay service in your app.